
Adding a transparent watermark to your images is one of the best ways to protect them from being stolen and used without permission.
But before you can add a watermark to your images, you must create it first.
In this post, we’ll show you how to:
- make a transparent watermark in popular programs (Photoshop, Illustrator, Lightroom);
- create one in Google Docs and PowerPoint;
- use Modula to add a watermark to your pictures;
- a few other things that will make you understand the importance of a watermark.
Let’s dive in!
Table of Contents
- Why is it important to add a watermark to your pictures?
- Photoshop
- Lightroom
- Illustrator
- Google Docs
- MS Word
- PowerPoint
- Modula
Why is it important to add a watermark to your pictures?
- Watermark will protect your pictures from theft and piracy;
- You will make yourself and your brand known;
- Watermarks encourage print sales;
- This way, you can promote your brand, and if someone shares your work, you can get more clients;
- Having your watermark on pictures will make you look more professional.
How to Make a Transparent Watermark in Photoshop
Let’s start this tutorial with one of the most popular programs photographers use: Photoshop.
Step 1: Open Photoshop
We’ll make a text-based watermark for this tutorial, so start by launching Photoshop.
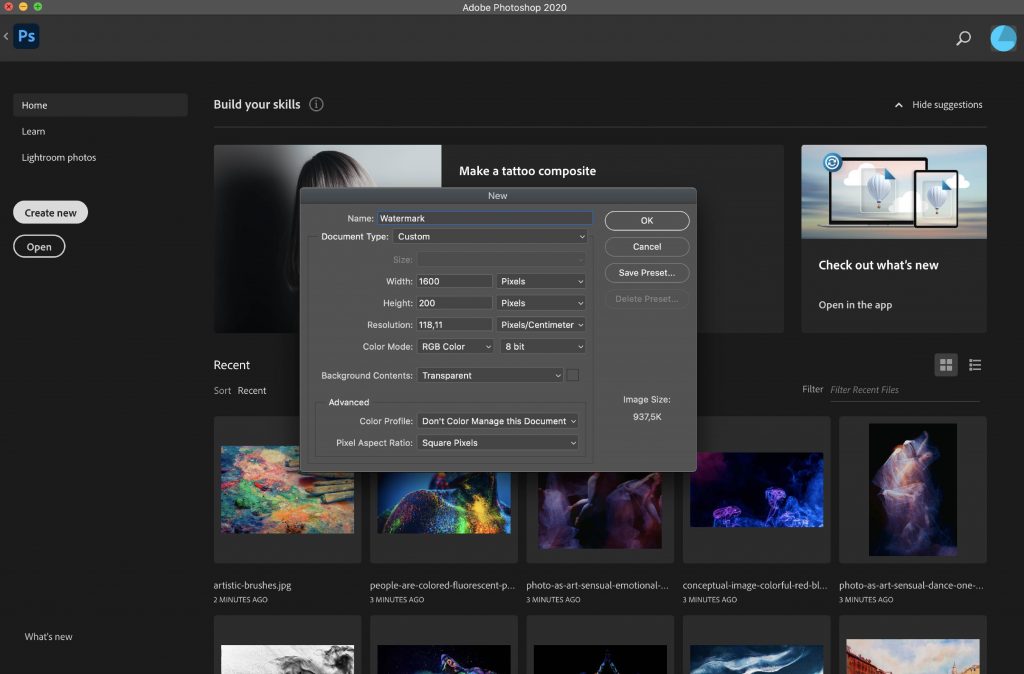
Step 2: Create a new document
Create a new document with your preferred dimensions. I’ve set mine to 1600px x 200px, so the watermark is still visible when working with images of large dimensions.
I can also quickly scale the watermark down if I work with images with smaller dimensions. Don’t forget to set your background to transparent.
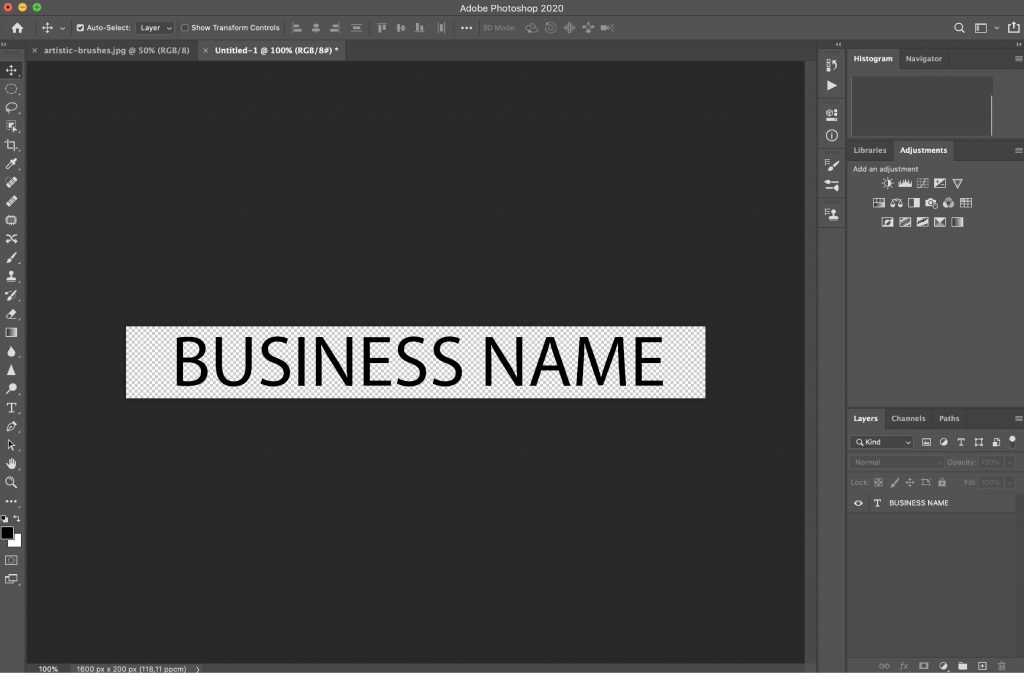
Step 3: Enter Your Business Name
With your document open, select the Text tool and type in your business name. You can customize this with your preferred font or a brand font.
You can also play with the font size and color to make your watermark on brand and easily recognizable.
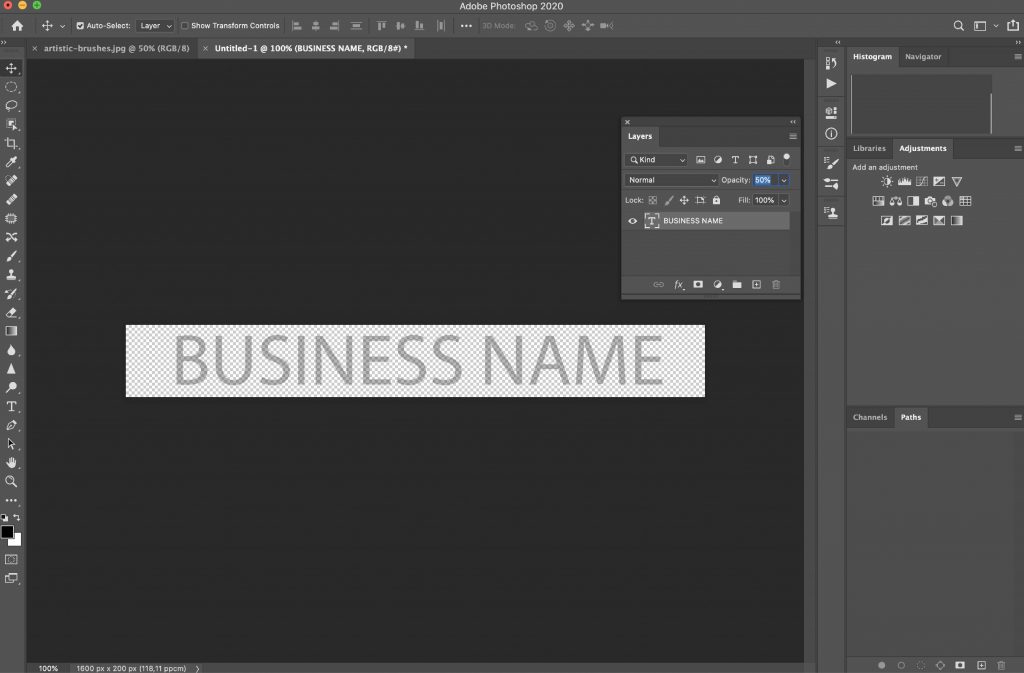
Step 4: Reduce The Opacity
In the layers palette, reduce the opacity to around 50%. You can also make a few versions of your watermark with varying opacity levels to see which works best for your photos.
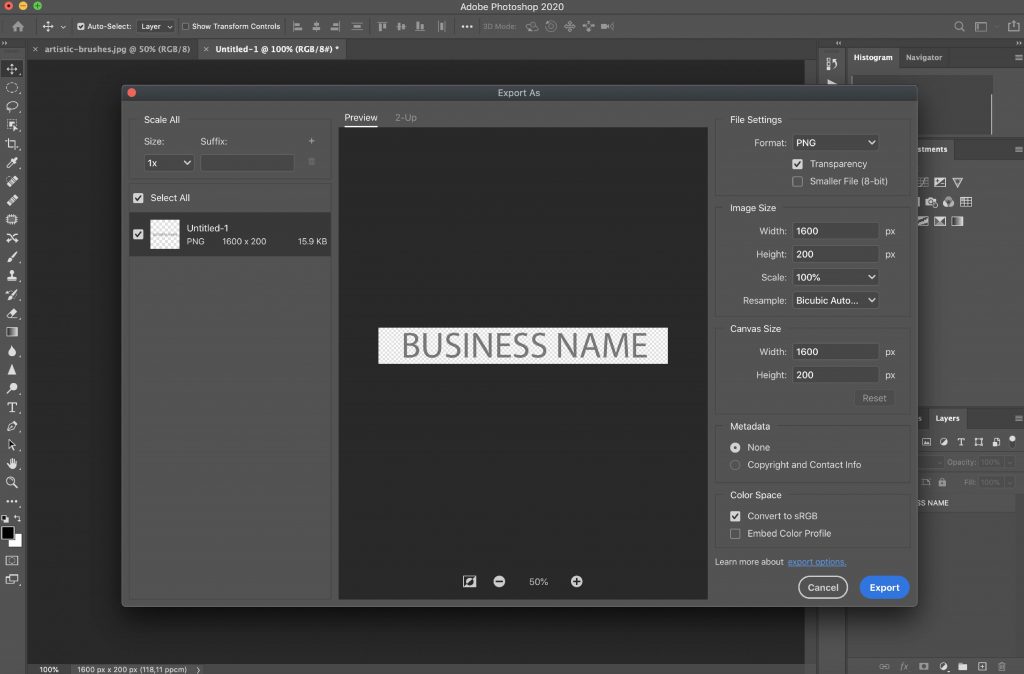
Step 5: Export Your Transparent Watermark as PNG
The last step is to export your watermark as a transparent PNG document. You can now use it on all your photos.
How to Make a Transparent Watermark In Lightroom
Lightroom is another popular program for photographers and photography enthusiasts alike. You can easily make a transparent watermark in Lightroom.
Here’s how:
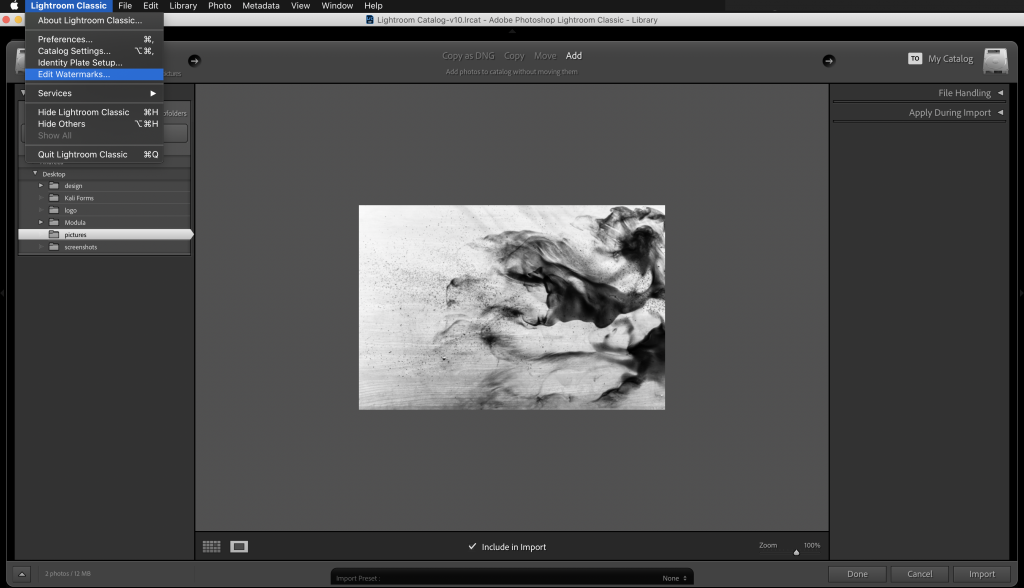
Step 1: Open Lightroom
Start by launching Lightroom and navigating to Lightroom > Edit watermarks.
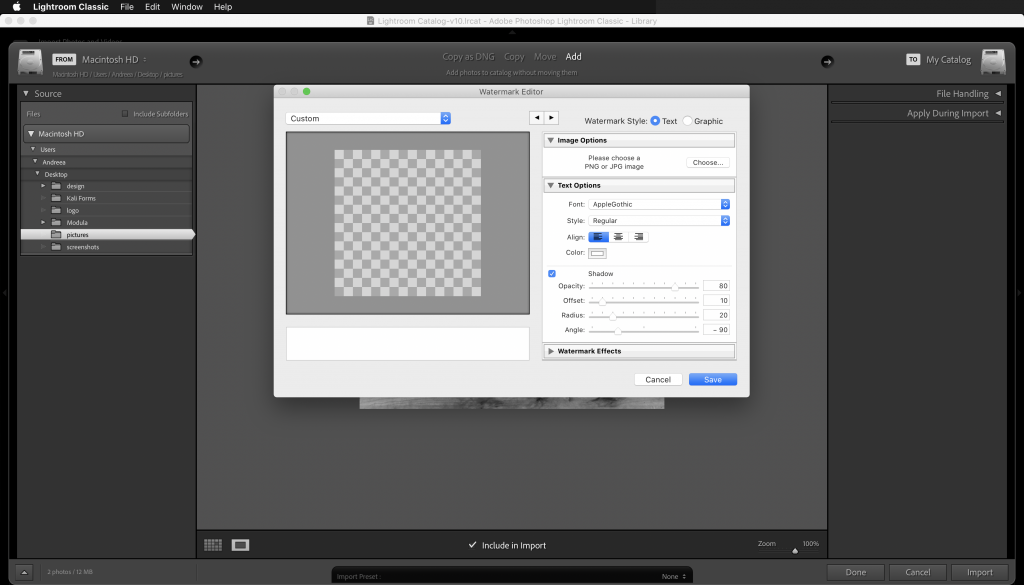
Step 2: Choose Text or Graphic
When the Watermark editor loads, choose a text or graphic watermark. For this tutorial, we’ll create one from scratch with text, but you can just as easily import the watermark you’ve made in a program like Photoshop, as described above.
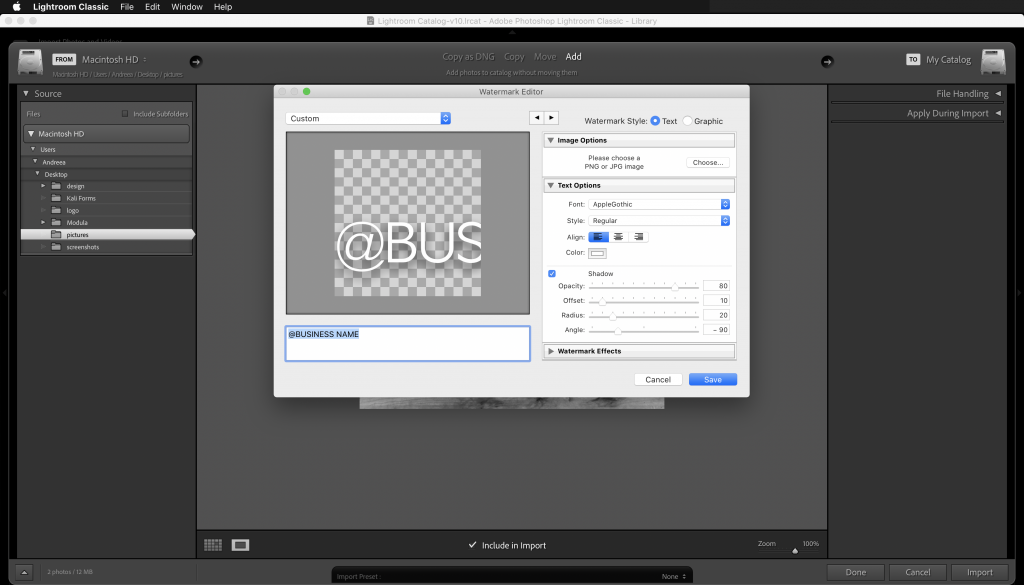
Step 3: Type in Your Business Name
By default, Lightroom will prefill the watermark text with your name, but you can easily replace it with your business name or whatever text you’d like.
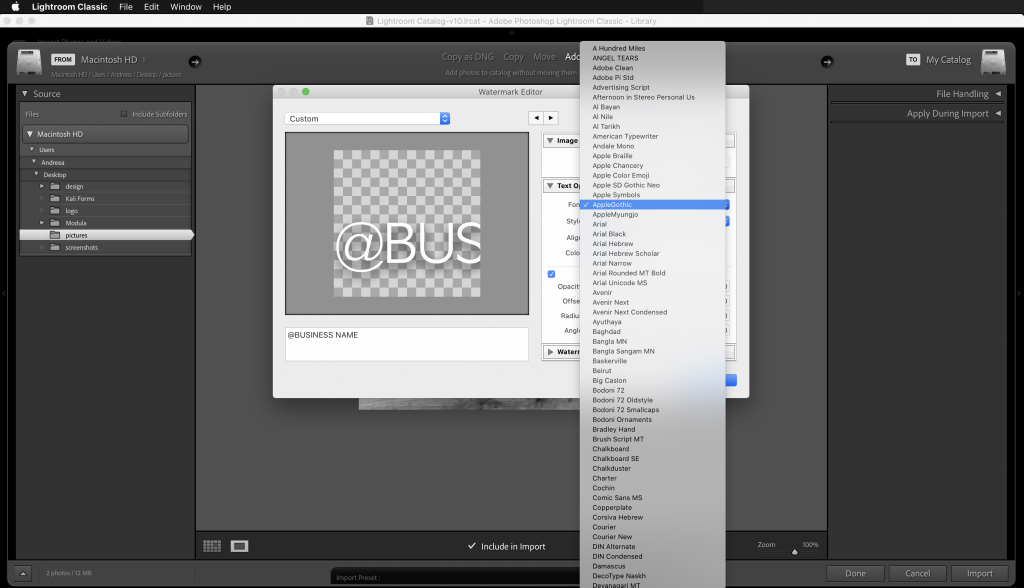
Step 4: Adjust Font Settings
You can adjust text settings on the right-hand side and choose your font, alignment, and color.
Step 5: Adjust Opacity and Size
Once you’re happy with how your watermark looks, reduce the opacity of the watermark. Be sure to adjust your watermark’s size and anchor, as this will control where the watermark is positioned on the screen.
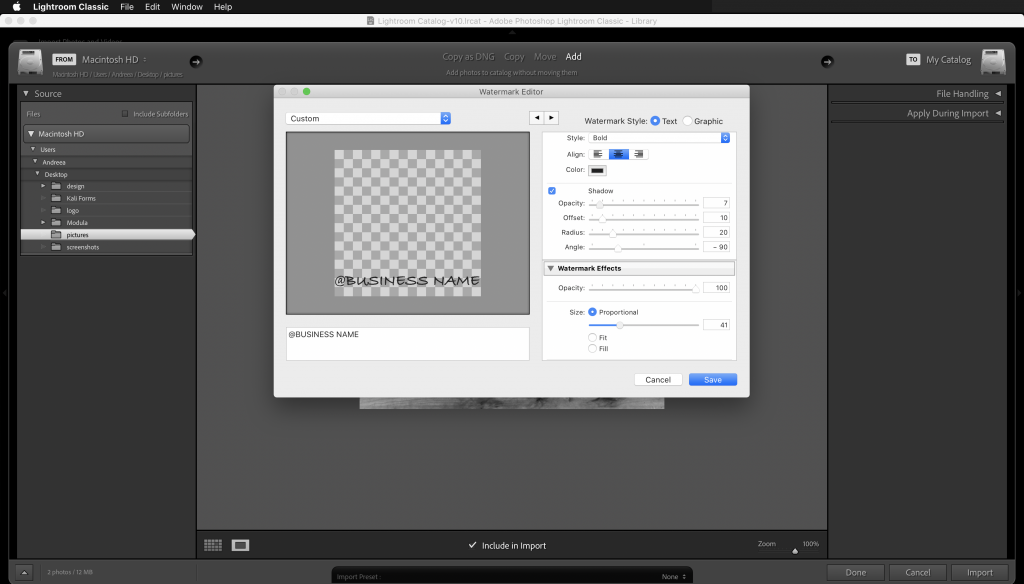
Step 6: Save Your Watermark
The last step is to save your watermark as a preset. Click the Save button and add a name for your newly created watermark.

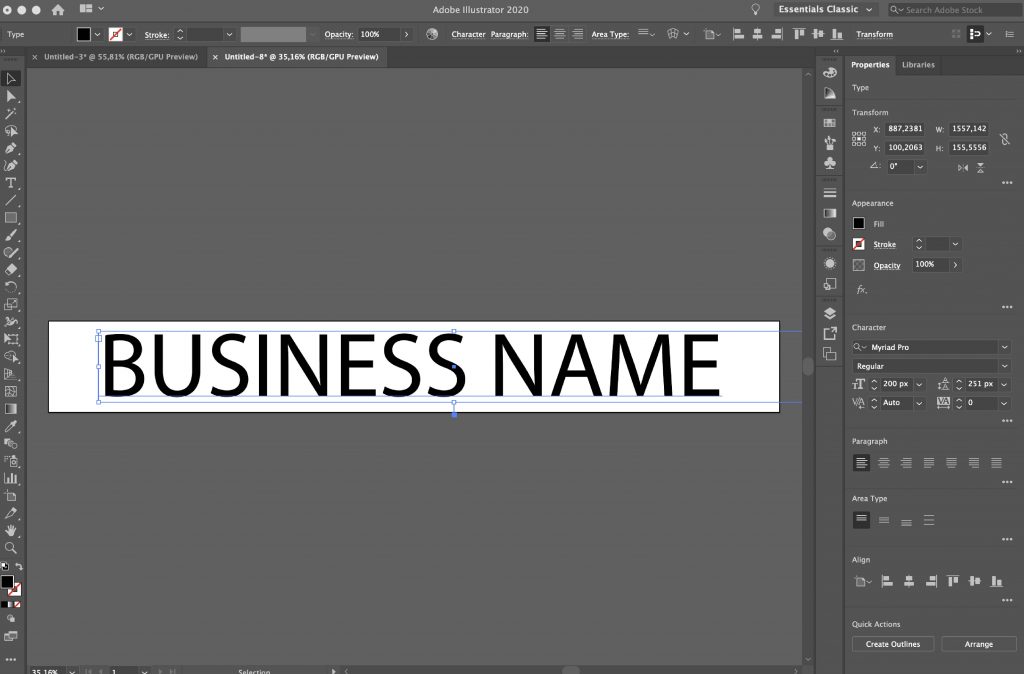
How to Make a Transparent Watermark In Illustrator
Creating a transparent watermark in Illustrator is similar to making one in Photoshop.
Step 1: Open Illustrator
Start by launching Illustrator first.
Step 2: Create a New Document
Create a new document and set the dimensions to whatever you choose. I’ve set mine to 1600px x 200px, as shown in the screenshot below.

Step 3: Add Your Business Name
Select the Text tool and add your business name. Customize the font, the size of your text, and the color.
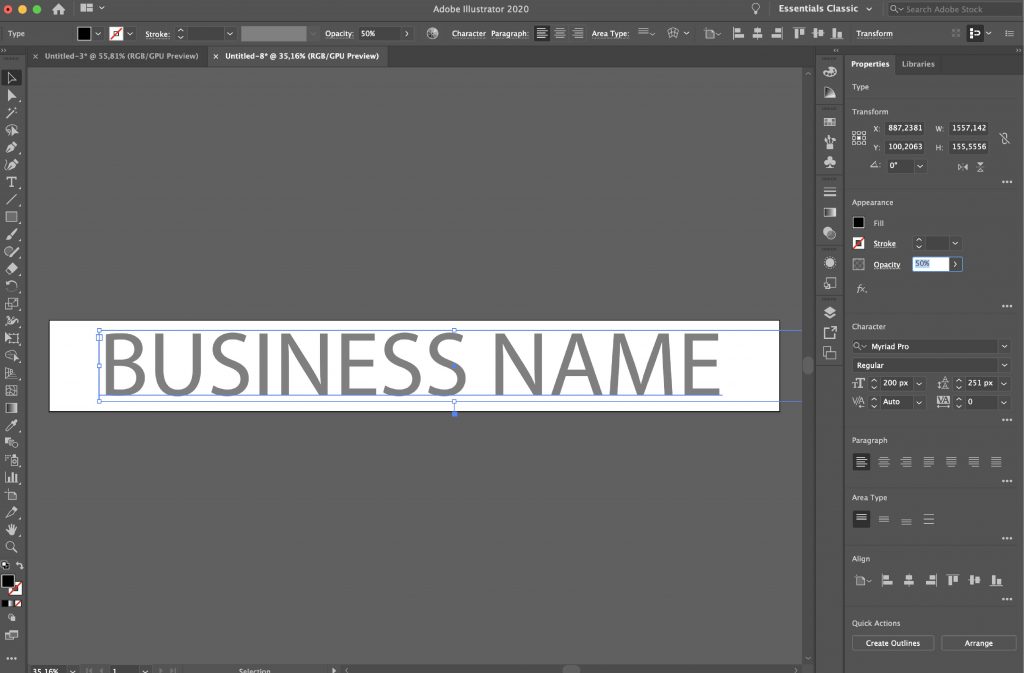
Step 4: Reduce Opacity
Reduce the opacity of your watermark to around 50%. As with Photoshop, play around with opacity until you’re happy with how your watermark looks. You can also save several versions of your watermark with different opacity settings.
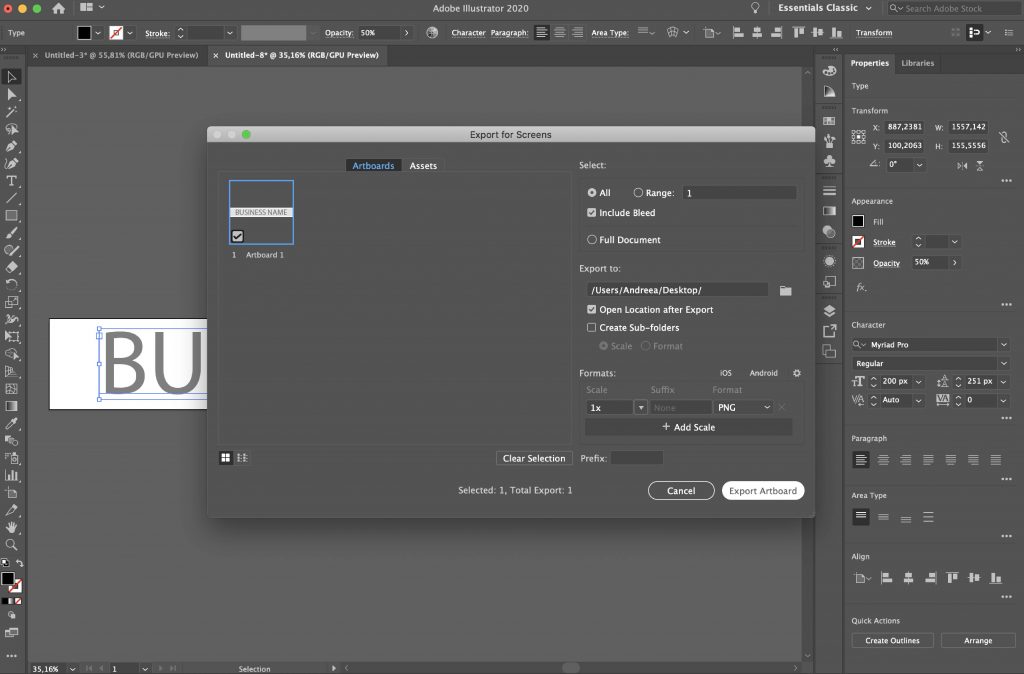
Step 5: Export Your Watermark
When you’re done, export your watermark as a transparent PNG.
How to Make a Transparent Watermark In Google Docs
Creating a watermark in Google Docs is not straightforward, but it can be done. In a nutshell, you’ll use Google Docs drawing tools to add your watermark as an image.
Step 1: Insert Your Image in Your Google Doc
If you want to make a transparent watermark in Google Docs, you’ll need to add the photo to which you wish to apply the watermark.

Step 2: Adjust Image Opacity
Click the image you’ve uploaded and adjust its opacity by going to Image options > Transparency and moving the slider as needed.

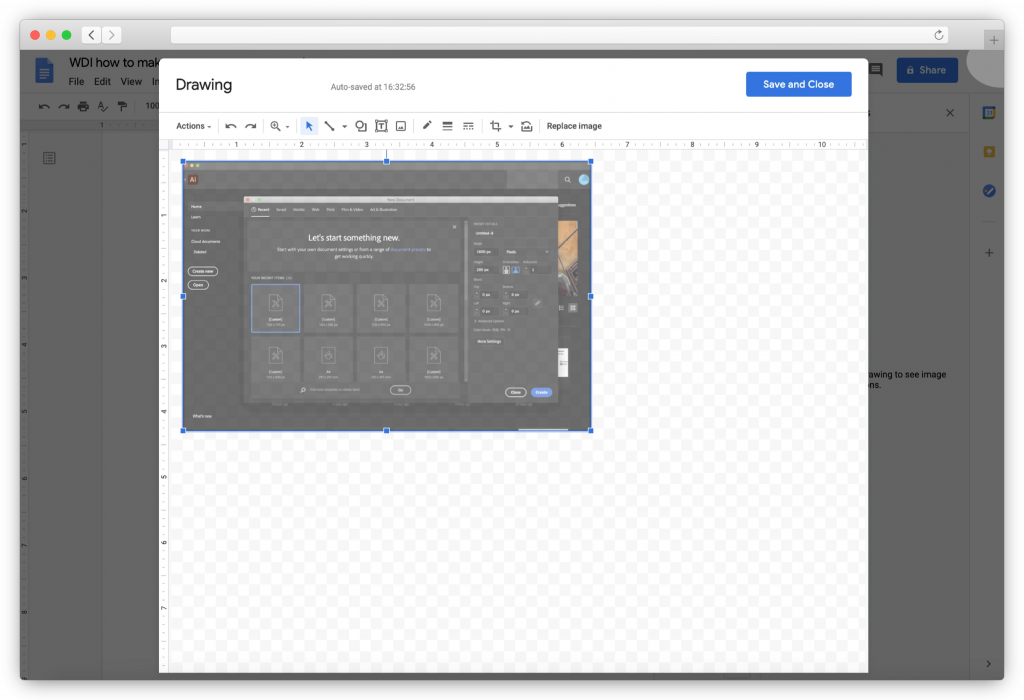
Step 3: Create Your Watermark
Once you’re happy with the image opacity, click CTRL+C to copy the image and then go to Insert > Drawing. When the Drawing window opens, paste your image.
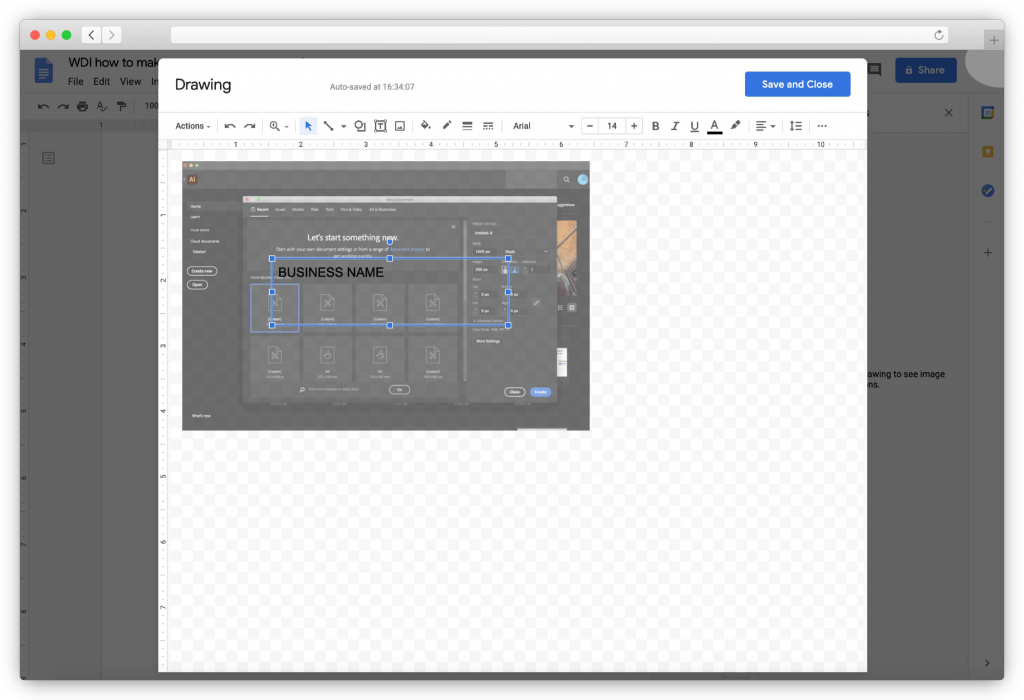
You’ll then want to select the text tool and drag the text box to where you want your watermark to appear on the image. Type in your business name and customize the font, size, and color.
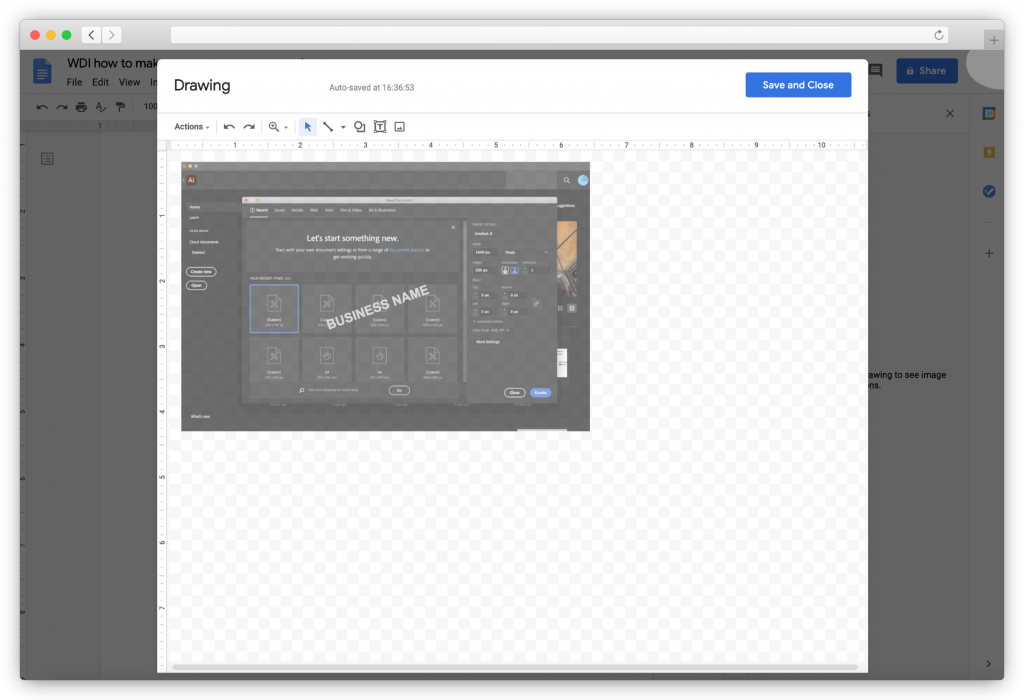
Step 4: Save Your Watermark
You can then click Save and Close button. You’ll have to repeat this process for each image you add to your document.
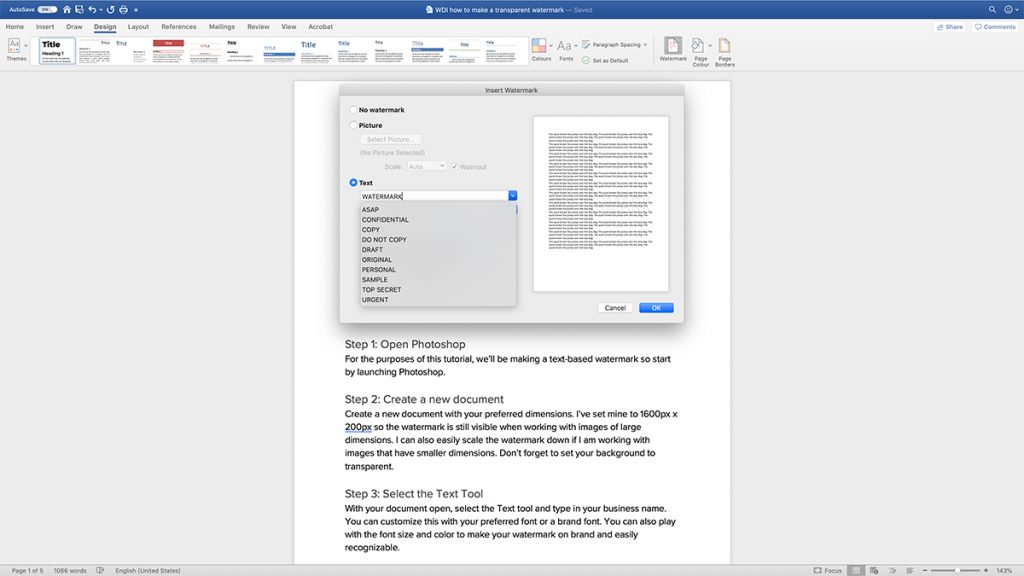
How to Make a Transparent Watermark In Word
Microsoft Word comes with six premade watermarks that you can use to protect your documents and photos within them. Here’s how to add them.
Step 1: Switch to the Design Tab
In your Word document, switch to the Design tab and select Watermark.
Step 2: Add Your Watermark
When the Insert Watermark dialog appears, select Text, choose one of the premade watermarks, or type in your own.
Step 3: Adjust Watermark Settings
Customize your watermark by choosing your desired font, layout, size, colors, and orientation.
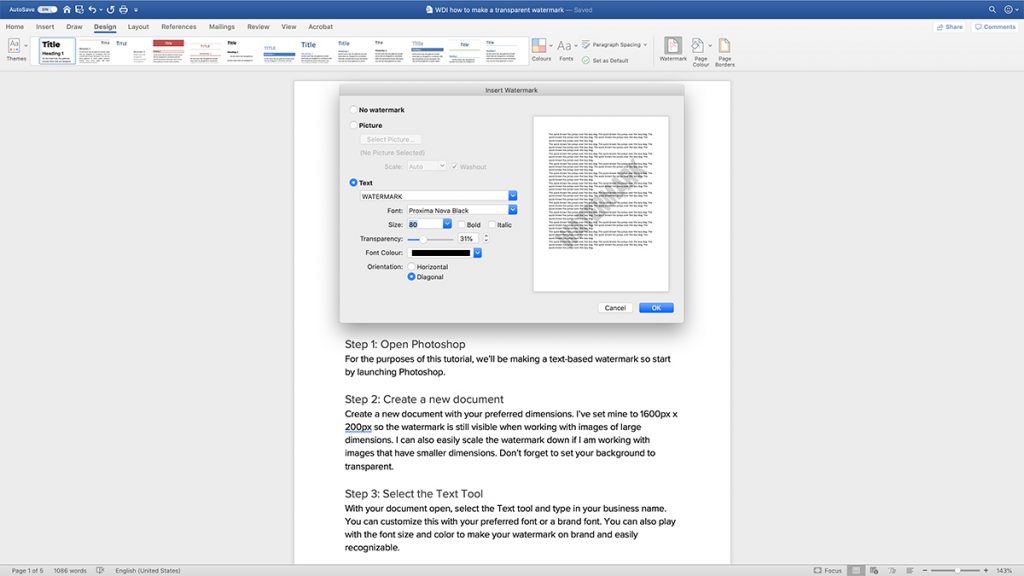
Step 4: Save Your Changes
When you’re happy with how your watermark looks, click OK to save your changes.
How to Make a Transparent Watermark In PowerPoint
To add a watermark to your PowerPoint presentation, you’ll need to create it first with a program like Photoshop or Illustrator, following the steps we outlined earlier in this article. Then, follow the steps below:
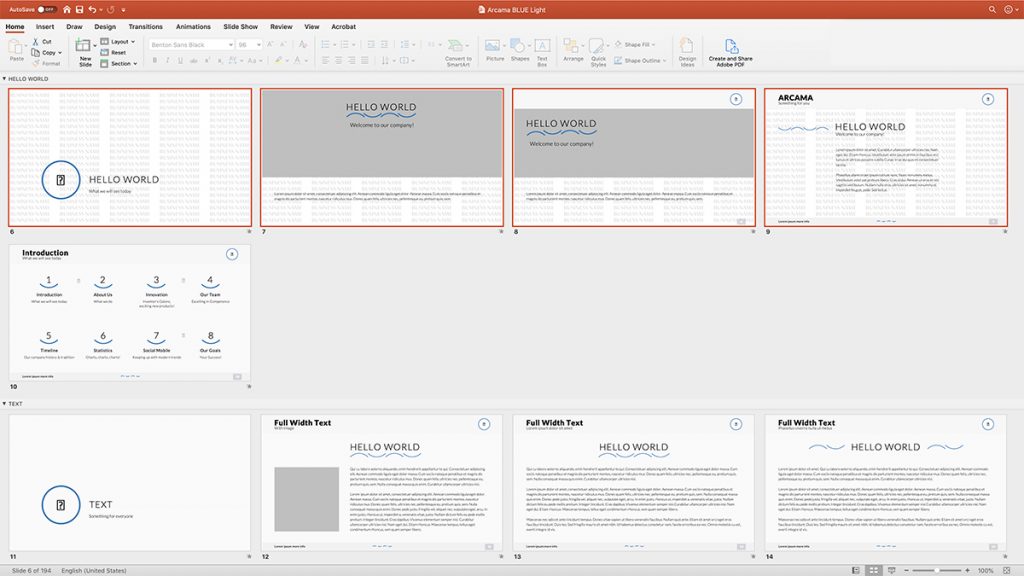
Step 1: Switch to Slide Sorter View
With your PowerPoint presentation open, go to View > Slide Sorter. Select all the slides that you want to add the watermark to.
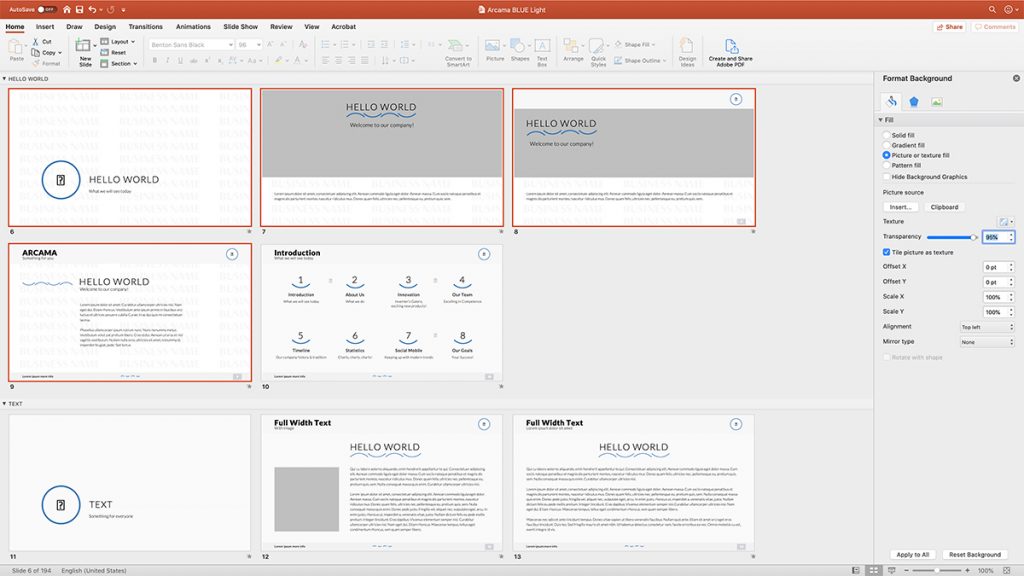
Step 2: Insert Your Watermark Image
With your slides selected, right-click on any slide and select Format background > Picture or Texture Fill. Choose your saved watermark image.

Step 3: Adjust the Opacity
Then, use the transparency slider to adjust the opacity of your watermark. Drag the slider until you’re happy with how your watermark appears. You can also tile the picture as a texture and play around with the offset settings.
Step 4: Apply the Watermark to All Slides and Save
Don’t forget to click Apply to all button to apply your watermark to all your slides. Then, save your presentation.
How to Make a Transparent Watermark With Modula
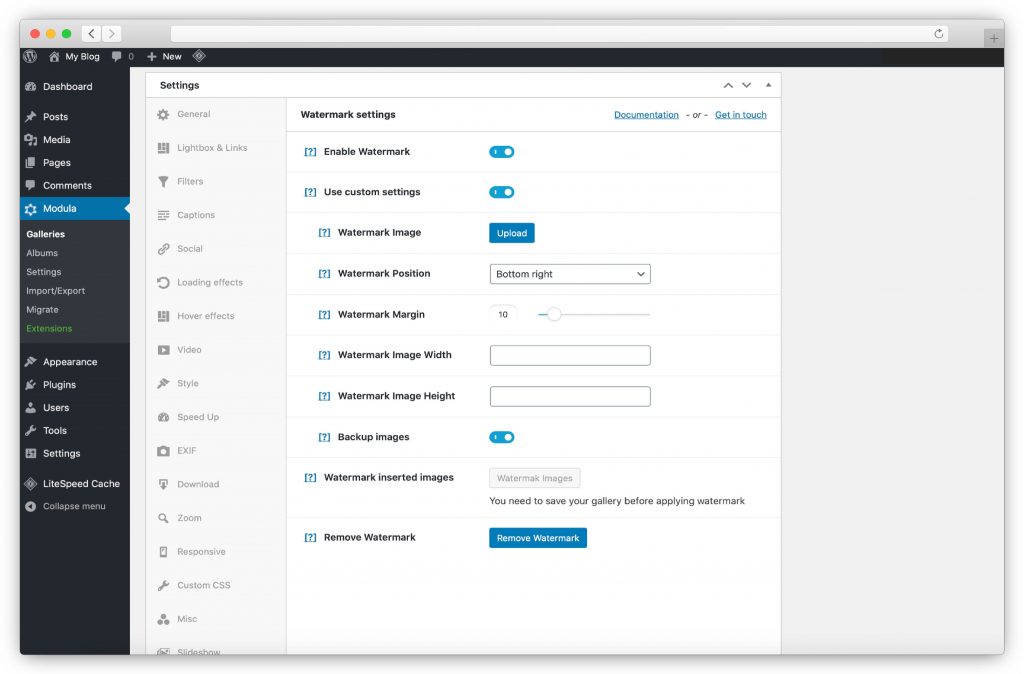
If you want to add a transparent watermark to the photos on your website without re-uploading them, you can use Modula. We’ve already covered how to add a watermark in Modula in our tutorial on how to watermark photos, so all you need to do is follow the steps in the article.

Modula Gallery Plugin
Create stunning, responsive photo galleries with ease. Showcase your work, captivate your audience, and boost engagement. You don’t need to do any coding.
If you want to prevent your images from being copied online, adding a transparent watermark can help deter people from stealing and misusing them.
Make your work easier, follow these tips, and add transparent watermarks to your pictures. It would be best to have subtle watermarks not to burden your photographs.
Check out our piece on the best WordPress watermark plugins to use now – it should make choosing a proper watermarking plugin much easier.
Creating a watermark with a background remover tool
This method is ideal if your future watermark consists of an element of a picture (like a logo). In this case, using a background remover tool is very helpful.
Just upload the photo, hit a button, and the background magically disappears and will be transparent. Therefore, the resulting picture can be used as a watermark wherever you wish.
Final Thoughts
As you can see, there are a lot of alternatives for making transparent watermarks for your pictures. And also a lot of programs and software that will make everything easier.
You only have to find and design a watermark that suits your style. Don’t forget that watermarks are an excellent way to make yourself and your masterpieces known.
This is how you sign your art.