If you’re reading this guide, you’re probably using WPBakery. You’ll undoubtedly be enjoying its ease of use and drag-and-drop functionality. You’ve decided to use a tool that makes it easy for you to create a website. But you need something extra to help you showcase your images (or maybe even videos) via galleries.
Hold on to your hat; we’ve got just the tutorial for you.
In this guide, we’ll show you how to use this dynamic duo (think Batman & Robin) to create a recipe for success!
You don’t need baking (*wink wink*) or even coding skills for this one.
Table of contents
What’s the deal with WPBakery?
WPBakery is a super popular drag-and-drop page builder for WordPress that lets you create professional-looking websites without coding skills.
Here are some cool things about WPBakery you should know:
- Drag and drop: You can easily add pre-built elements and content blocks to your pages and posts by simply dragging and dropping them. No coding is required!
- Pre-built templates: WPBakery has dozens of ready-made templates for landing pages, portfolios, and blogs, to get you started quickly.
- Customization options: With WPBakery, you can tweak the look of every element on your page, including fonts, colors, backgrounds, and more.
- Compatibility: WPBakery is compatible with most WordPress themes and plugins, so you can easily use it with your existing website.
- Front-end editor: WPBakery’s front-end editor lets you preview your changes in real-time before publishing, so you can see how everything looks.
Using WPBakery combined with Modula, you can create killer galleries, whether they’re for images or video.
Creating a WPBakery Image Gallery with Modula
Creating and displaying an image gallery with WPBakery and Modula is super easy. Don’t believe me? Check these easy steps for yourself:
Step 1: Setting up WPBakery and Modula
Before creating stunning image galleries with WPBakery and Modula, you must install and set up both plugins.
If you haven’t already, you must purchase and download WPBakery. You can do this from the WPBakery website. Once you’ve purchased, you can download the plugin in a ZIP file.
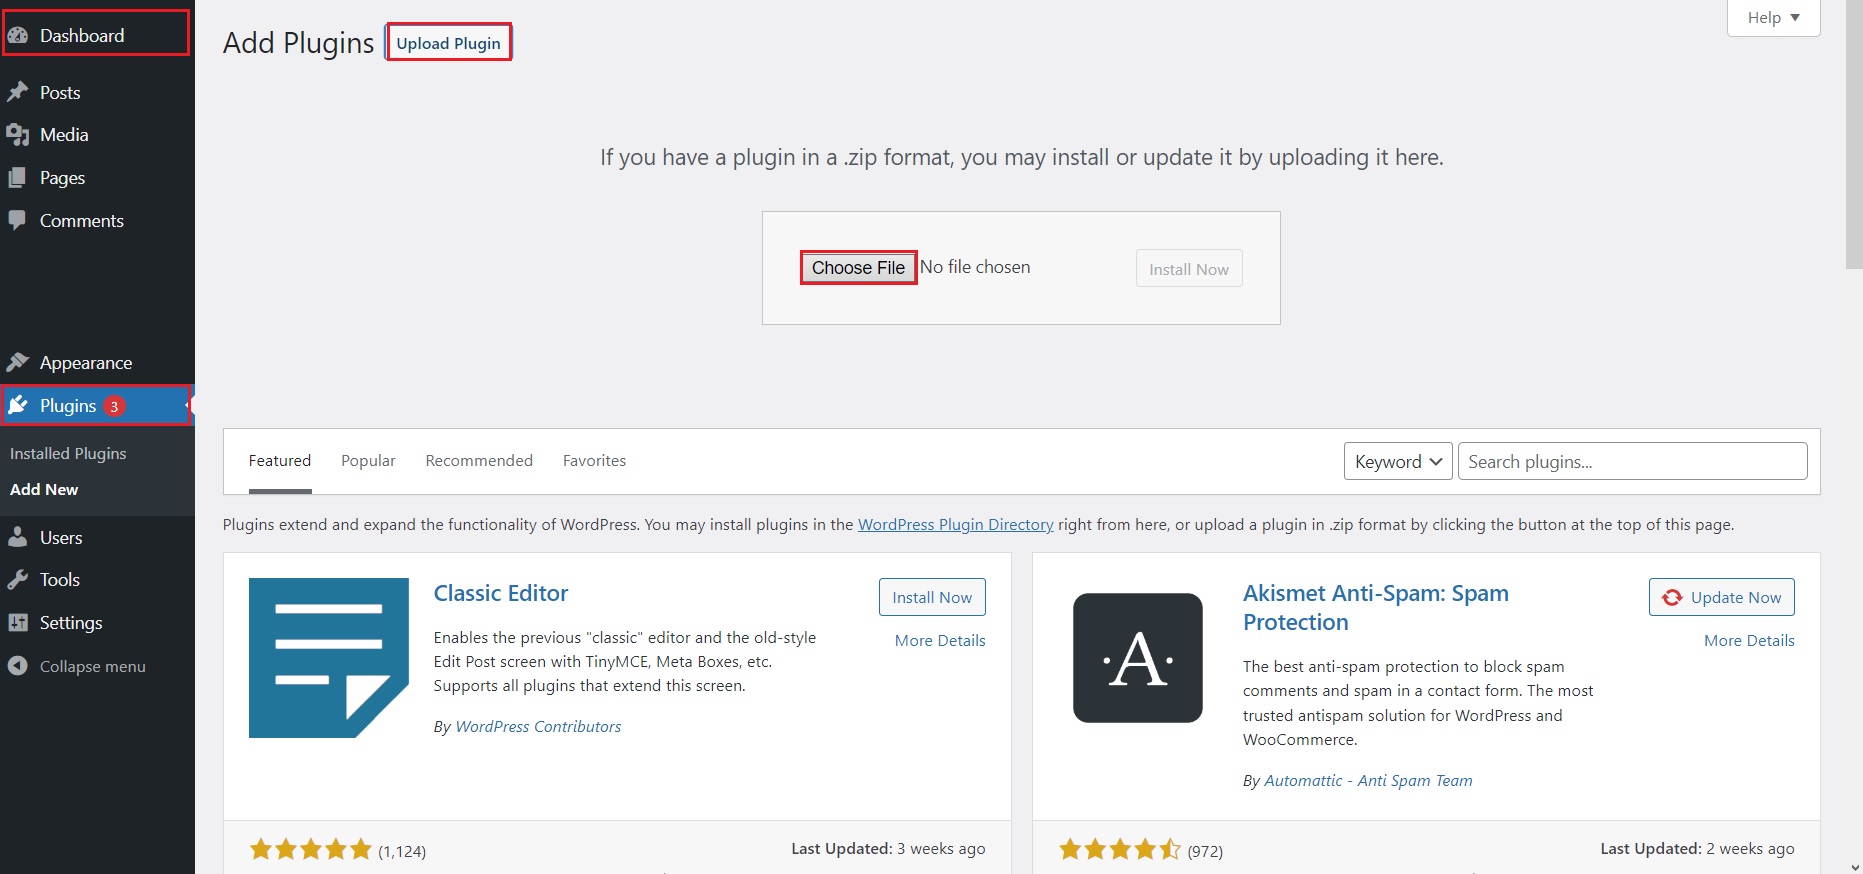
To install WPBakery, head to your WordPress Dashboard > Plugins > Add New > Upload Plugin. Select the zip file you downloaded, and install and activate the plugin.
When it comes to Modula, you can try out the free version. Installing and activating Modula is just as easy as WPBakery. (I did say this was going to be easy.)
Check out our step-by-step guide on installing and activating Modula.
I will be using the free version for this article, so don’t worry about breaking the bank just yet. But if you want to unleash its full potential and create galleries that will leave your visitors in awe, consider getting Modula Pro.

Modula Gallery Plugin
Create stunning, responsive photo galleries with ease. Showcase your work, captivate your audience, and boost engagement. You don’t need to do any coding.
Trust me; it’s like upgrading from a tricycle to a Ferrari, it’s a game-changer!
Step 2: Creating an image gallery with Modula
There are times when plugins overwhelm me. Although I already have a history of using WordPress, I’m not tech-savvy. Luckily for me, Modula makes it very easy to navigate around and create galleries!
First, head to your WordPress Dashboard, click “Modula,” and select “Add New.” You will be redirected to a new page where you can start uploading your images or select a few from your WordPress Library. You can drag and drop images to arrange them as you wish.
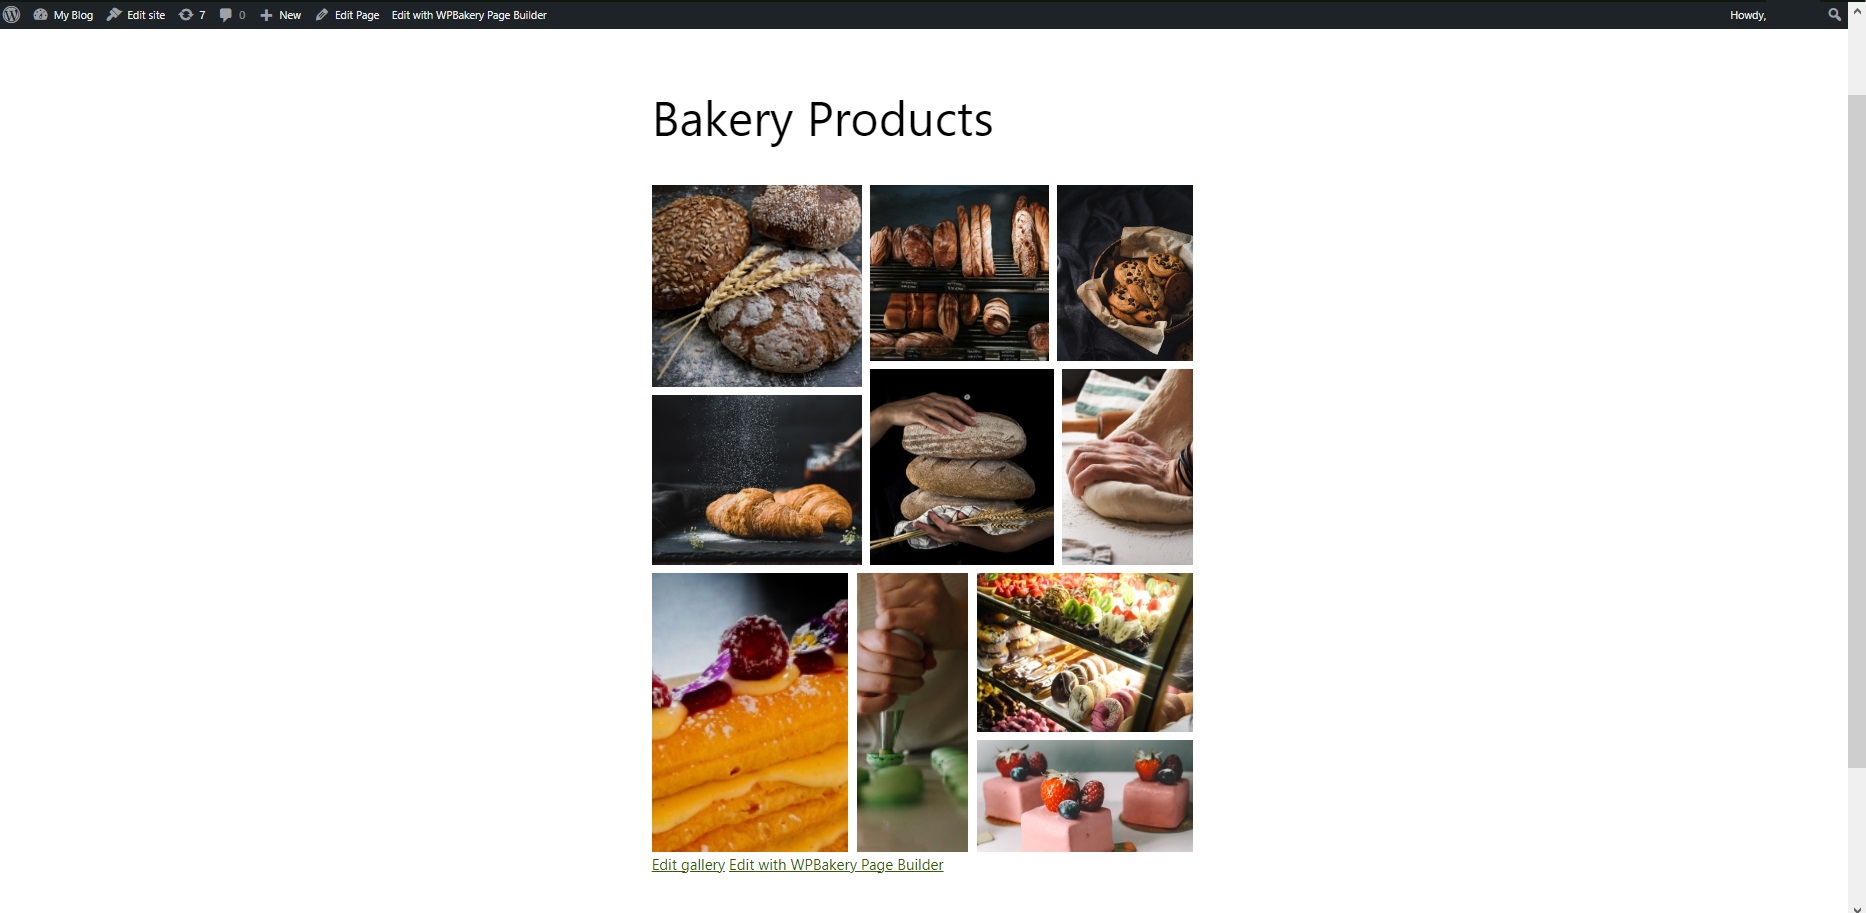
As we’re working with WPBakery, I couldn’t resist doing this guide without creating an image gallery filled with bakery and patisserie products.
I’m not a baker, but I love eating them.
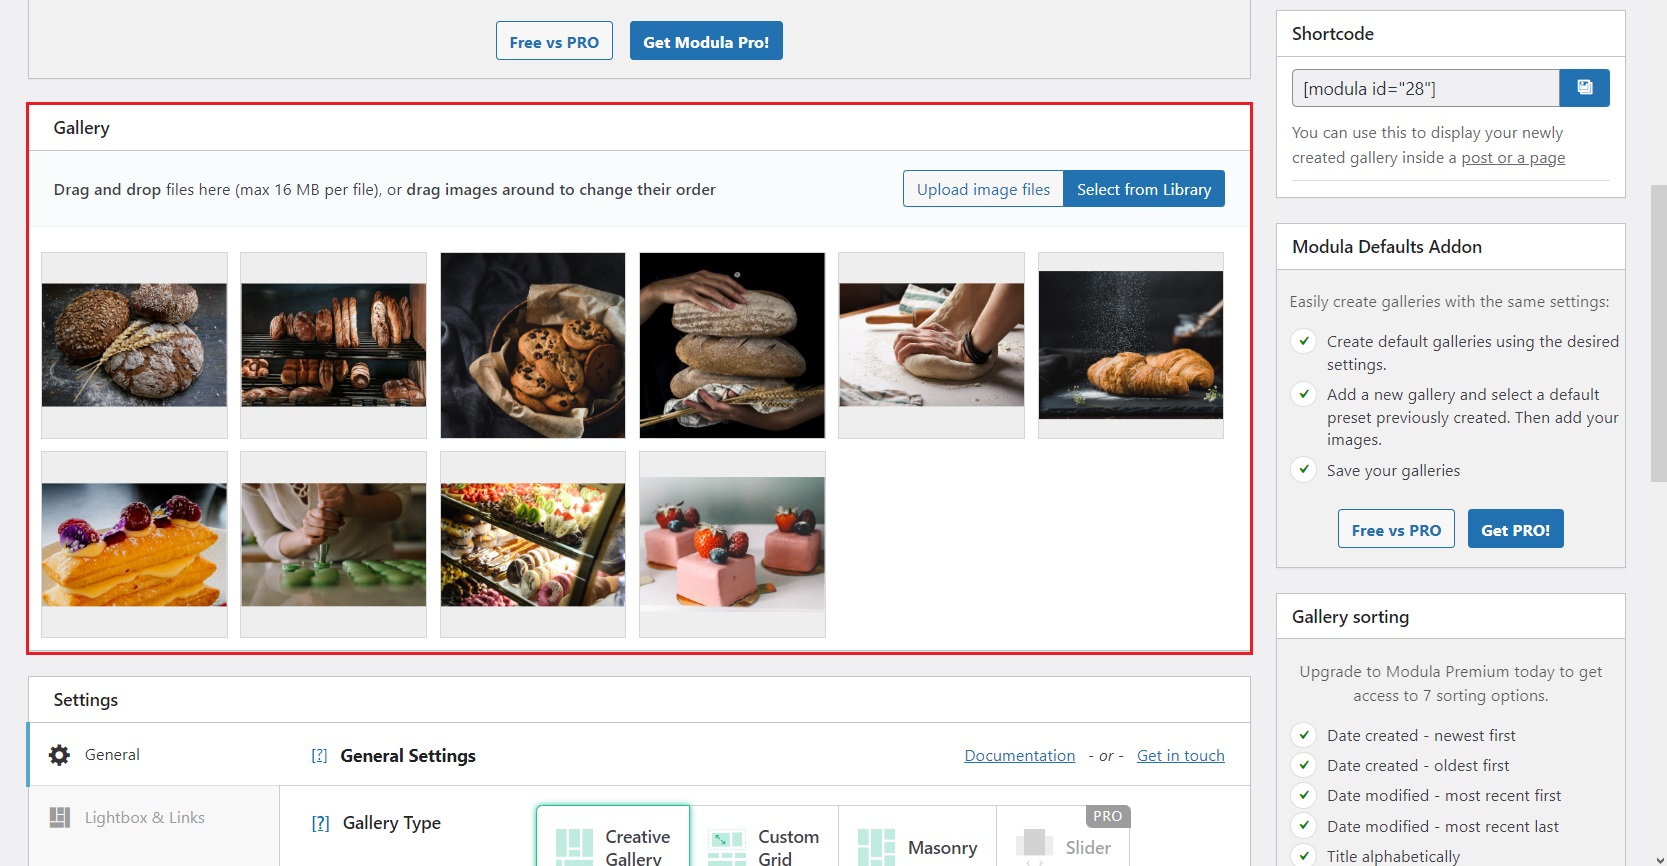
Make sure to click on the Save Gallery button once you are done with the customization.
You will receive a Shortcode as soon as you save the gallery. Don’t forget to copy it; we need it for the next step.
Step 3: Displaying the image gallery with WPBakery
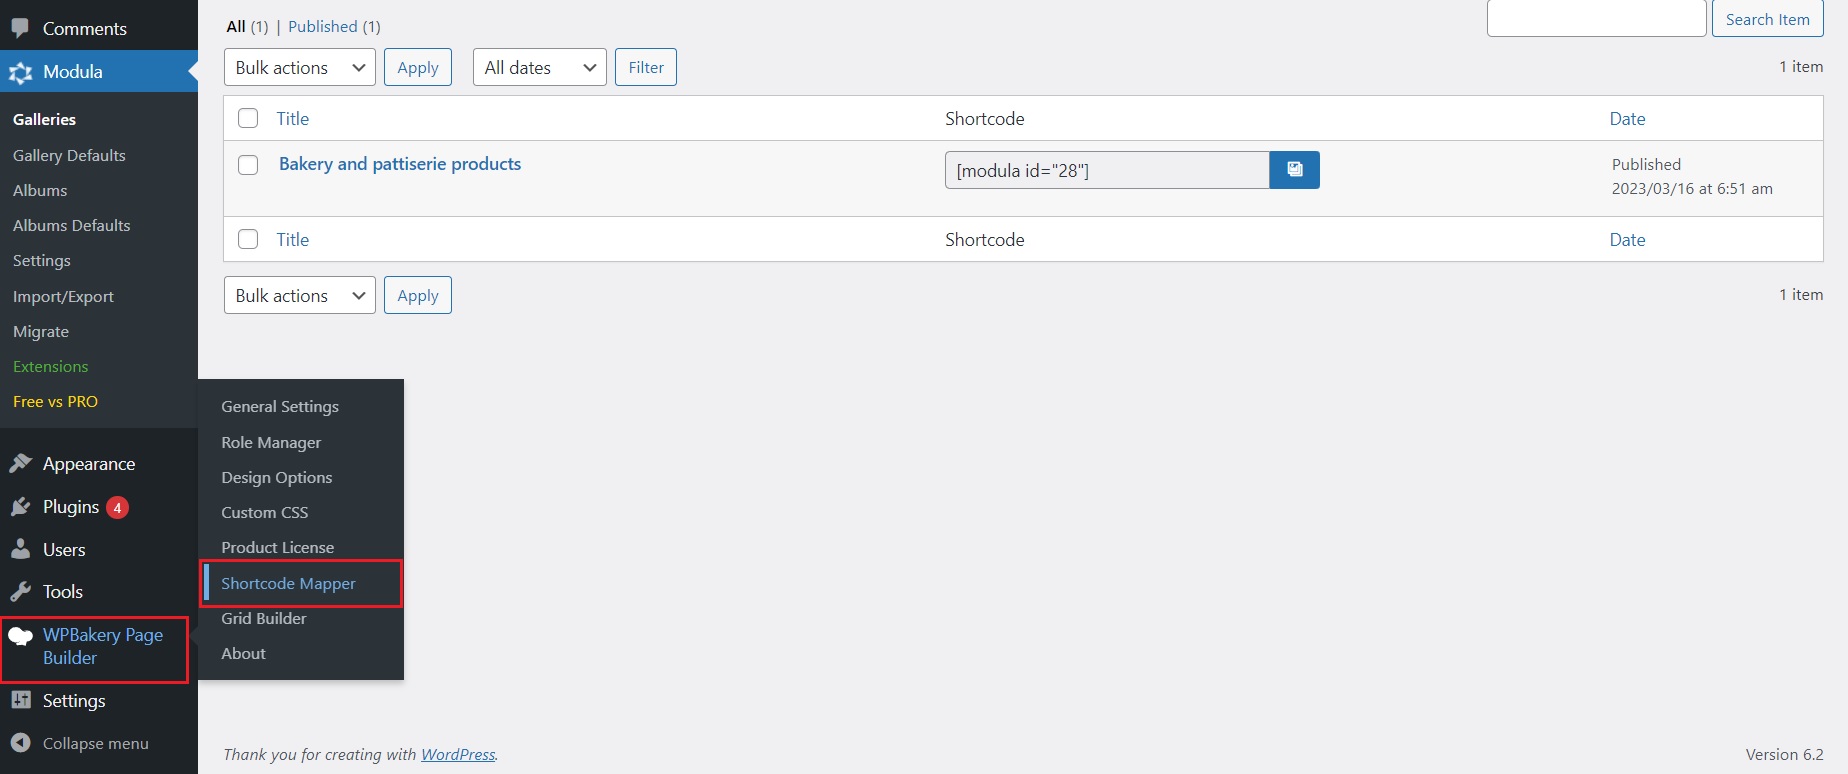
Before doing anything with WPBakery, we must map the shortcode we just received. Go to Dashboard > WPBakery Page Builder > Shortcode Mapper.
You will be redirected to another page. Click on the Map Shortcode button.
A new text box will appear. You must paste the Modula shortcode in the text box and click on the Parse Shortcode.
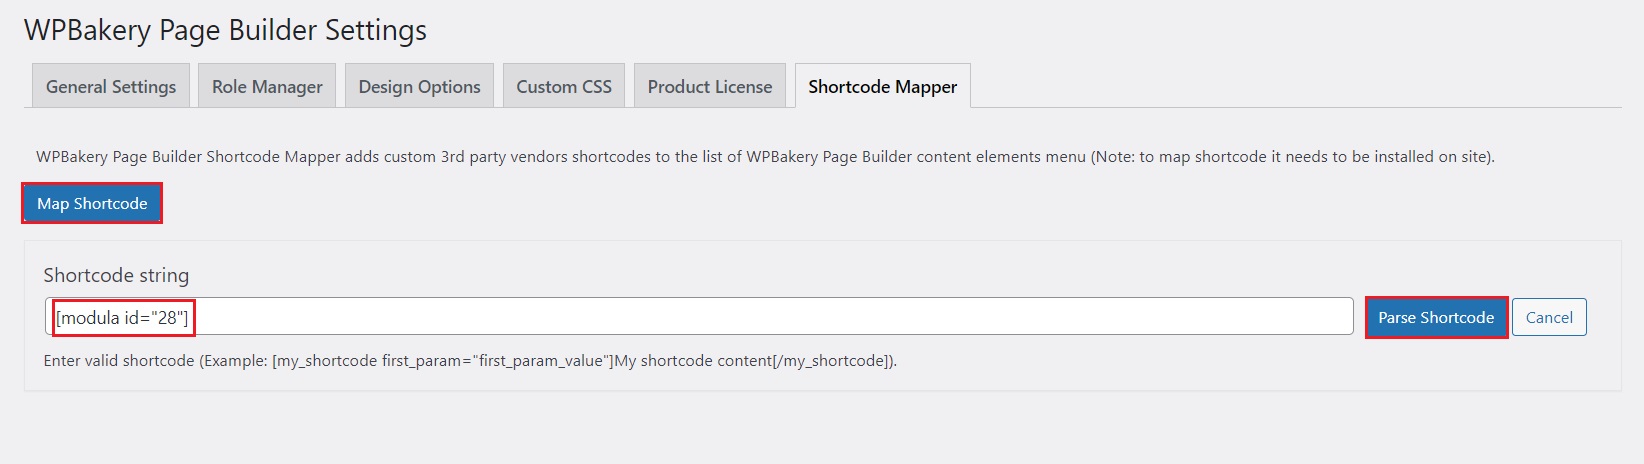
More options will appear underneath. You don’t have to do anything here. Don’t mess with anything since I don’t know how to help you if something is not working. You know what they say; if it works, leave it as it is.
Click on Save Changes, and let’s head to the next step.

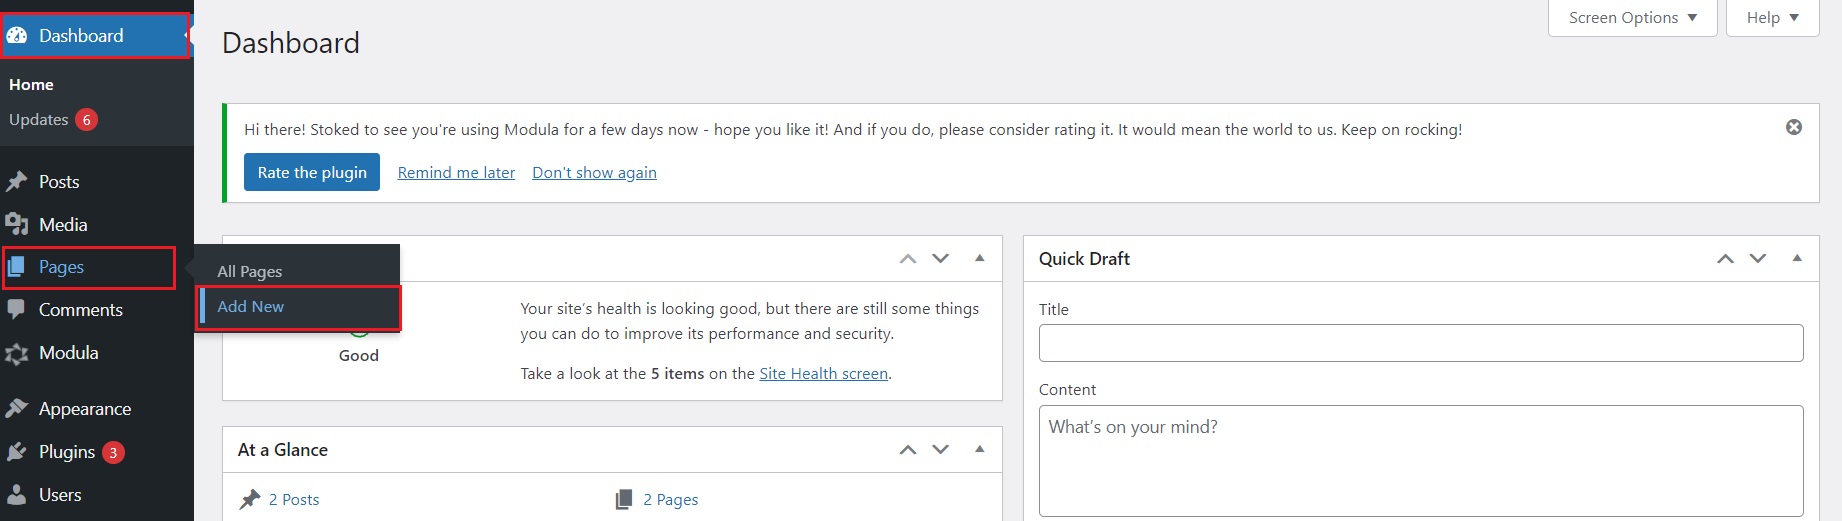
Now we get to create the WPBakery page. Head over to your Dashboard > Pages > Add New.
You will get to your typical WordPress editing mode (as shown below). Click on the WPBakery Page Builder button.
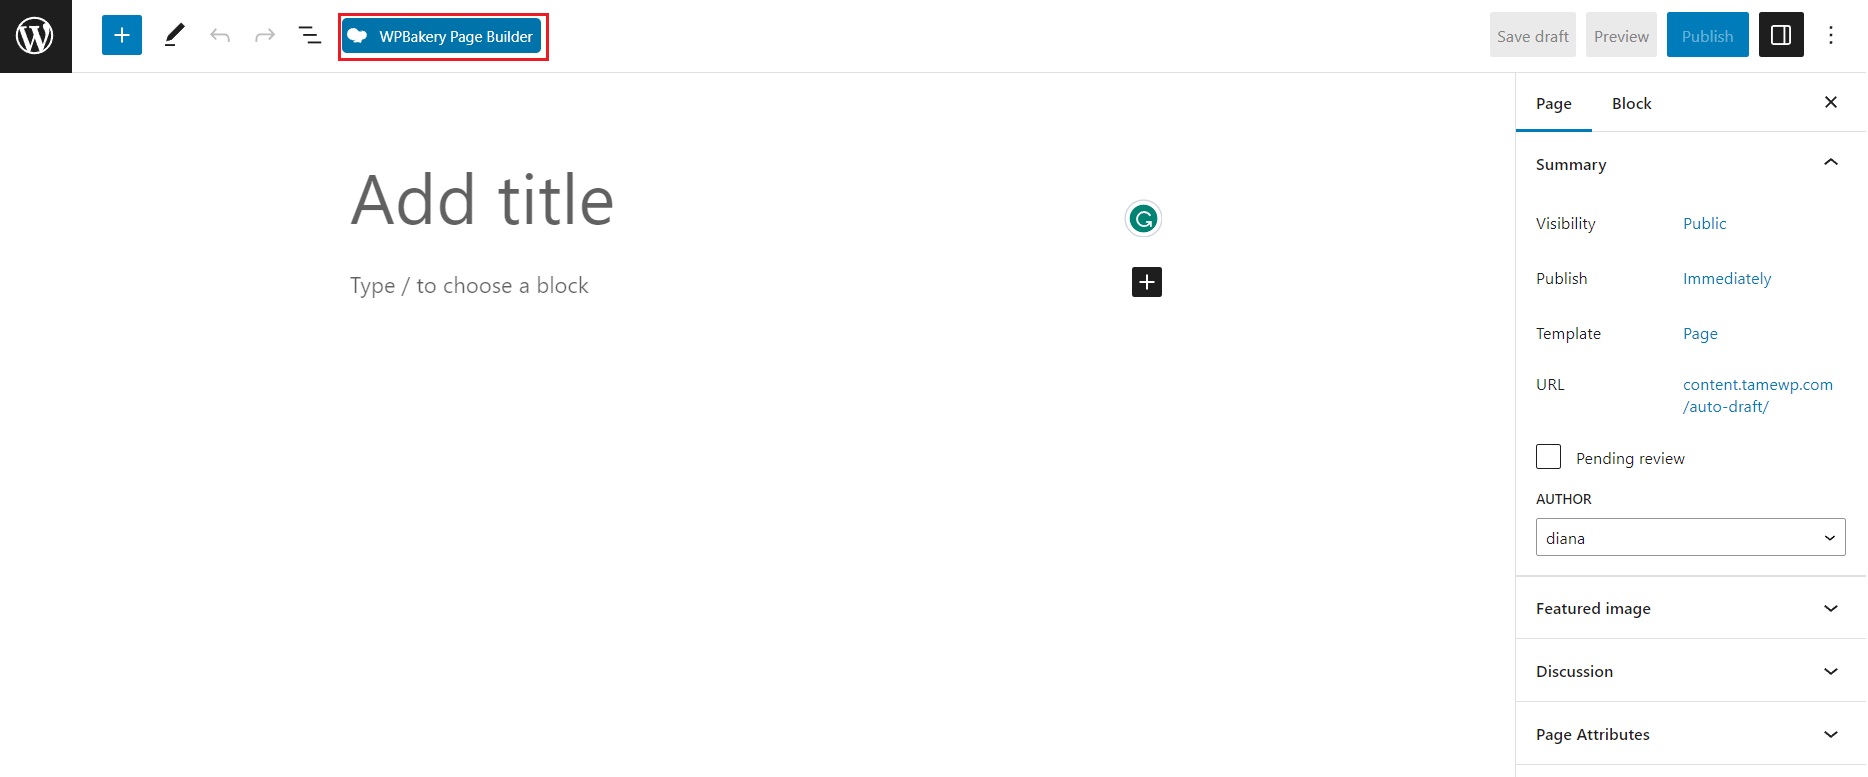
You will be redirected again to another page. Begin by giving your page a title, then click on the backend editor.

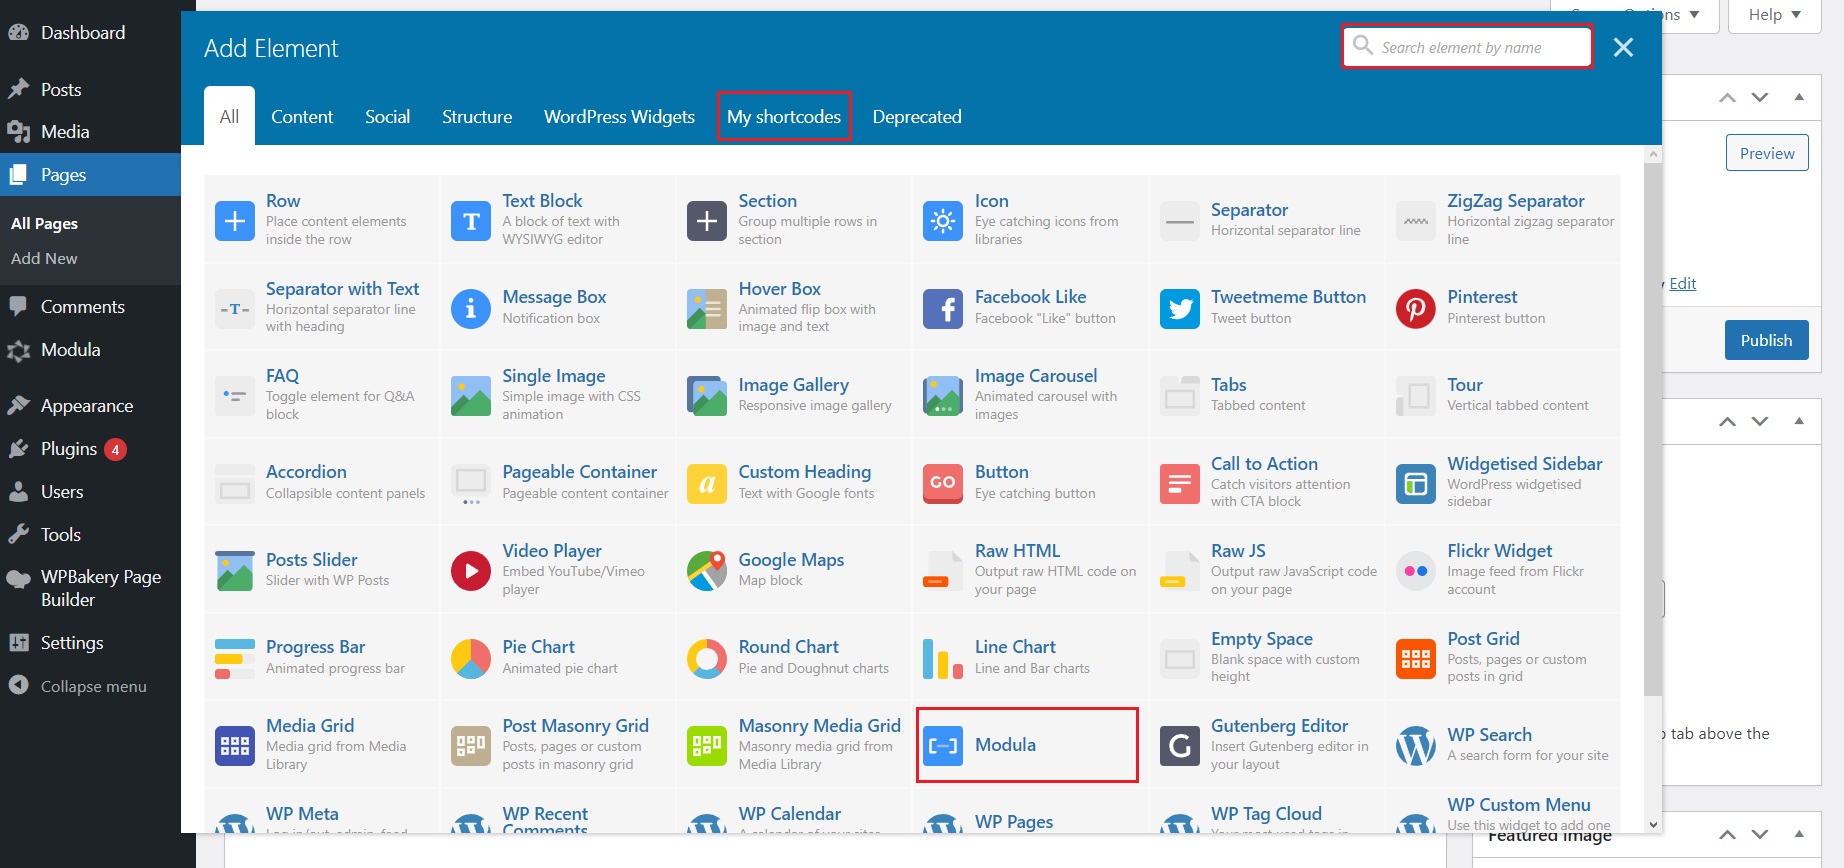
Click on the Add Element button.
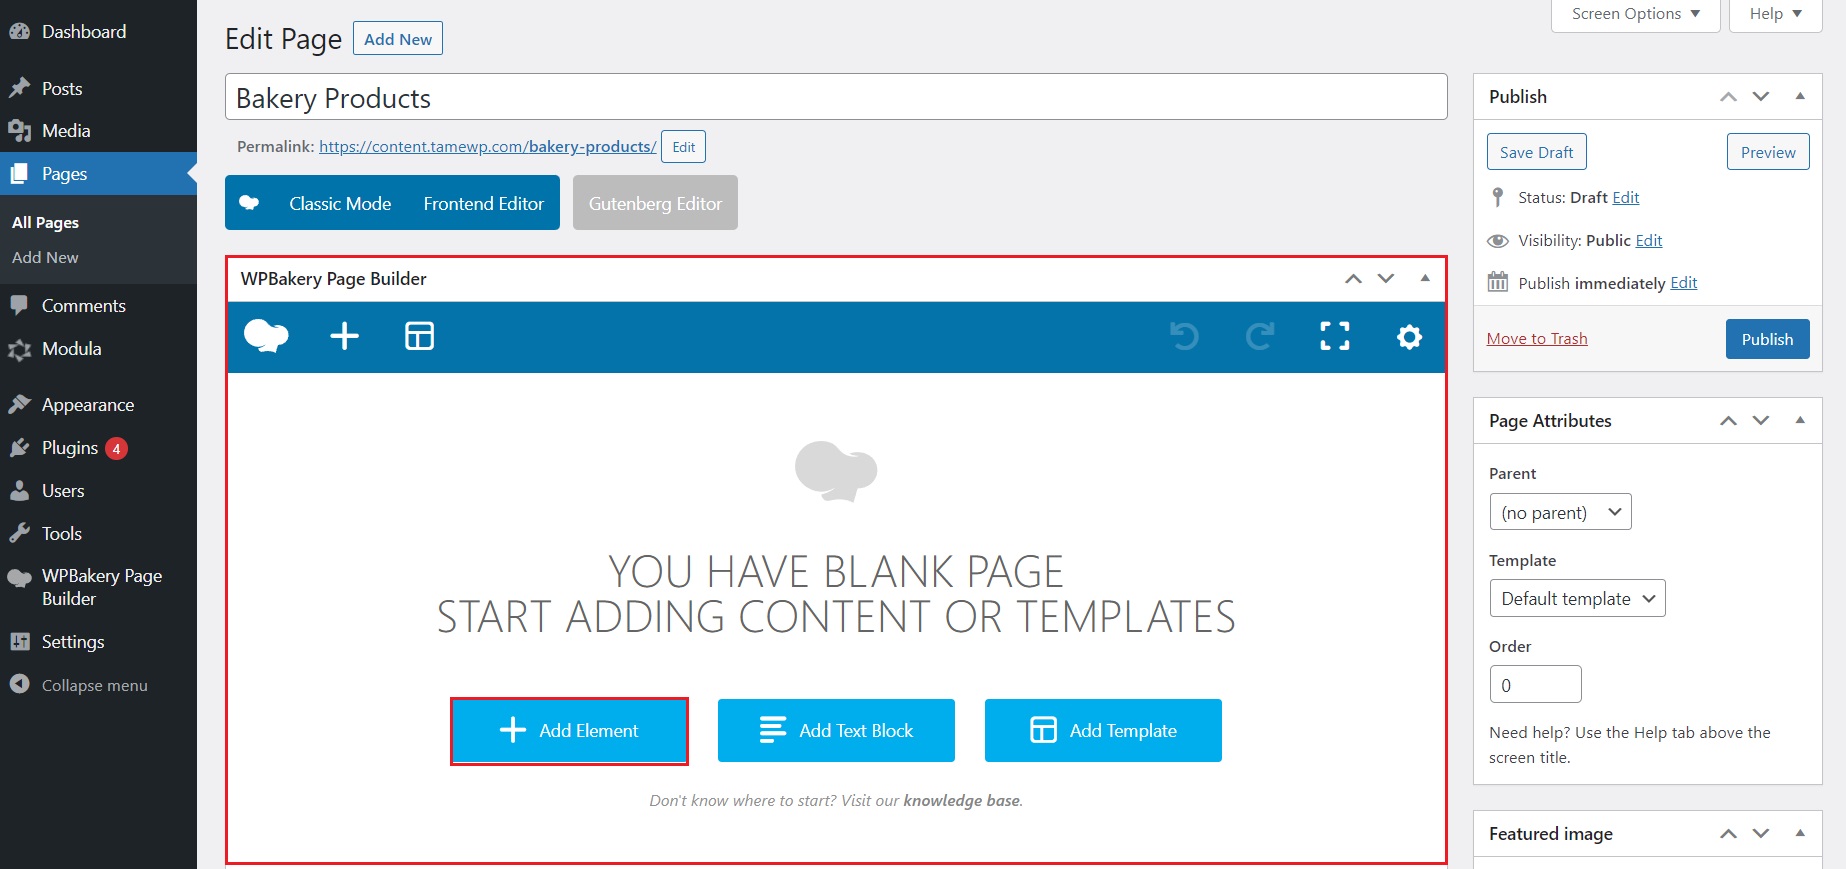
A new window will pop up with a lot of options. You can either go to My Shortcodes and find Modula or simply use the search bar in the top right corner.
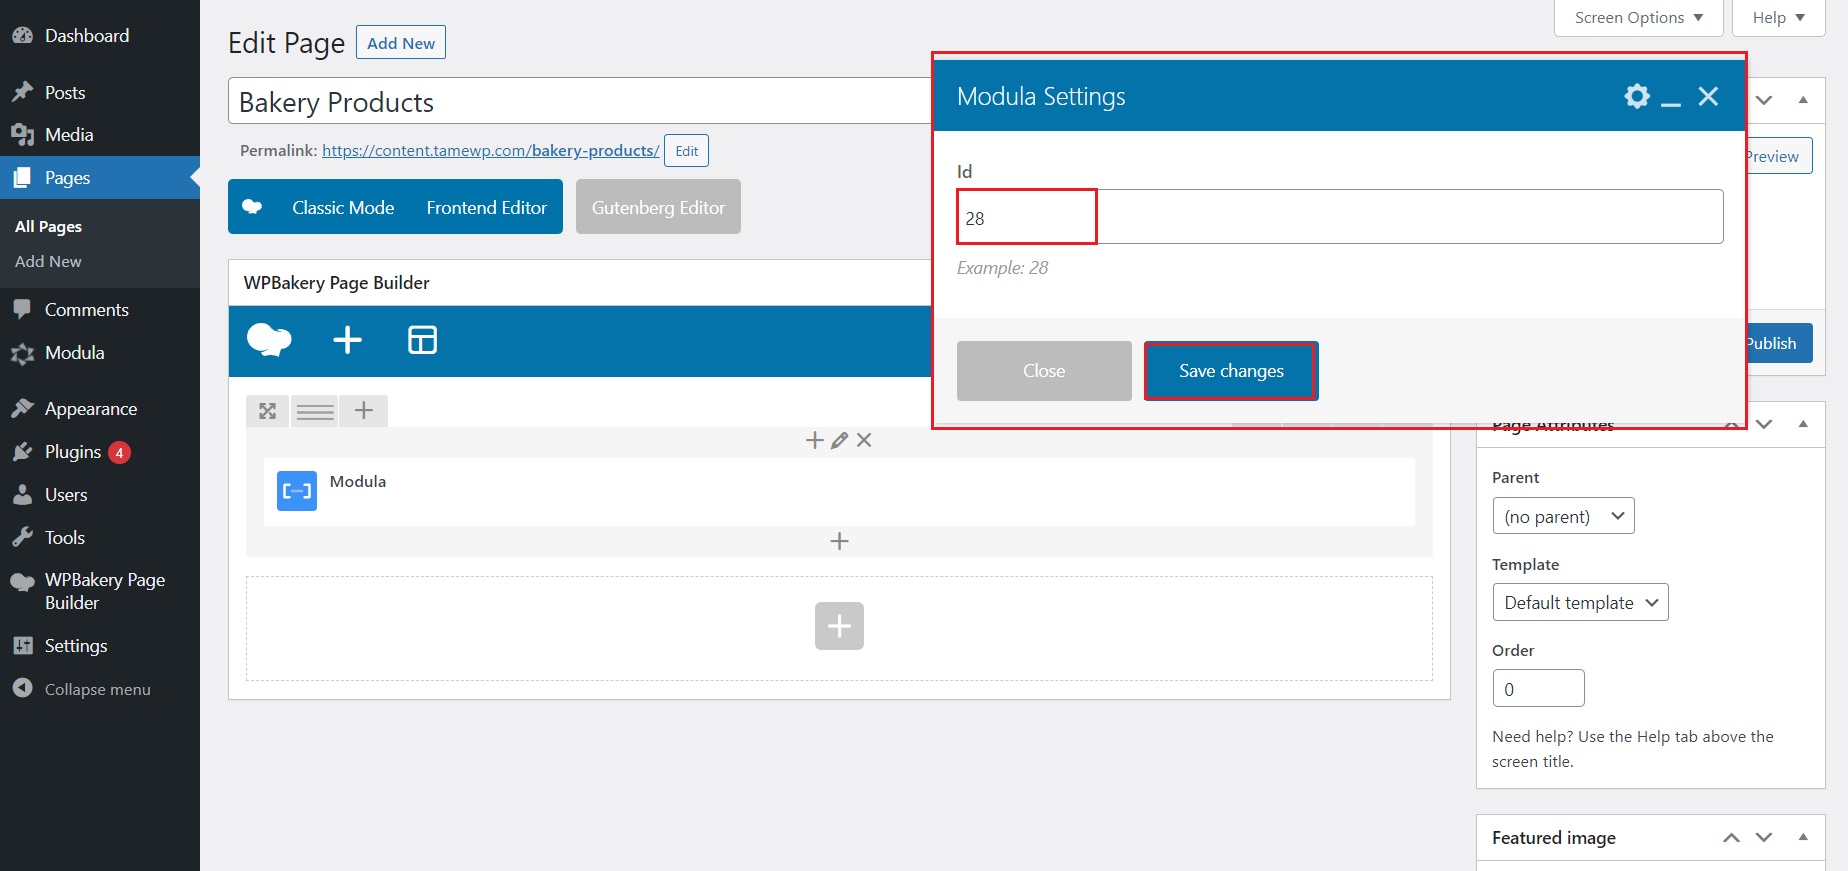
Once you select Modula, another window will pop up. If you didn’t mess with anything when you did the parsing shortcode part, you should have the same ID as the shortcode in the text box.
Click on Save Changes to continue building your page as you see fit.
Once you are done, click Publish page and see your work in action!
So far, I have shown you the bare minimum and the main idea of using WPBakery and Modula. Both plugins are fantastic and come with excellent customization options.
Play with them to build your image galleries to fit your needs. Have fun with it, and go to town!
Wrapping up…
And that’s a wrap, folks! You’ve learned how to use WPBakery and Modula to whip up delicious image galleries that will make your website pop.
So go ahead, sprinkle in your creativity, and experiment with different settings and configurations to create a masterpiece that will leave your visitors craving more.
Happy baking!
Modula Gallery Plugin
Create stunning, responsive photo galleries with ease. Showcase your work, captivate your audience, and boost engagement. You don’t need to do any coding.
