Have you ever wondered how to disable Right Click on images in WordPress? If you’ve ever been concerned about protecting your website’s images from being easily downloaded without your consent, you’re in the right place!
In this blog post, we’ll show you how to disable the right-click option on your images using Modula’s Protection Extension. The best part? This user-friendly method doesn’t require technical expertise or coding skills.
So, let’s dive in!
Table of contents
Why Disable Right-Click on Images in WordPress?
Disabling right-click on images is important because it prevents others from stealing or misusing your pictures without permission. Turning off right-click is like adding a protective shield around your images online.
Plus, there are other good reasons to do it, too. Let’s explore those together:
- Protecting Copyright: If you’re a photographer, artist, or content creator, your creations are like your babies, right? Disabling right-click helps safeguard your copyright and ensures that others can’t misuse your work without permission.
- Maintaining Professionalism: Image protection is vital to maintaining a sleek and polished look for businesses and professional websites. It shows that you value your content and the hard work you’ve put into making your site visually appealing.
- Improving SEO: When people swipe your images without asking, duplicate content creates a problem. Search engines don’t like that!
By stopping image theft, you’re telling search engines, “Hey, this content is unique and valuable.” This control over your content’s SEO value can boost your website’s rankings, making it easier for people to find you online.
How to Disable Right-Click on Images in WordPress Using Modula’s Protection Extension
Now that we’ve learned how disabling right-click on your browser helps you secure your images, let’s dive into the simple steps for doing this in WordPress using Modula and its Protection Extension.
1. Install and Activate Modula
First, you’ll need to install and activate Modula Lite on your WordPress site. But don’t stress—it’s super easy! There are two straightforward methods for getting your hands on the plugin.
- Method 1: Get a zip file of Modula Lite from its WordPress.org profile.
- Method 2: Directly install Modula Lite from your admin dashboard.
Let’s take the quick and easy route and install Modula directly from the admin dashboard.
Log in to your WordPress admin area. On the left-hand side, you’ll see a menu. Click on Plugins >> Add New.
This will redirect you to the plugins’ directory page. In the search bar, type in “Modula.” Hit enter, and voila! You should see the Modula Lite plugin in the search results.
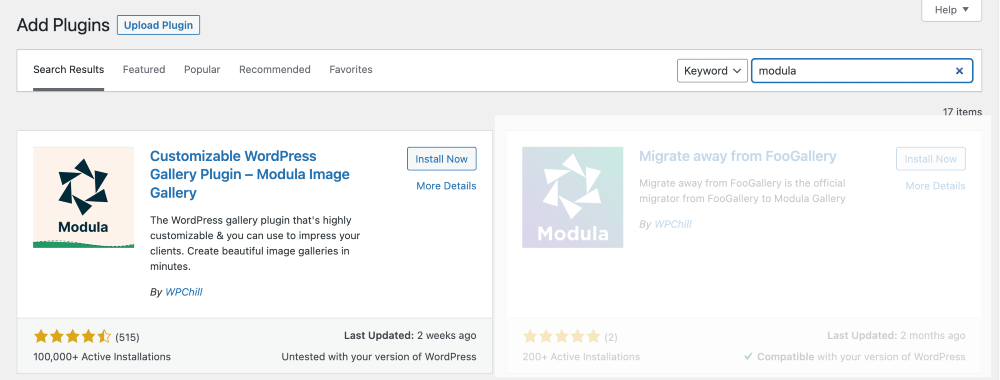
When you spot Modula, click on the “Install Now” button. WordPress will work its magic. After the installation is complete, click “Activate” – and just like that, the LITE version of Modula is live on your site!
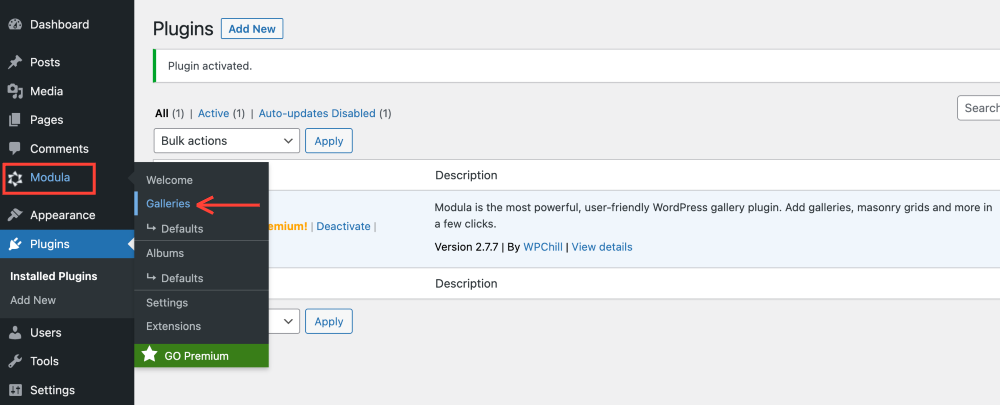
Once Modula is up and running smoothly on your website, you’ll notice a new addition to your admin dashboard—a menu option called “Modula.”

To disable the right-click on images, you’ll need the Protection Extension, which is included in the Trio or higher plan.
2. Add Protection Extension
Modula’s Protection Extension simplifies the process of disabling right-clicking on images in WordPress, diving in, and getting started. Easier than tying your shoelaces!
Here’s a quick rundown of the main steps to help you get started:
- Step 1: Purchase and download Modula’s Pro package. Upload the zip file to your WordPress site just like any other plugin.
- Step 2: Validate your premium package by adding your license key. Once Modula Pro is activated, go to your WordPress dashboard, click Modula, and then navigate to Extensions.
- Step 3: In the Extensions menu, locate Right-Click Protection and toggle on the button to enable the extension features.
If you need more detailed guidance, the step-by-step guide is available.
3. Create Your Image Gallery
Once you’ve set up Modula and the Protection Extension, the next step is to start creating awesome image galleries on your website.
To create your galleries, head to your dashboard and click Modula >> Galleries.
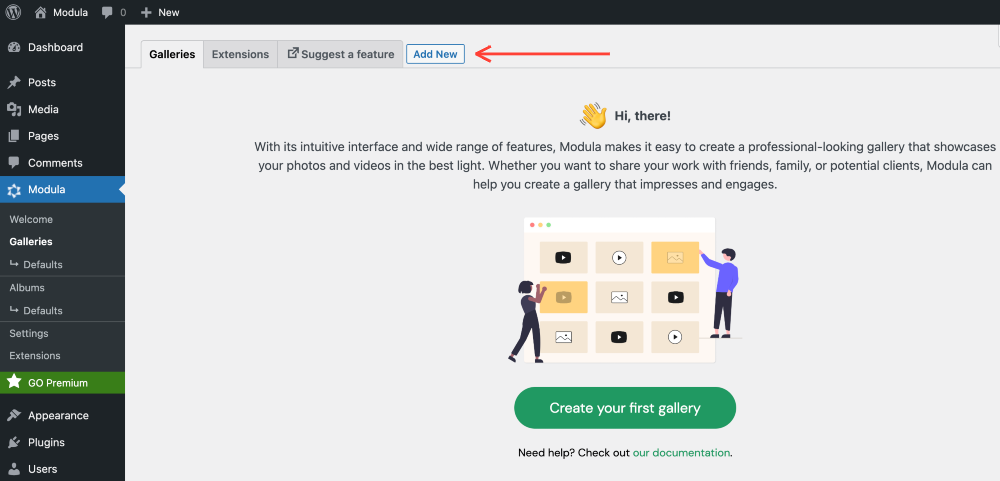
When you move on to the next page, look for the “Add New” button. If this is your first time using Modula, just click the “Create your first gallery” button.
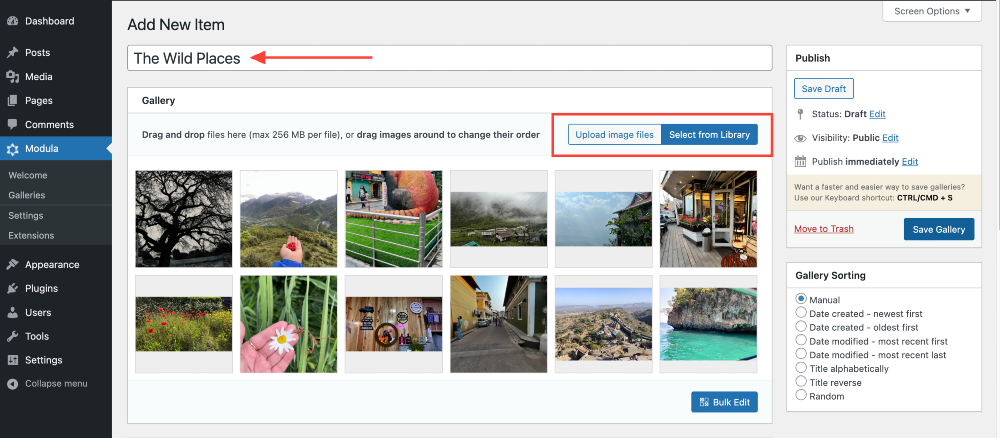
Next, you’ll be redirected to Modula’s gallery setup screen. Start by adding an interactive Title to your image gallery.
After that, it’s time to upload your images. You have two easy options: click the “Upload Image Files” button to add new pictures or choose photos directly from your WordPress Library.
Once you upload the images, you can use Modula’s in-built drag-and-drop builder to arrange the pictures in your desired order.
Before we move on, let’s discuss some fantastic customization options that Modula offers.
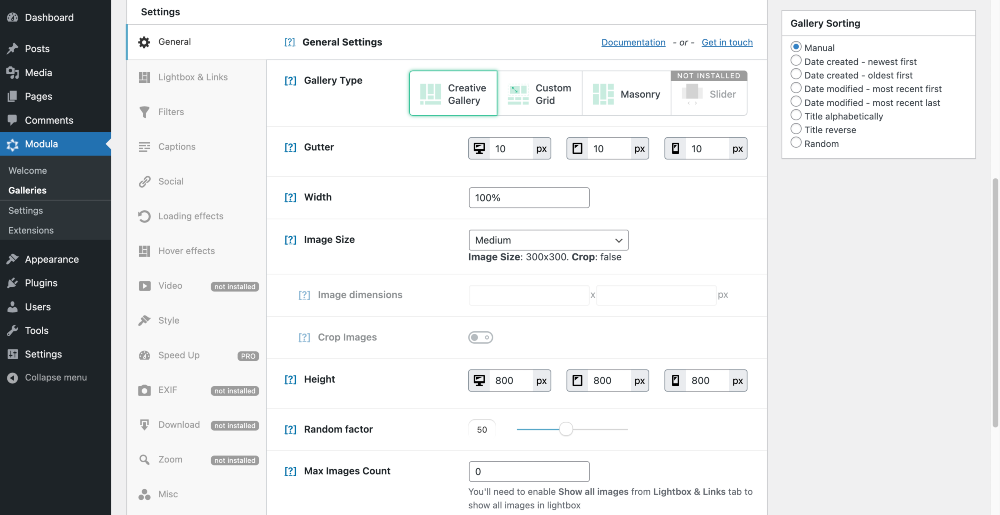
In the General Settings tab, you can pick from various gallery layouts. Whether you prefer a creative look with a Creative Gallery, a structured design with a Custom Grid, or an artistic touch with a Masonry layout, Modula offers it all!
But the customization doesn’t stop there. You can fine-tune your gallery with options like Gutter, Width, Image Size, and Height, ensuring your layout looks picture-perfect.
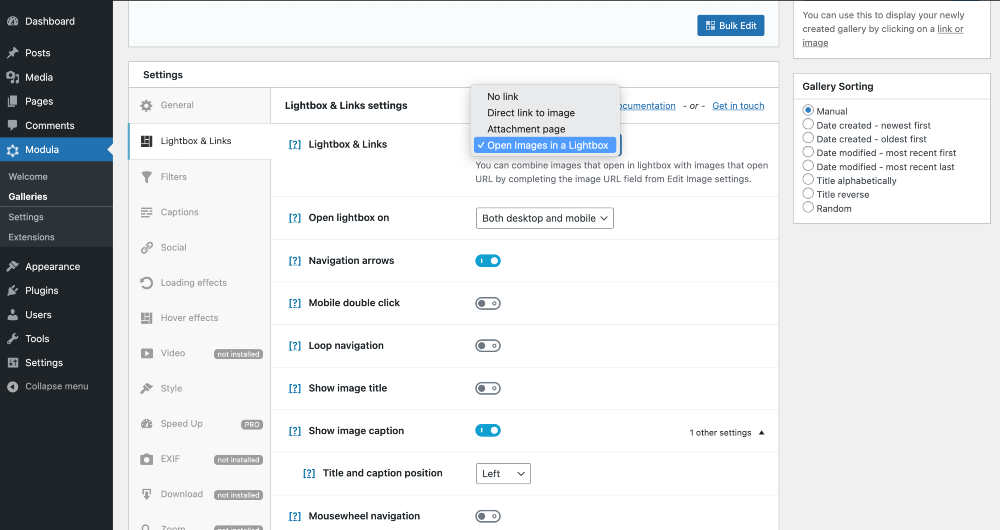
The Lightbox tab is packed with settings to enhance your viewer’s experience. You can play around with animation types, transition effects, auto-play, social sharing buttons, navigation arrows, and more!
Modula allows you to personalize your image gallery precisely as you envision it.
4. Enable the Right-Click Protection
Now that your image gallery is ready enhance its security by disabling right-clicking on the images.
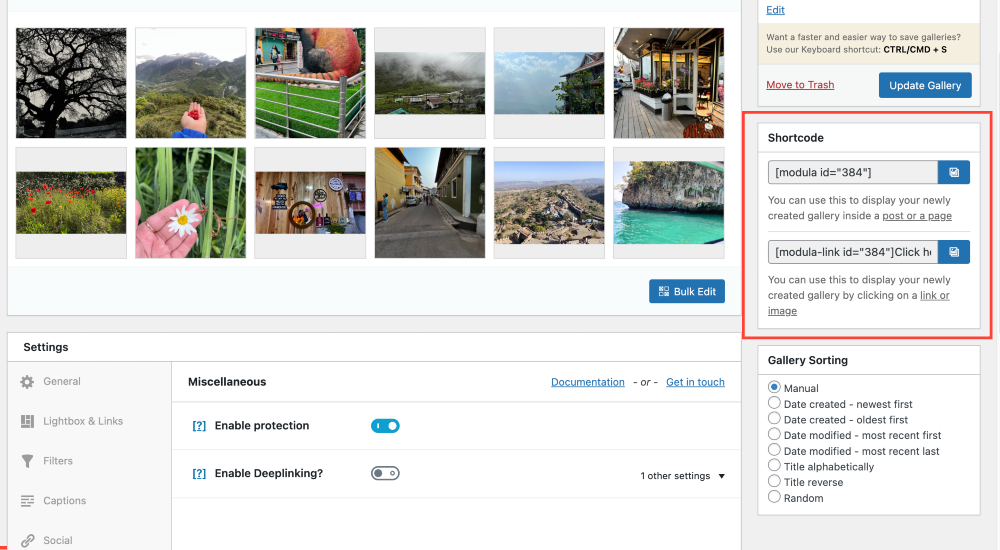
Scroll down the page until you spot the “Misc” tab (Miscellaneous). Click on the tab to open it and toggle on the “Enable protection” button.
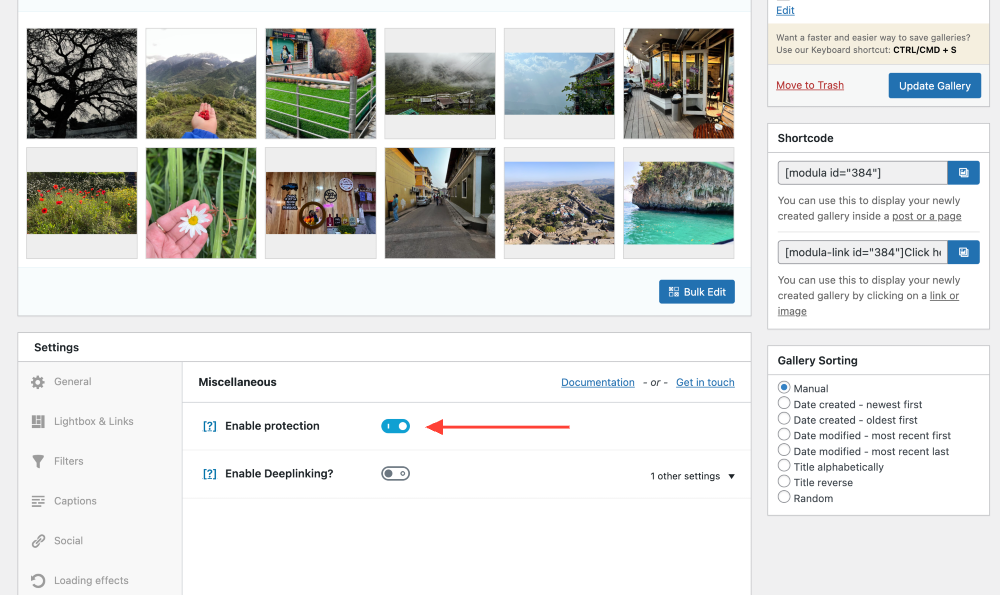
Enabling this feature enhances the security of your Modula image gallery. By disabling right-clicking, you can prevent users from downloading or copying your images. This protection applies to both visitors who are not logged in and users who are logged in but do not have Media permissions. It gives you complete control over who can view and use your content.
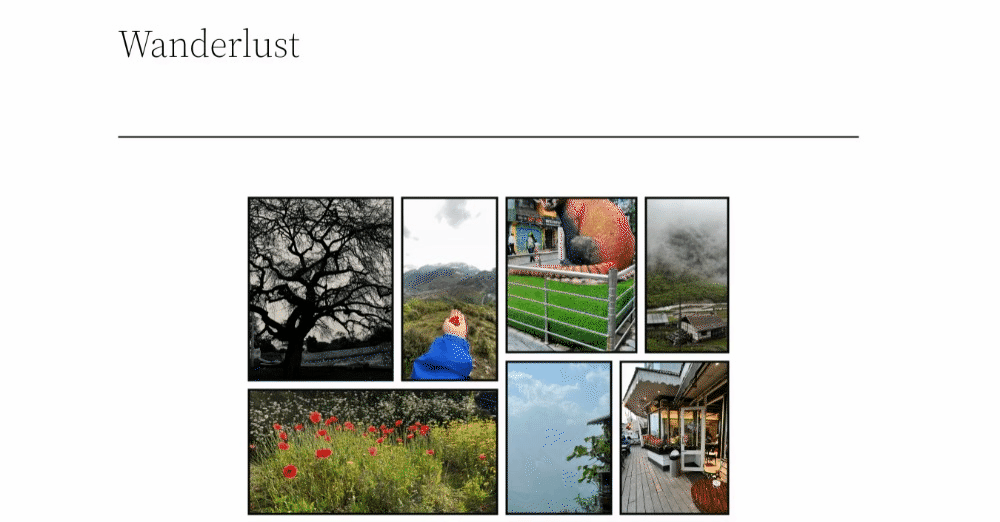
Once done, save your gallery and copy the shortcode.
Next, go to the page where you want to embed your gallery, paste the shortcode, and publish your page.
5. Test the Right-Click Protection
It’s time to put the Protection Extension to the test and see its magic in action.
To test the right-click protection, open the page where you’ve published your image gallery. Access the page in incognito mode or using a browser without logging in as an admin.
Now, try right-clicking on the images, and you’ll notice that right-clicking doesn’t work on that page.
And there you have it! That’s how you disable right-click on images in WordPress with Modula and its Protection Extension. Your pictures are now safe and secure from unauthorized downloads.
Unveiling More Image Protection Features of Modula
Modula is not just your typical gallery plugin for WordPress; it’s a feature-packed powerhouse. Its protection features go beyond just disabling right-click. It offers more cutting-edge protection features and ensures your creativity remains secure while being beautifully showcased.
With Modula, you can:
Password-Protected Image Galleries
Modula grants you the flexibility to create password-protected image galleries. Whether you’re a photographer, artist, or designer, you can now share your work exclusively with those who hold the key – your chosen password. This ensures that your content is only accessible to the eyes you intend it for, maintaining the integrity of your creative vision.
Watermark Your Images
In the digital age, protecting your images from unauthorized use is paramount. Modula’s watermarking feature lets you add a layer of security to your galleries. With just a few clicks, you can imprint your logo or copyright information directly onto your image galleries.
Add Image Licensing
Within Modula galleries, you can define clear licensing terms for your images. Whether you want to sell licenses for commercial use or grant free licenses for non-commercial projects, Modula facilitates a hassle-free way to manage your creative assets.
Wrapping Up!
Now, no more worries about your images being snatched without your consent because Modula and its Protection Extension have your back!
But here’s the exciting part—if you invest in Modula Pro, you’re in for more image protection features and benefits. Not only can you disable right-clicking, but you can also add watermarks, restrict access to specific user roles by adding passwords, and more.
So, don’t miss out on these extra layers of protection – explore the premium features today and give your images the safeguard they deserve!
