Hey there! Are you ready to dive into the ultimate guide of image licensing in Modula Galleries? Buckle up because we’re presenting a comprehensive post that will elevate your WordPress gallery.
Modula is a fantastic WordPress plugin that takes your image galleries to a new level. And here’s the cool part: With its premium Image Licensing Addon, you can enhance the ethicality of your galleries by providing separate licenses to each gallery.
If you’re tight on budget, you can leverage the basic license features of Modula Lite without spending a single penny.
So, without any further ado, let’s get started!
Table of contents
Why Is Image Licensing a Big Deal?
- Builds Credibility: Licensing shows that you are the creator of these stunning images. It adds a layer of credibility and professionalism to your work, helping visitors trust your photography skills.
- Generates Exposure: Visitors can easily find your name or website linked to the images when they see proper licenses. This exposure can lead to more visitors exploring your portfolio and hiring you for photography projects.
- Respects Copyright Laws: A proper image license demonstrates your commitment to respecting copyright laws. It sets an excellent example for your audience and encourages others to do the same, which is essential in the digital age.
- Encourages Collaboration: Allowing people to use your photos with a license opens collaboration opportunities. Bloggers, designers, and businesses often look for quality images to enhance their content, and they may contact you for partnerships.
- Boosts SEO: Image license also plays a major role in enhancing the SEO of your site. When you provide clear license details, it enhances the user experience. Visitors can understand the source or creator of the image, which builds trust and credibility.
Now that you understand why licensing your images’ so important, let’s talk about how Modula makes it a breeze to add licenses to your entire image gallery.
Yes, you heard it right: with Modula, you don’t need to spend hours licensing individual images. You can create image galleries and add license to the whole gallery with a single click.
Introducing Modula: One Nifty Tool to License Image Galleries in WordPress
Modula is the most user-friendly WordPress image gallery plugin. You can do it all with Modula, from creating standard grid layouts to interactive masonry image galleries to stylish carousel image gallery layouts.
Regarding image gallery security, Modula offers features such as adding a watermark, flexibility to create password-protected image galleries, and a gallery license to save images on your WordPress website from theft.
The best thing is that you get license features in both Lite and Paid versions of Modula. You get some basic features in the free, while the paid packages offer more functionality, flexibility, and advanced options.
So, let’s first start with Modula Lite and learn how to license your WordPress image galleries.
Getting Started With Modula
If you’re new to the Modula plugin and want to give it a spin on your WordPress website, don’t worry – getting started is super easy! All you need to do is follow a quick and easy installation process, and voilà, the plugin activates itself without any hassle.
You can directly install it from your website’s plugin area, or if you prefer, you can download a zip file from your WordPress.org profile. You’ll be up and running with Modula in no time, whichever method you choose!
Now that you’ve already proceeded here, it’s safe to assume you have a WordPress-powered website up and running. So, let’s cut to the chase and activate Modula Lite directly from your admin dashboard.
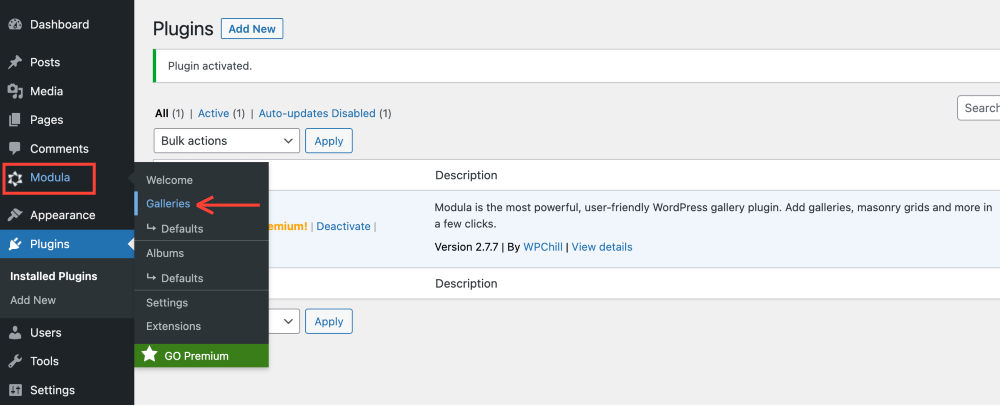
Head to your admin dashboard, click on Plugins >> Add New and type “modula” into the search bar on the next page.
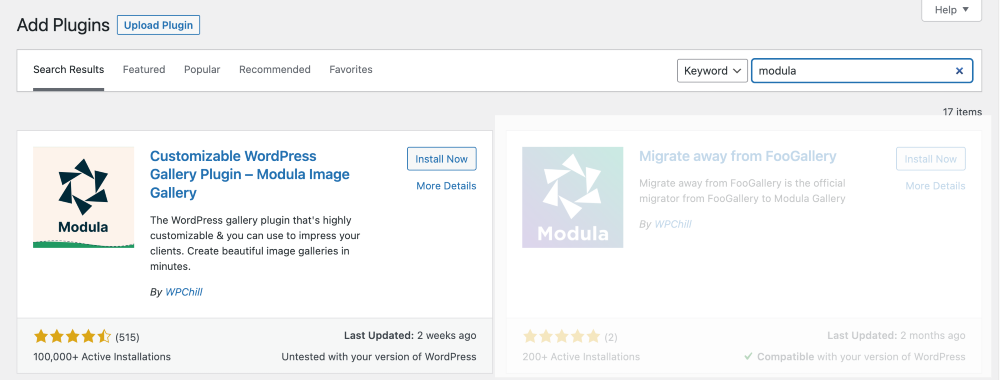
Once you spot the Modula plugin, hit the “Install Now” button. After the installation process wraps up, don’t forget to click the “Activate” button. Remember, Modula is brought to you by Team WPChill, so double-check the name to ensure you’re activating the right plugin.
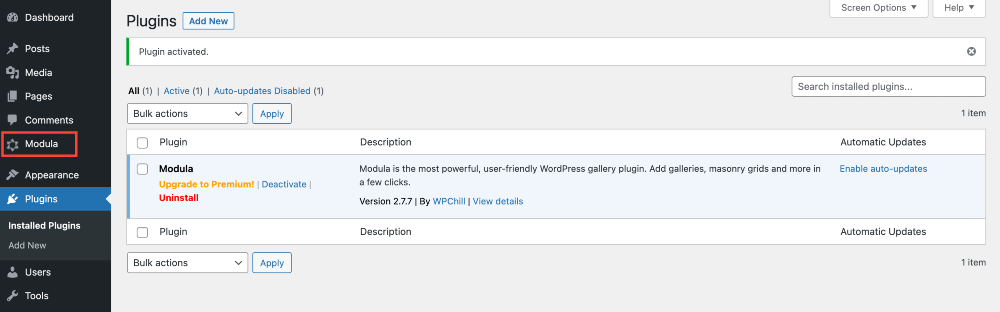
Now that Modula is up and running on your website keep an eye out for a new menu option conveniently labeled “Modula” right there on your admin dashboard.
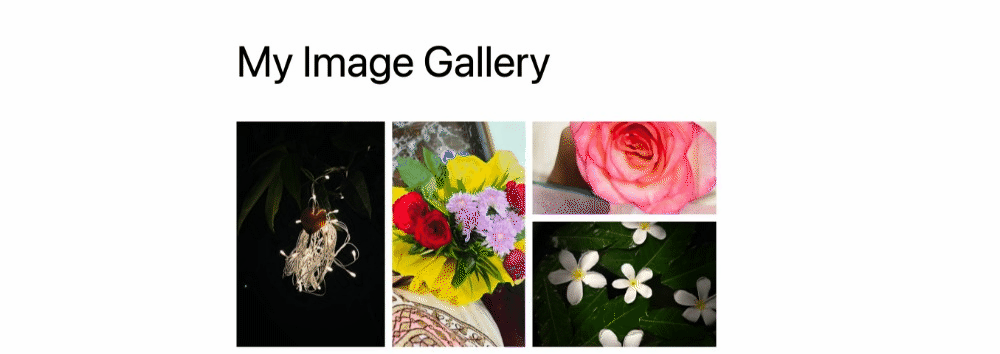
Creating Your First Image Gallery
It’s time to start creating your stunning photo galleries! Navigate to Modula >> Galleries from your left sidebar menu.
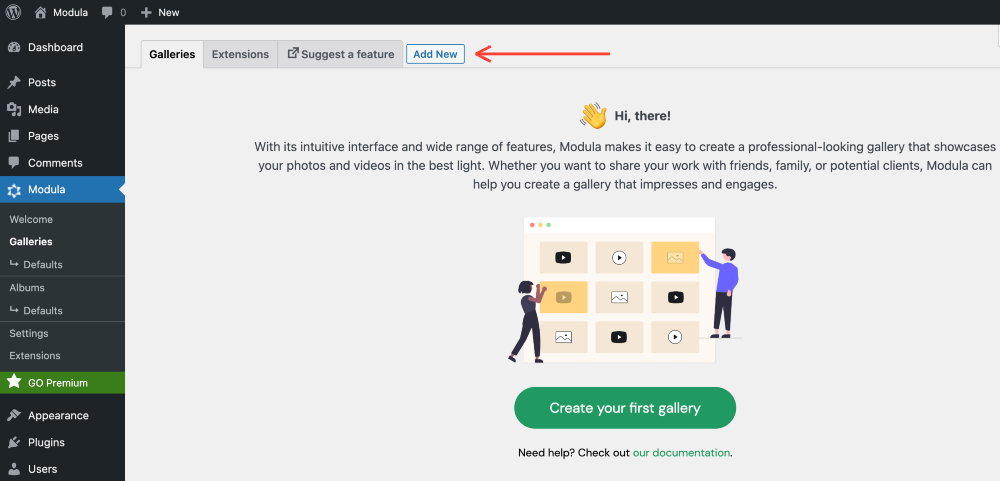
On the next page, look for the Add New button at the top or click the Create your first gallery option, especially if this is your first time creating image galleries using Modula.
This will open the gallery setup screen of Modula. Here, you first need to give a captivating title to your gallery.
The next step is to upload your images. You can begin by clicking on the Upload Image Files button. Alternatively, you can select photos from your WordPress Library.
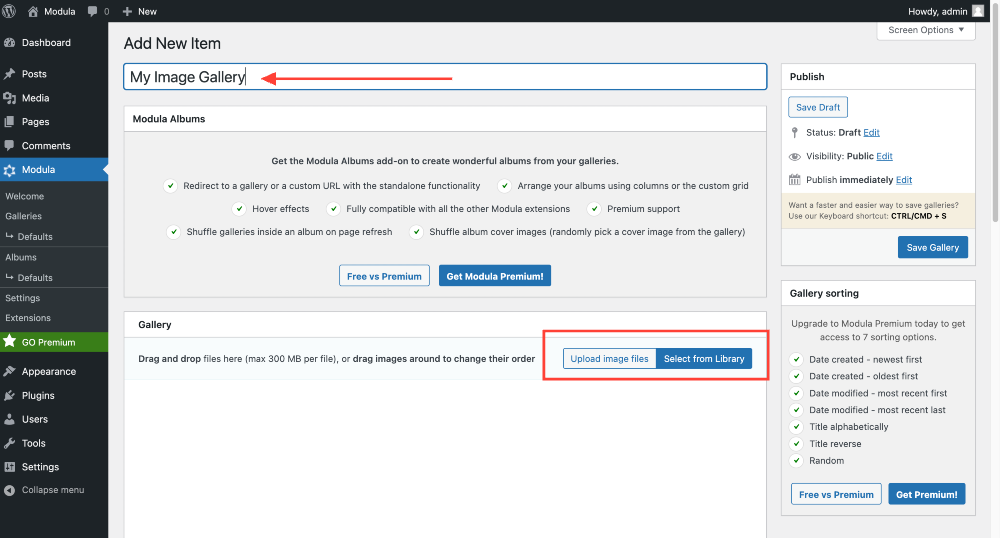
Feel free to rearrange your images to your heart’s content by dragging and dropping them into your desired order.
Let’s dive into customizing your gallery to make it uniquely yours! The free version offers fantastic options that you can play around with to give your gallery that personal touch.
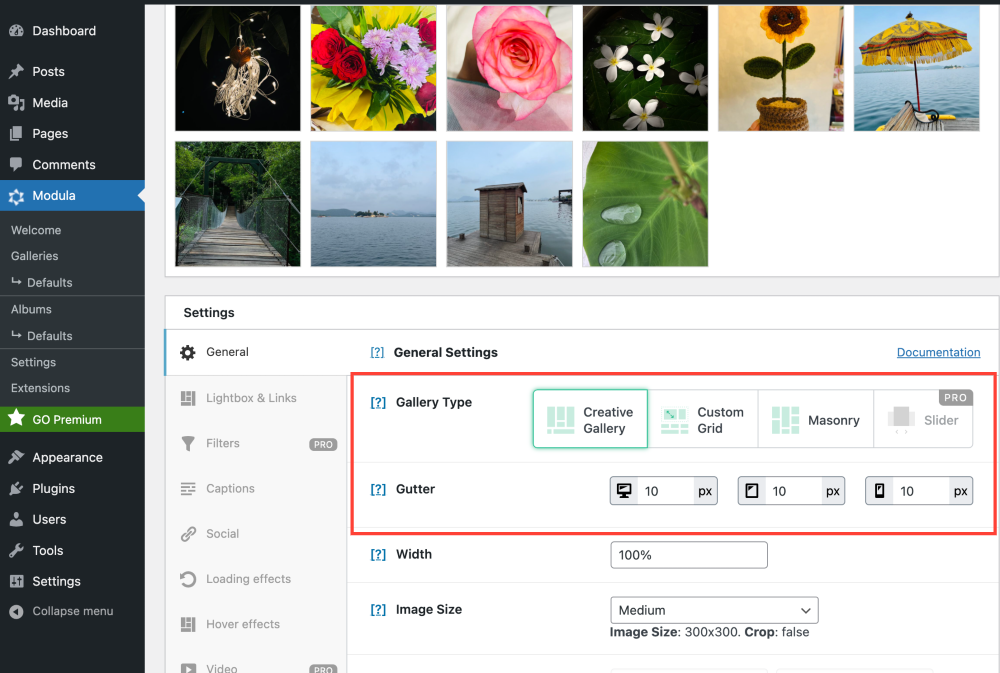
First things first, head over to the General Tab. Here, you’ll find a variety of gallery layouts to choose from. Do you prefer the sleek look of a Creative Gallery, a Custom Grid’s structured appeal, or the Masonry layout’s artistic flair? Take your pick!
You can adjust the gap between your images using the Gutter option. Whether you want them close together or with a bit more breathing room, it’s all up to you.
Caption settings are next on the list. You can get creative here, too! Decide if you want to hide or show titles and captions. Plus, you can choose the perfect caption color and font size to match your gallery’s style.
You can also enable social sharing when someone hovers over a gallery thumbnail. It’s a neat way to encourage sharing and engagement.
There are even more customization options at your disposal. You can tinker with these settings until your gallery looks just as you envision.
Once you finish the customization options, remember to click the Save Gallery button.
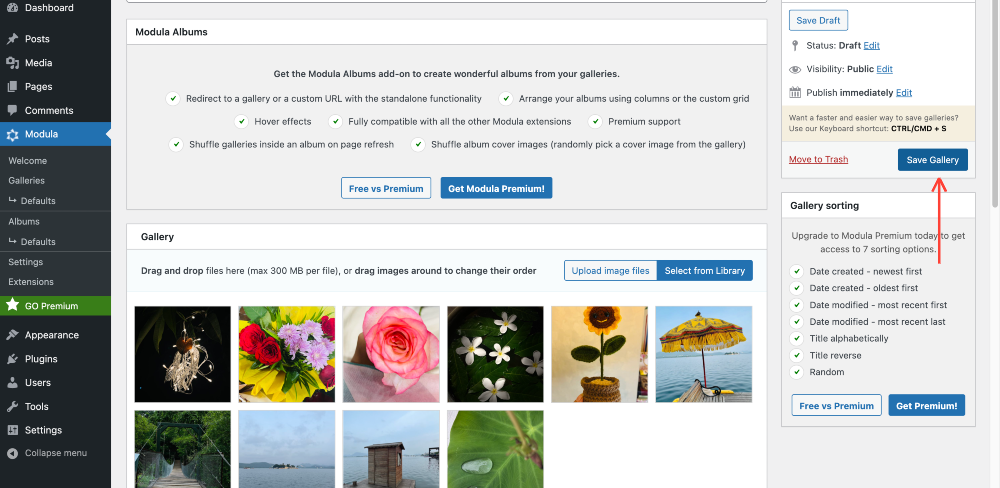
Great, now let’s move to the Image License settings.
Image Gallery License Options in Modula Lite (Free Version)
On your dashboard, under the Modula options, click “Settings”.
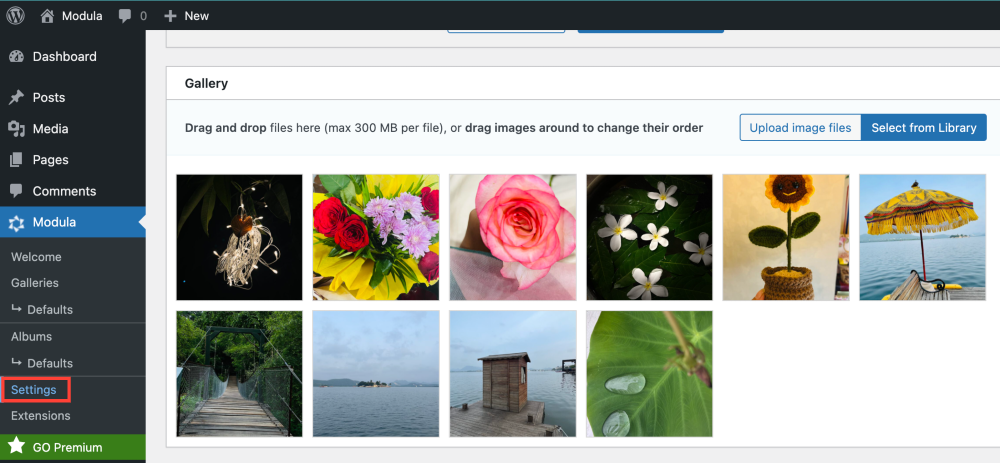
Once you’ve clicked on “Settings,” you’ll be whisked away to the main Settings page of Modula. Here, you’ll want to keep an eye out for the tab named “Image License.”
Go ahead and click on this tab to open the license settings. Don’t worry; everything you’ll find here is straightforward to understand. But if you’re new to photography and image licensing, it can initially seem overwhelming.
The choice of which Creative Commons license to apply to your pictures on your website depends on how you want others to use and share your images. Let’s break down each of the licenses and see how they apply when you’re the owner of the pictures:
- Attribution 4.0 International License (CC BY 4.0)
- Others can use, modify, and share your photos for commercial purposes.
- They must give you appropriate credit.
- Attribution-ShareAlike 4.0 International License (CC BY-SA 4.0)
- Others can use, modify, and share your pictures for commercial purposes.
- They must give you appropriate credit.
- If they create derivative works using your photos, they must apply the same license to those works.
- Attribution-NonCommercial 4.0 International License (CC BY-NC 4.0)
- Others can use, modify, and share your pictures, but not for commercial purposes.
- They must give you appropriate credit.
- Attribution-NonCommercial-ShareAlike 4.0 International License (CC BY-NC-SA 4.0)
- Others can use, modify, and share your pictures, but not for commercial purposes.
- They must give you appropriate credit.
- If they create derivative works using your images, they must apply the same license to those works.
- Attribution-NonCommercial-NoDerivatives 4.0 International License (CC BY-NC-ND 4.0)
- Others can download your pictures and share them with others if they give you appropriate credit.
- They can’t change your photographs in any way or use them commercially.
- Attribution-NoDerivatives 4.0 International License (CC BY-ND 4.0)
- Others can download your pictures and share them with others if they give you appropriate credit.
- They can use and share photos for any purpose, even commercially.
- CC0 Universal Public Domain Dedication license (CC0)
- You are giving up your copyright and related rights to your pictures and making them available to the public.
- Others can use your photos for any purpose without restrictions.
As the owner of the pictures, you can choose the license that aligns with how you want your work to be used. If you want to maximize the distribution and use of your pictures, choose a more permissive license like CC BY. If you wish to retain more control, choose a license with more restrictions, like CC BY-NC-ND. Finally, if you want to allow unrestricted use, you can use the CC0 license. Be sure to indicate the chosen license on your website so others know how to use your pictures.
Now that you know about the Creative Commons license, let’s return to our tutorial.
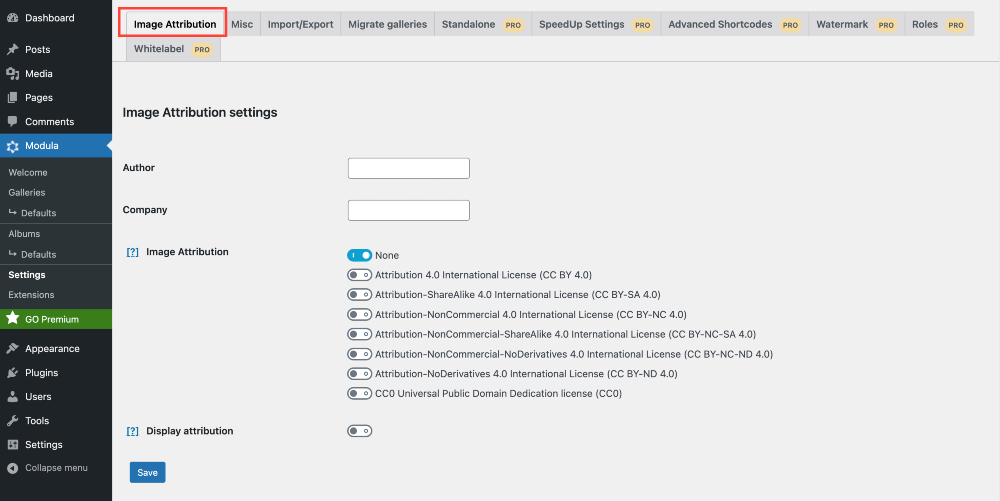
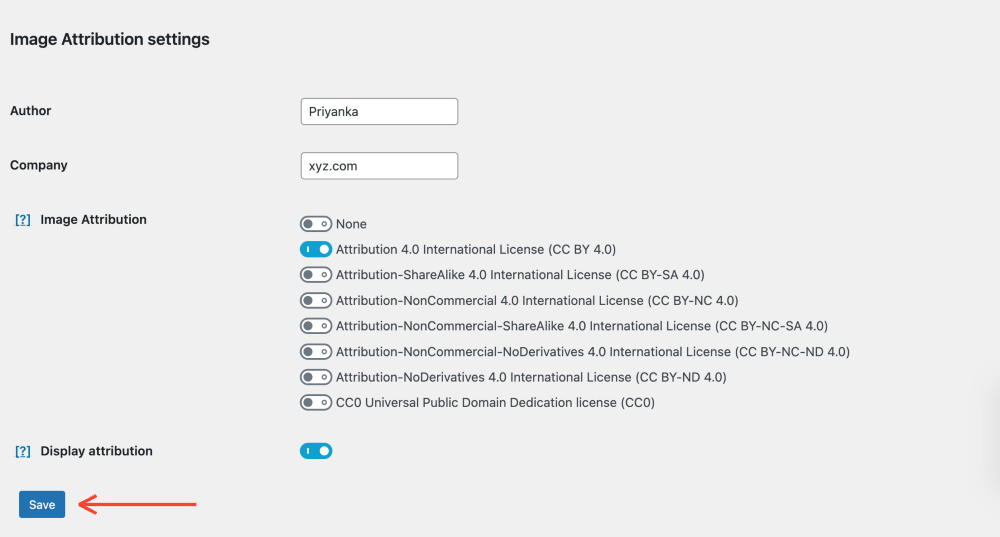
To correctly license your image gallery, here’s what you need to fill.
- Author: This is where you can add the name of the respective author or owner of the images.
- Company: If the images belong to a company, you can add the company’s name here.
- Image License: This is where you’ll select a license for your images within a gallery. This choice will dictate how others can use and share your pictures.
- Display License: You can enable this option to display the license information under each gallery. It’s a great way to give credit where it’s due and let your audience know the source of your images.
Once done, click the Save button.
Showcase Your Image Gallery on Your Website
Now it’s time to showcase your fantastic image gallery on your live website. Modula makes this embedding process a piece of cake, thanks to its dedicated shortcode for each image gallery.
Here’s what you need to do:
- Click on Modula >> Gallery.
- You will be directed to a new page that lists all your galleries, where you can find the shortcode tab. Copy the code.
- Next, paste this code on the page or post where you want to embed your image gallery.
- Publish the page, and that’s it! Your image gallery will now appear beautifully on your live site.
Underneath the gallery, you’ll see the license notice displayed. If you or your visitors click the notice banner, it’ll take you to the official license page.
This is how you can add licenses to your image galleries in WordPress using the free version of Modula. Simply enable the license option from the main settings page. Once activated, Modula will automatically display the license for all your published image galleries on your website.
But what if you’re looking for more control and different credit rules for your image galleries? , No worries! You can achieve that, too! Just invest a bit in Modula’s premium Image Licensing addon. It lets you customize image credits exactly how you want.
Adding Image Licensing Extension
You’ll need Modula’s Trio or a higher premium plan, to access the Image Licensing Extension. But don’t stress; the process is simple. Here’s a detailed step-by-step guide to get you started:
- Step 1: Start by purchasing and downloading Modula’s Pro package.
- Step 2: Once you have the zip file, it’s time to upload it to your website, just like you would with any other WordPress plugin’s zip file.
- Step 3: Add your license key to validate your extension.
- Step 4: Finally, activate the extension.
It is as simple as that! With these four steps, you’ll have the Image Licensing Extension ready to enhance your Modula experience and take your image galleries to the next level.
Image License Options in Modula Pro (Paid Version)
You’ll unlock a powerful feature once you’ve successfully added your license key and activated the Image Licensing Extension. Here’s how to make the most of it:
- In your WordPress dashboard, navigate to the Modula menu.
- Under the Modula menu, you’ll find the “Image Attribution” tab. Click on it.
- Once you’re on the Image License page, locate the “Add New” button and click on it.
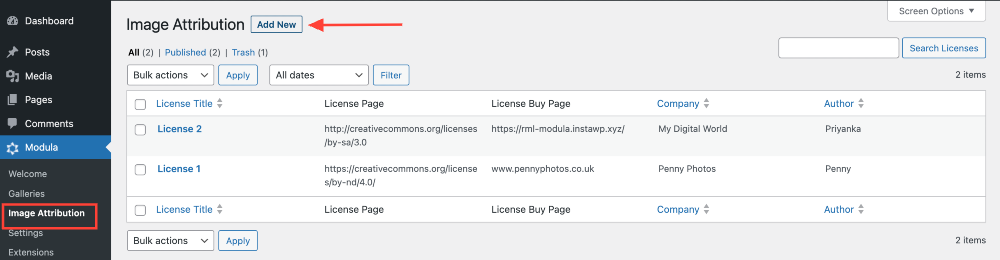
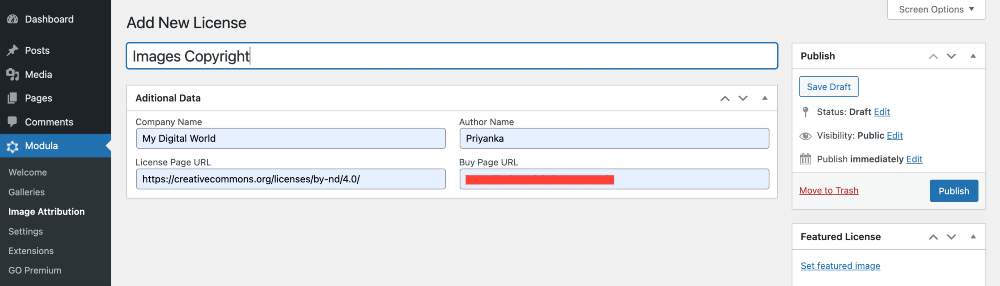
On this page, you can create custom licenses for your image galleries. Start by entering a license title and filling in details like Company Name, Author Name, License Page URL, and Buy Page URL.
If your website has a custom page with information about the image’s license, the License Page URL option is super helpful. And if you’re selling the image and have a specific sales page, you can include the Buy Page URL. But don’t stress if you haven’t set it up yet – filling in this detail is optional!
Further, you get options to set a custom Featured Image for your newly created license.
Once you’ve created your new license, it’s time to create a new gallery or open an existing one.
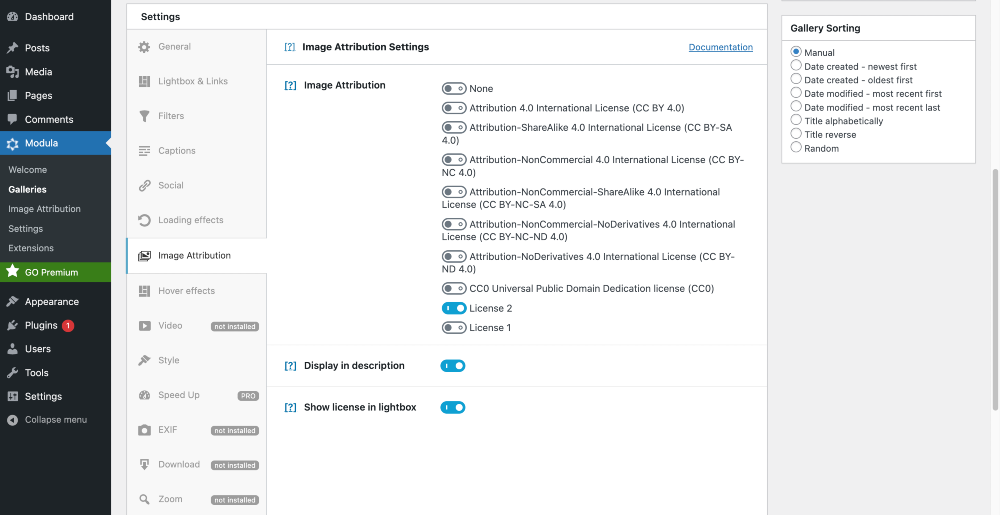
Scroll down the page until you find the “Image License” tab. Click on it to open the Licensing Settings. You’ll see a list of Creative Commons licenses, including the custom license you just created and other options.
You can enable the Custom License or one of the Standard Licenses and toggle on the Display in the description button to show license information beneath the respective image gallery.
If you want to display the license information for each image in the Lightbox, you can do that too by enabling the Show license in Lightbox toggle button.
After choosing your desired options, save your gallery and copy the shortcode. Next, go to the page where you want to display your gallery, paste the shortcode, and publish your page.
And voilà! That’s how you make Creative Commons license information beautifully displayed in your image gallery.

Using the Image Licensing Extension, you can create multiple licenses and select the perfect one for your galleries as needed. This gives you ultimate control and flexibility in showcasing image content on your WordPress website.
Wrapping Up!
As we wrap up our guide of image license, it’s clear that ensuring proper credit for your images is essential in the digital age. The good news? Modula Gallery and its Image Licensing extension make this process a breeze!
With Modula, you can effortlessly create stunning image galleries that captivate your audience and showcase your creative prowess. The Image Licensing extension simplifies adding license information, ensuring proper recognition of your work.
So, whether you’re a talented photographer showcasing your work or a content creator curating your images, Modula is your reliable partner. If you’re using Modula Lite, consider switching to the Premium version to leverage the benefits of all the powerful extensions, including the Image extension.
