
Suppose you’re already familiar with Visual Composer as a powerful page builder and are looking for a compatible plugin to enhance your website’s image galleries. In that case, you’re in for a treat! Get ready to unleash the full potential of your imagery as we dive into a winning combination of Modula galleries and Visual Composer.
I’ll show step-by-step instructions, valuable tips, and best practices to transform your virtual domain into a mesmerizing visual masterpiece.
Prepare to captivate your audience with stunning image galleries that will leave them yearning for more. So, buckle up and get ready to sprinkle some visual magic onto your virtual domain! ♂️

Table of contents
Understanding Modula and Visual Composer
Before we dive into the nitty-gritty of creating Modula galleries with Visual Composer, let’s familiarize ourselves with these two powerful tools.
Visual Composer, is a popular website builder that offers a drag-and-drop interface for designing and customizing websites. Modula seamlessly integrates with Visual Composer, providing a cohesive user experience. This integration enables website owners, web designers, and developers to easily incorporate Modula’s impressive image gallery capabilities into their Visual Composer-powered websites.
Modula is a feature-rich WordPress gallery plugin that allows you to create and customize beautiful image galleries effortlessly. With its intuitive interface and a wide range of options, Modula empowers you to showcase your photographs, artwork, or products in the best possible light.

Modula Gallery Plugin
Create stunning, responsive photo galleries with ease. Showcase your work, captivate your audience, and boost engagement. You don’t need to do any coding.
Getting Started: Setting up Modula and Visual Composer
Let’s ensure you have everything set up correctly. This section guides you through installing and activating the Modula plugin and Visual Composer.
For this article, I will use the free versions of Modula and Visual Composer. We recommend upgrading both plugins to pro if you plan on using them to their full potential.
Installing and Activating Modula
Head to your WordPress dashboard and navigate to the “Plugins” section.
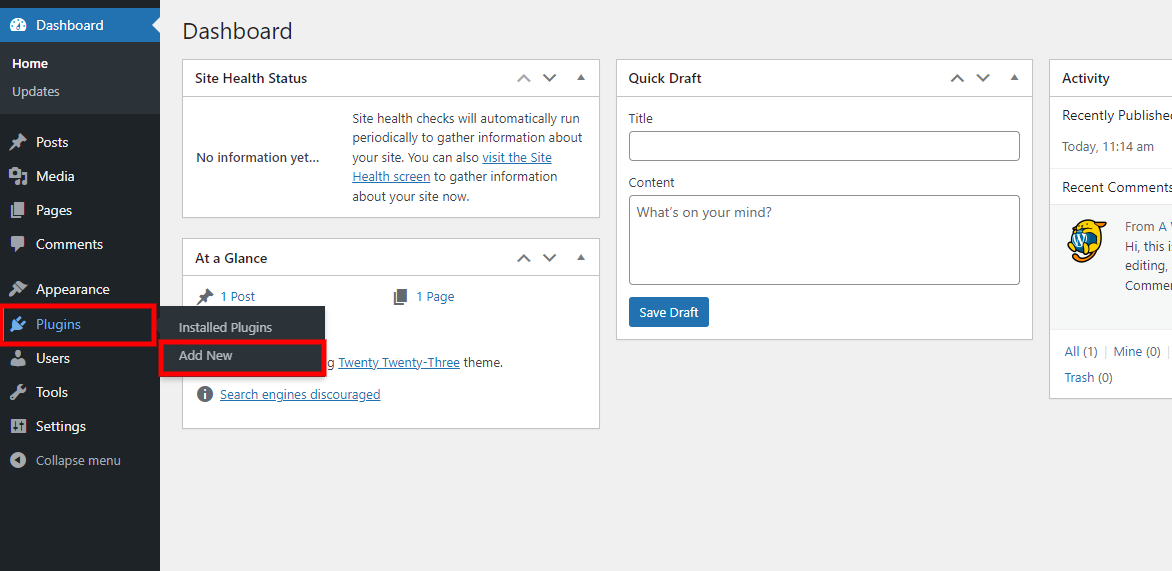
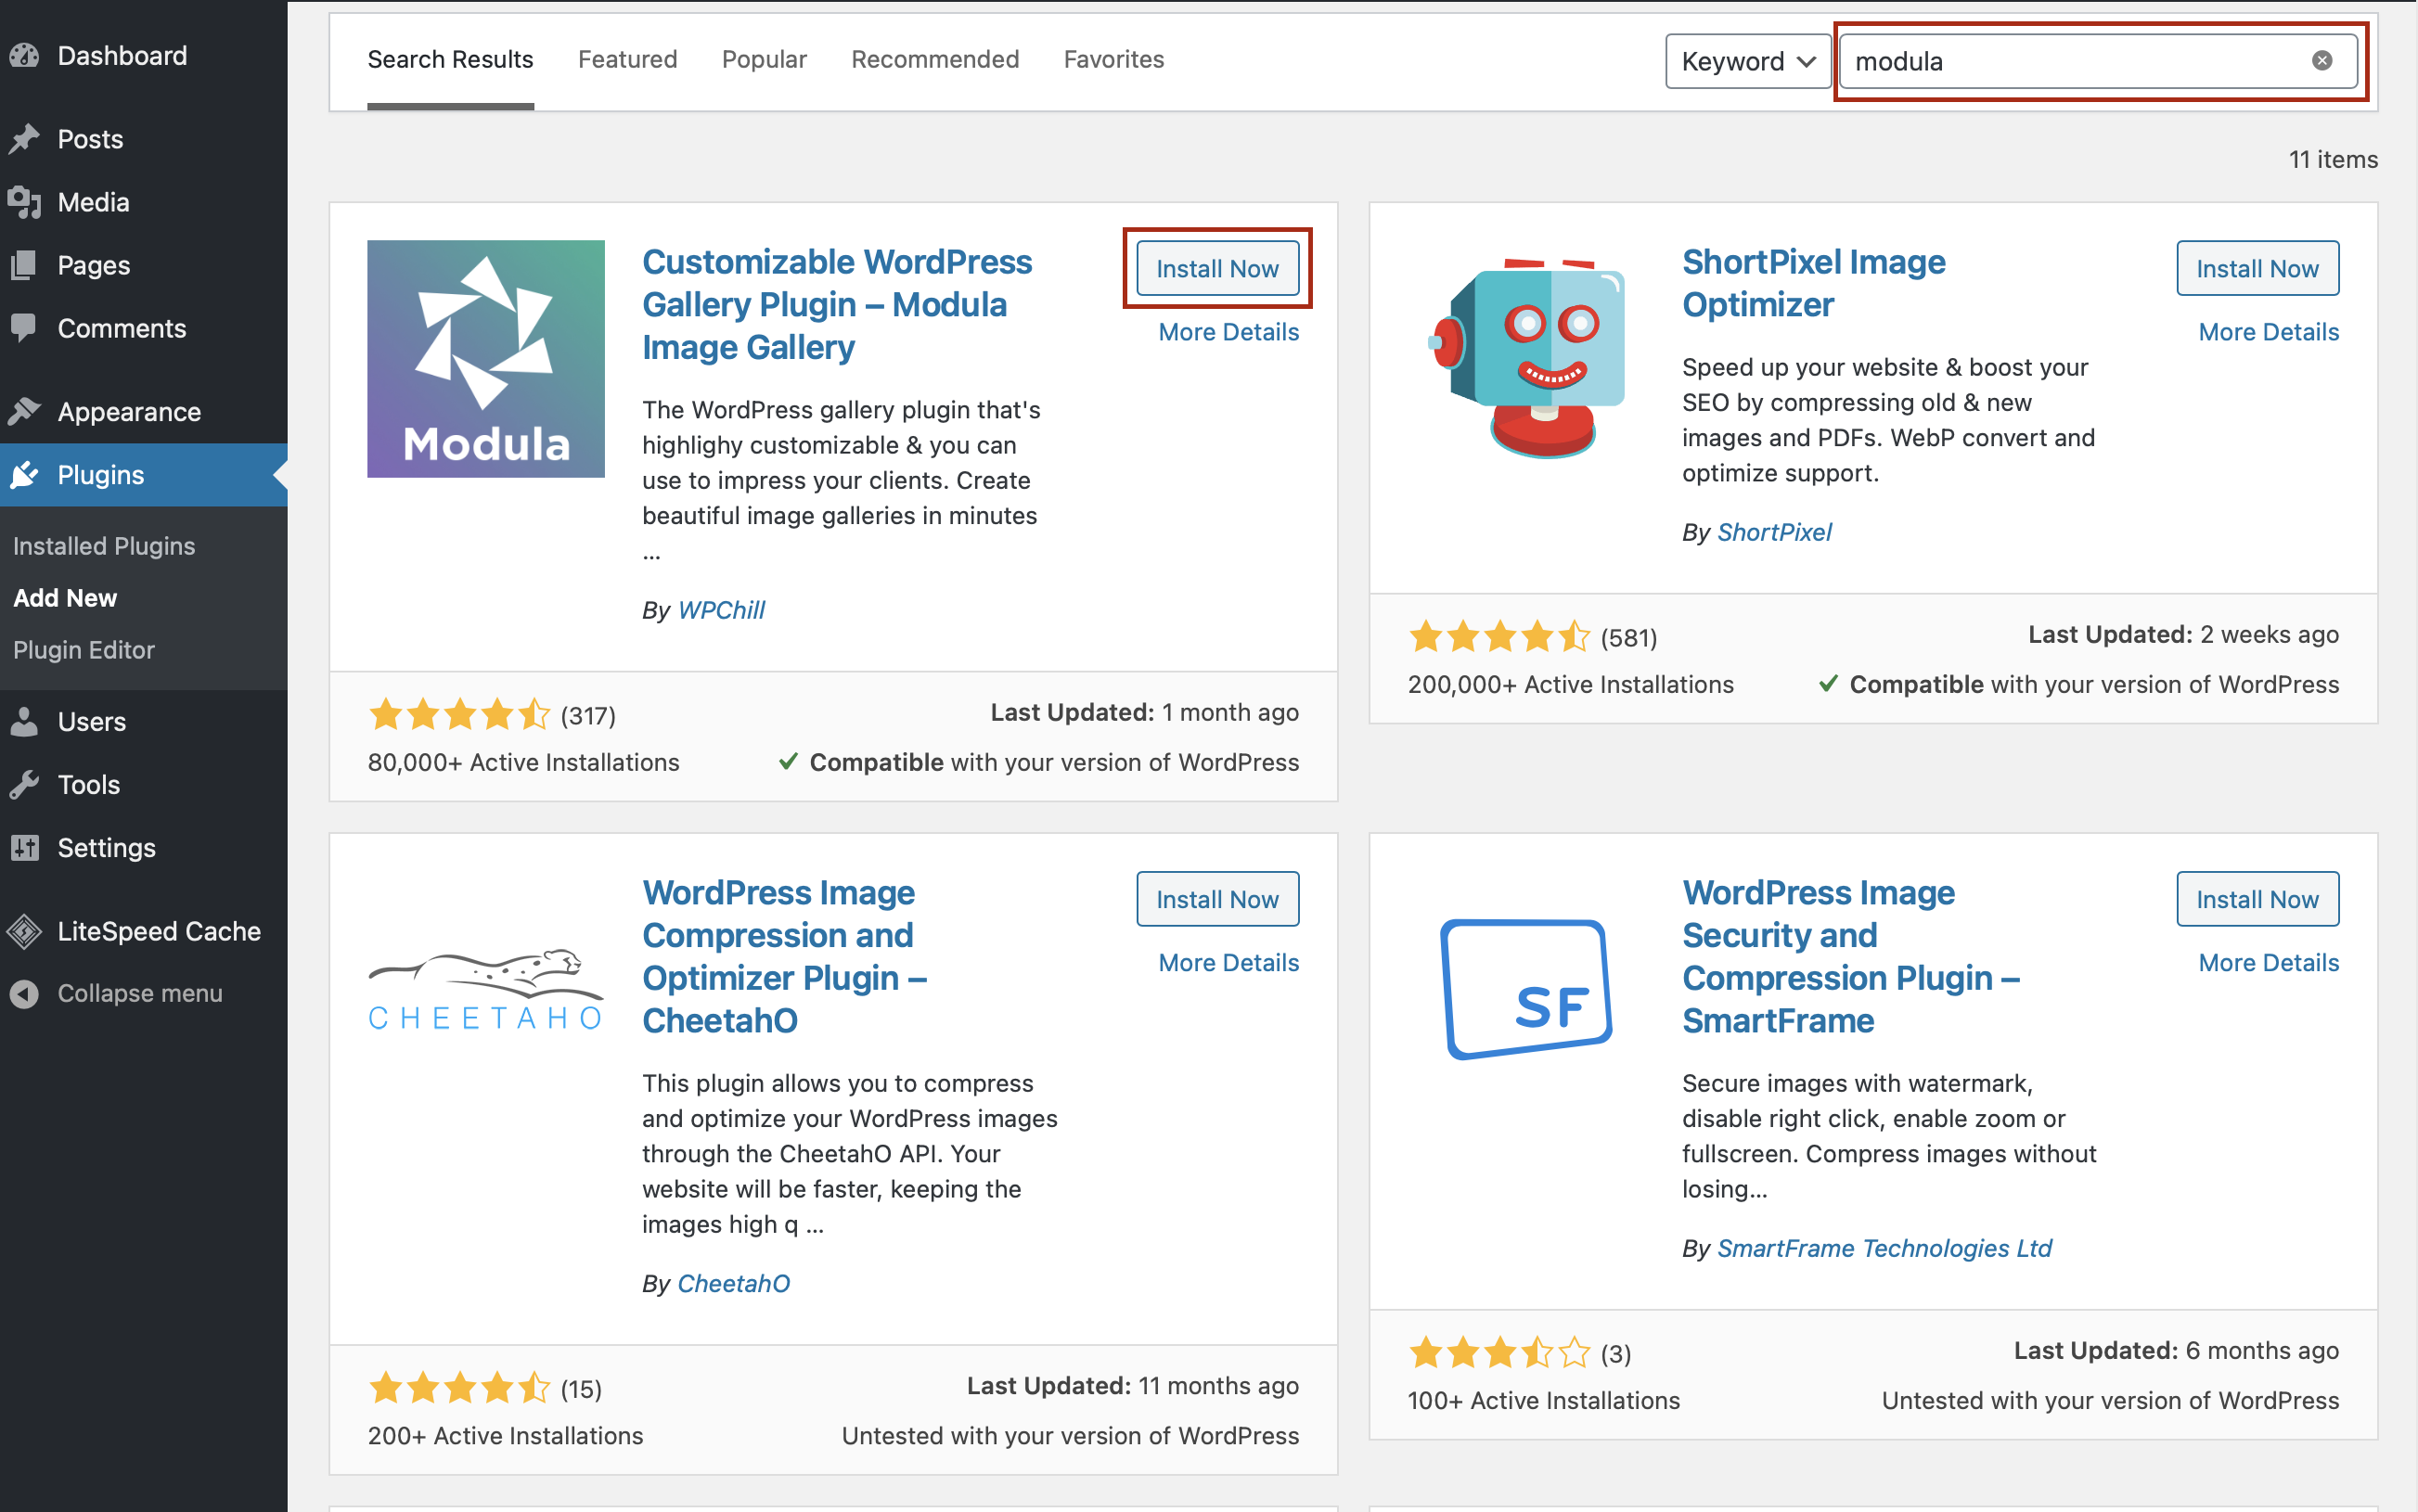
Click “Add New” and search for “Modula” in the plugin repository. Once you find Modula, click “Install Now” and activate the plugin.
Installing and Activating Visual Composer
The beauty of installing plugins from the WP repository is that no matter the plugin, its installation process is precisely the same.
Go to your WordPress dashboard’s “Plugins” section and click “Add New.” Search for “Visual Composer” in the plugin repository.
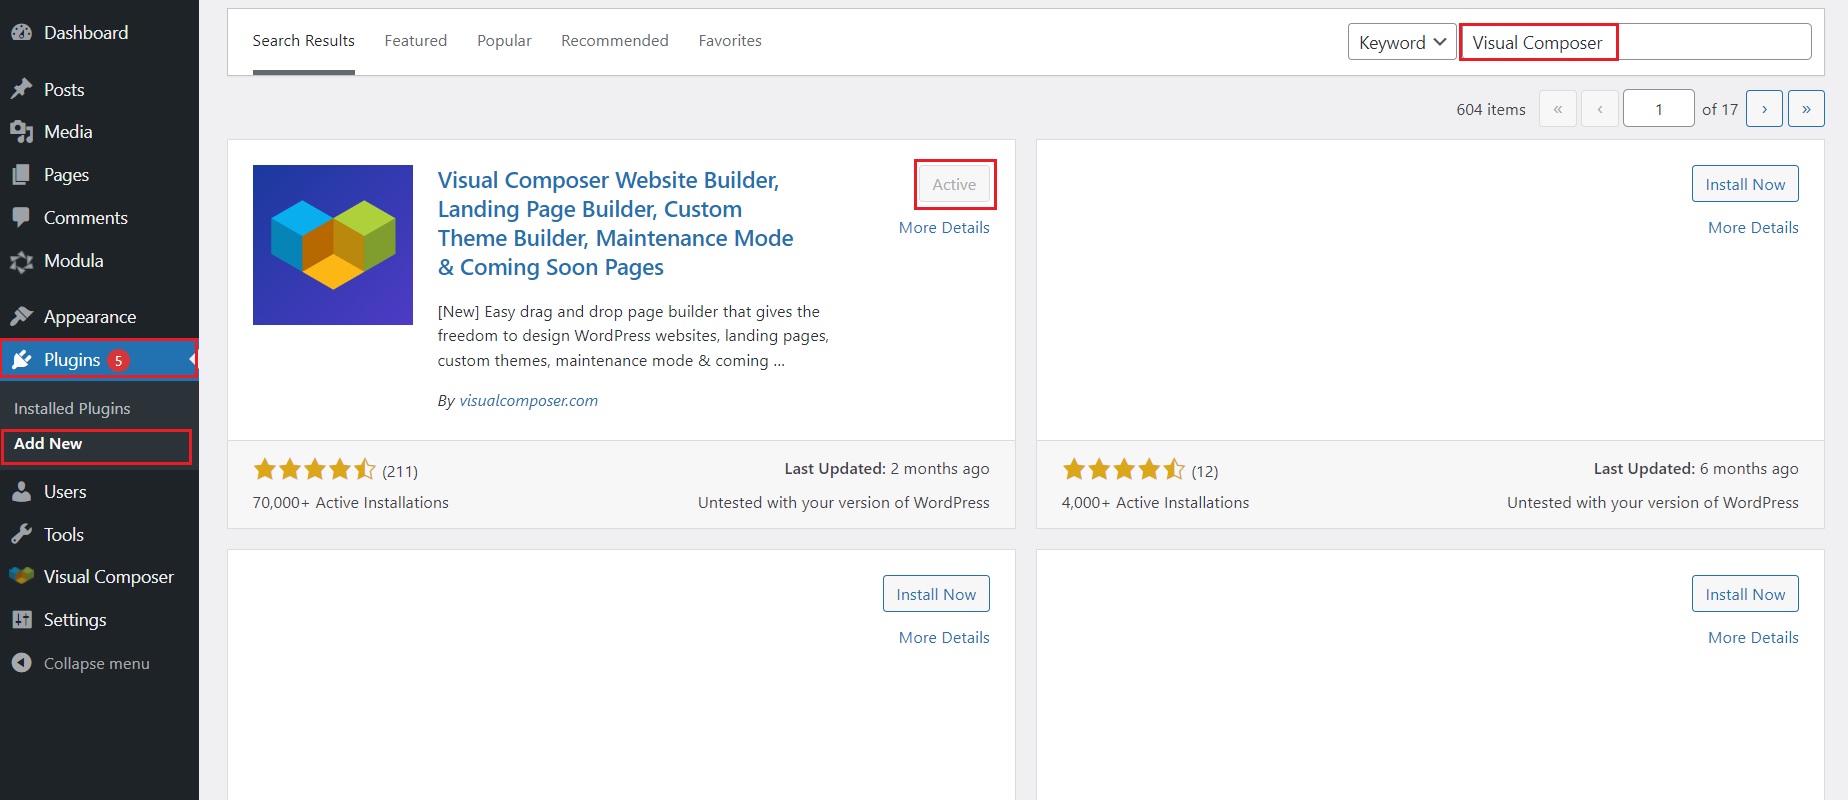
Find the Visual Composer plugin and click on “Install Now.” After installation, activate the plugin to unlock its full potential.
Fantastic! You’ve now equipped your website with both Modula and Visual Composer’s arsenal of design tools
Creating Your First Visual Composer Page
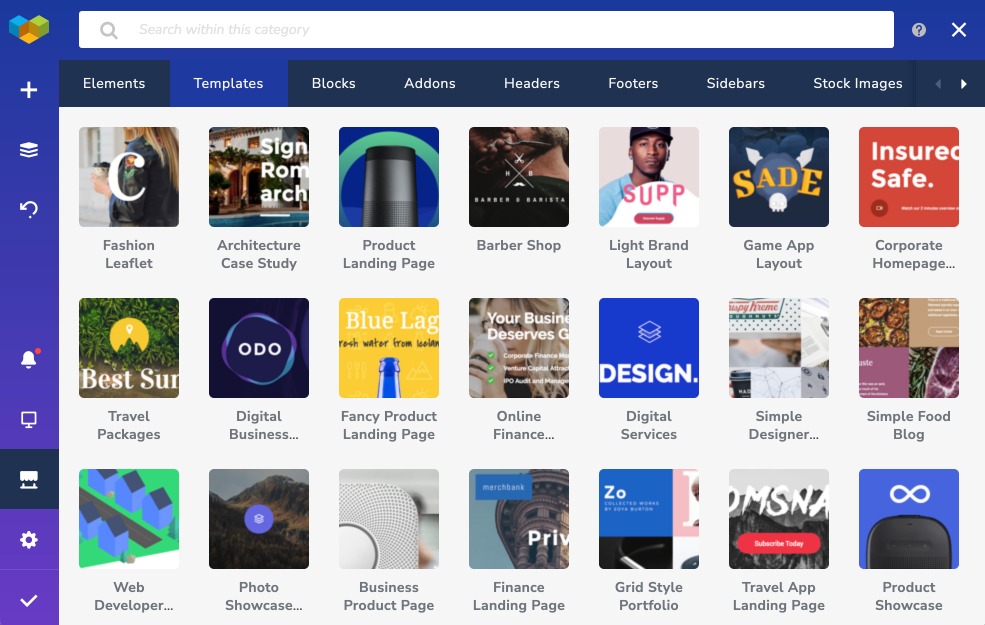
If you want to create a Visual Composer page without breaking a sweat, I’ve got to teach you a small trick! Just snag one of the ten templates available in the free version, or better yet, choose from over 200 templates in the premium version. It’s like having a ready-made website delivered to your virtual doorstep!
Of course, if you’re feeling adventurous and want to start from scratch, you can create your masterpiece on a clean canvas.
But here’s a little secret, even seasoned WordPress wizards recommend starting with a template, especially if it’s your first rodeo. Trust me; it’s like getting a head start in the wild world of website creation!
Now that you’ve found the perfect template let’s get down to business! Think of it like playing dress-up for your website.
You can tinker with every tiny detail of the template design. Rearrange sections like a virtual Tetris master, swap images and text like a digital Picasso, and play with fonts and sizes to your heart’s content.
Once you’ve made some changes, take a step back and look at your work. Does it look good? Does it feel like you? If not, keep tweaking it until you’re happy with the results.
Remember, this is your website. Make it your own!
For more detailed instructions on how to create a page with Visual Composer, check out their step-by-step guide.
Visual Composer offers hundreds of different content elements that you can use to build your pages.
When working with elements, here’s something that should help you to understand, there are two types of elements:
- Structure elements: These are like the building blocks of your page. Think of them as the foundation, walls, and floors. You’ve got sections, rows, and columns to play around with. It’s like being an architect but without the hard hat. ♀️
- Content elements: These juicy bits fill up your page and make it shine brighter than a disco ball. We’re talking about text blocks, images, buttons, and more. It’s like having a bunch of fancy decorations at your fingertips, ready to dazzle anyone who visits your site.
Once you’ve got the structure of your page all set up, it’s time to shift our gears towards Modula and how you can create a stunning image gallery to display on your Visual Composer page.
Creating Your First Modula Gallery
Now that you have Modula and Visual Composer set up and your first Visual Composer page ready let’s dive into creating your first Modula gallery. No matter your level of techiness, Modula makes the whole process super easy! Let me show you how.
First, head to your WordPress Dashboard, click “Modula,” and select “Add New.” You will be redirected to a new page where you can start uploading your images or select a few from your WordPress Library. You can drag and drop images to arrange them as you wish.
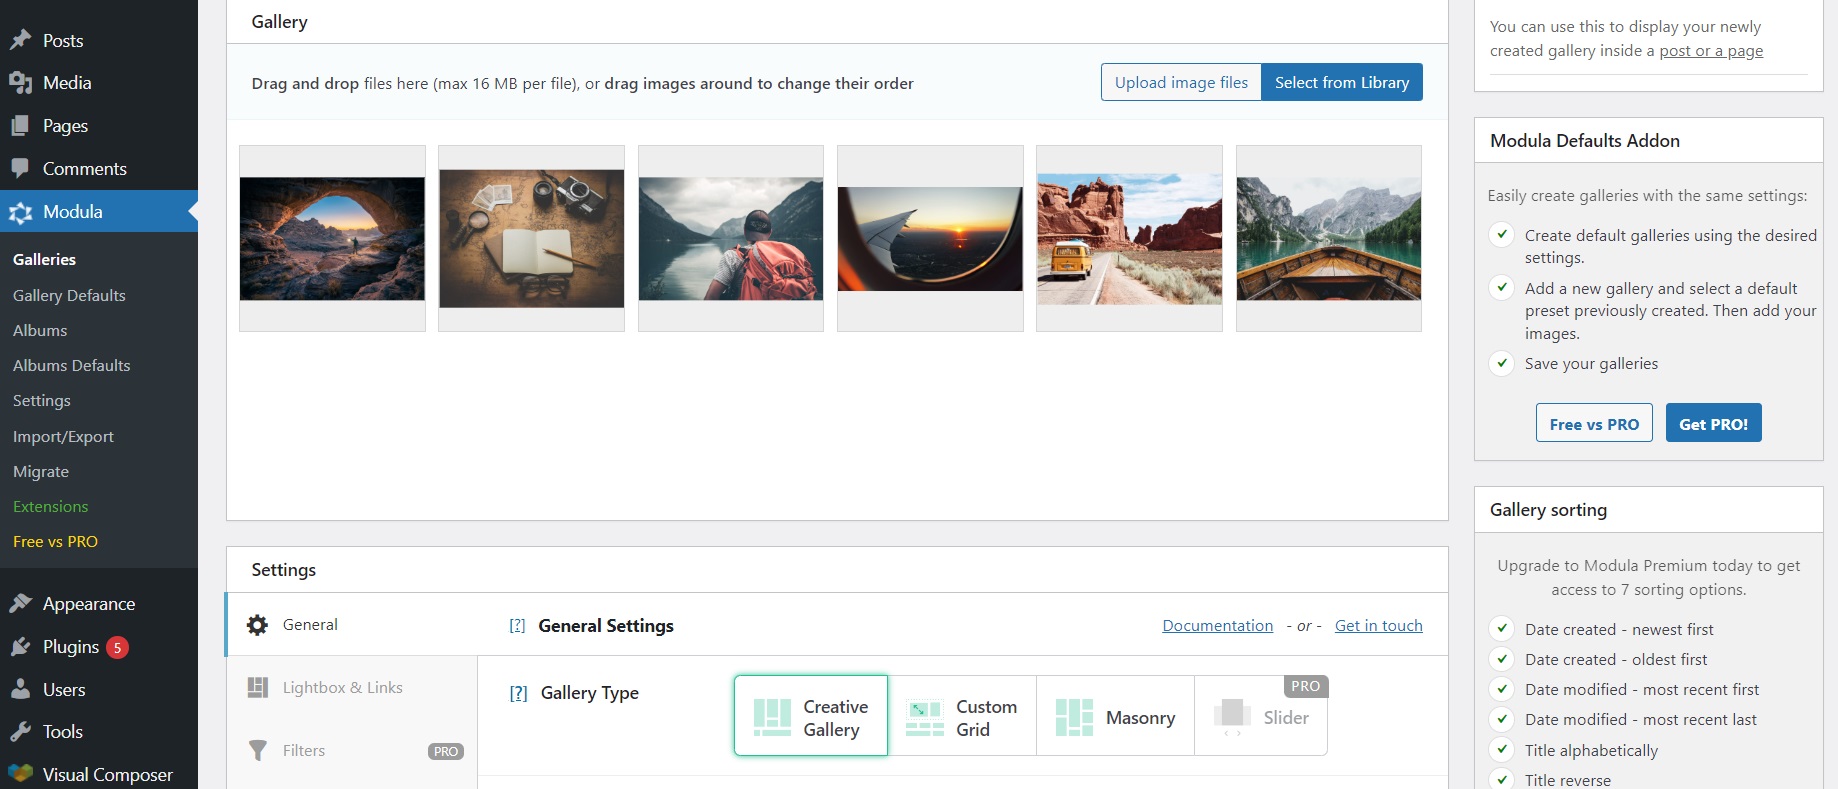
You can play around with many customization options. Here is the fun part: you can experiment as much as you like. Don’t worry about messing up, you can always come back, and it will show on your gallery in real time once you save.
If you want to read more about Modula’s customization options, make sure to check out this knowledgebase article.
Speaking of saving, click the Save Gallery button once you have completed your customizations.
You will receive a Shortcode as soon as you save the gallery. Don’t forget to copy it because we will need it for the next part
Displaying Your Modula Gallery on a Visual Composer Page
Now that we have a Modula gallery to work with, it’s time to display it on your Visual Composer page.
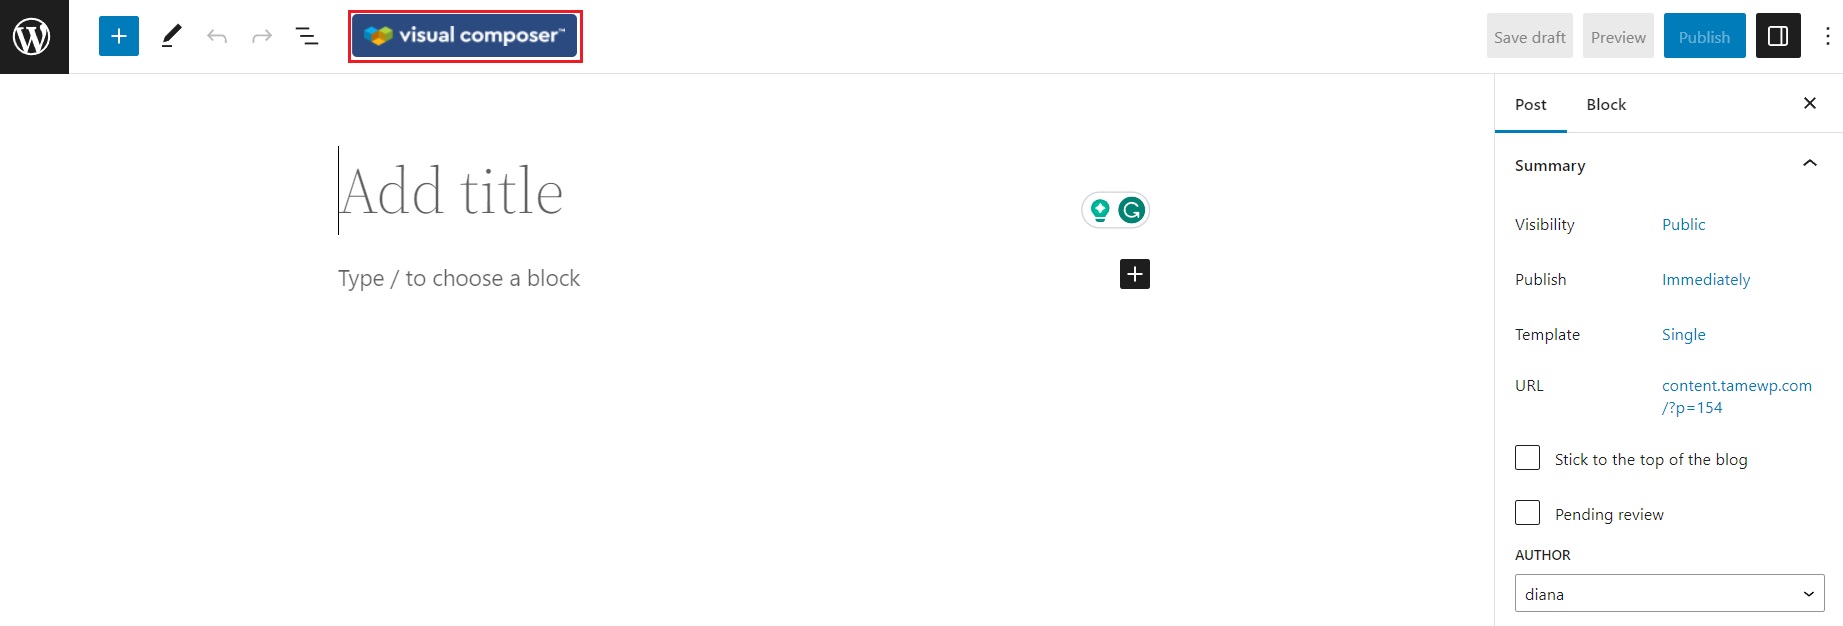
Head over to your desired page or post. You will see the Visual Composer interface. If you don’t, you should have a “Visual Composer” button you can click to switch to the editor.
On the left sidebar, you can see multiple icons. Click on the “+” icon, and you should have a new window pop open. There you can search for the Shortcode block. You can easily drag and drop it into the page.

Paste the copied shortcode from the Modula gallery we just created.
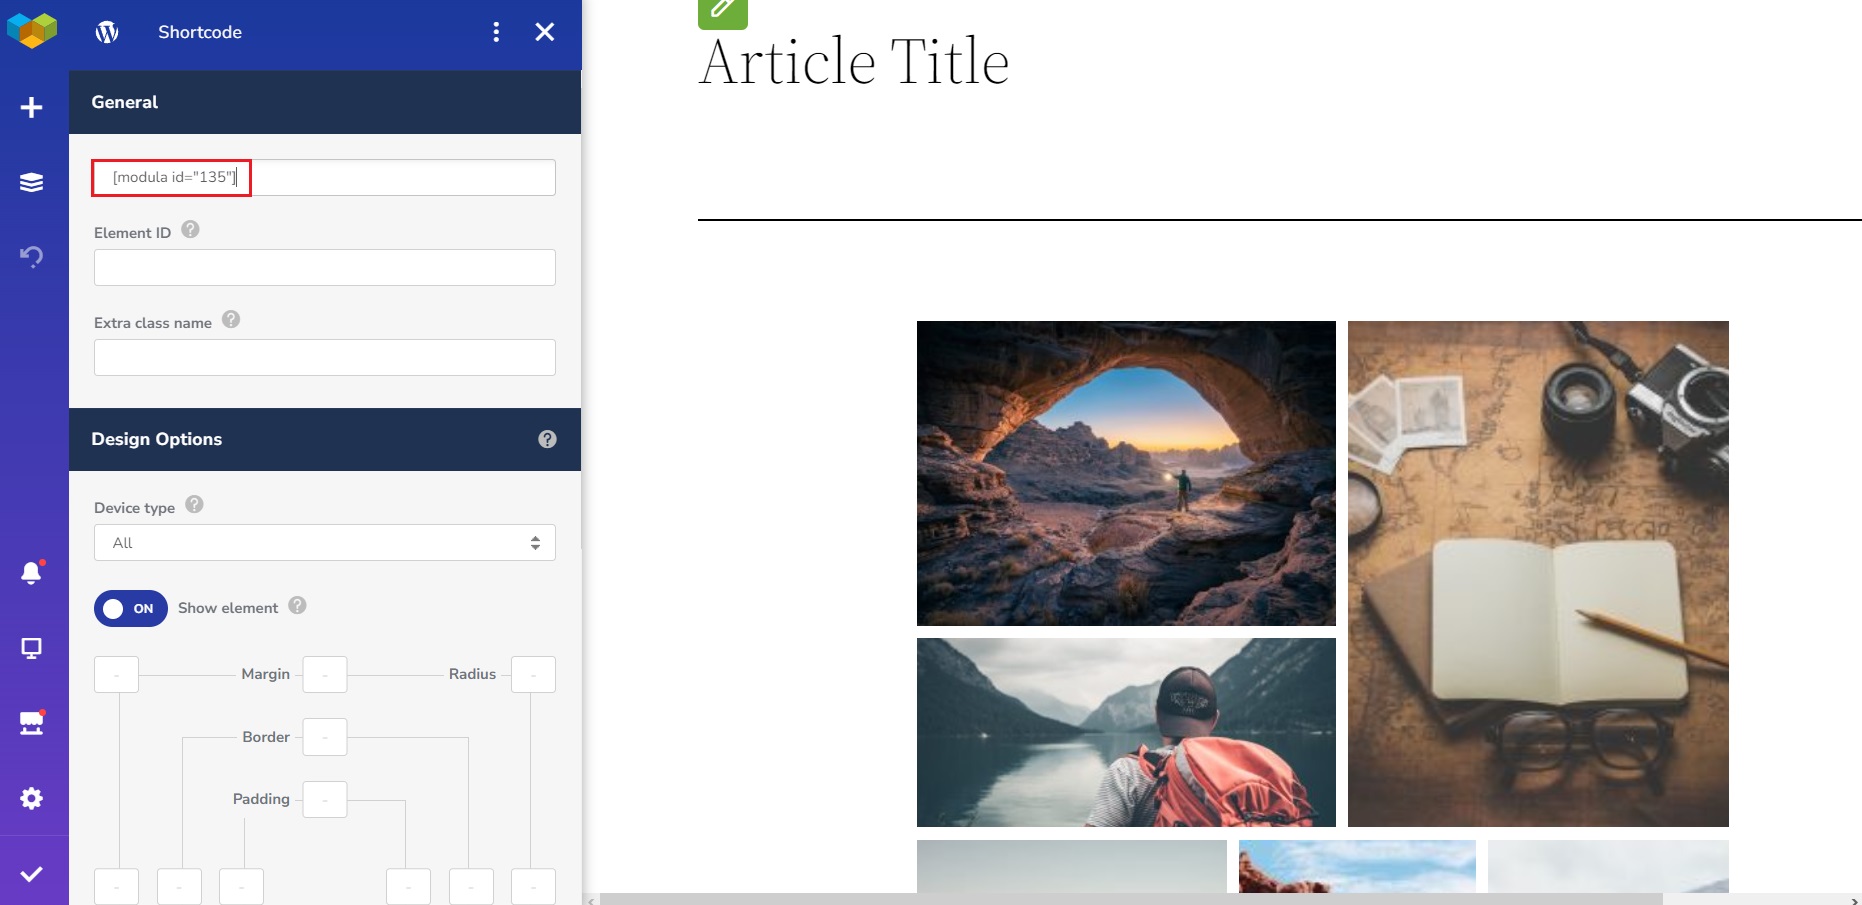
From there, you have some editing options provided by Visual Composer. You can play around with them and see what fits best.
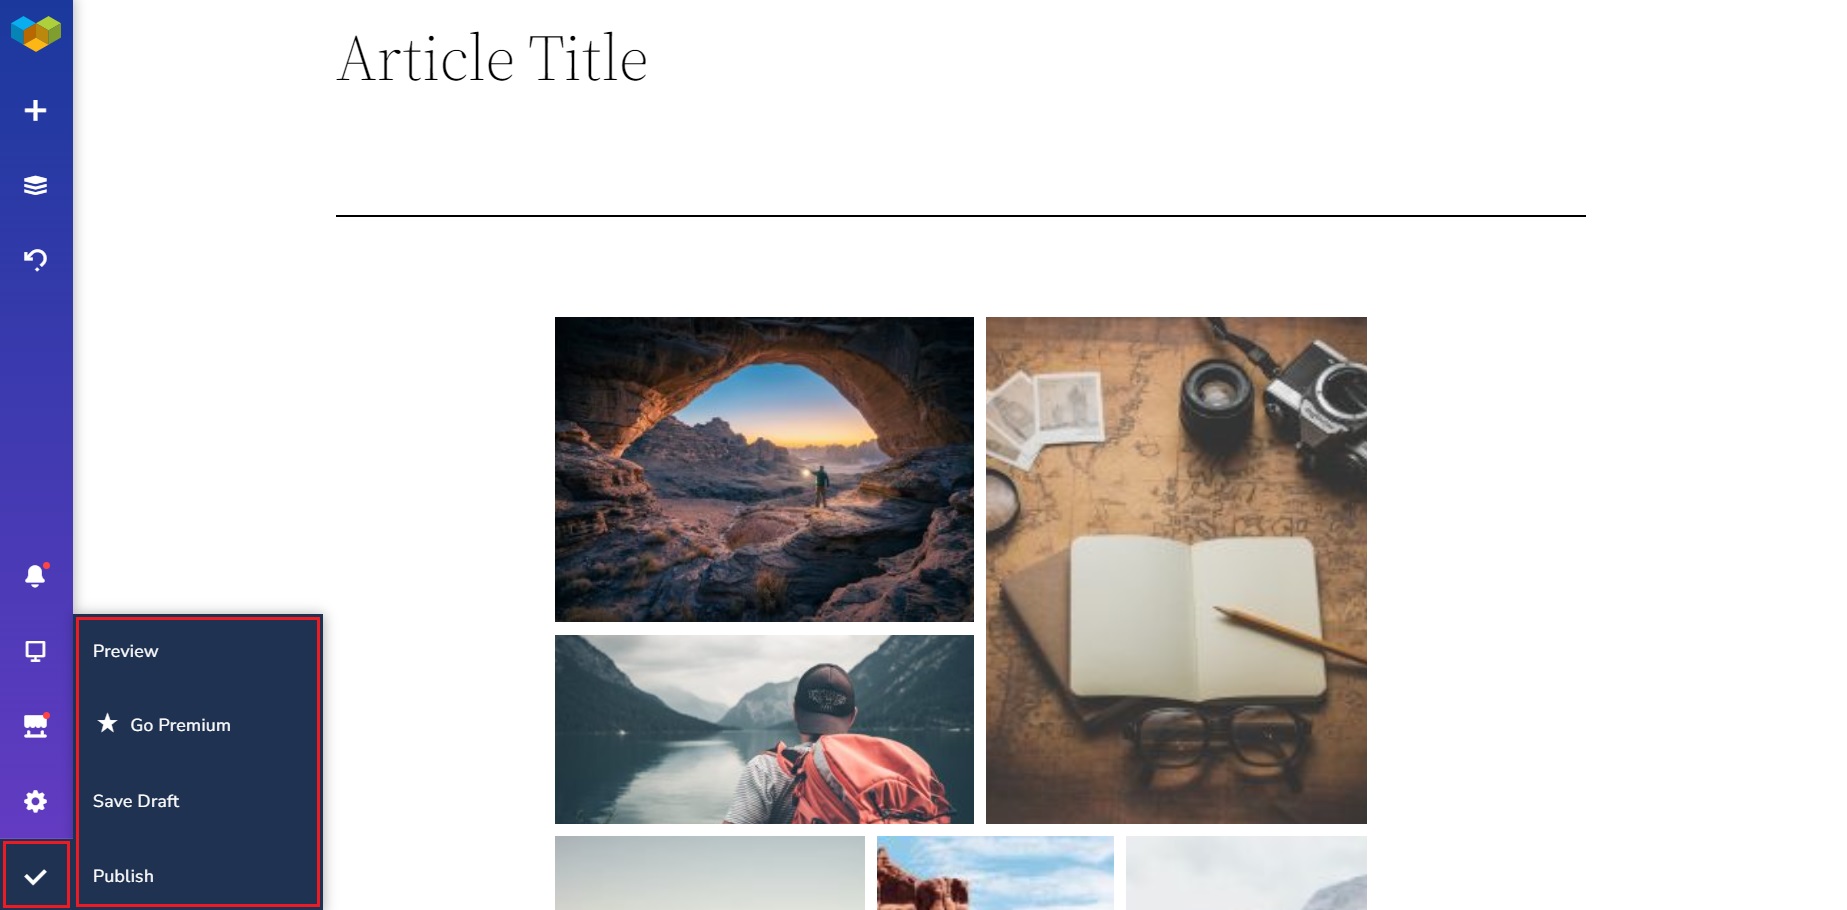
Once you are happy with everything, click on the checkmark on the left sidebar to save your changes, or hover over it and click on the Preview Changes to check if everything is ok before posting.
Best Practices for Optimal Gallery Display
To ensure that your Modula galleries deliver the best possible user experience, consider the following best practices:
Image Optimization:
- Optimize your images before uploading them to your Modula galleries, or use the SpeedUP extension to do it automatically. Compress them without sacrificing quality to improve loading speed and overall performance.
- Use appropriate image sizes and formats to balance quality and file size. JPEG is typically suitable for photographs, while PNG is ideal for transparent images.
Loading Speed and Responsiveness:
- Keep your gallery’s loading time in check by resizing images to fit the container and reducing file sizes.
- Test the responsiveness of your galleries on different devices and screen sizes to ensure they adapt seamlessly. Modula helps you create responsive galleries (you can choose the number of displayed columns on each type of portable device – mobile or tablet).
- Infinite scrolling is also one of your best friends. Modula offers infinite scrolling to help with page loading times by loading images as you scroll instead of all at once.
Organization and Categorization:
- Organize your images into logical categories or albums within your Modula galleries to provide a streamlined browsing experience for your visitors.
Wrapping up…
It’s time to unleash your inner design superstar and follow the step-by-step guidance provided in this article to create gallery masterpieces. Your images deserve the spotlight, and Modula and Visual Composer are here to give them their moment to shine
So, what are you waiting for? Go forth, my digital Picasso, and unleash your creative prowess. Elevate your website’s aesthetics, engage your audience, and become the ruler of your online visual realm.
Modula Gallery Plugin
Create stunning, responsive photo galleries with ease. Showcase your work, captivate your audience, and boost engagement. You don’t need to do any coding.
