
Do you want to display multiple galleries on one page in WordPress? Are you looking to display more than one gallery on the same page to show your work? Read this article to find out how to create multiple photo galleries in WordPress. By default, WordPress doesn’t offer this option, but with Modula, you have a simple to use and efficient solution to create multiple WordPress galleries on one page.
In this article, we will share:
- What plugin should you use to add multiple WordPress galleries;
- How to create and edit your gallery;
- How to add multiple WordPress galleries on the same page;
- And much more.
Table of contents
Why use Modula to add multiple galleries in WordPress?
Modula is the perfect answer for any kind of web owner. It fits any needs because it is multipurpose and flexible. You do not only create galleries, but you can style them, even make them responsive or edit the EXIF metadata. Some example of features includes 4 grid types, video extension, password-protection, zoom extension and so much more. You can diversify your galleries by creating galleries with different features, like WordPress thumbnail gallery or WordPress image carousel.
How to create and edit a new gallery?
To be able to create stunning pages with multiple galleries, we need to install and activate Modula. It will take less than 2 minutes, and there are only a few easy steps to follow, so don’t worry! This process will remain available for every free WordPress plugin installation. Let’s see how to install and activate Modula.
Install and activate Modula
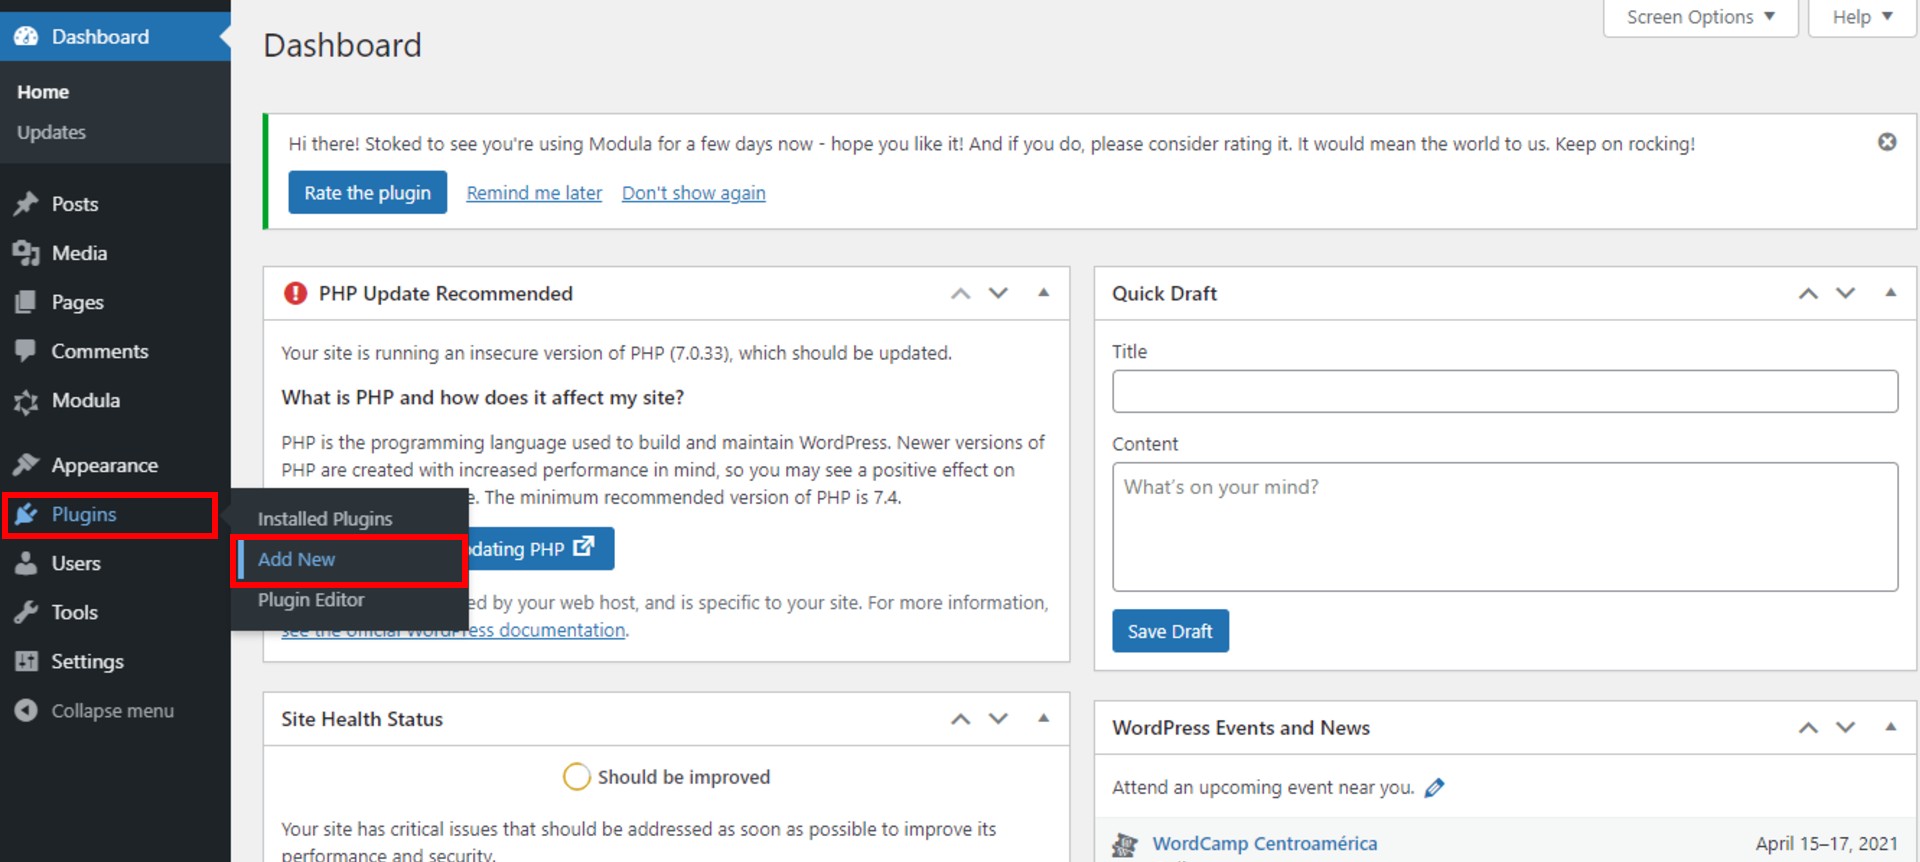
First, go to WordPress Dashboard > Plugins > Add New.
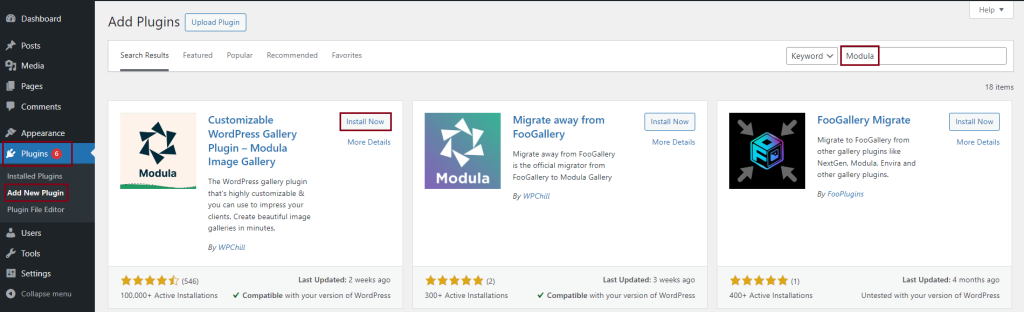
It will pop up a new page with a search bar in the right upper corner. In this search bar, you can find any free WordPress plugin you are looking for. To find Modula, type Modula in this search bar. When the results appear, click on the Install Now button and wait a couple of seconds until the installation process is finished.
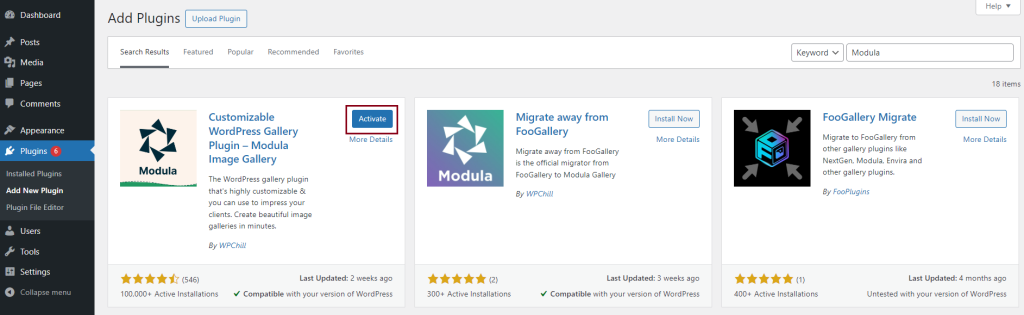
When the Activate button is visible, click on it to activate the plugin you just installed. If you do not activate the plugin, it will not work. It is like your plugin is turned off.
Create a new gallery
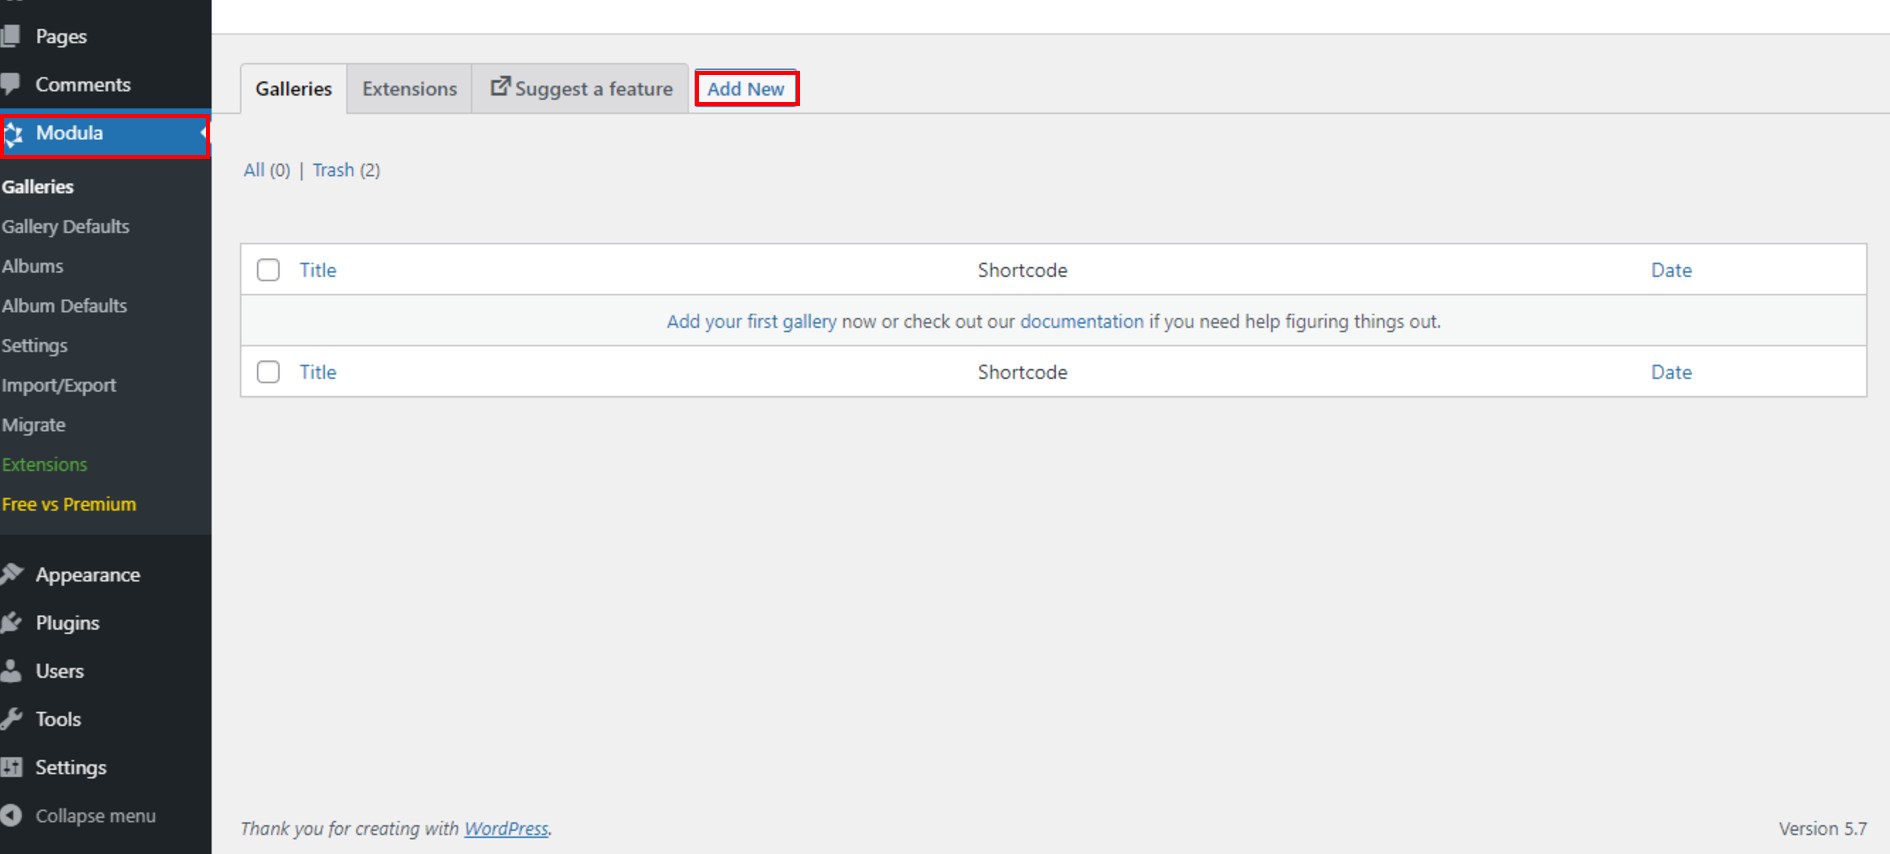
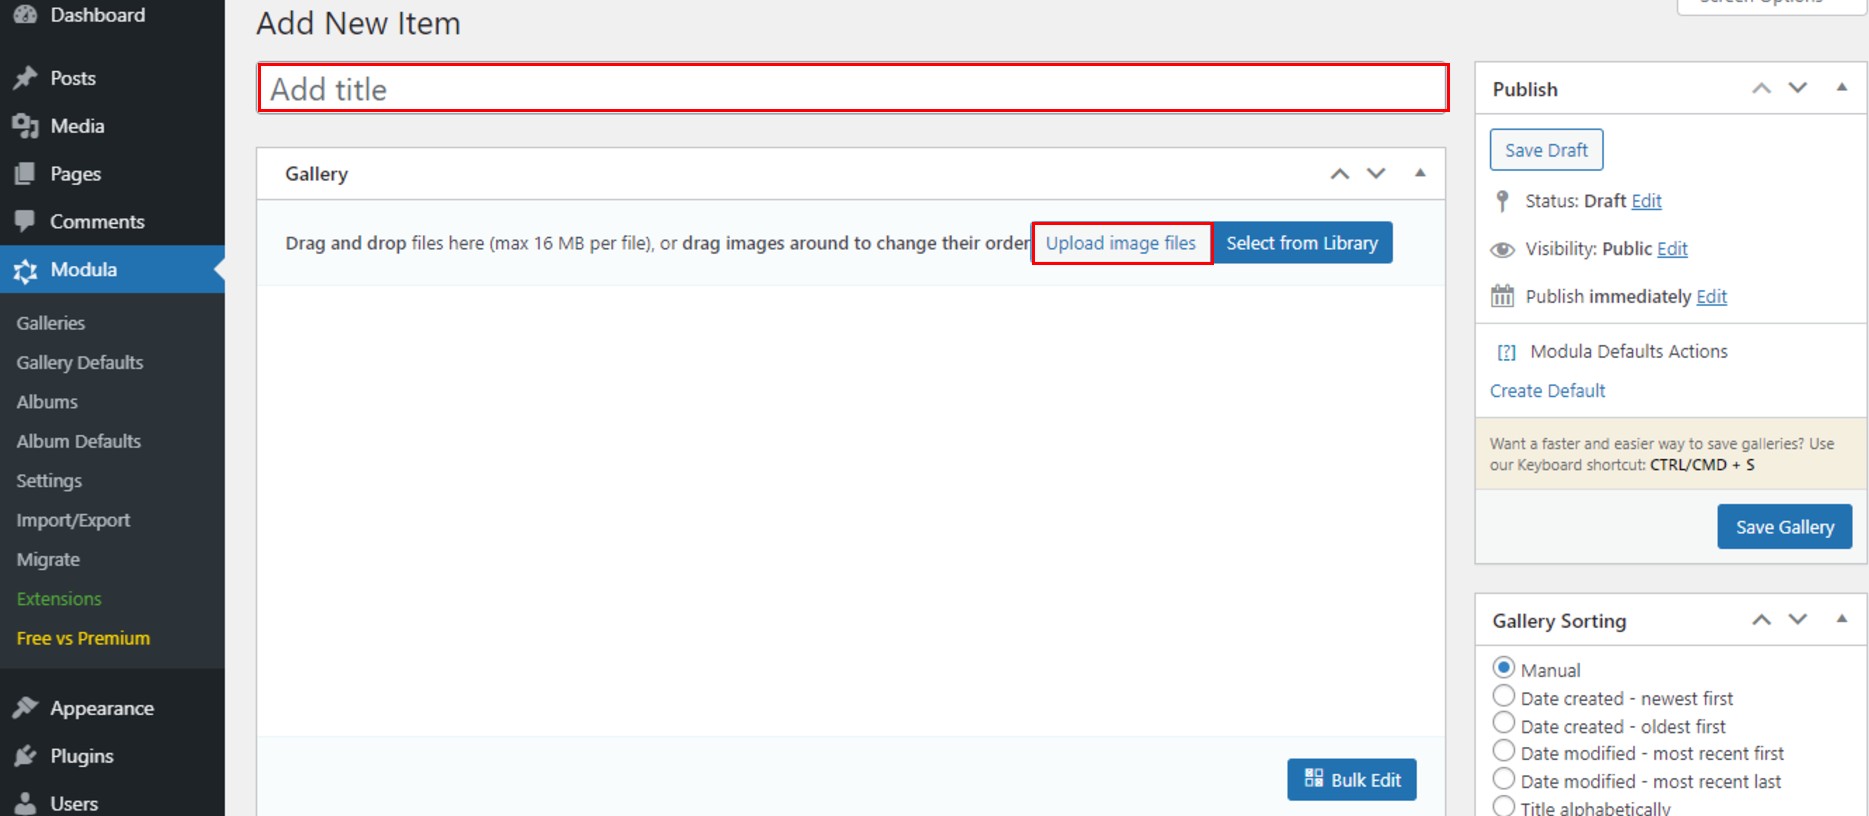
Each time you want to create a new gallery, go to Galleries > Add New.
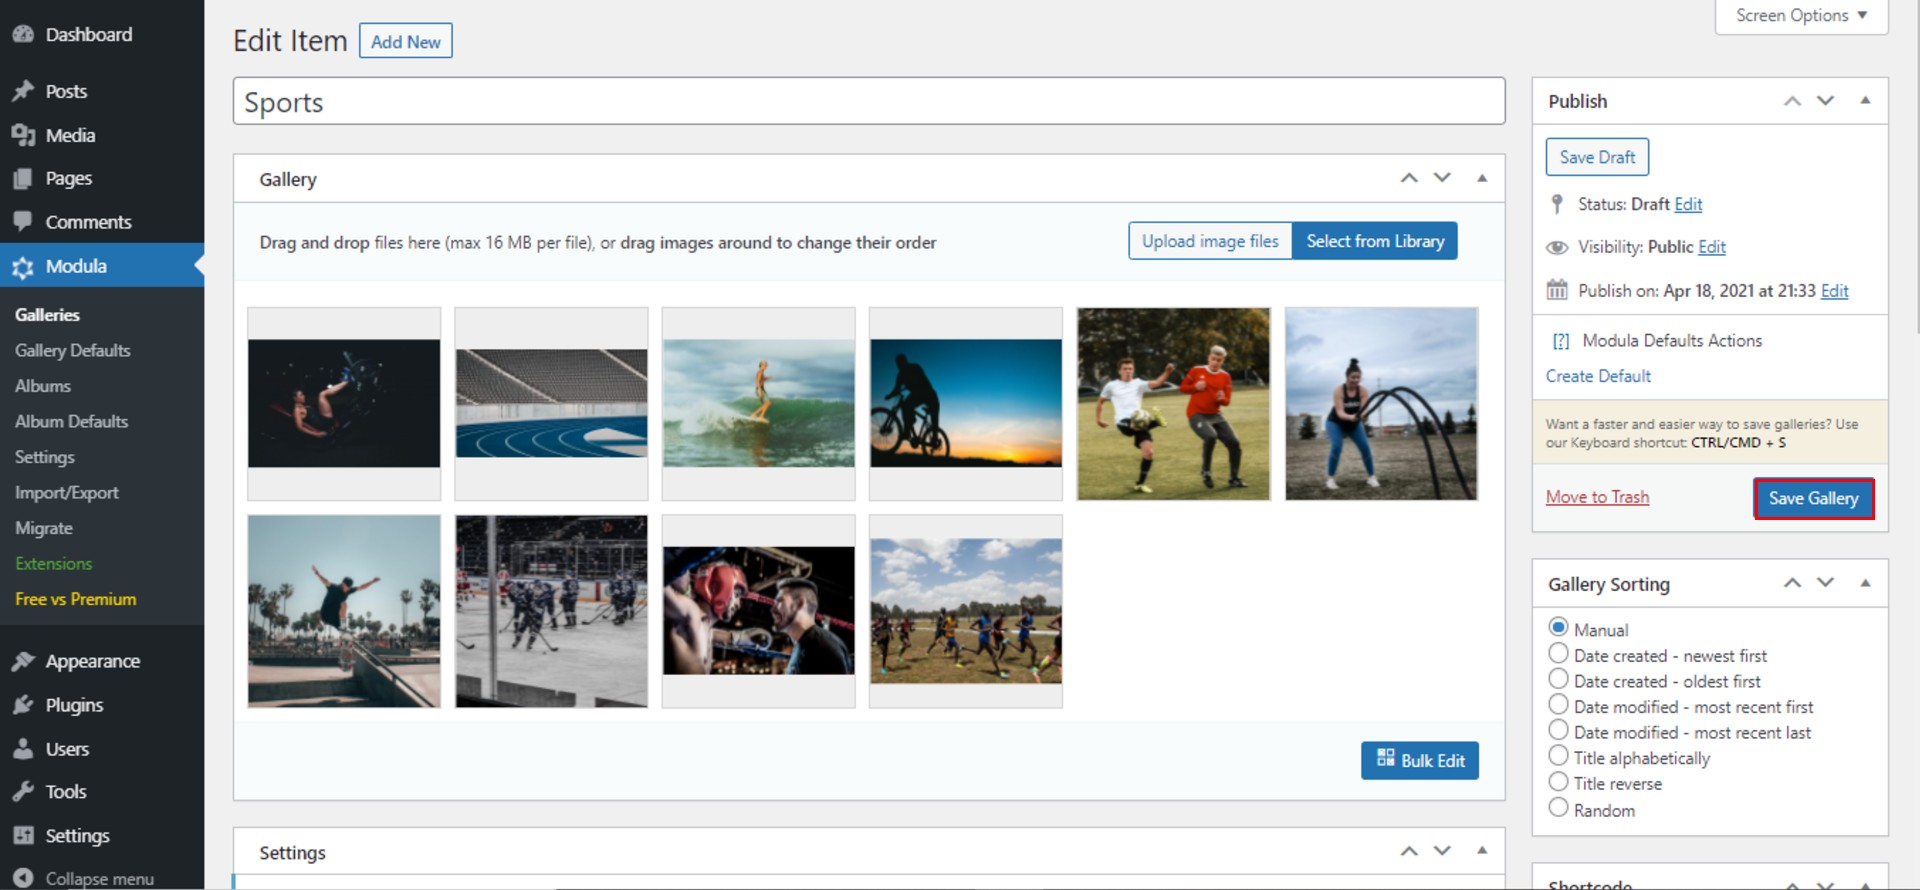
After you created your gallery, give it a title and start to upload images with drag and drop builder, or use Upload images button.
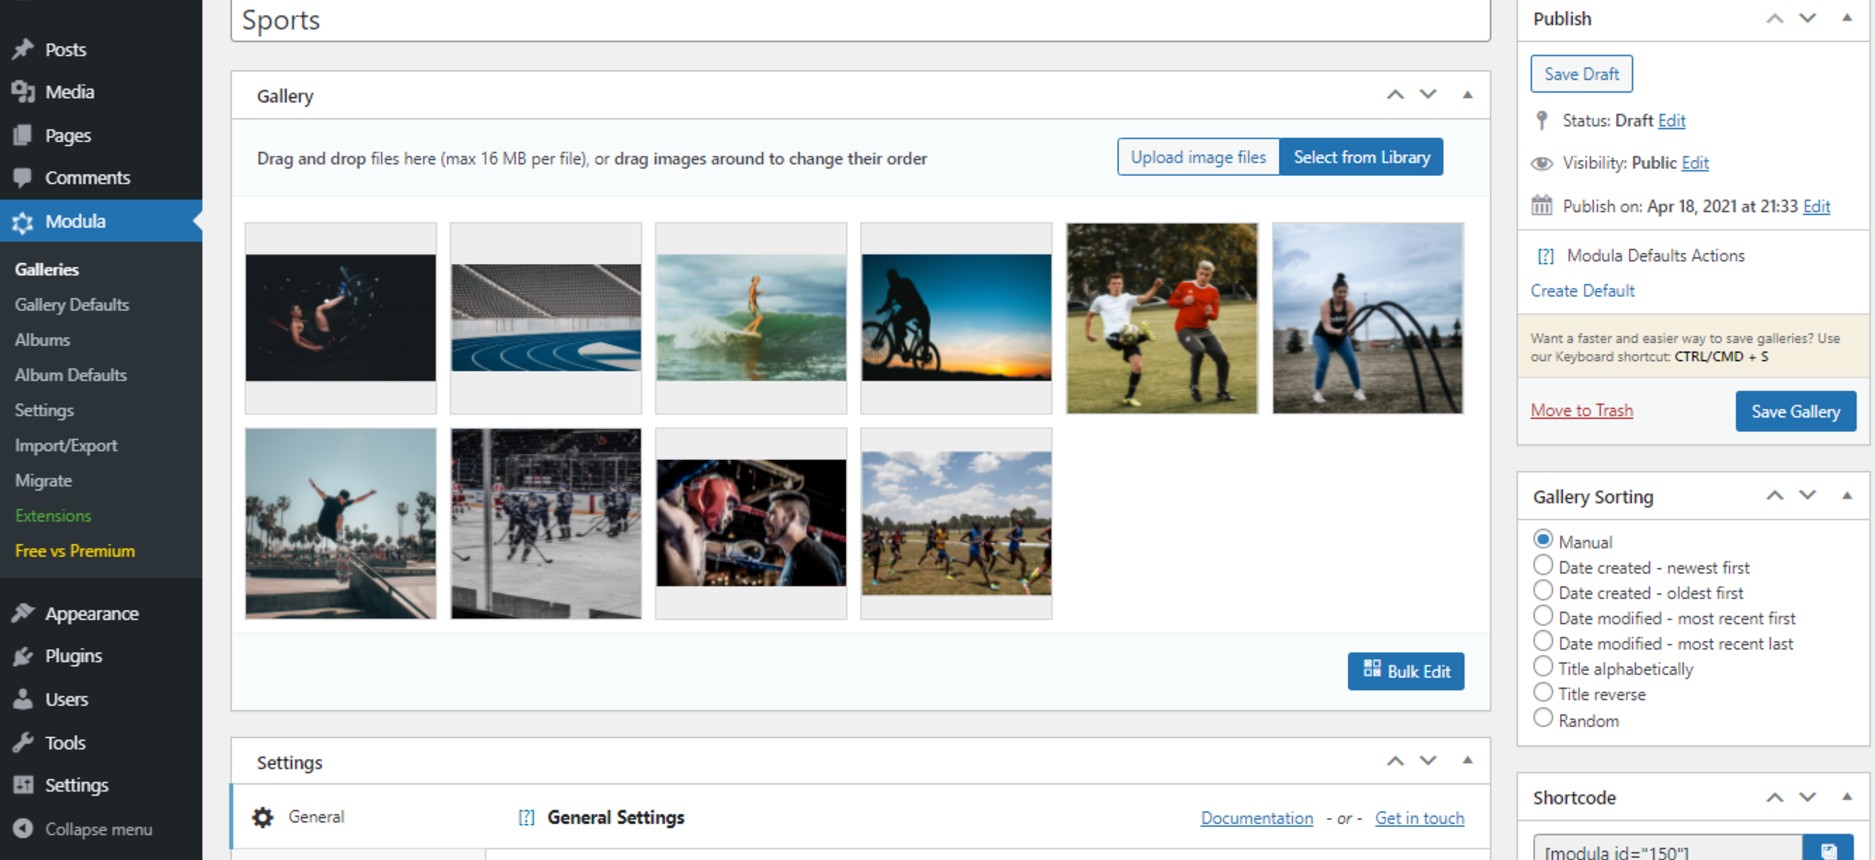
This is what my gallery looks like, until now.
Edit gallery
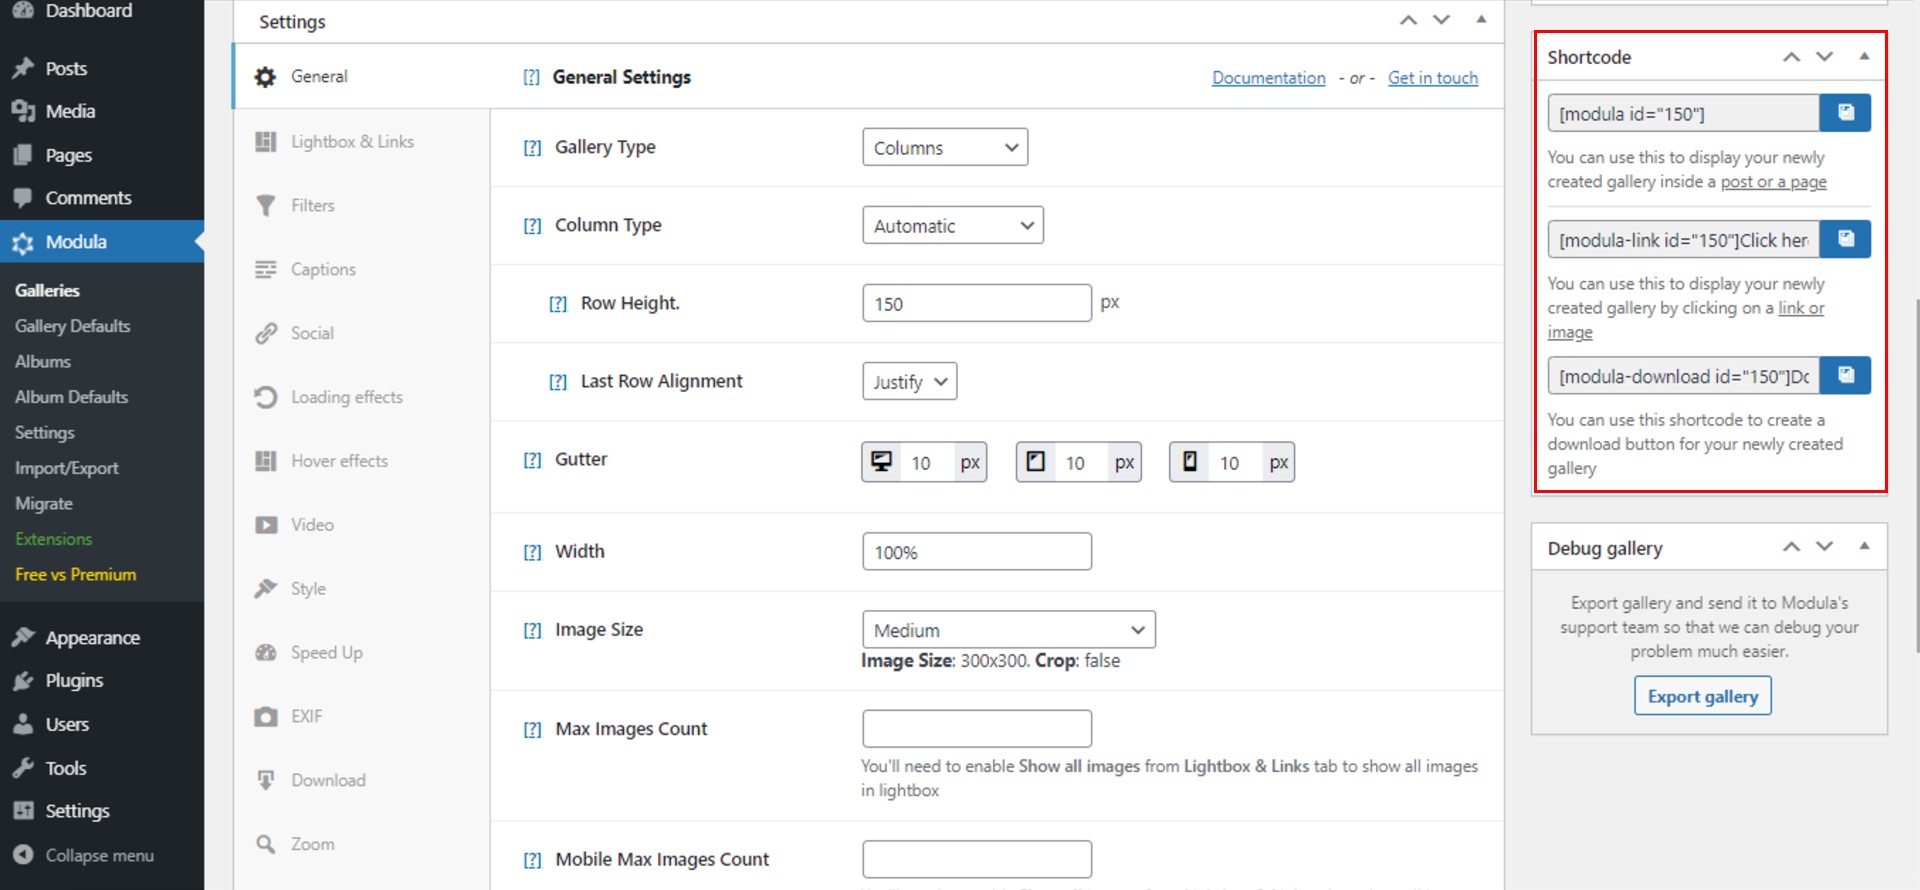
Now, we are going to do some editing for our gallery. Start with selecting the grid type. You have four options to choose from creative, custom, slider, and masonry. I will go with masonry or columns type. At the same time, once you select the gallery type, there are many customization options you can benefit from.
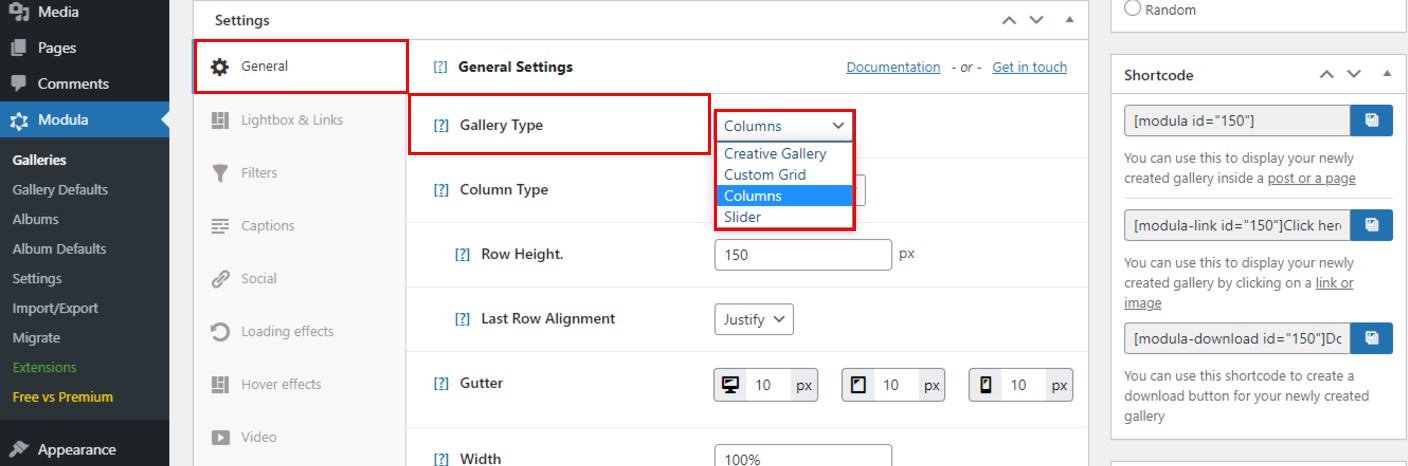
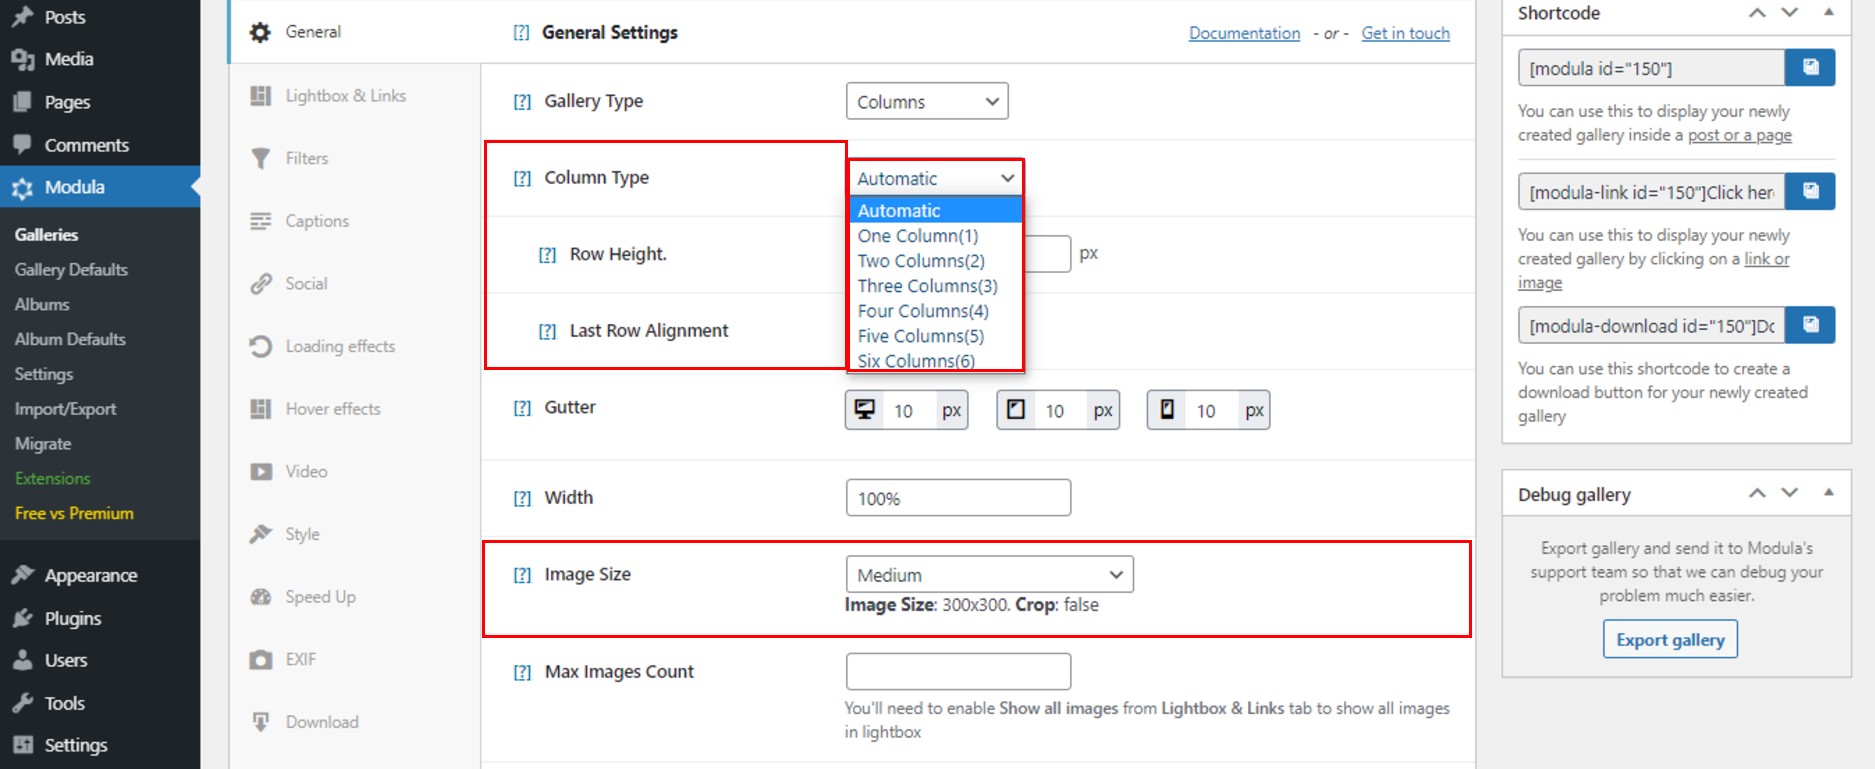
I chose to go with columns gallery type, and now there are few features specific to this gallery type. If we take a closer look, we can see that there is the option to edit the column type, row height, or image size.
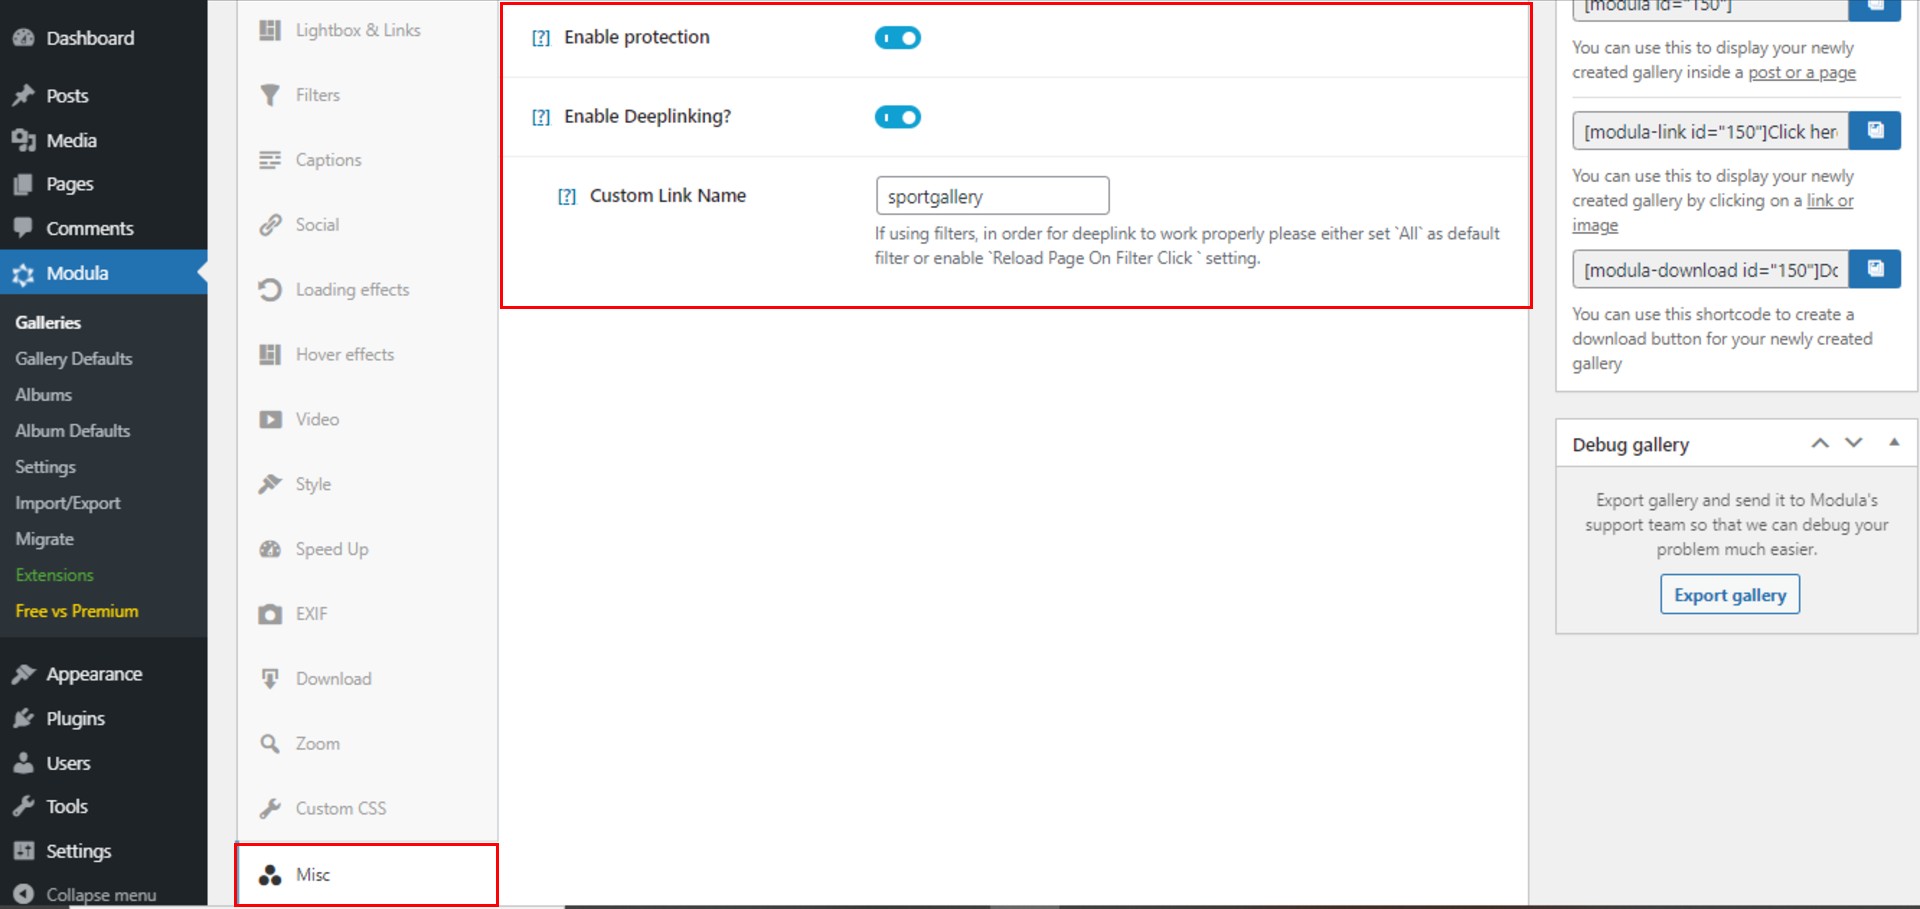
Once we are done with editing our columns, let’s move on and edit our gallery by enabling protection and deeplinking. By enabling protection, you protect your gallery images and disable right-click and Alt + Click for downloading images. Deeplinking is helping you to create a unique and indexable URL for each of your Modula galleries. You can use that to help you with SEO. You find all these features in the Misc section.
When we are all done with styling our newest gallery, click on the Save Gallery button.
The generated shortcode can be used to share your gallery within a post or a page.
After editing and saving our gallery, do not forget that to manage multiple WordPress galleries, you need to create at least two galleries.
Add multiple WordPress photo galleries on one page
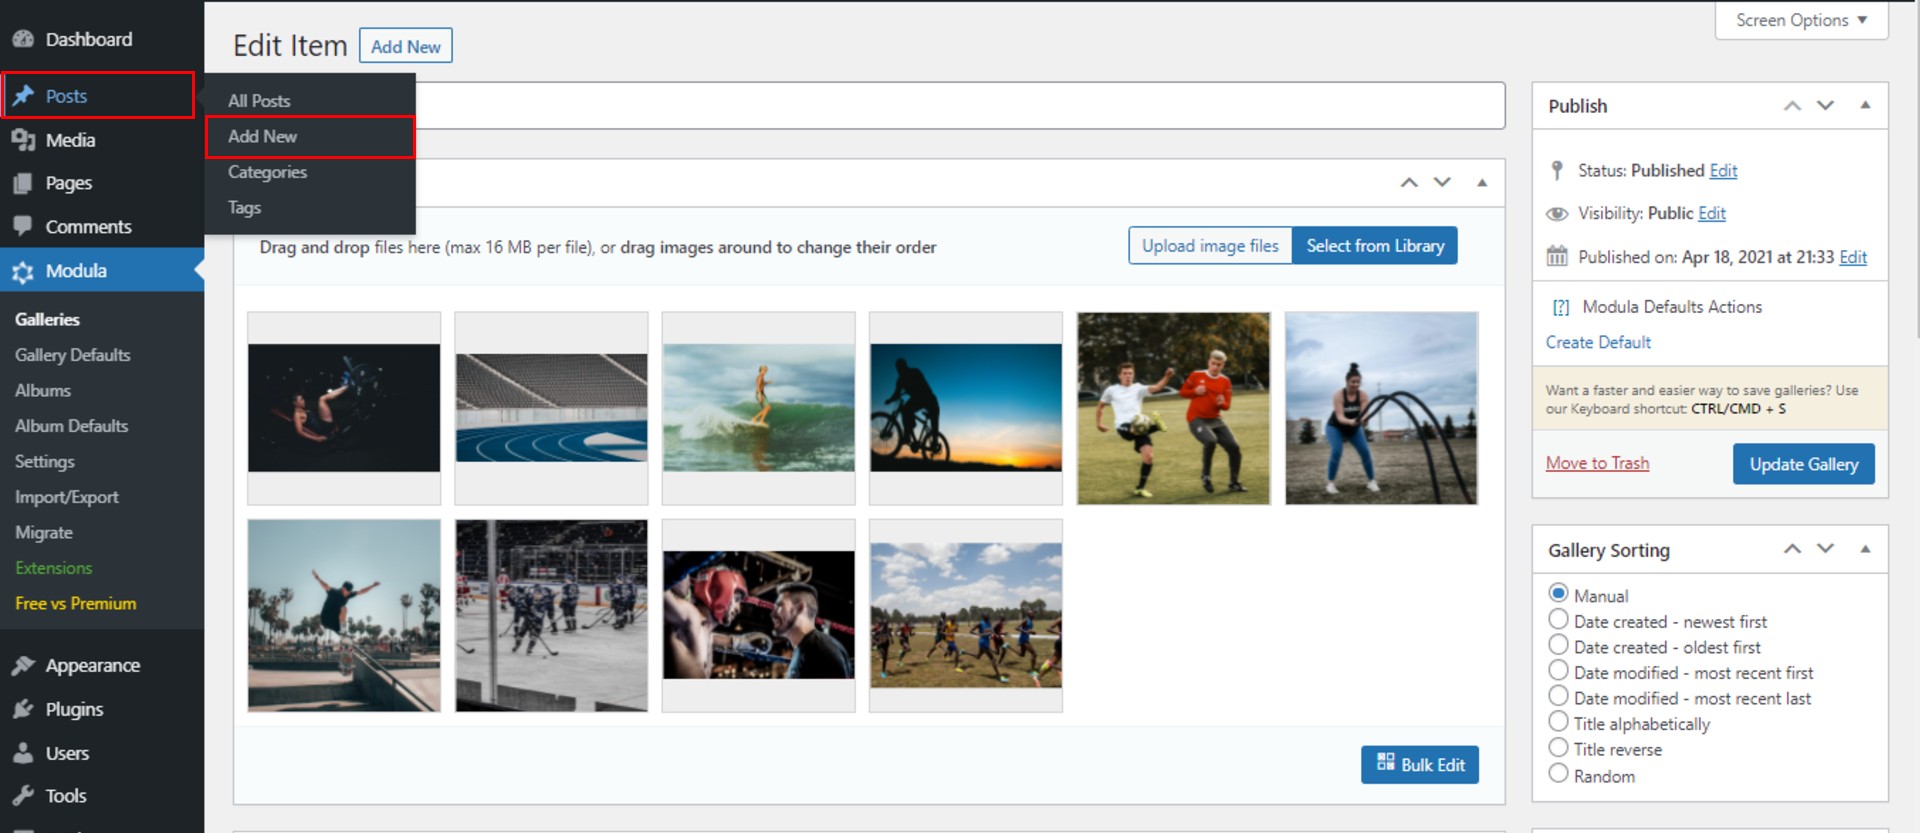
To add multiple galleries, we need to create a new post or page on our blog. Go to Posts > Add New.
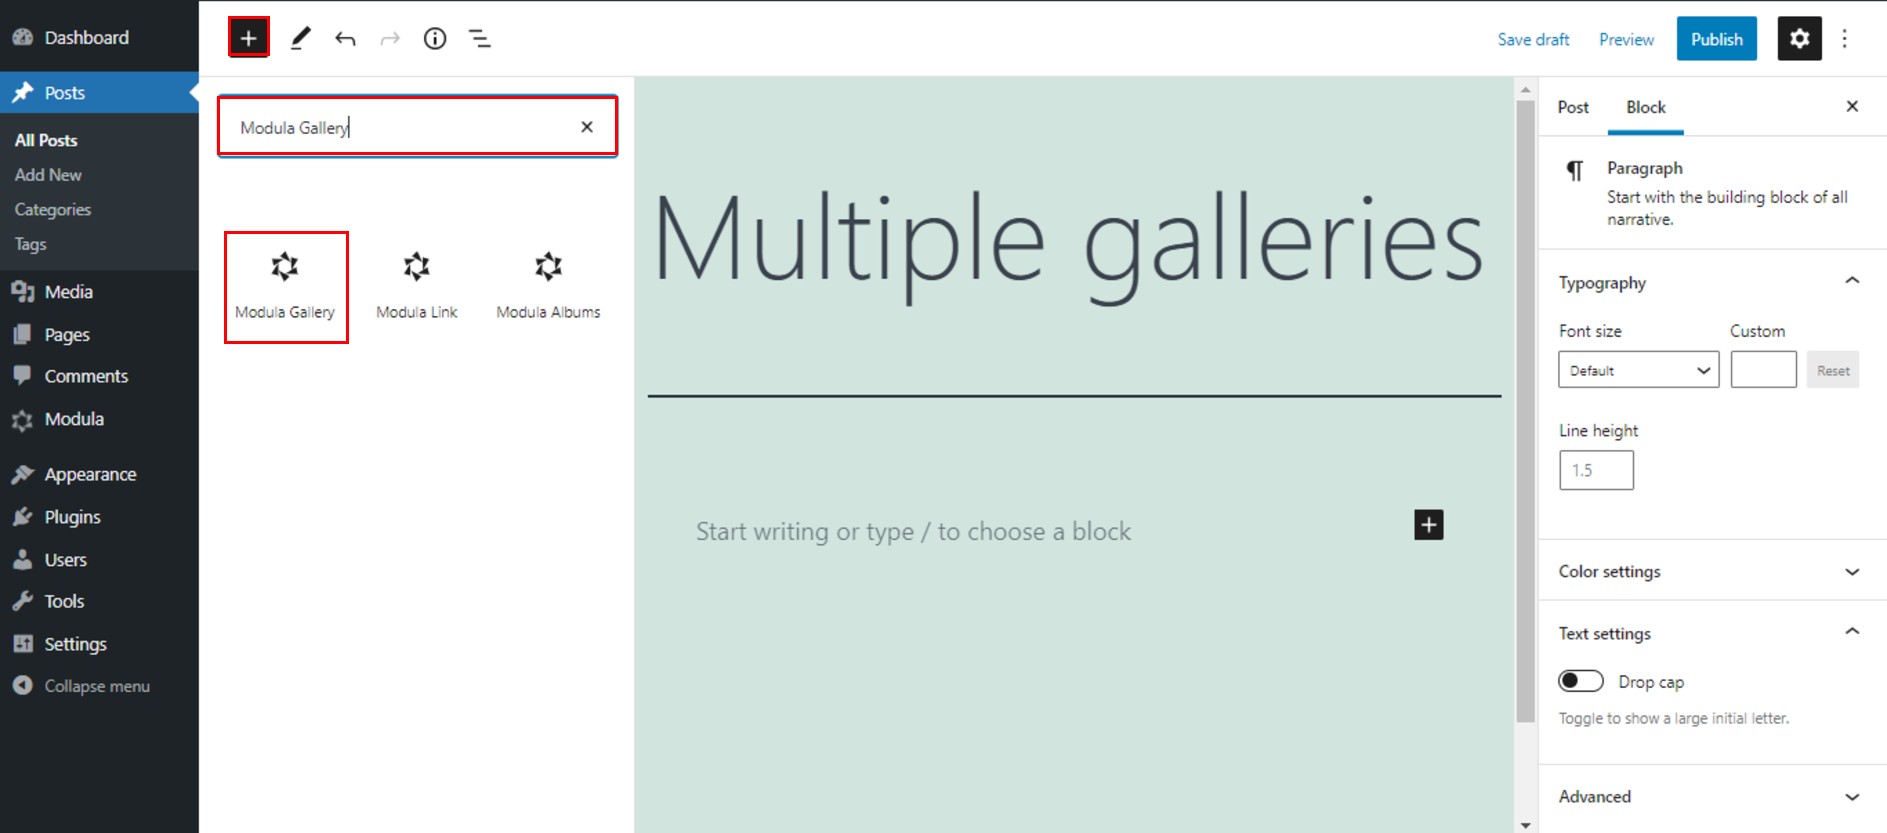
To add the first gallery, select the “+” icon, and in the search bar type Modula Gallery. As soon as you see it, click on Modula Gallery.
Another way to do that is to click on the left upper “+” icon and search for Modula Gallery in the search bar.
Now you have the option to choose between displaying a gallery you created already or creating a new gallery using preset. We select the first option, displaying an existing gallery.
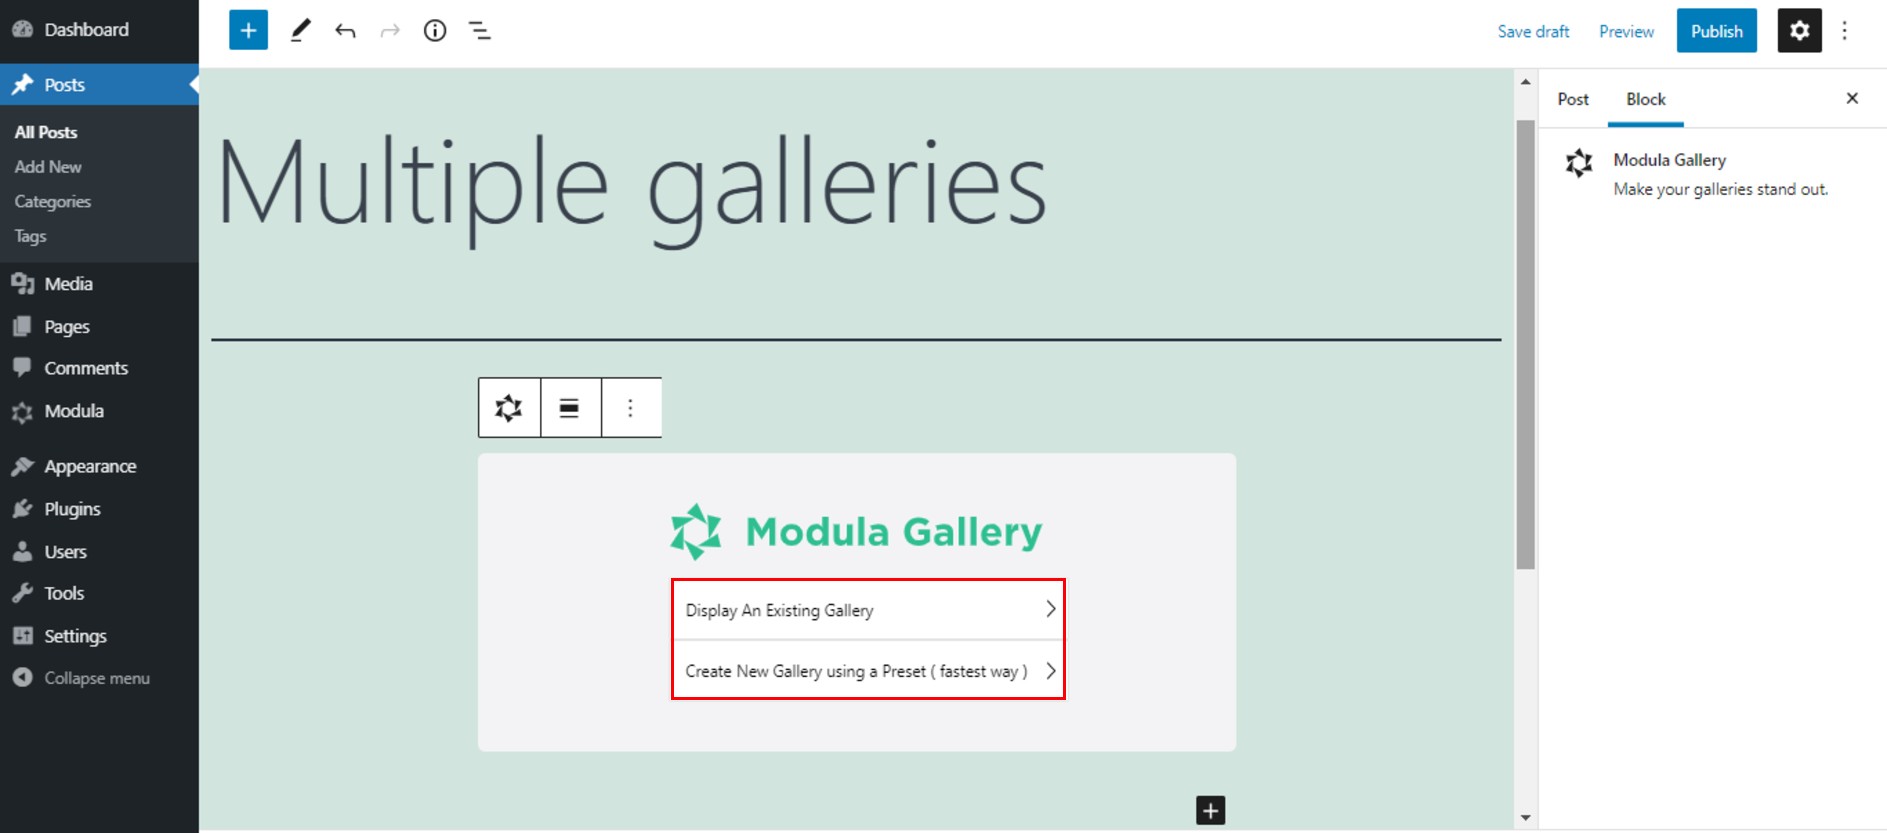
Then, there will be a list of your Modula galleries and you can choose which one to display.
You will see the gallery displayed in a moment, and it will appear a “+” icon again. In order to add another gallery, you need to repeat the same process.
Final thoughts – How do I create multiple galleries in WordPress?
As shown above, this is how you add multiple galleries in WordPress with Modula. It is not a sophisticated process. There is one thing for sure. With Modula, you can style your galleries the way you want and display them in a post or page with no code skills.
Try Modula and amaze your website’s visitors!