In the dynamic world of WordPress, users are constantly seeking ways to enhance their websites. One invaluable hack they often overlook is the image galleries with thumbnails. These miniature previews play a pivotal role in providing users with a quick and engaging glimpse into the content, and in this article, we’ll show you how to harness their potential.
Lucky for you, we prepared a straightforward tutorial on creating an image gallery with thumbnails using the WordPress editor (also known as the Gutenberg Block Editor) and a gallery plugin.
In this article, we will show you the following:
- A comparison between the WordPress core gallery and Modula.
- How you can add thumbnails with the default WordPress gallery.
- Steps to follow when creating an image gallery with thumbnails.
- Alternative solutions to create a WordPress thumbnail gallery.
- And much more.

Modula Gallery Plugin
Create stunning, responsive photo galleries with ease. Showcase your work, captivate your audience, and boost engagement. You don’t need to do any coding.
Table of contents
Thumbnail galleries are one of the most used solutions on the web for displaying multiple images because they don’t take up so much space and allow quick browsing and closer inspection when needed.
So, you are a WordPress user looking to create image galleries with thumbnails. You have two options: the Gutenberg Block Editor (no thrills and easy on the budget) or a gallery plugin (more features).
| Tool | Thumbnail gallery | Open images in a Lightbox | Thumbnails at bottom | Keyboard navigation | Vertical/horizontal scrolling for thumbnails | Insert external link |
| Gutenberg Block Editor | ✅ | ✅ | ❌ | ❌ | ❌ | ❌ |
| Modula | ✅ | ✅ | ✅ | ✅ | ✅ | ✅ |
Depending on your needs, you can see what you’ll get for the thumbnail gallery with each solution in the above table.
Both the WordPress editor and Modula allow you to create a thumbnail gallery and open images in a Lightbox (the window that opens when you click on an image and appears in its entirety) – the only downside here is that you can’t customize your Lightbox with the default WordPress gallery.
You could choose a Lightbox plugin that works great with the WordPress editor. What if you need to install other plugins, and they’re not compatible?
You could end up with broken galleries, or worse yet, not even be aware that your galleries need to be fixed! You don’t want that, and we don’t want you to go through that!
Moreover, you won’t benefit from support and updates, as you benefit from a commercial solution like Modula.
While useful for basic galleries, the default WordPress gallery can be limited compared to other full-blown plugins.
Here are just a few of the things that the native WordPress gallery can’t do:
- You can’t allow people to navigate through your thumbnails with the keyboard – they’ll have to close and open one image at a time, a problem that might frustrate your users and make them leave your site.
- You can’t place thumbnails at the bottom of the Lightbox – this will make it challenging to navigate through thumbnails, and the user experience can be affected.
- It doesn’t offer a thumbnail axis – if you don’t allow people to scroll through thumbnails, they can’t reach all your images or find what they’re looking for.
- You can’t add external links to images – in some cases; you’ll want to link thumbnails in your gallery to external URLs.
If you are still trying to decide which tool suits you best, let’s see how they work.
Create a thumbnail gallery with the WordPress block editor
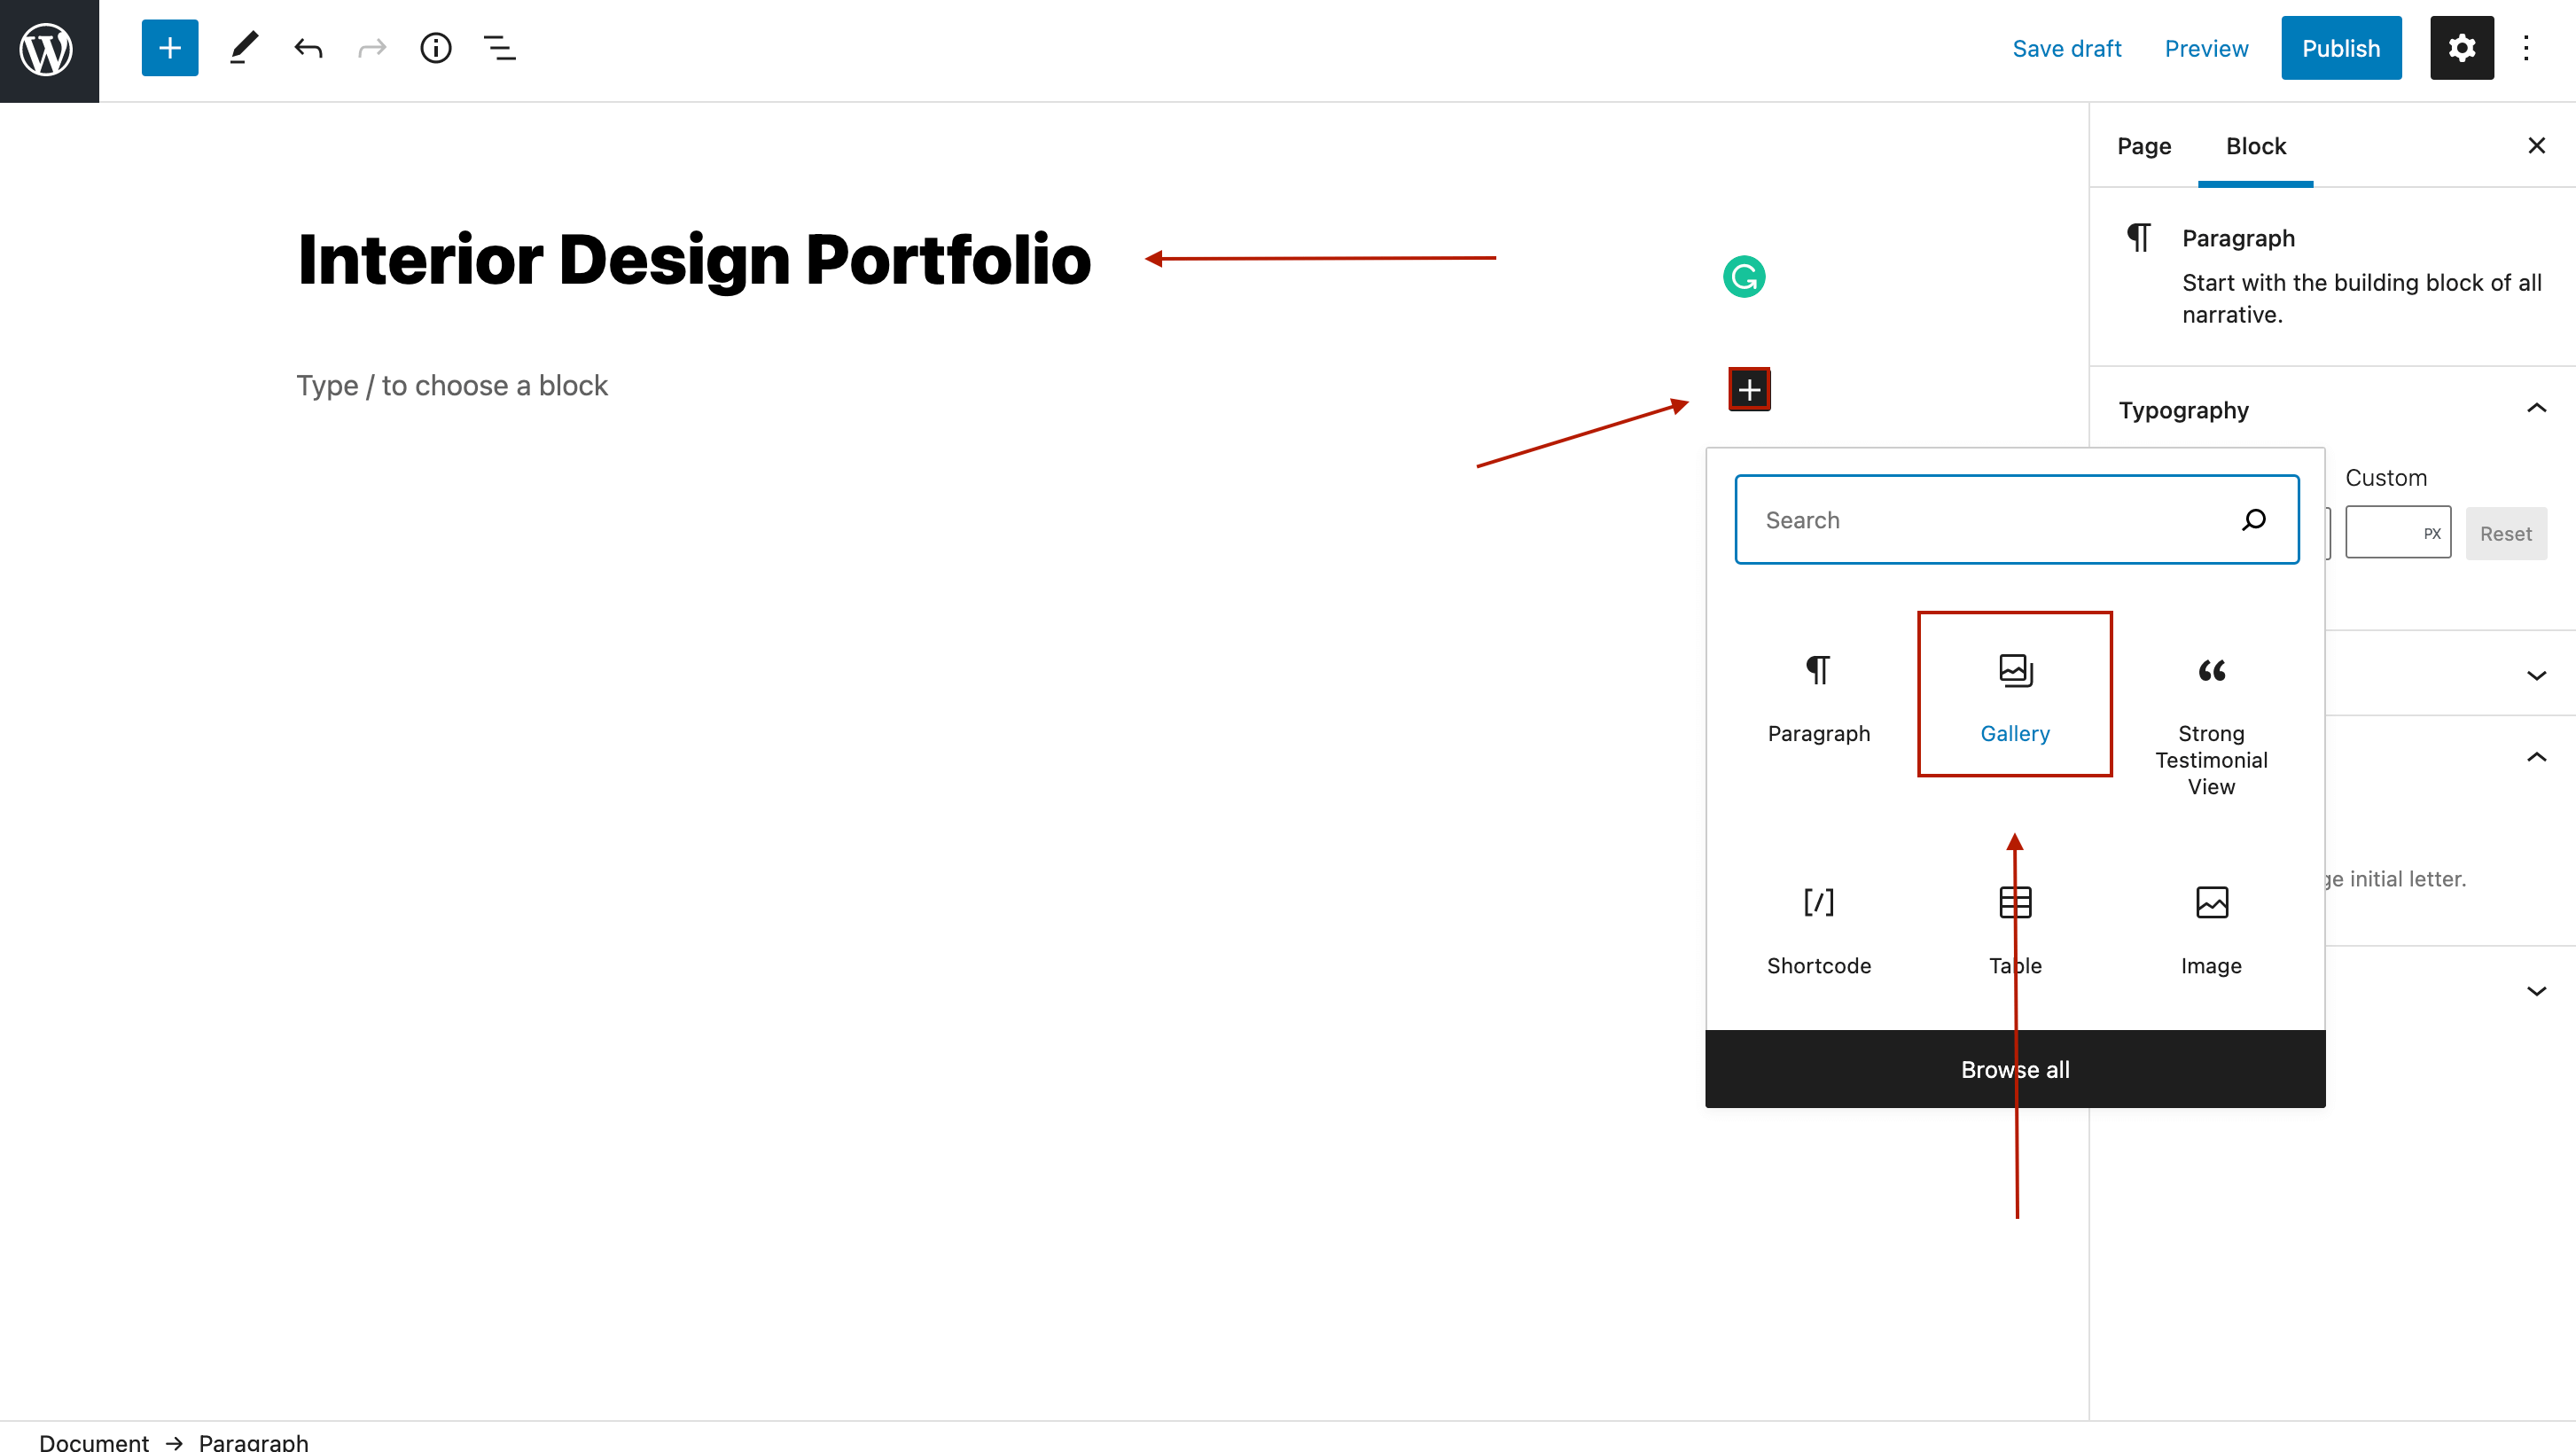
Let’s say you’re an interior design photographer or help people decorate their houses and want to create a page with some interior design images to show people your portfolio.
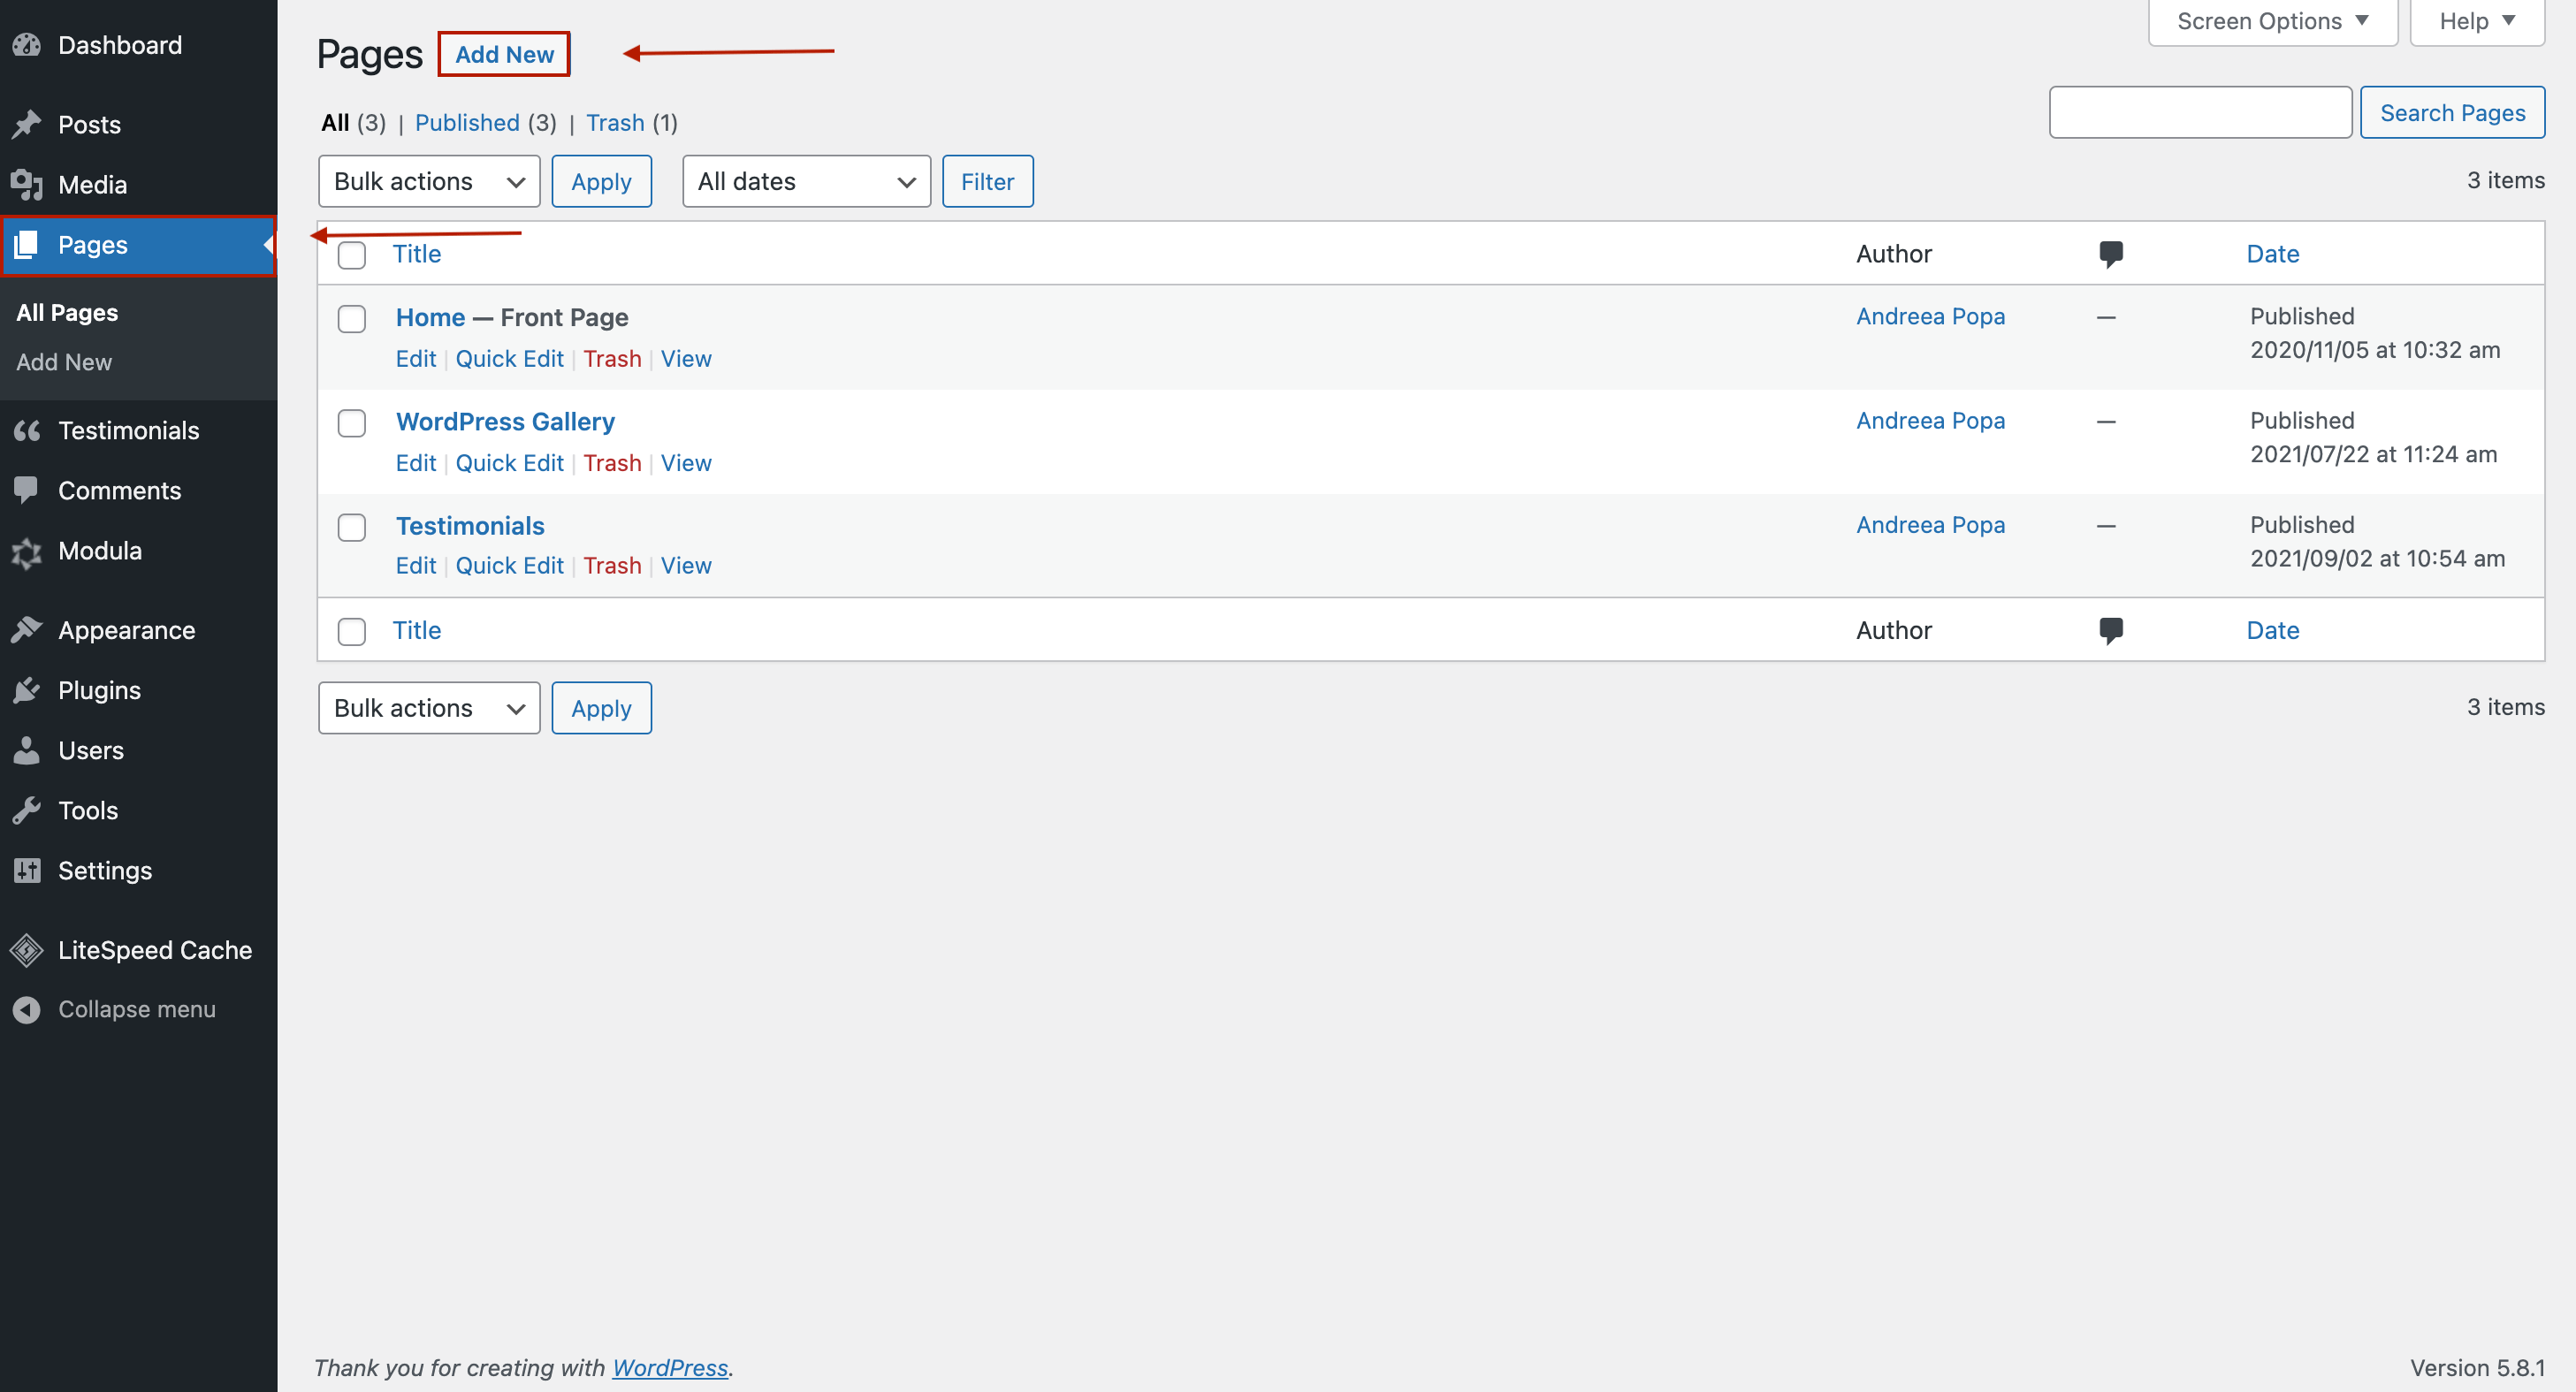
Go to your WordPress dashboard > Pages > Add New. We’ll create a new page on your website with your pictures.
I’ll give a name to my page, then click on the “+” icon and add the Gallery block.
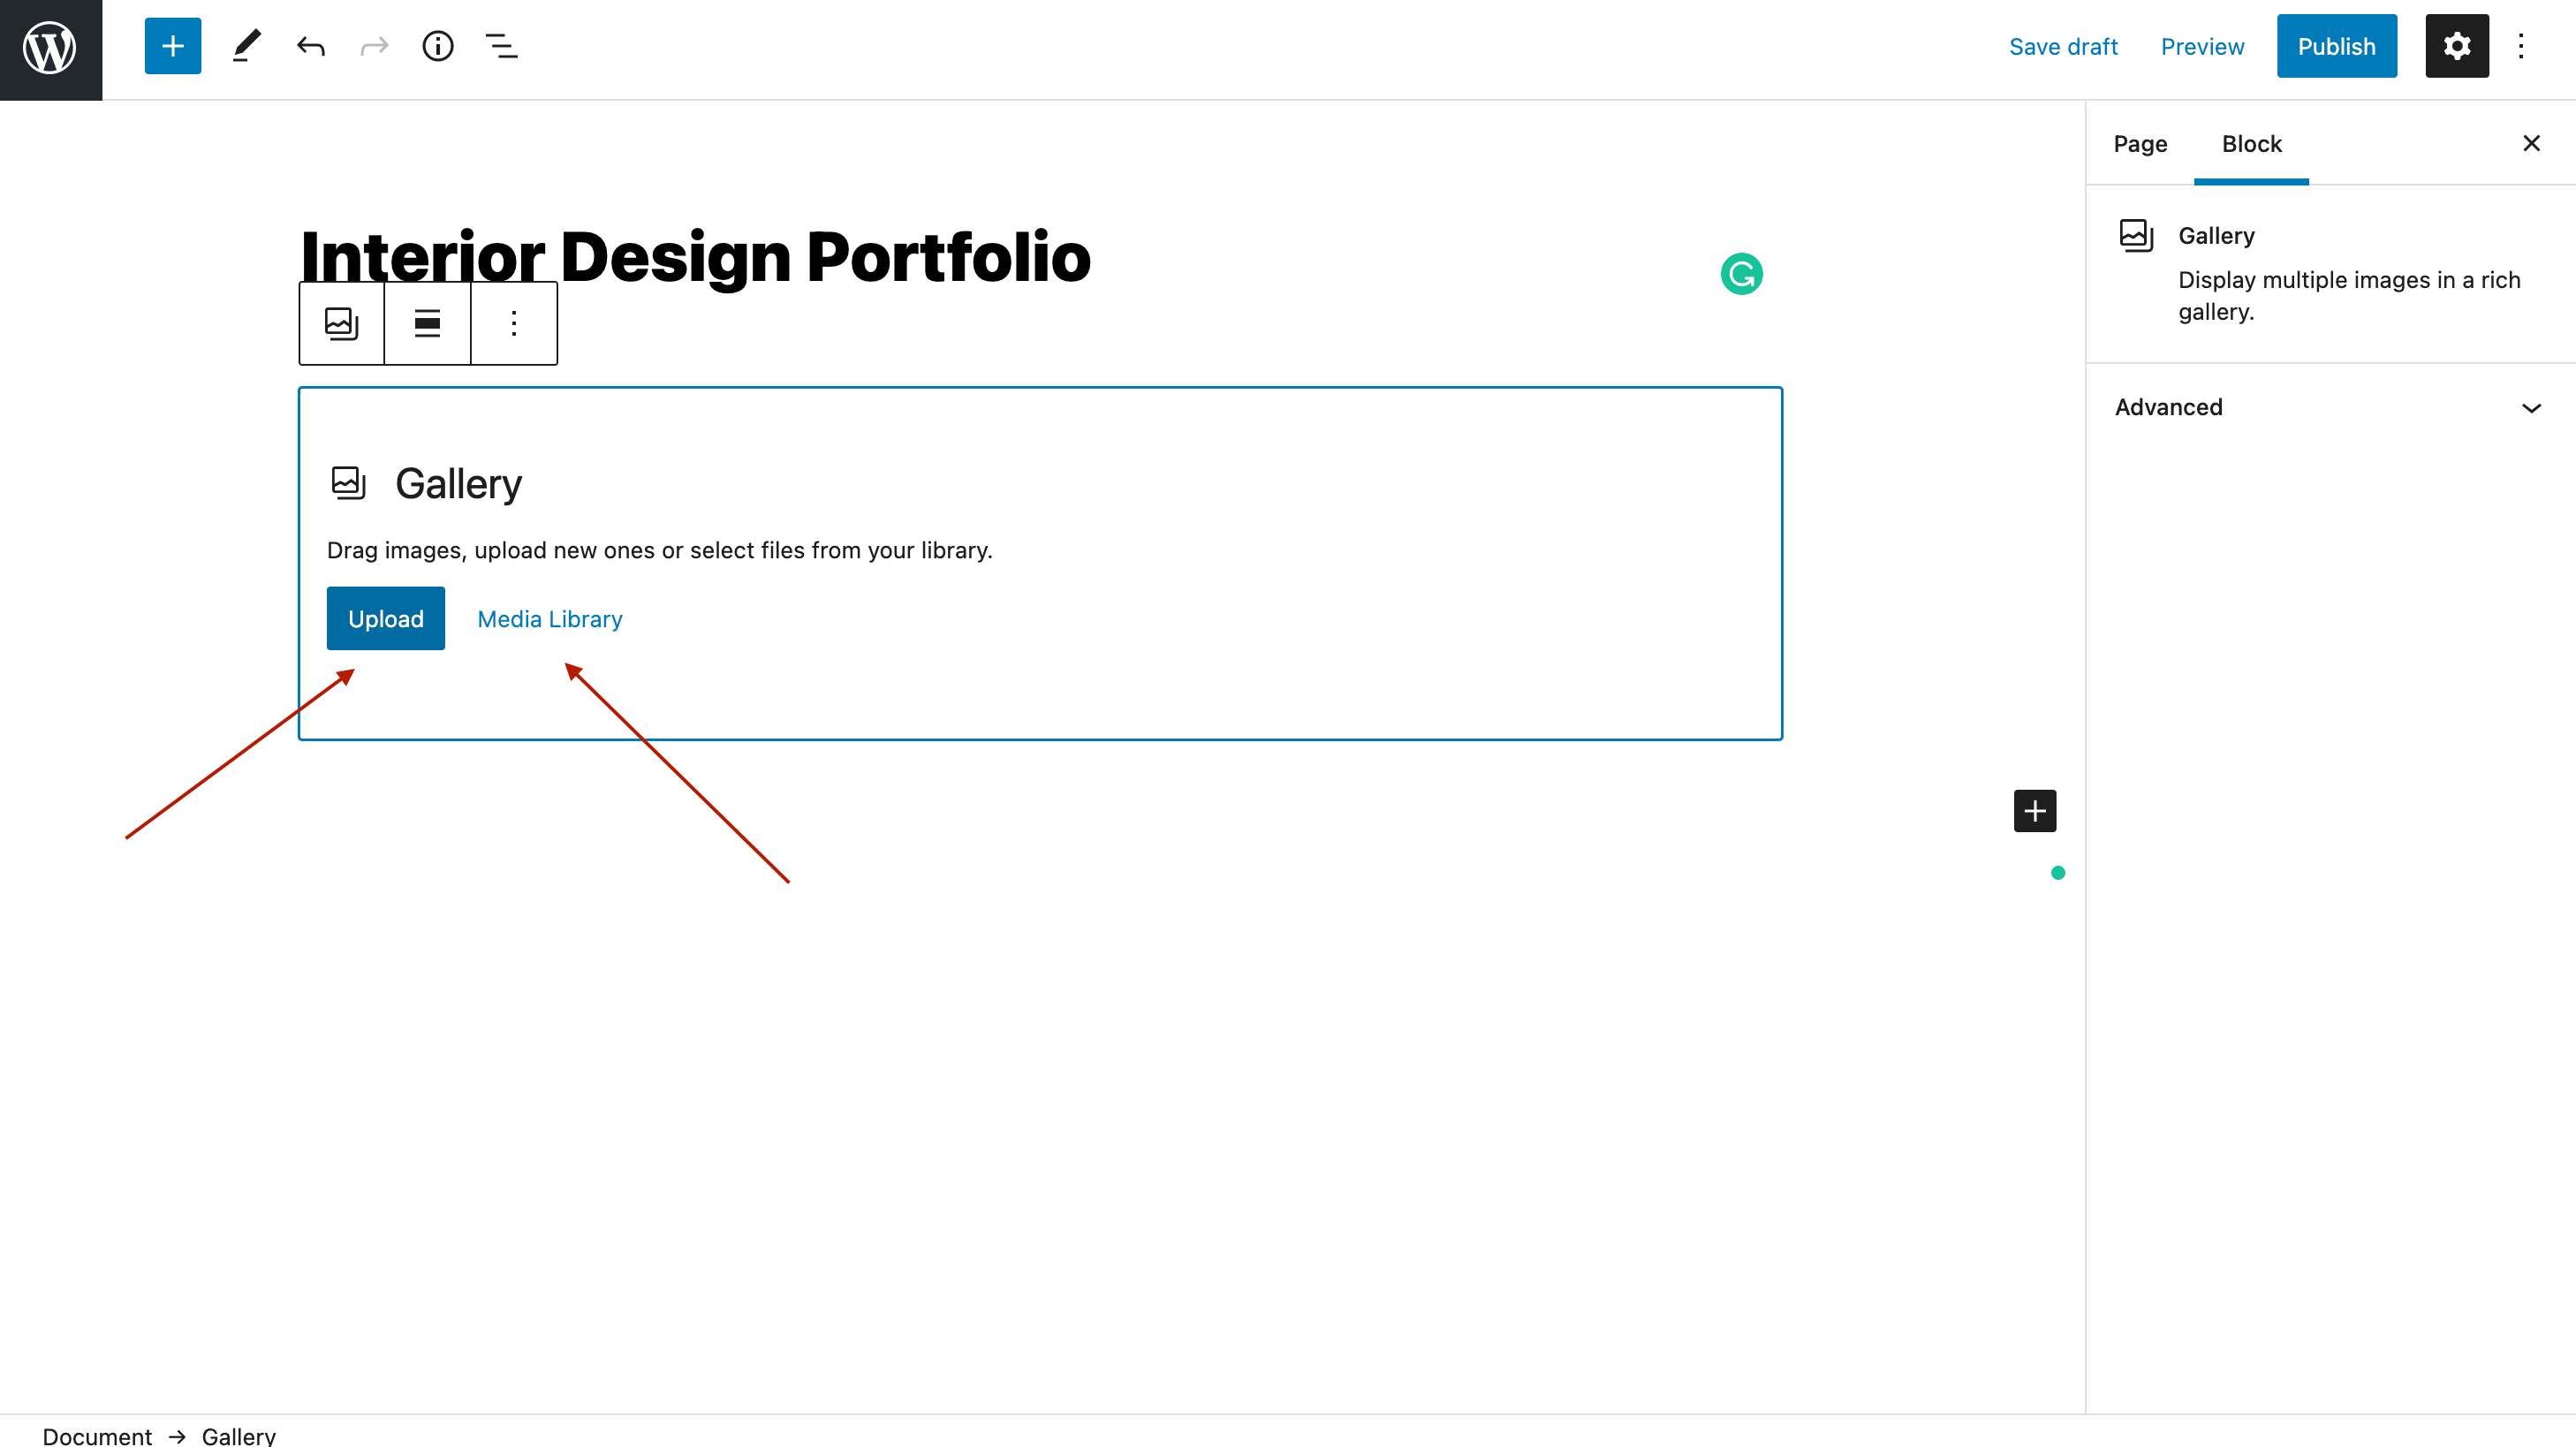
Now, you need to upload your images, or if you already have them uploaded on WordPress, you can add them from your Media Library.
Once you’ve uploaded your pictures, let’s create an image gallery with thumbnails. In the right sidebar, you’ll see some gallery settings.
Go to Image size and set Thumbnail. Next, select how many images to display per column (I’ve added eight images, but you can add as many as you want).
In the last part, you must link your images to the media file or an attachment page (if you don’t, people won’t be able to click on a picture and see it in its entirety).
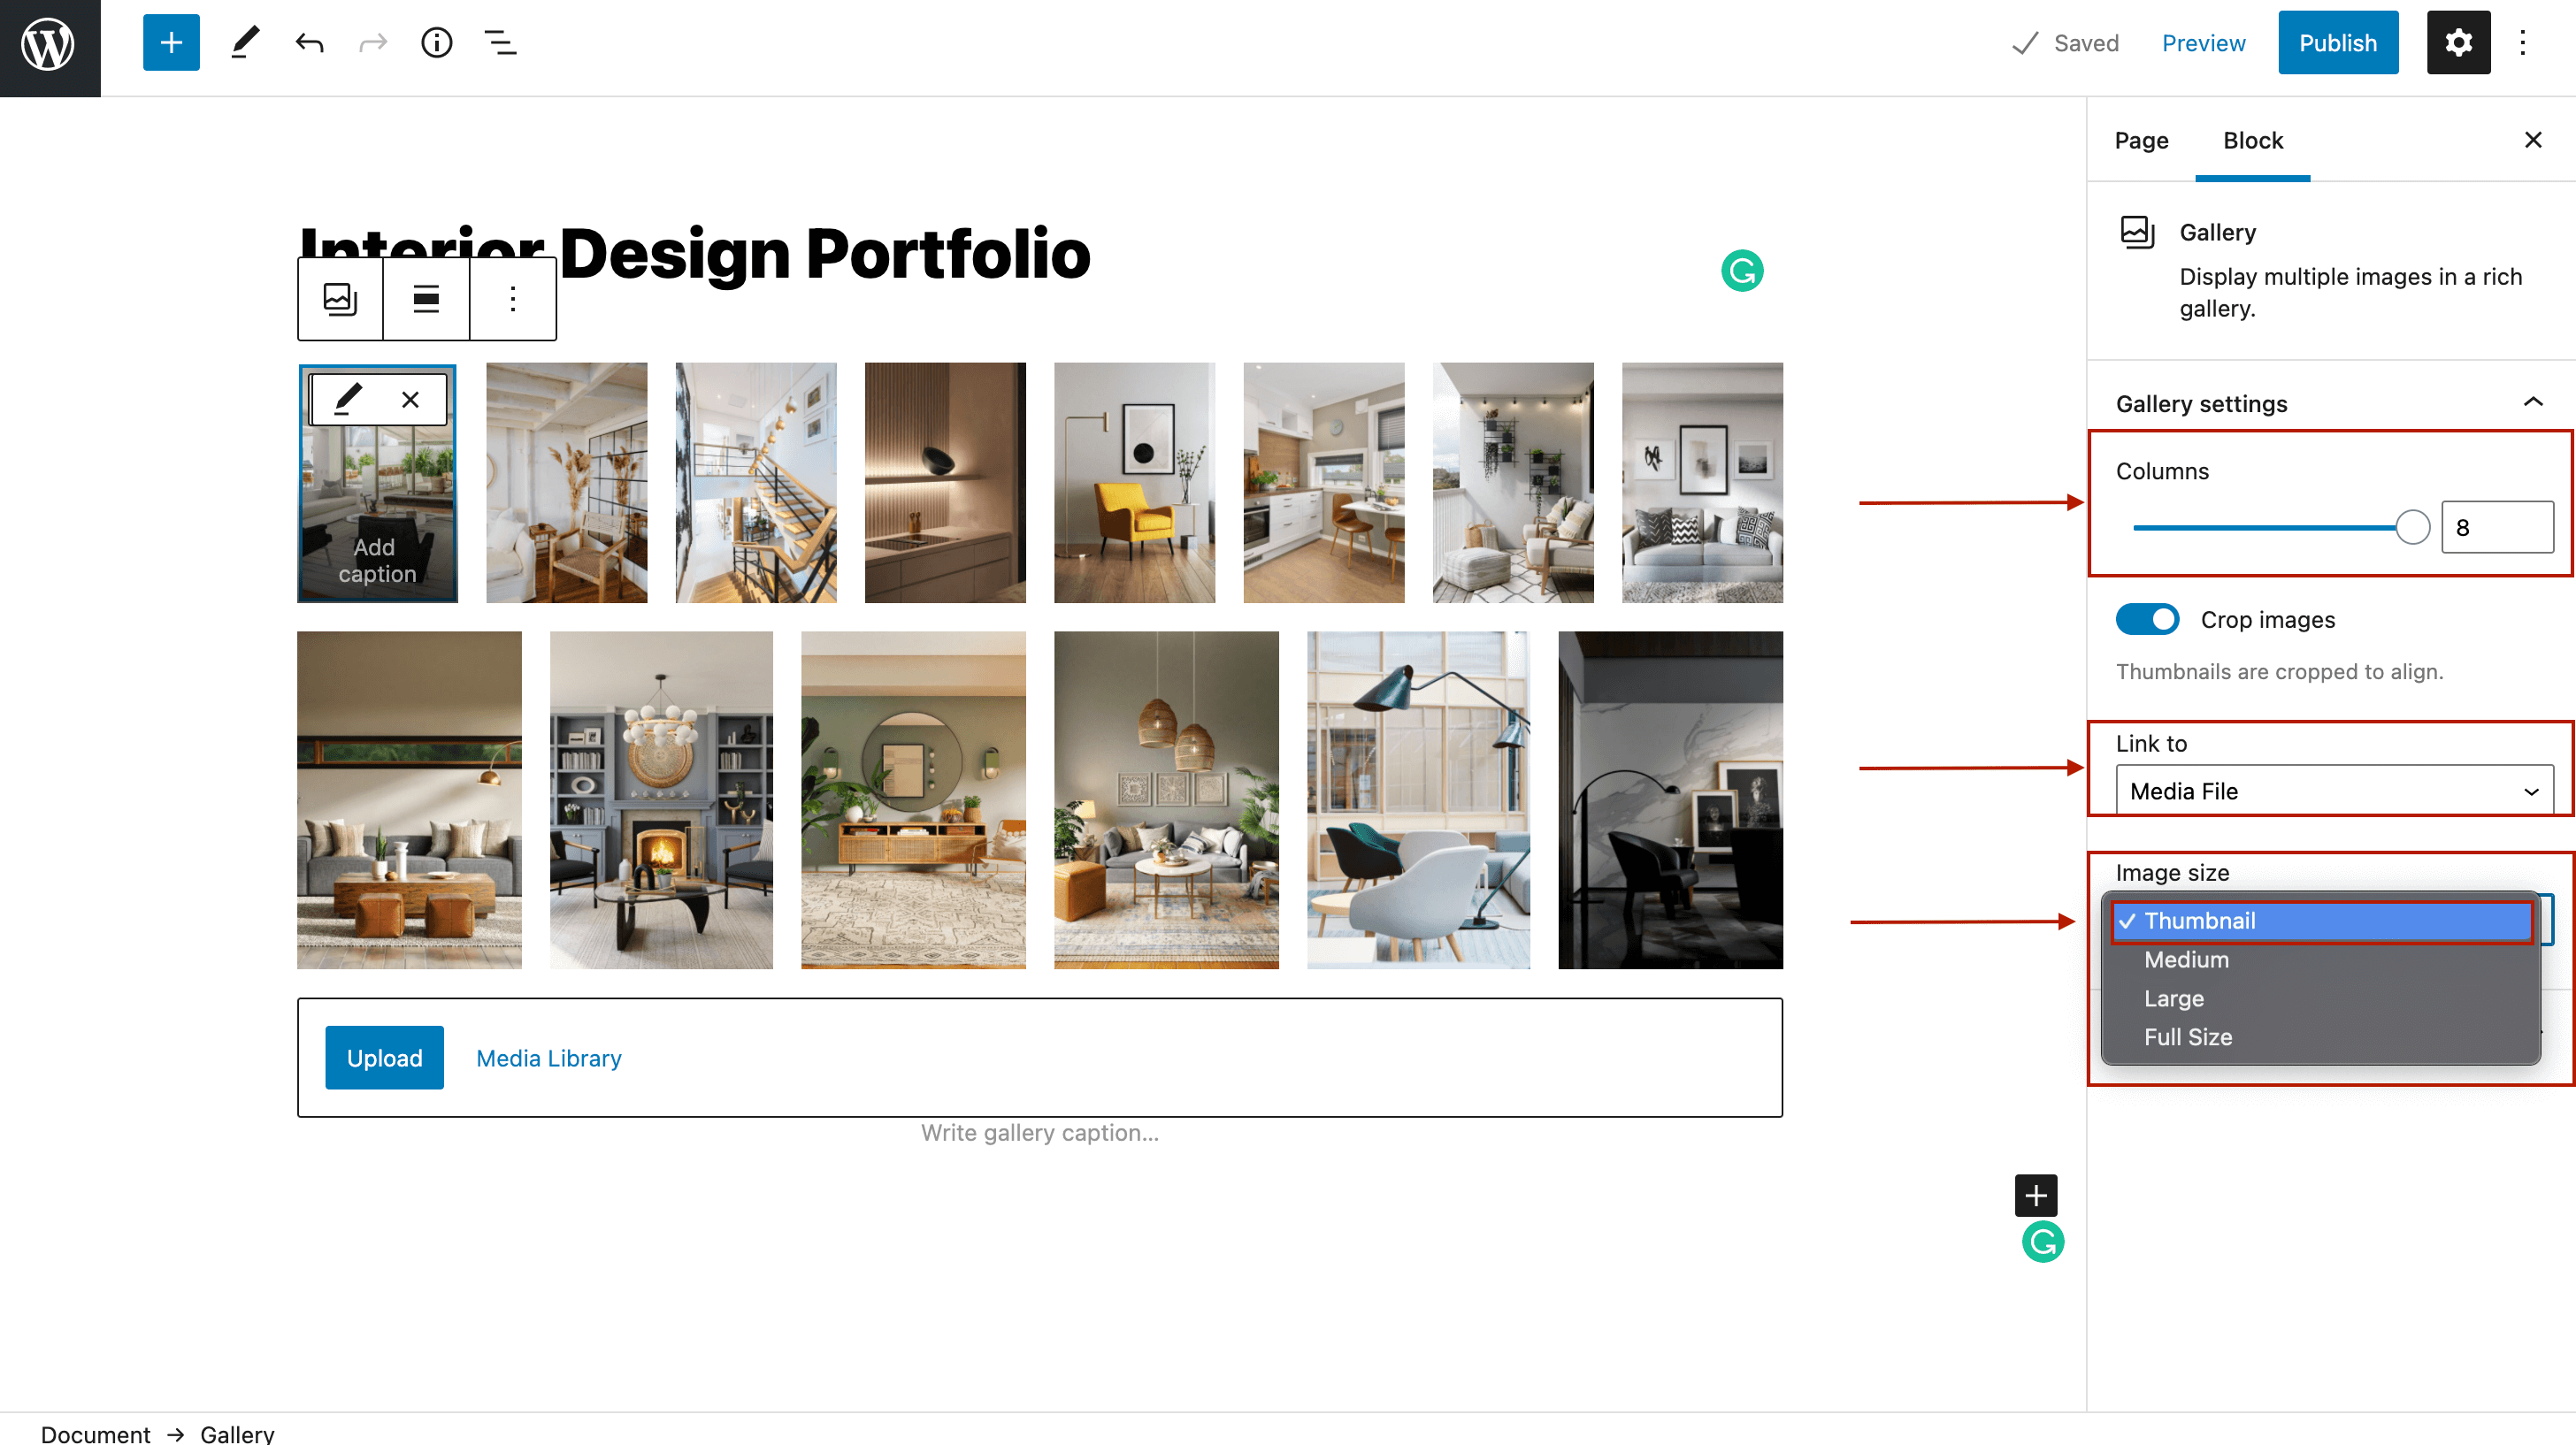
This is how you can create an image gallery with thumbnails with the default WordPress editor. Once you’ve set up your gallery, click Publish, and your thumbnail gallery is live.
Creating a thumbnail gallery with Modula
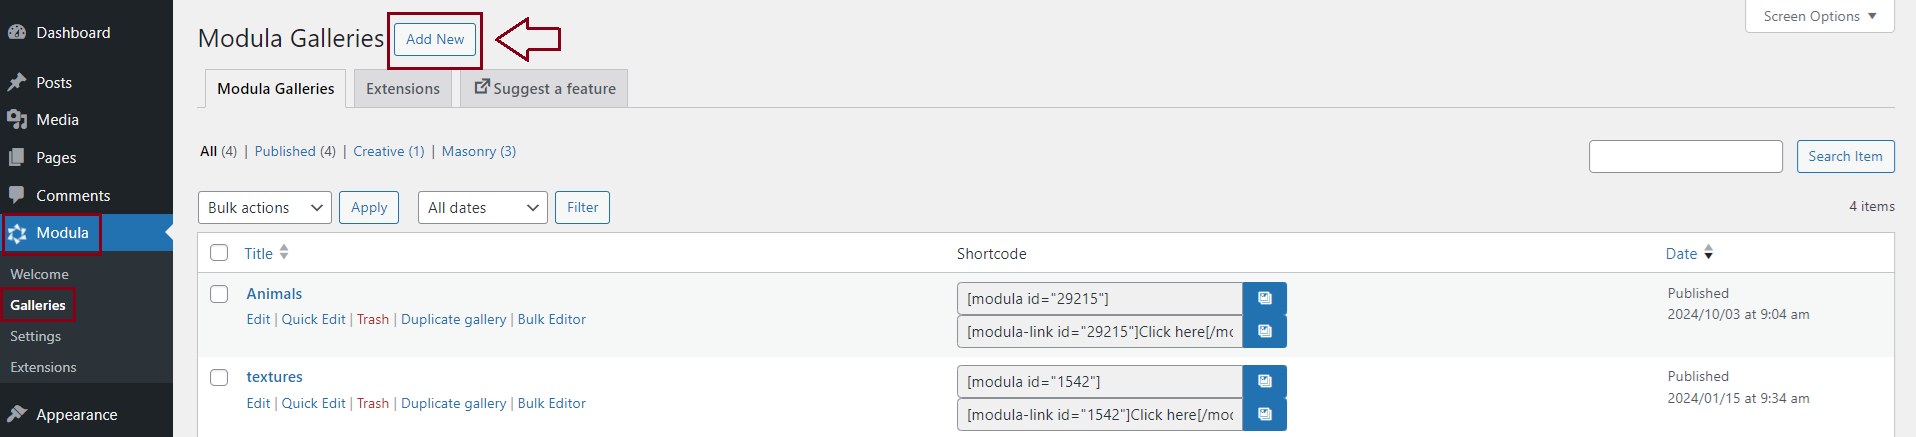
Before creating our WordPress thumbnail gallery, you need to install and activate Modula – the process is super easy and will take less than a minute.
Step 1: Create an image gallery
Every time from now on, when you want to create an image gallery, click on the Modula icon and then press Add new.
You can start by adding a descriptive title to your WordPress thumbnail gallery and uploading your images. If you already have your photos uploaded in WordPress, you can select them from your Library.
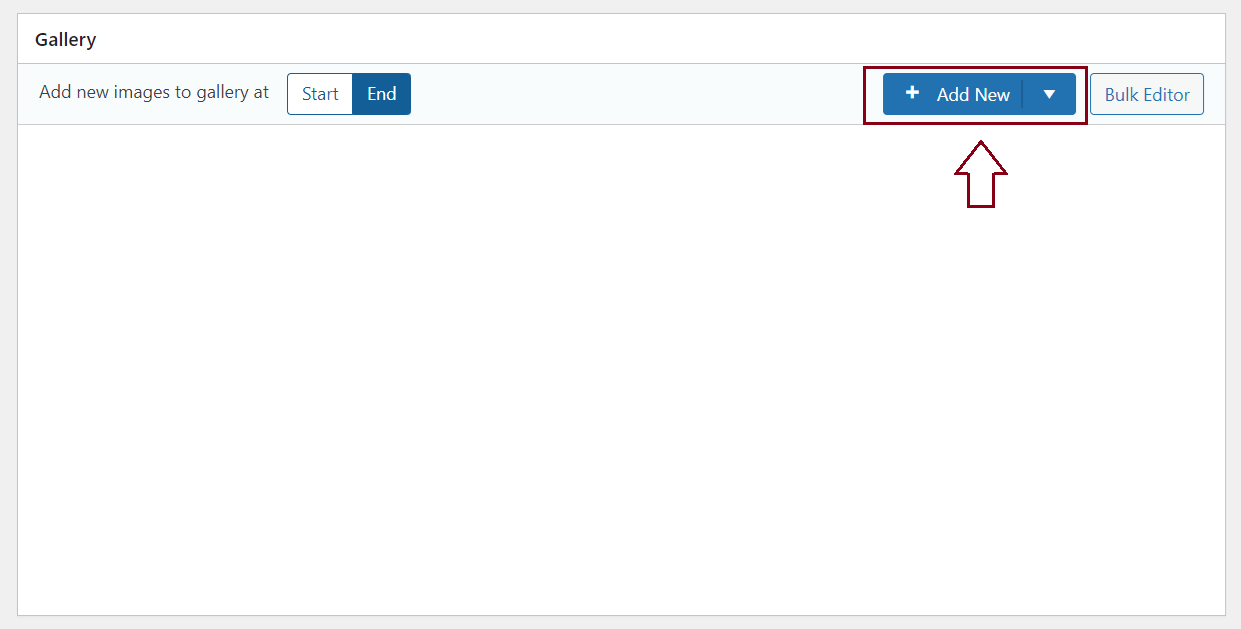
Thanks to Modula’s drag-and-drop interface, you can arrange images in your galleries according to your preferences.
Step 2: Add thumbnails to your image gallery
The most fantastic thing you can do with your galleries is to add a gallery type. How?
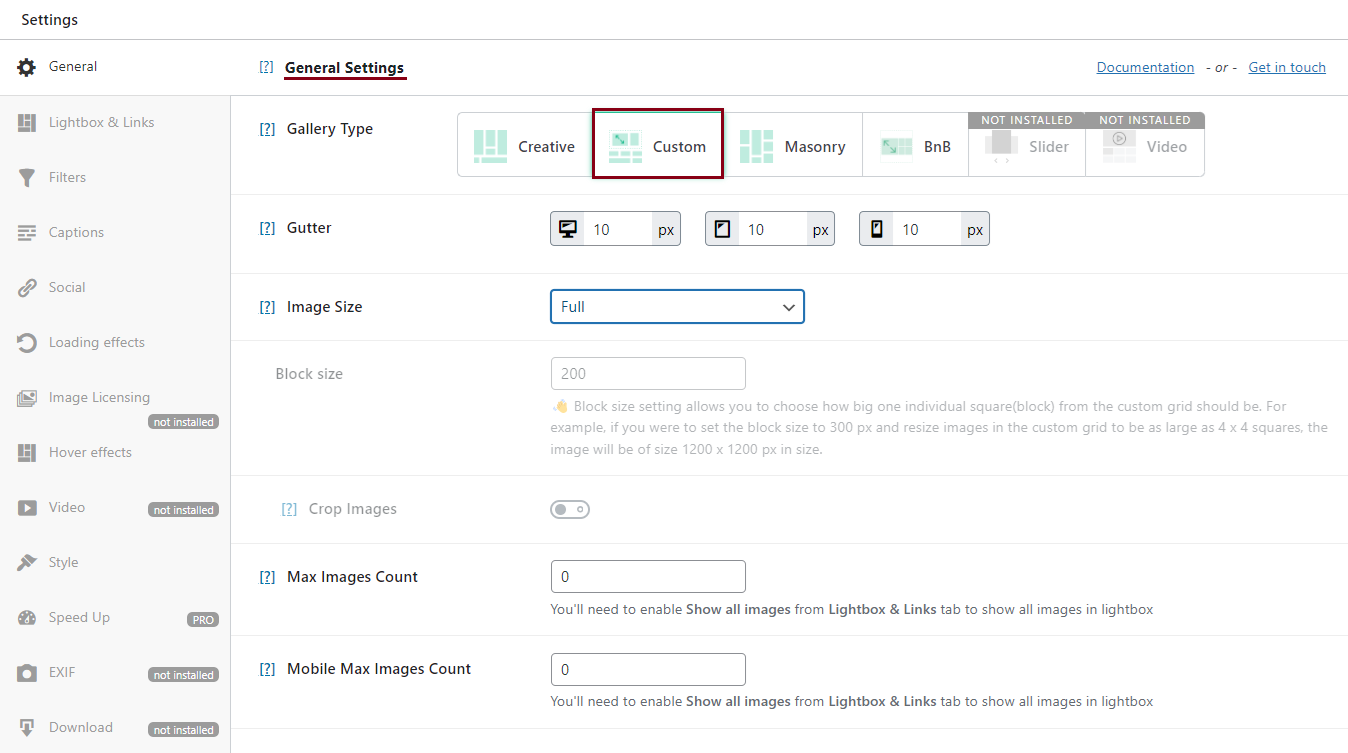
Scroll down and go to General Settings. In the gallery type, you can add a gallery with custom grids, a gallery with columns, a slider, or a creative gallery.
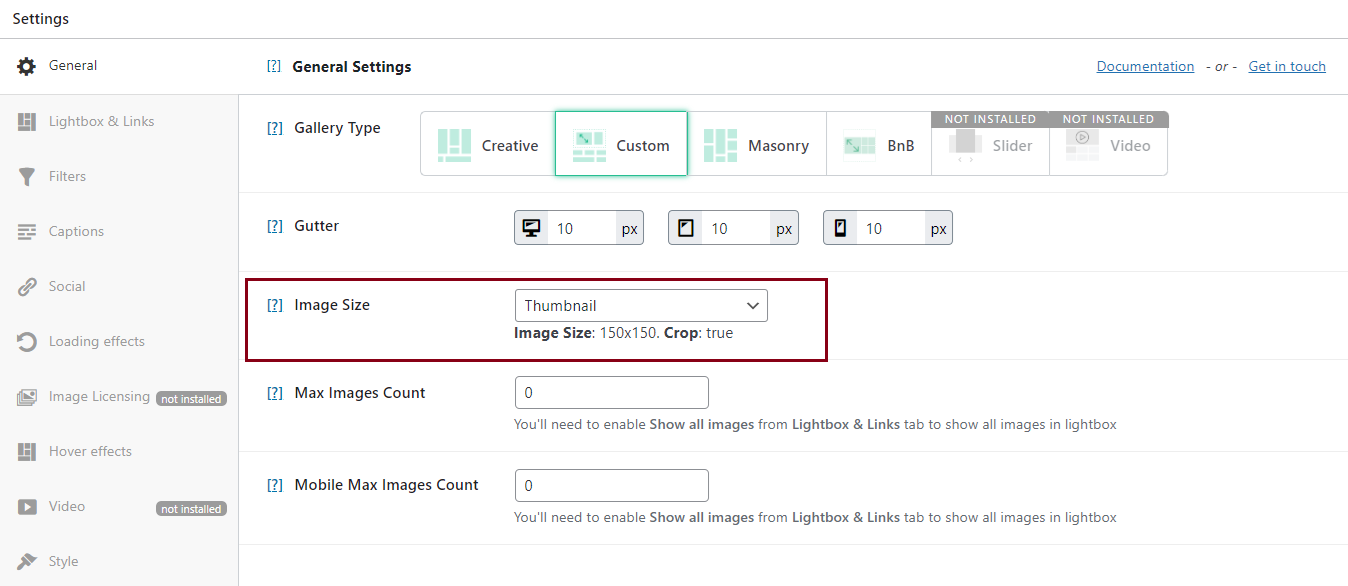
Next, let’s change the image size. In the same section, click on the Image Size dropdown box and click on Thumbnail.
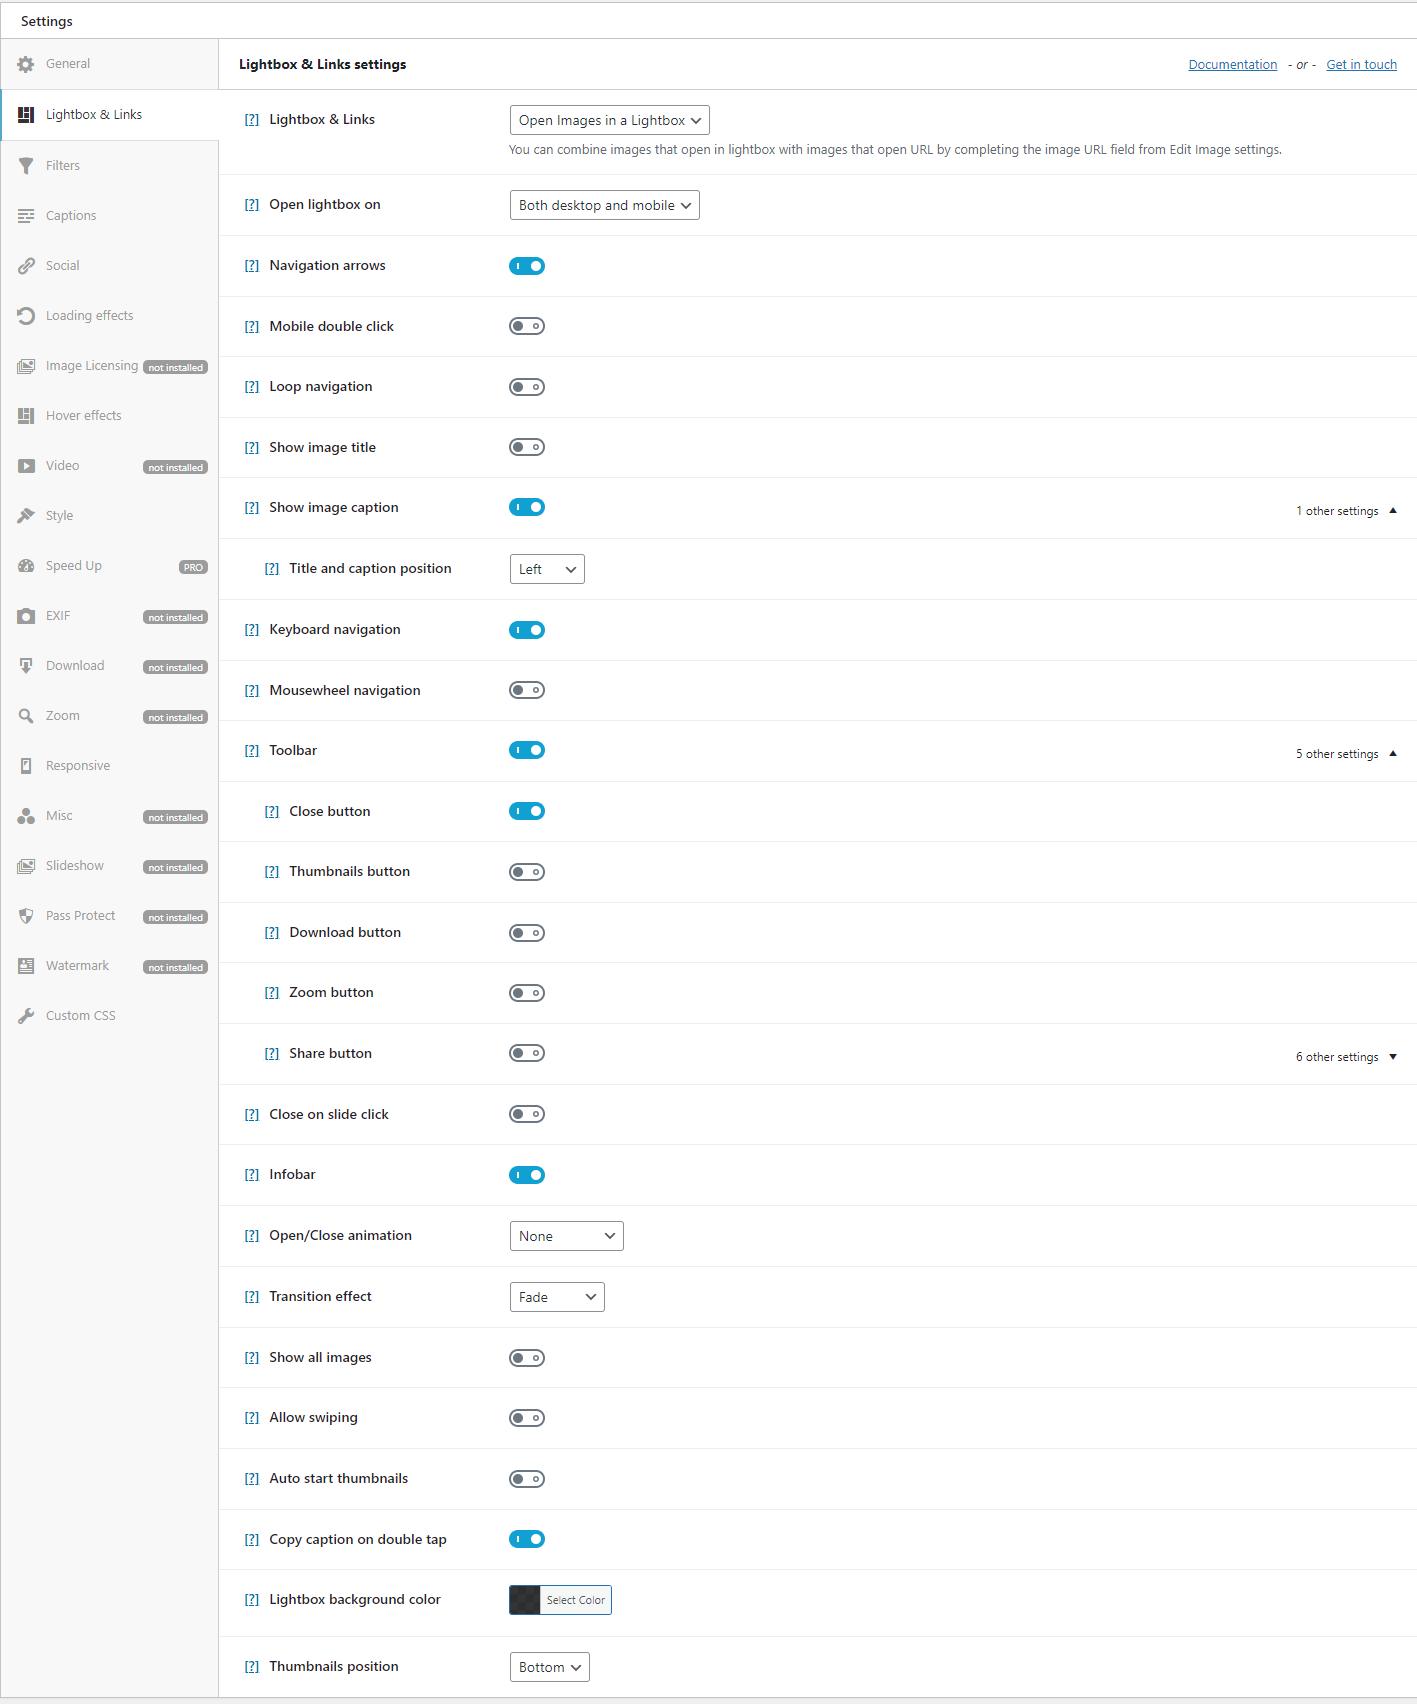
After you have set up your images’ size, go to Lightbox and Links. Here you can choose to open your image gallery in a beautiful Lightbox.
The Modula plugin also allows you to customize the thumbnail display. Scrolling down the page, you will find the thumbnail settings.
What can you do in this section?
- Add the thumbnails button in the Lightbox toolbar.
- Auto start thumbnails – display thumbnails on lightbox opening.
- Thumb axis – select vertical or horizontal scrolling for thumbnails.
- Thumbnails at the bottom – place the thumbnails at the bottom of the lightbox.
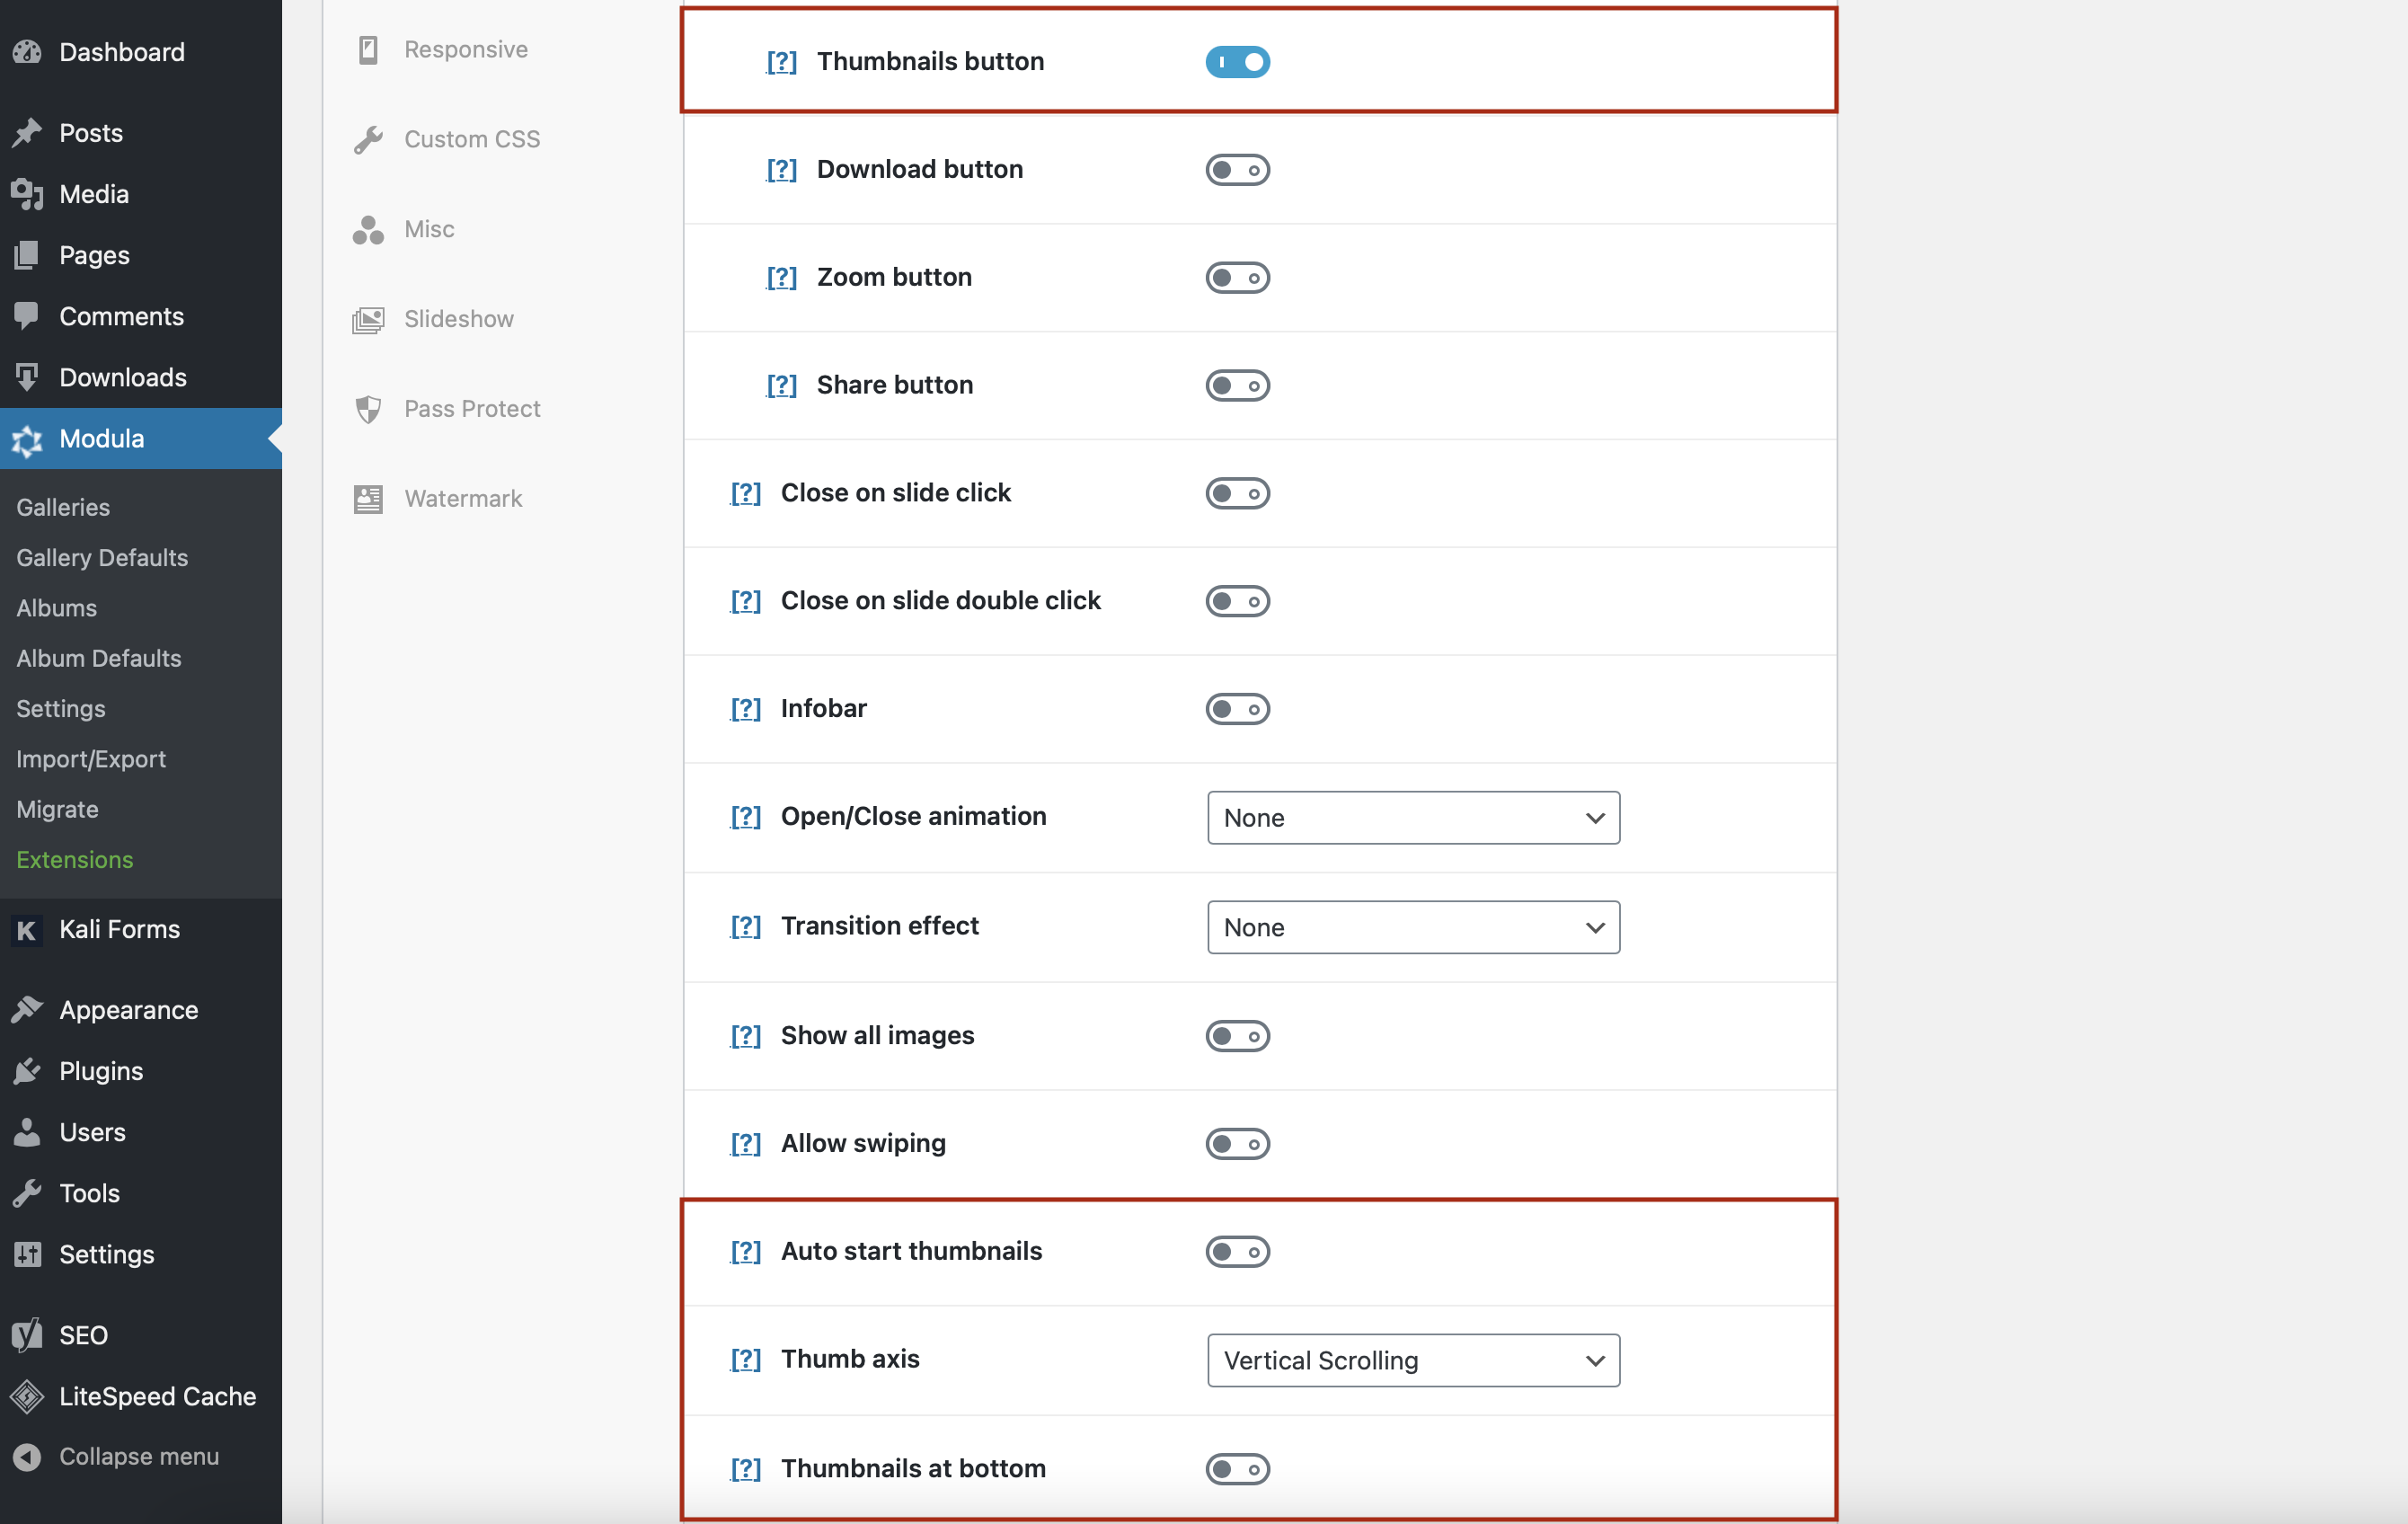
Add close/open animation, transition effects, and many other dynamic effects.
If you need to add external links to your thumbnails, here’s an article on how to add links to images.
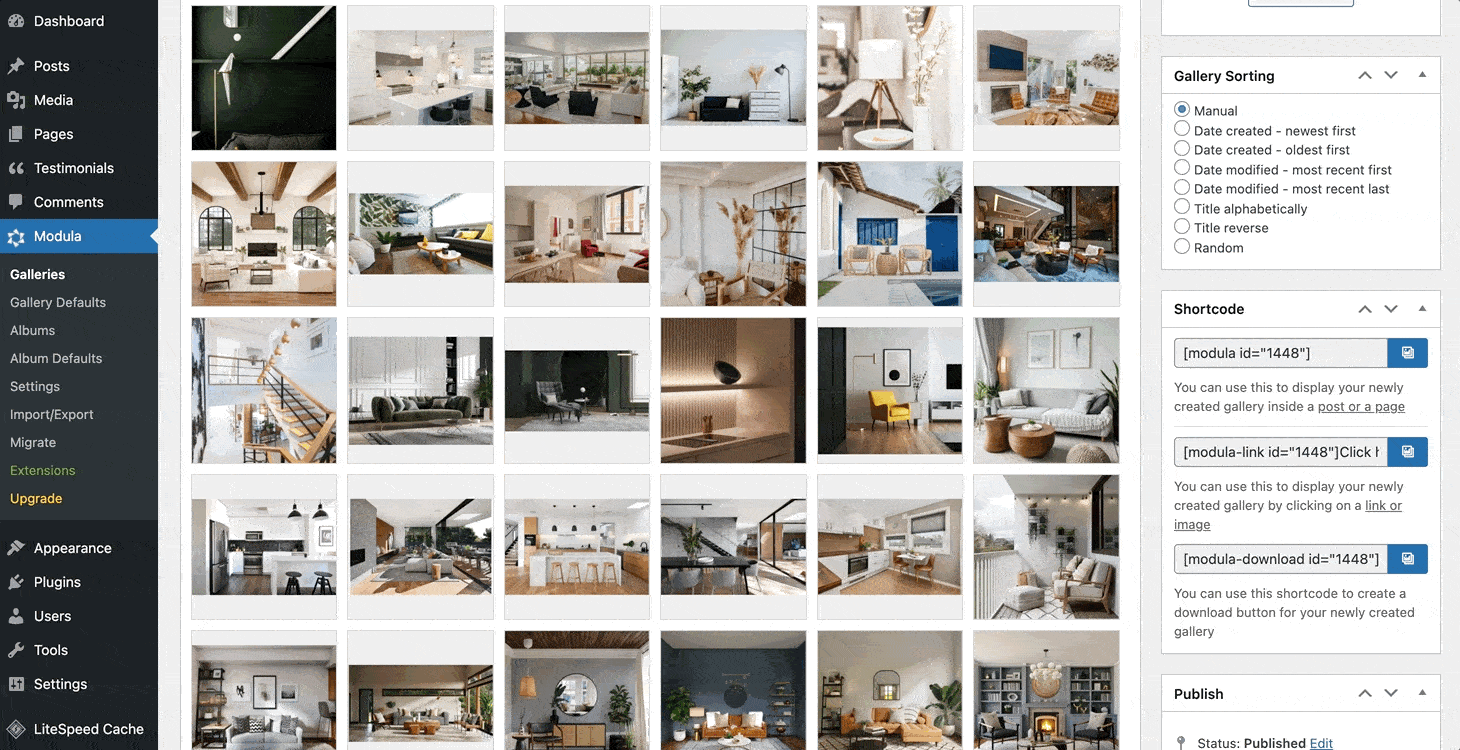
Step 3: Save your image gallery and add it to your website
Once you have customized your thumbnail gallery, don’t forget to click on Save Gallery. You don’t want to lose all the changes and have to start over!
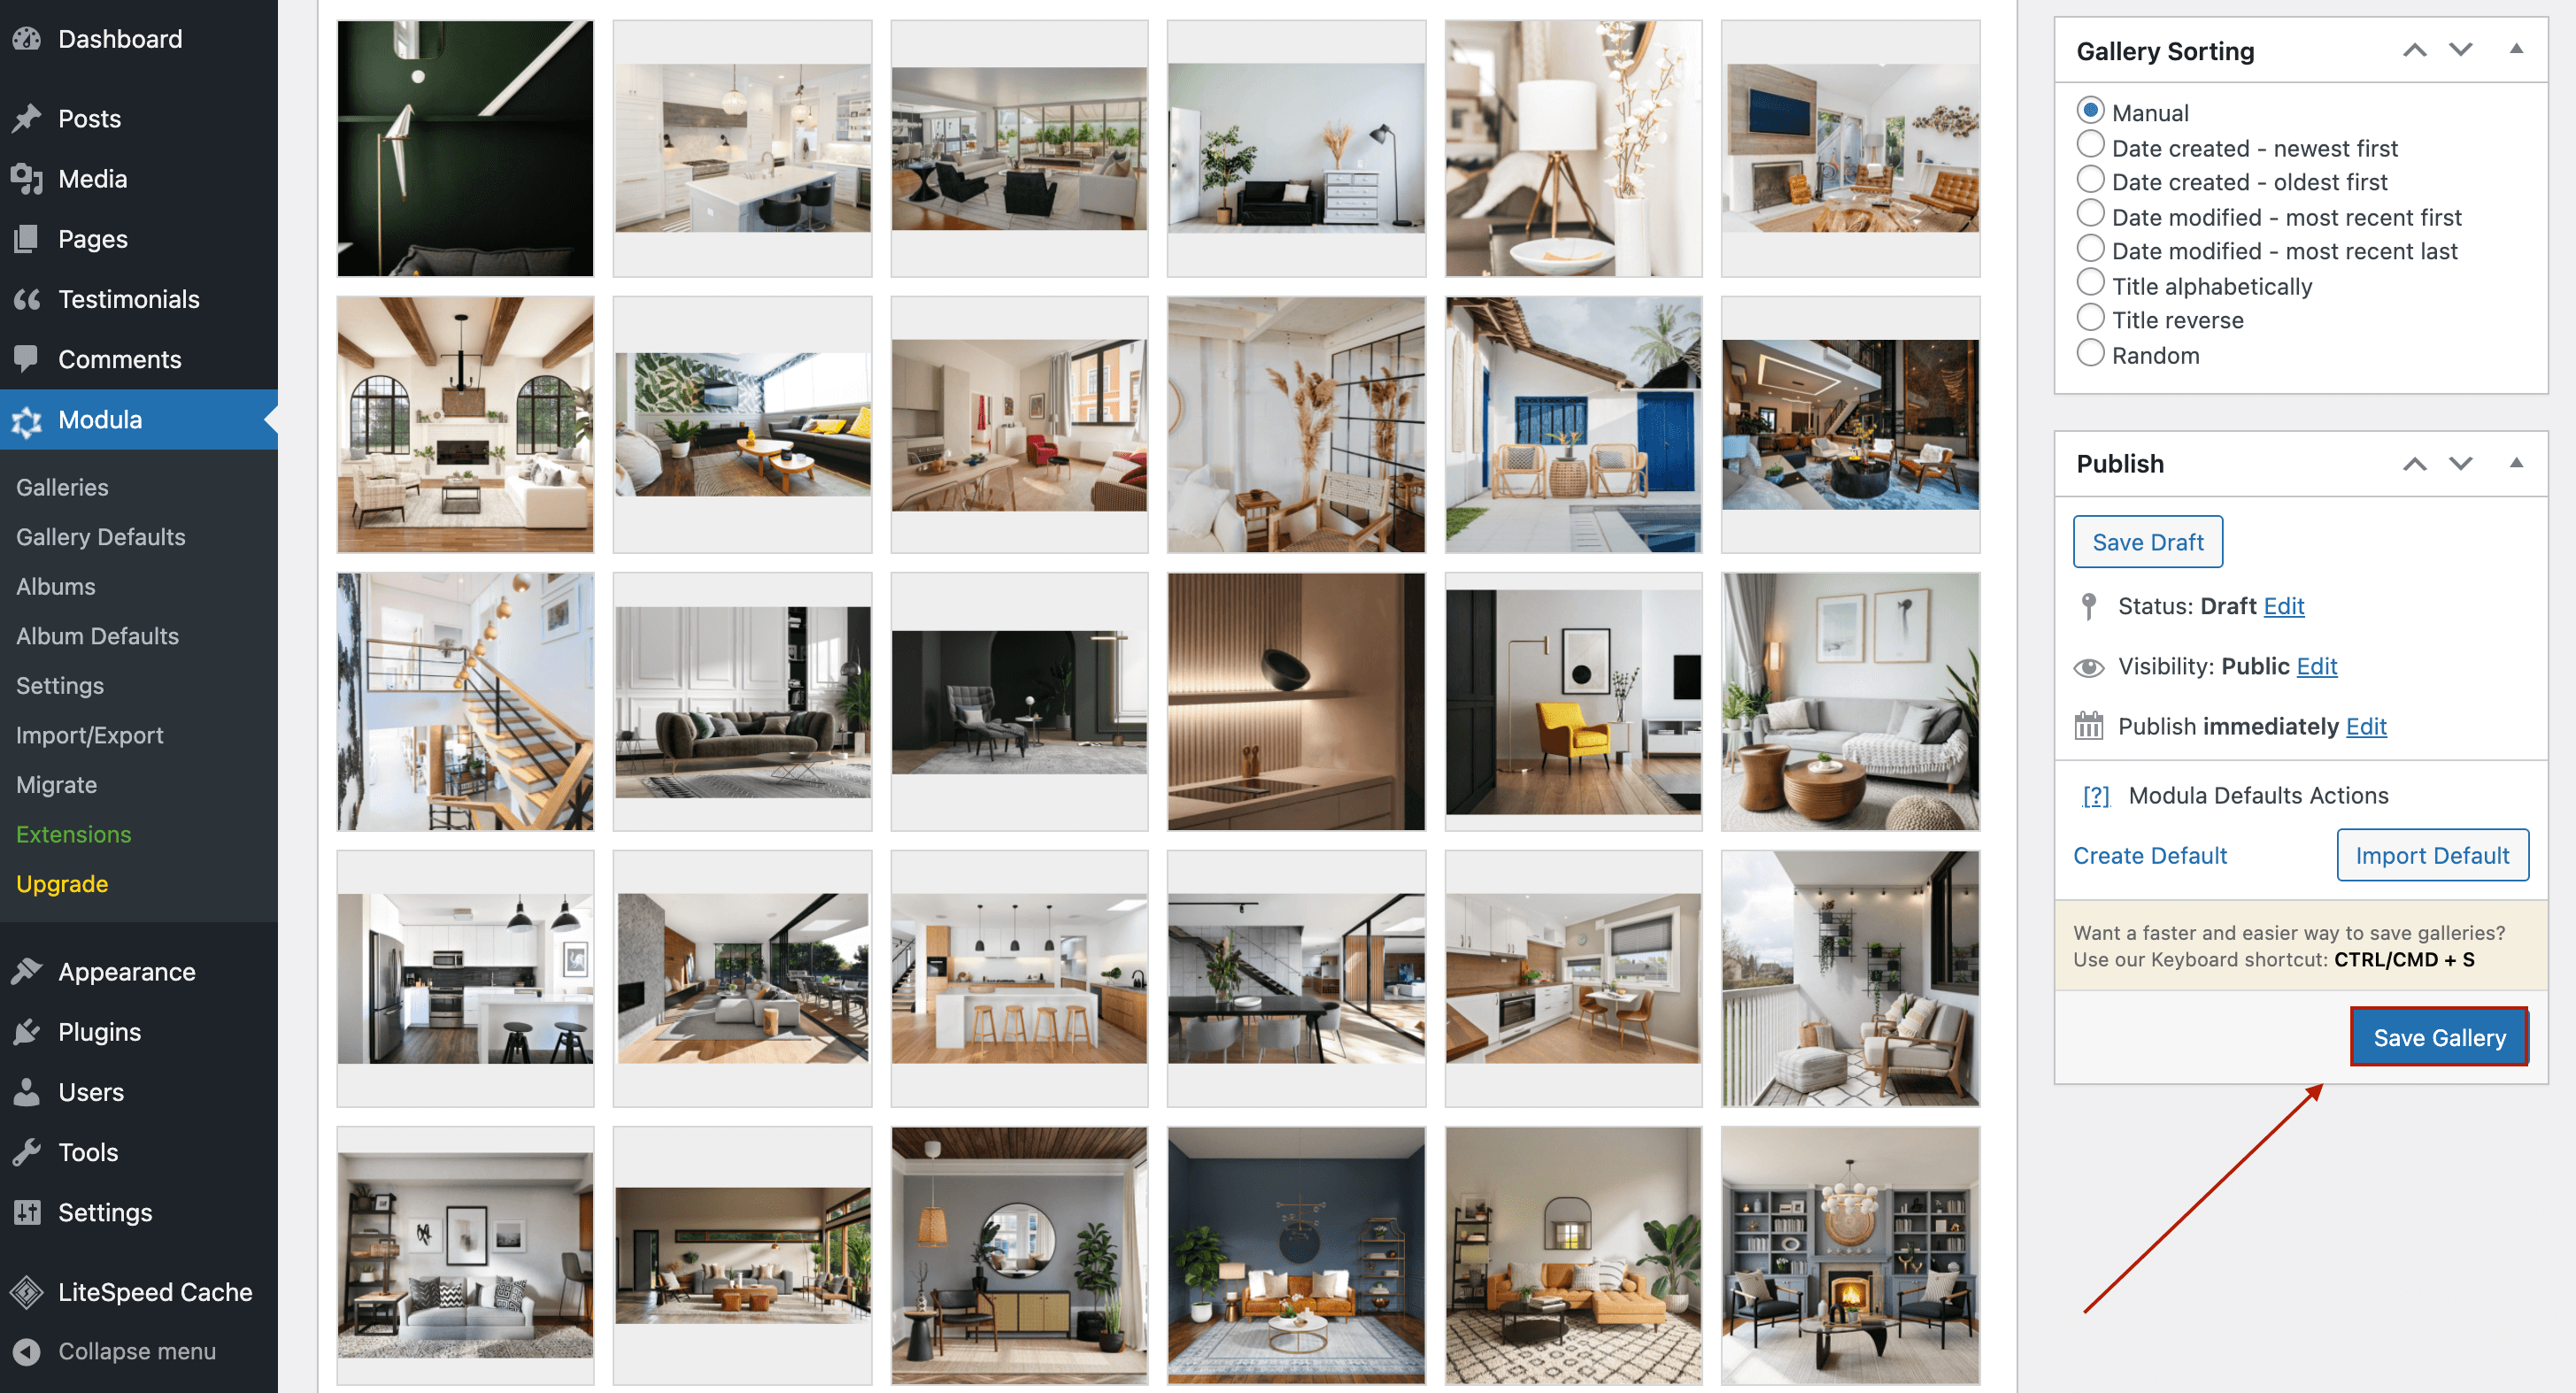
After you save your WordPress thumbnail gallery, Modula will generate a shortcode for your gallery.
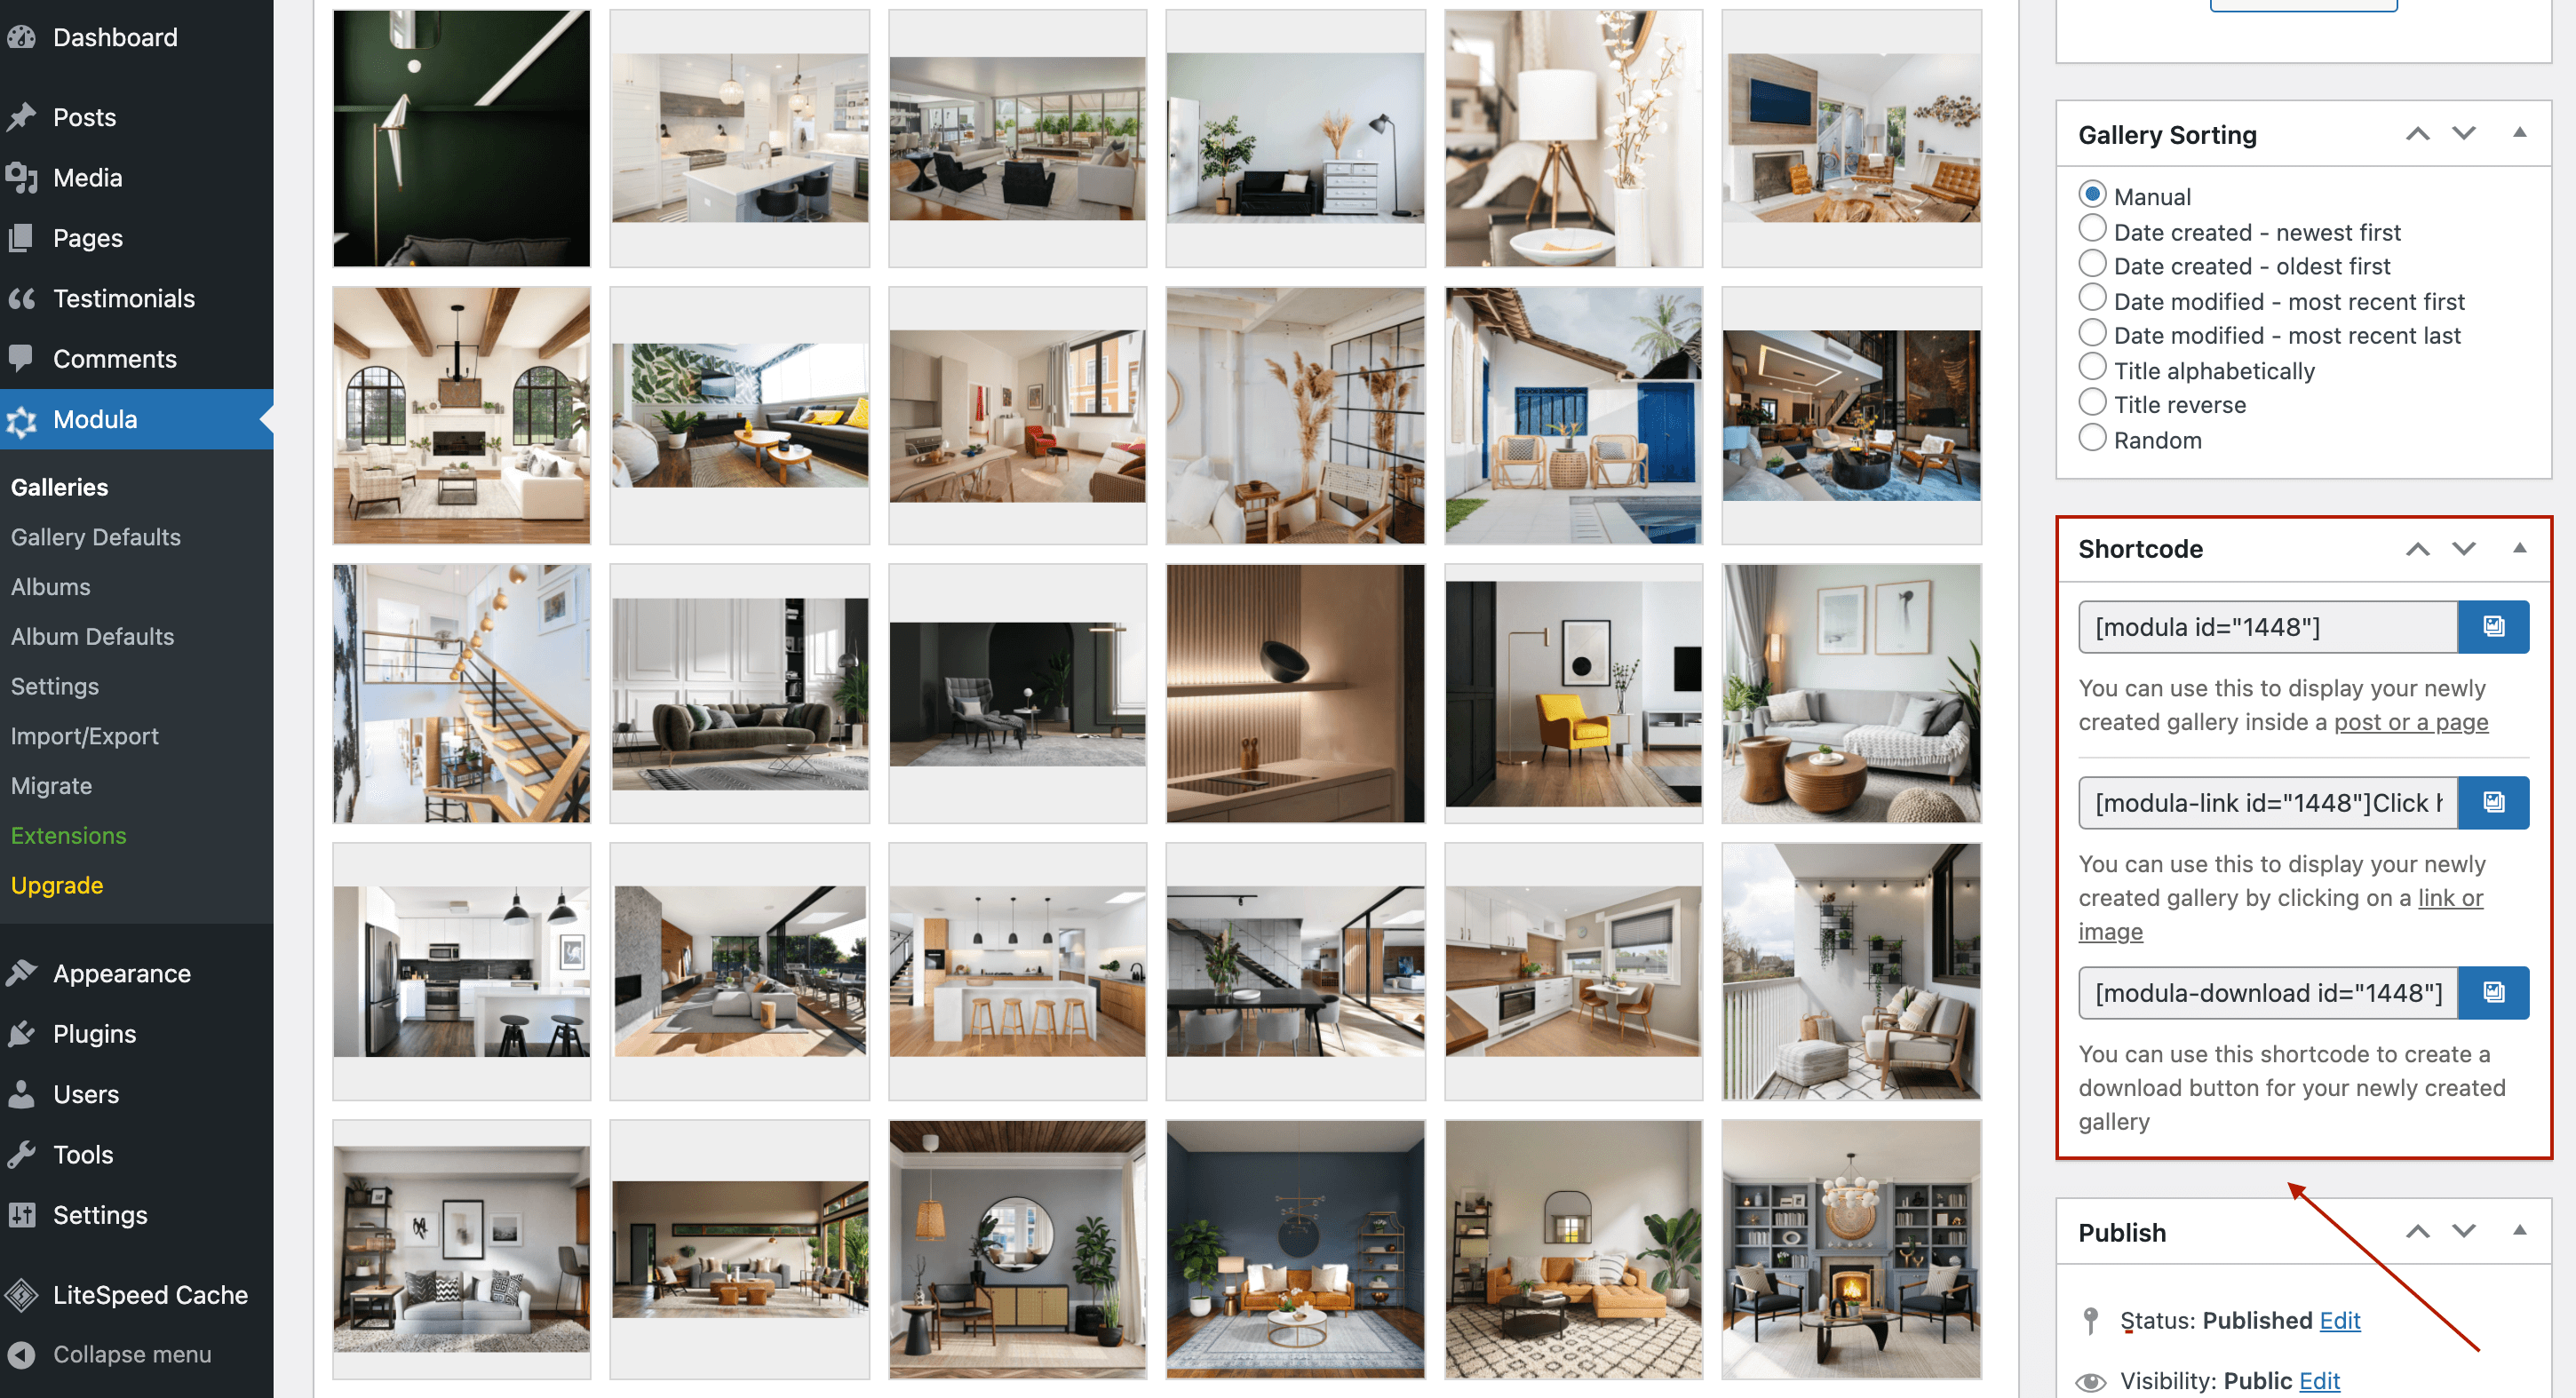
All you have to do now is to copy the shortcode and paste it into your page.
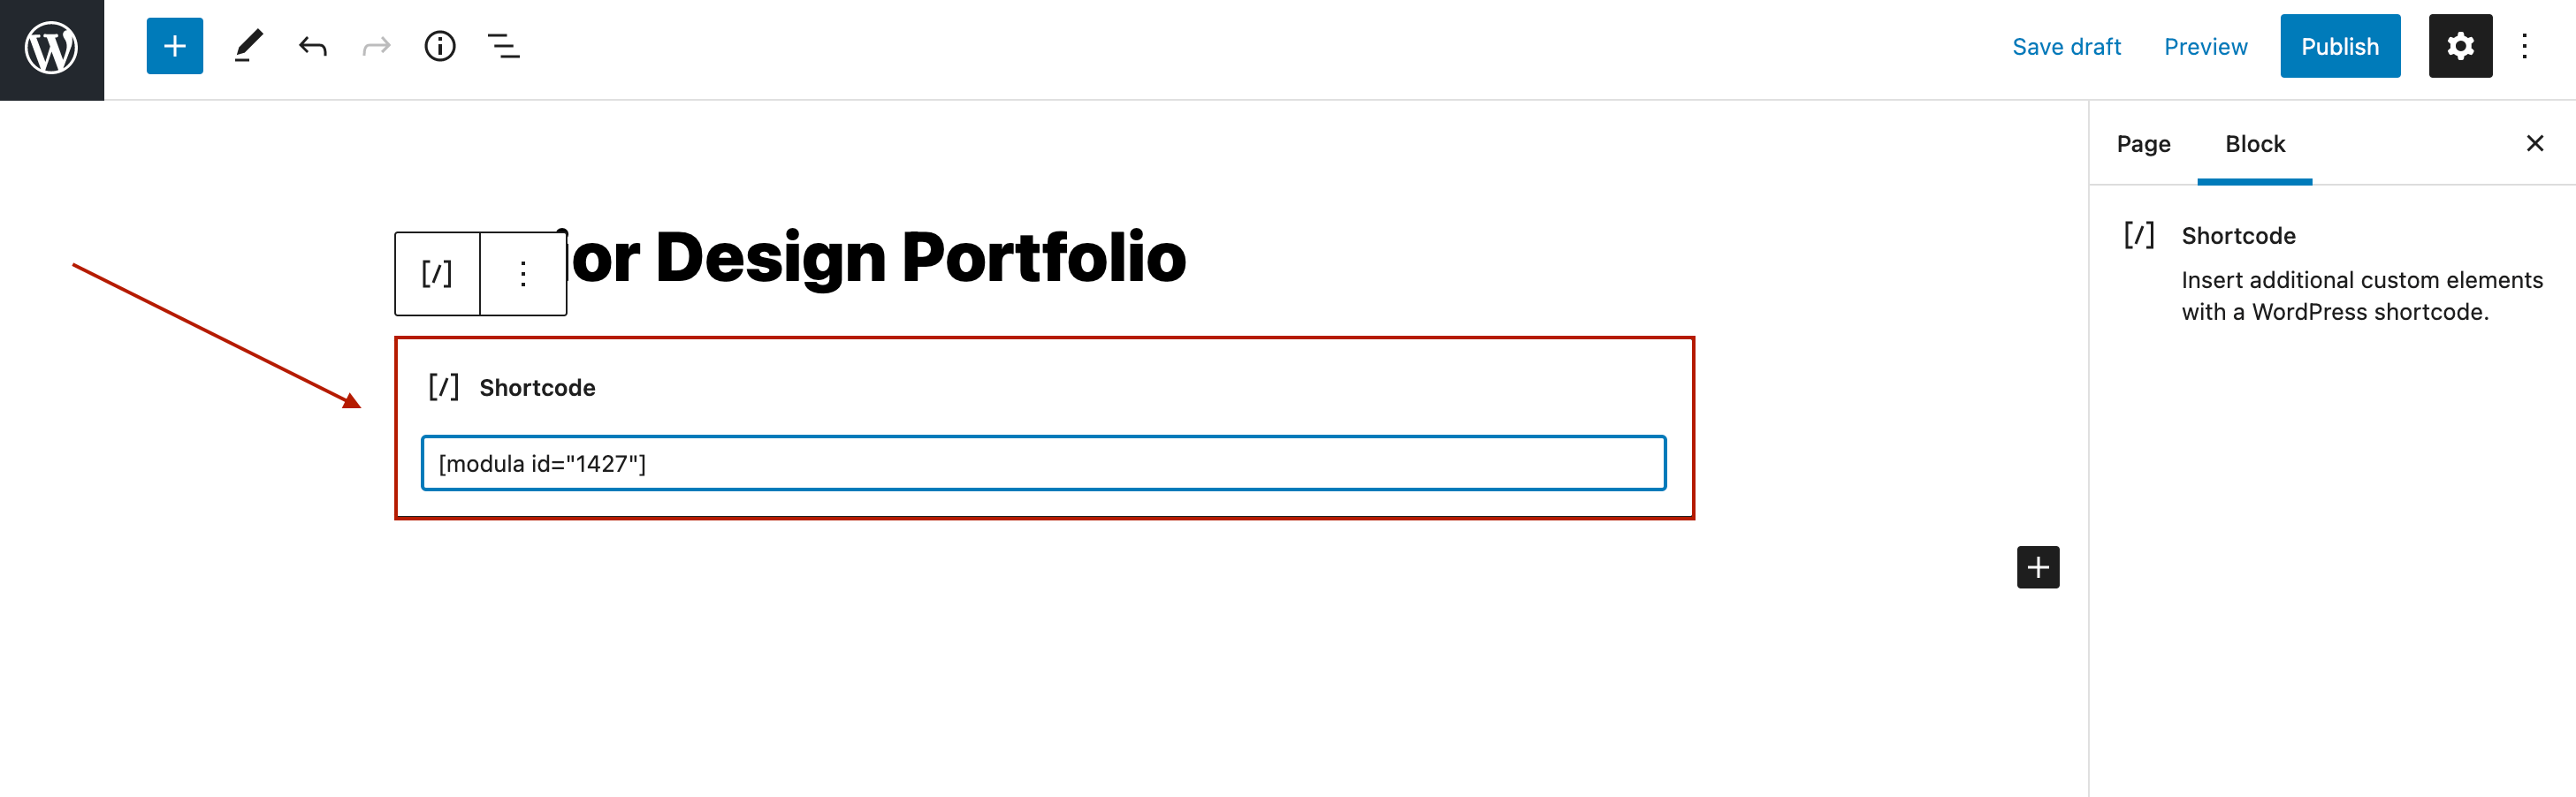
Click Publish, and let’s look at the Modula thumbnail gallery.
Final thoughts
You can go with the WordPress default gallery if you want to create basic galleries.
But if you want to improve the user experience, streamline the navigation process, and create visually appealing galleries, Modula is a better solution.
Not only can you display image galleries with thumbnails, but you can also have complete control over the appearance of your galleries.
All you need to do is:
- Create a new gallery and set the thumbnail image size.
- Allow images to open in a Lightbox with thumbnails at the bottom, and add a thumbnail axis and keyboard navigation.
- Add the image gallery with thumbnails to your website.
You can use all of these functionalities by getting the Starter Pricing Plan.
Modula Gallery Plugin
Create stunning, responsive photo galleries with ease. Showcase your work, captivate your audience, and boost engagement. You don’t need to do any coding.
