Are you tired of boring, lackluster websites that fail to grab your audience’s attention? Well, fret no more! Whether you’re a website owner, web designer, or WordPress enthusiast, get ready to unleash your creativity and captivate your audience with visually stunning video galleries.
So, grab your popcorn (or your favorite snack), and let’s embark on this step-by-step adventure. I’ll show you how to wield the powers of Modula and Visual Composer to create mesmerizing video galleries that will leave your visitors in awe.
Table of contents
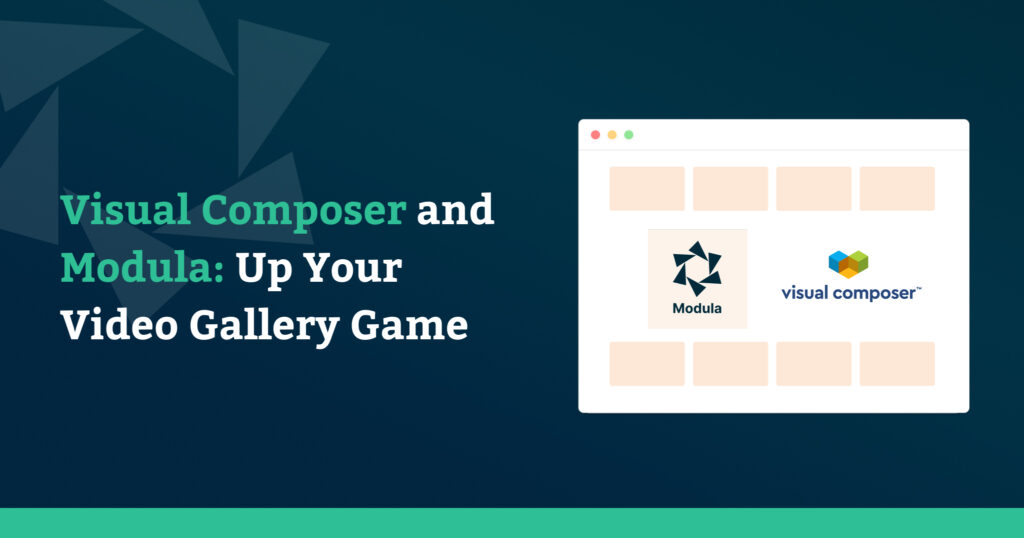
Understanding Modula and Visual Composer
Gaining a solid understanding of Modula and Visual Composer is the first step towards unleashing your creativity and creating jaw-dropping video galleries. So, before we jump into the exciting world of Modula galleries with Visual Composer, let’s take a moment to get acquainted with these powerful tools that will be the driving force behind your visual masterpieces.
About Visual Composer
Let’s start with Visual Composer. This popular website builder takes the art of designing and customizing websites to a new level. With its drag-and-drop interface, you can say goodbye to tedious coding and hello to endless creative possibilities.
What makes Visual Composer an absolute gem is its seamless integration with Modula. Combining these two powerhouses means you have all the tools to create beautiful video galleries to make your website stand out.
About Modula
Now, let’s turn our attention to Modula. This incredible WordPress gallery plugin is a game-changer in effortlessly creating and customizing stunning image and video galleries. With Modula’s user-friendly interface and a treasure trove of options, you can showcase your photographs, artwork, or products like a true pro. Get ready to see your visuals come to life in ways you never thought possible.

Modula Gallery Plugin
Create stunning, responsive photo galleries with ease. Showcase your work, captivate your audience, and boost engagement. You don’t need to do any coding.
Modula and Visual Composer are about to become your dynamic duo, whether you’re a website owner, a web designer or developer, or someone with an insatiable passion for stunning visuals. Together, they’ll unlock a world of creative potential, allowing you to craft video galleries (or image ones) that leave a lasting impression.
Getting Started: Setting up Modula and Visual Composer
Before unleashing your creative powers with Modula and Visual Composer, ensure everything is set up and ready to go.
In this section, I’ll walk you through installing and activating the Modula plugin and Visual Composer.
Rest assured; this guide will cover the steps using the free versions of Modula and Visual Composer. If you’d like to unlock the full potential of these incredible tools, consider upgrading to the pro versions.
Installing and Activating Modula
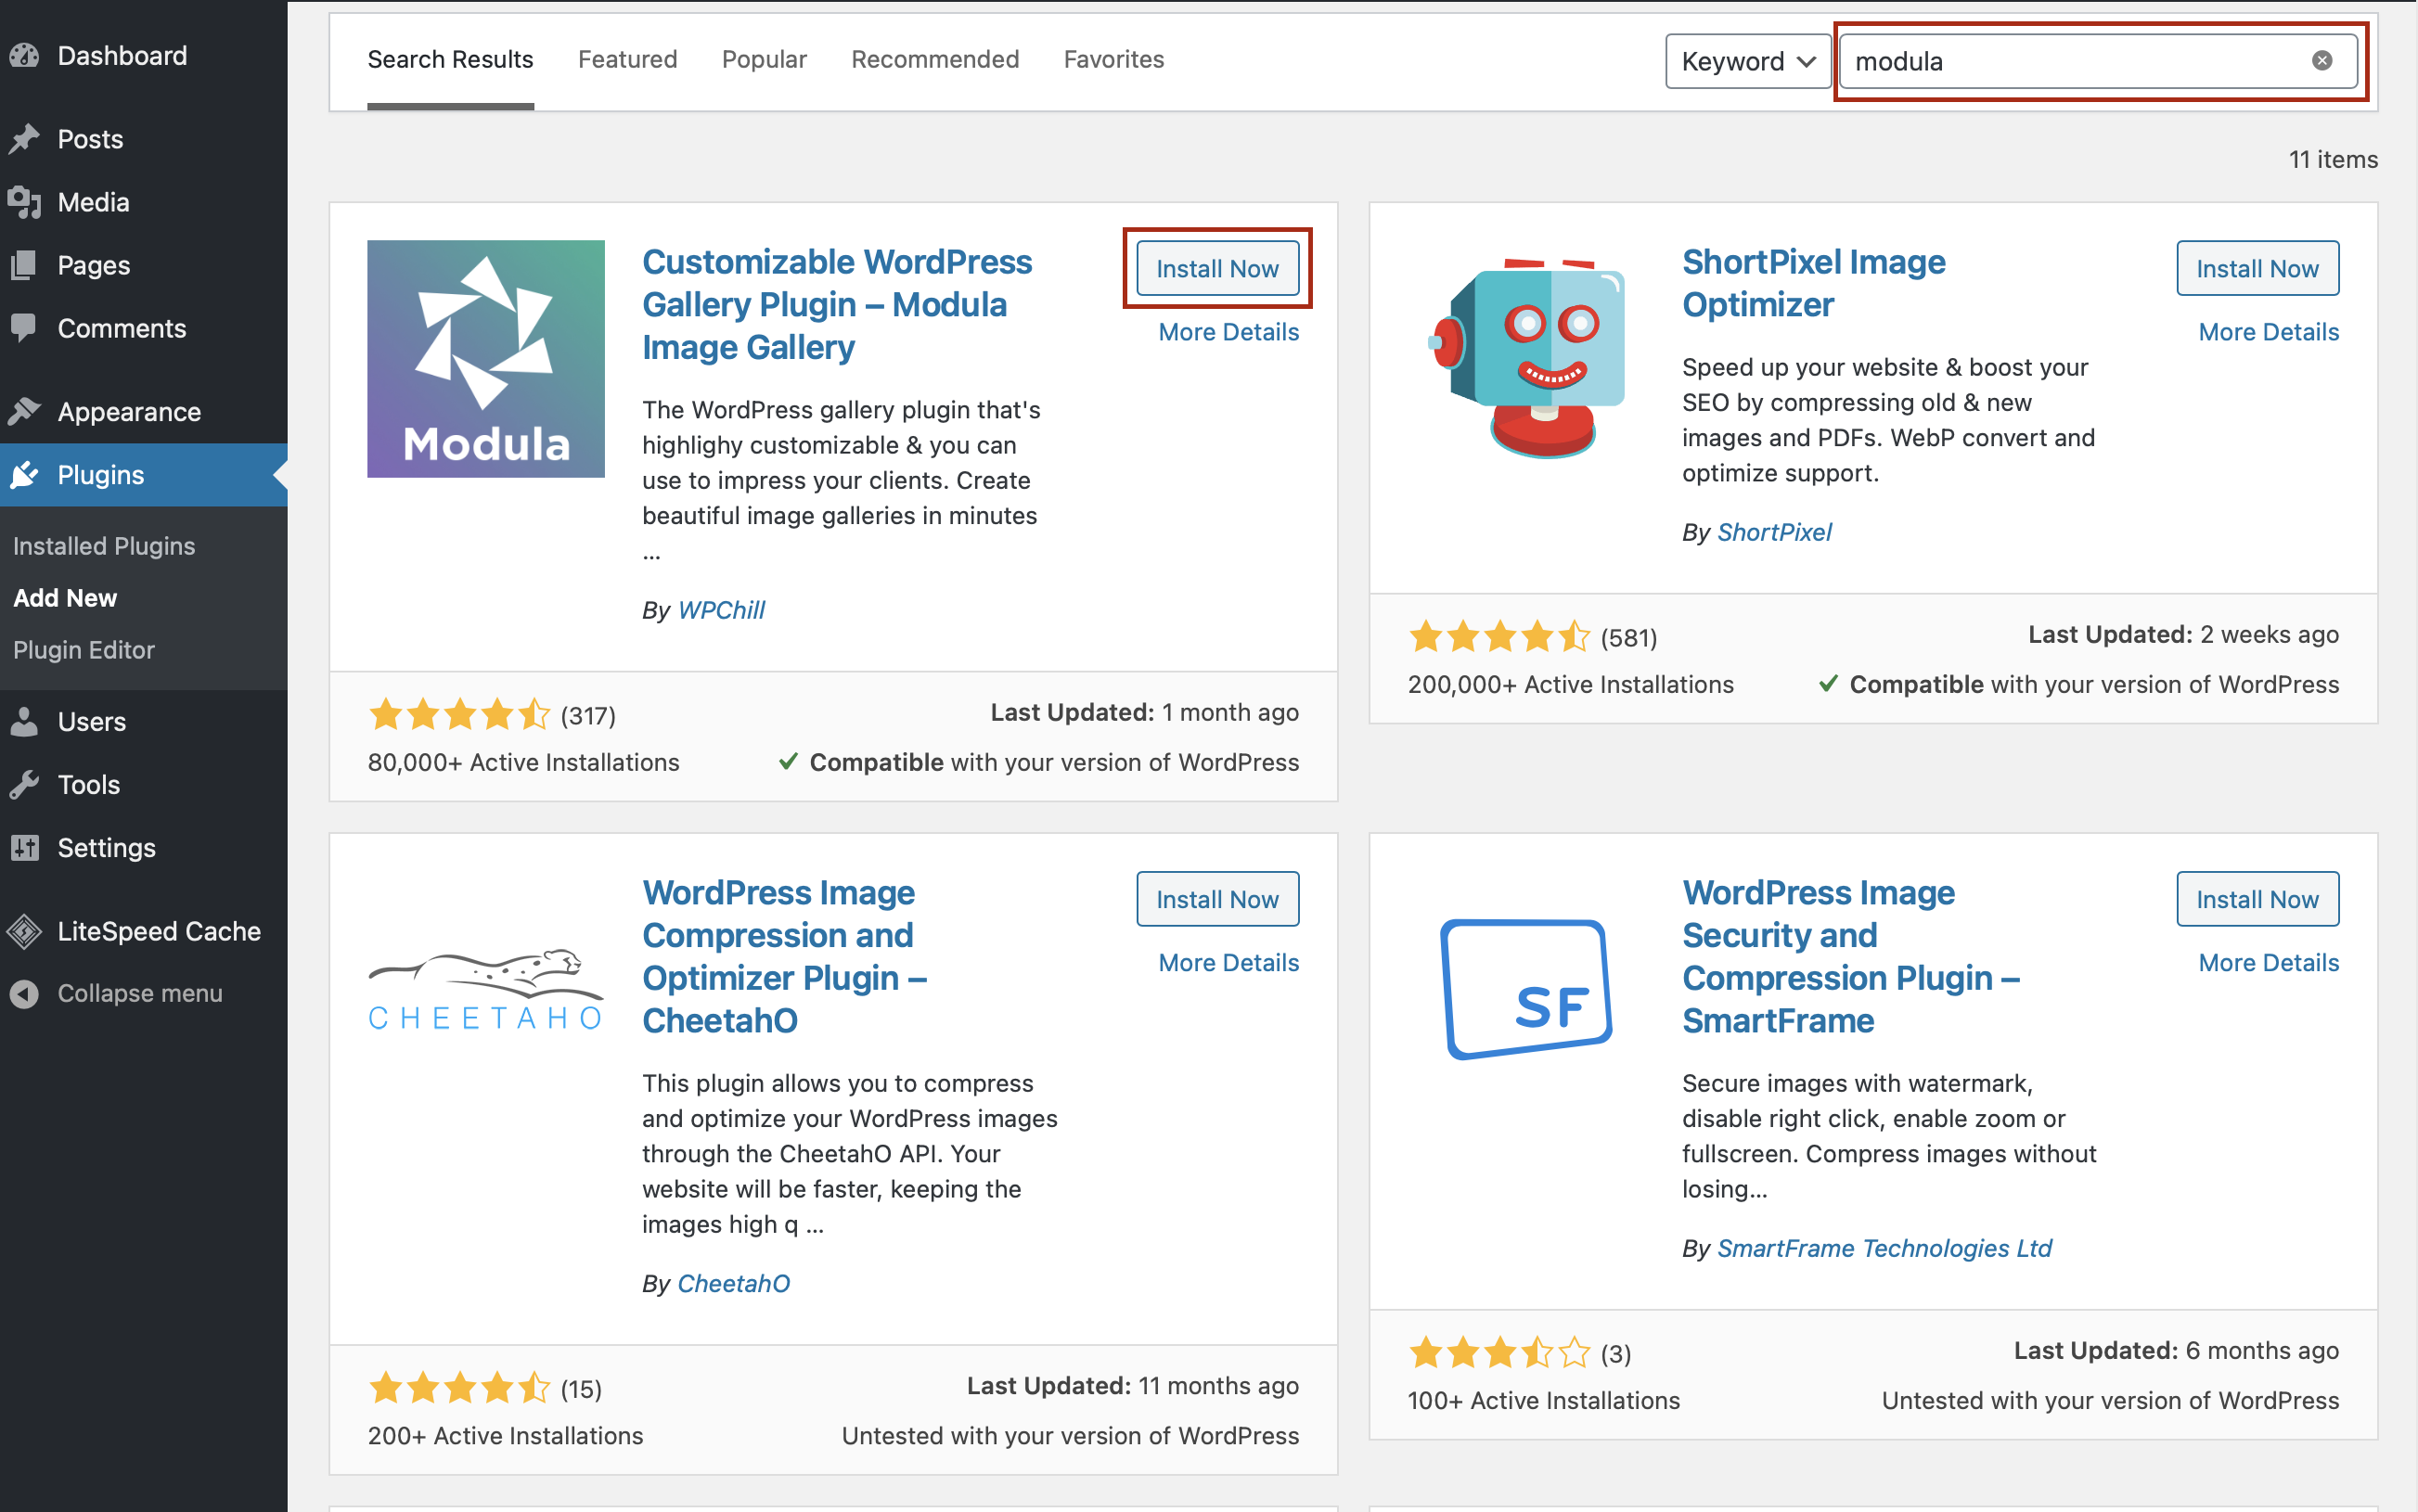
To begin the installation process, head to your WordPress dashboard and go to the “Plugins” section.
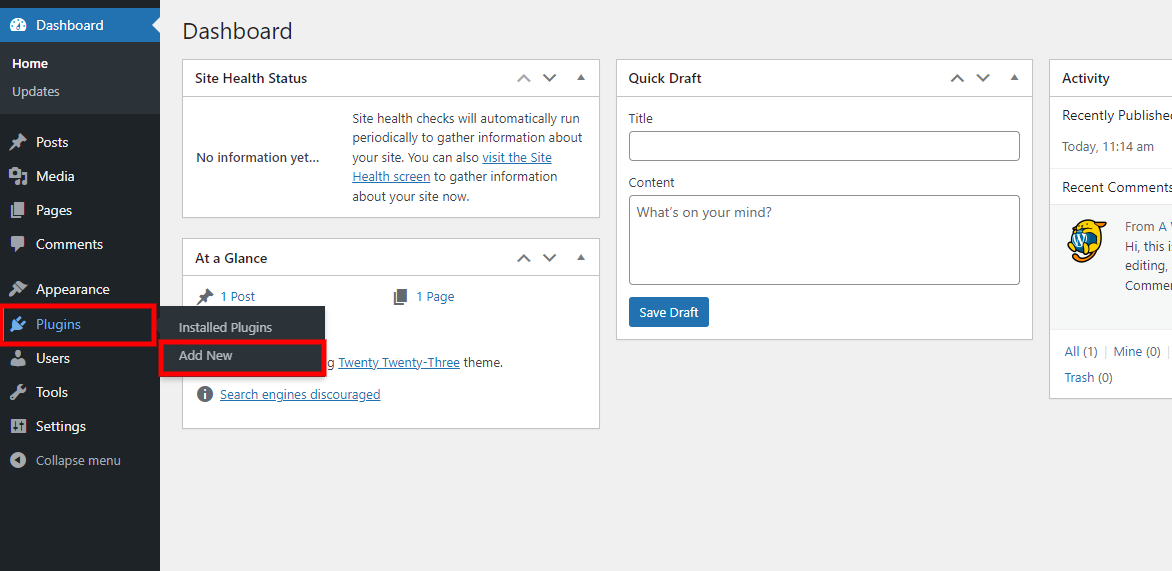
Click on the “Add New” button in your WordPress dashboard’s plugins section. In the search bar, type “Modula” and hit enter to search for the plugin in the WordPress plugin repository.
Once you locate the Modula plugin in the search results, click the “Install Now” button. Wait for the installation to complete, and then click on the “Activate” button to activate the Modula plugin.
To create video galleries, you will need the Modula Video extension, which comes with the Starter pack or higher. To install extensions, make sure to check our documentation.
Modula Gallery Plugin
Create stunning, responsive photo galleries with ease. Showcase your work, captivate your audience, and boost engagement. You don’t need to do any coding.
Installing and Activating Visual Composer
Installing Visual Composer is as easy as a few clicks. Here’s how you can add this powerful plugin to your WordPress website.
In your WordPress dashboard, navigate to the “Plugins” section and click “Add New.” In the search bar, enter “Visual Composer” and hit enter to search for the plugin in the WordPress plugin repository.
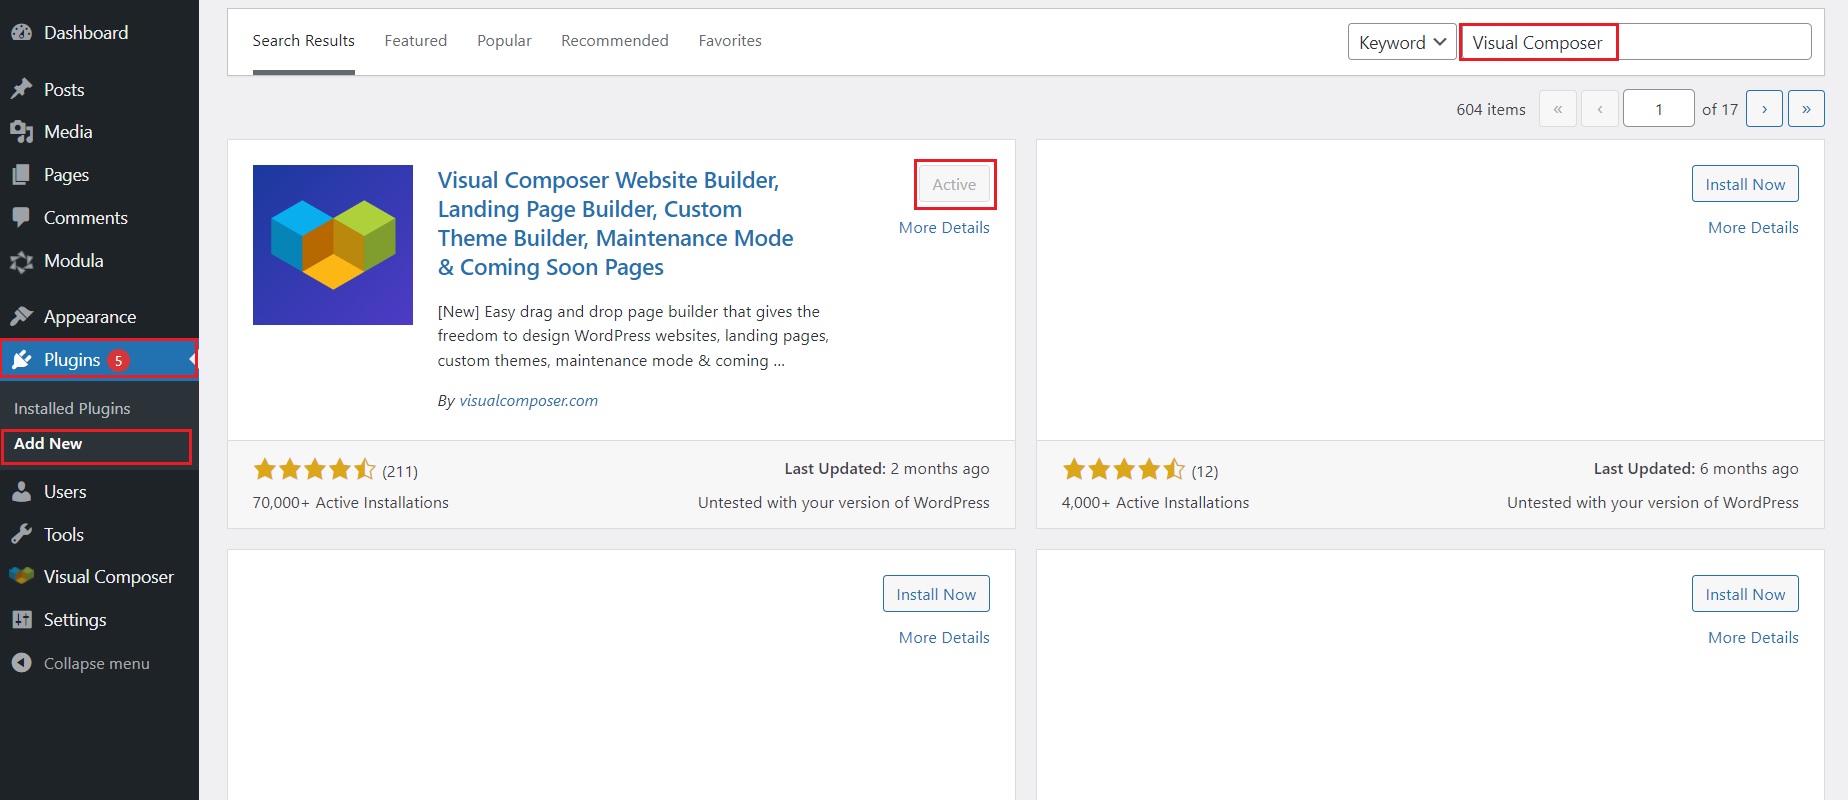
Once you find the Visual Composer plugin in the search results, click the “Install Now” button. Wait for the installation to complete, and then click on the “Activate” button to activate the Visual Composer plugin.
See? It was THAT easy!
Now, your website is equipped with the dynamic duo of Modula and Visual Composer, ready to unleash their full potential in creating captivating video galleries!
Creating Your First Visual Composer Page
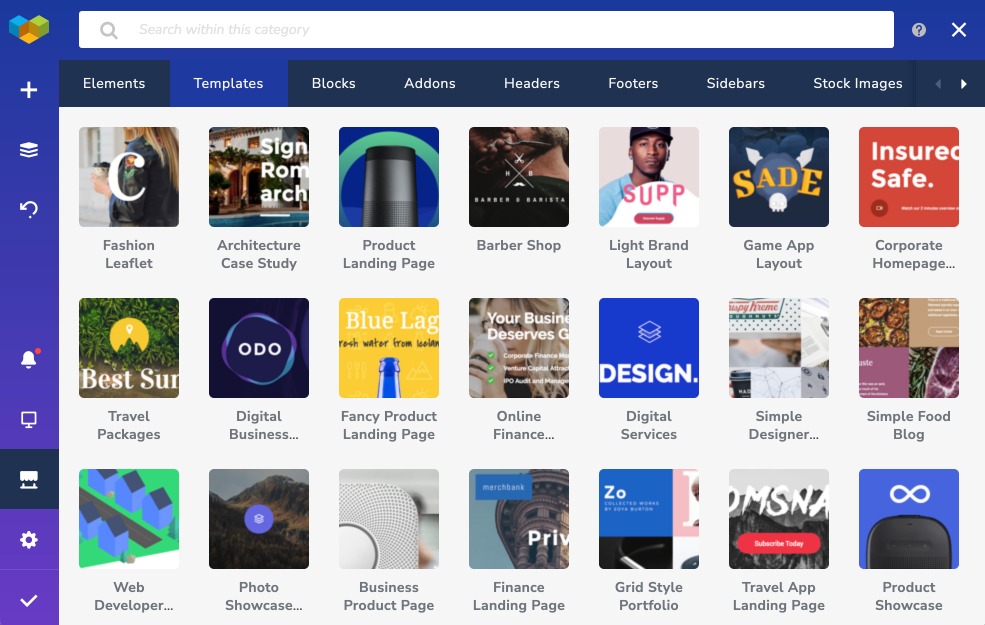
If you want to create a Visual Composer page quickly and effortlessly, you’re in luck! There’s a range of templates available for your convenience. In the free version of Visual Composer, you can choose from 10 templates; the premium version offers over 200 templates. These templates are designed to save you time and energy by providing pre-made layouts that you can easily customize to suit your needs.
Use the Pre-made Templates
I recommend exploring the available templates if you need help figuring out where to begin. Once you find one that catches your eye, import it into Visual Composer and start personalizing it. You can modify the text, images, and colors to align with your branding and have the flexibility to add or remove elements as required.
Using a template is a fantastic way to kickstart your journey with Visual Composer, even if you don’t consider yourself a designer. With a touch of customization, you can create a professional-looking website quickly.
Quick Tips on Using Visual Composer
Here are some additional tips to enhance your Visual Composer page creation:
- Leverage the grid system to ensure proper alignment of your elements.
- Utilize the text editor to format your text effectively.
- Employ the image manager to add images to your page seamlessly.
- Use the media library to incorporate videos and audio files into your content.
- Explore the variety of shortcodes available to add special features to your page.
- With a little practice, you’ll soon become a pro at crafting stunning Visual Composer pages!
Design Freedom Using Templates
You have the freedom to fine-tune every little detail of the template design. Unleash your creativity by rearranging sections exchanging images and text, and exploring various fonts and sizes.
For more detailed instructions on how to create a page with Visual Composer, check out their step-by-step guide.
Visual Composer also offers a wide range of customization options for both structural elements and content elements:
- Structural elements: These serve as the fundamental building blocks for your page. Think of them as a solid base, sturdy walls, and supportive floors. You have sections, rows, and columns at your disposal, allowing you to play the role of an architect minus the need for a hard hat.
- Content elements: These captivating components bring your page to life, making it shine as bright as a disco ball. We’re referring to text blocks, images, buttons, and more. It’s akin to having a collection of exquisite decorations readily available, ready to impress anyone who visits your website.
Once you’ve established the structure of your page, let’s shift our focus to Modula and explore how you can effortlessly create a breathtaking video gallery to showcase on your Visual Composer page.
Creating Your First Modula Video Gallery
Now that you have Modula and Visual Composer page set up, let’s dive into creating your first Modula video gallery. The best part? You don’t need to be a tech wizard to accomplish this. Modula simplifies the entire process, making it incredibly user-friendly and enjoyable.
If this is your first time creating a gallery with Modula, I have this awesome guide for creating a video gallery with Modula.
Now Let’s Jump Straight Into the Actual Steps:
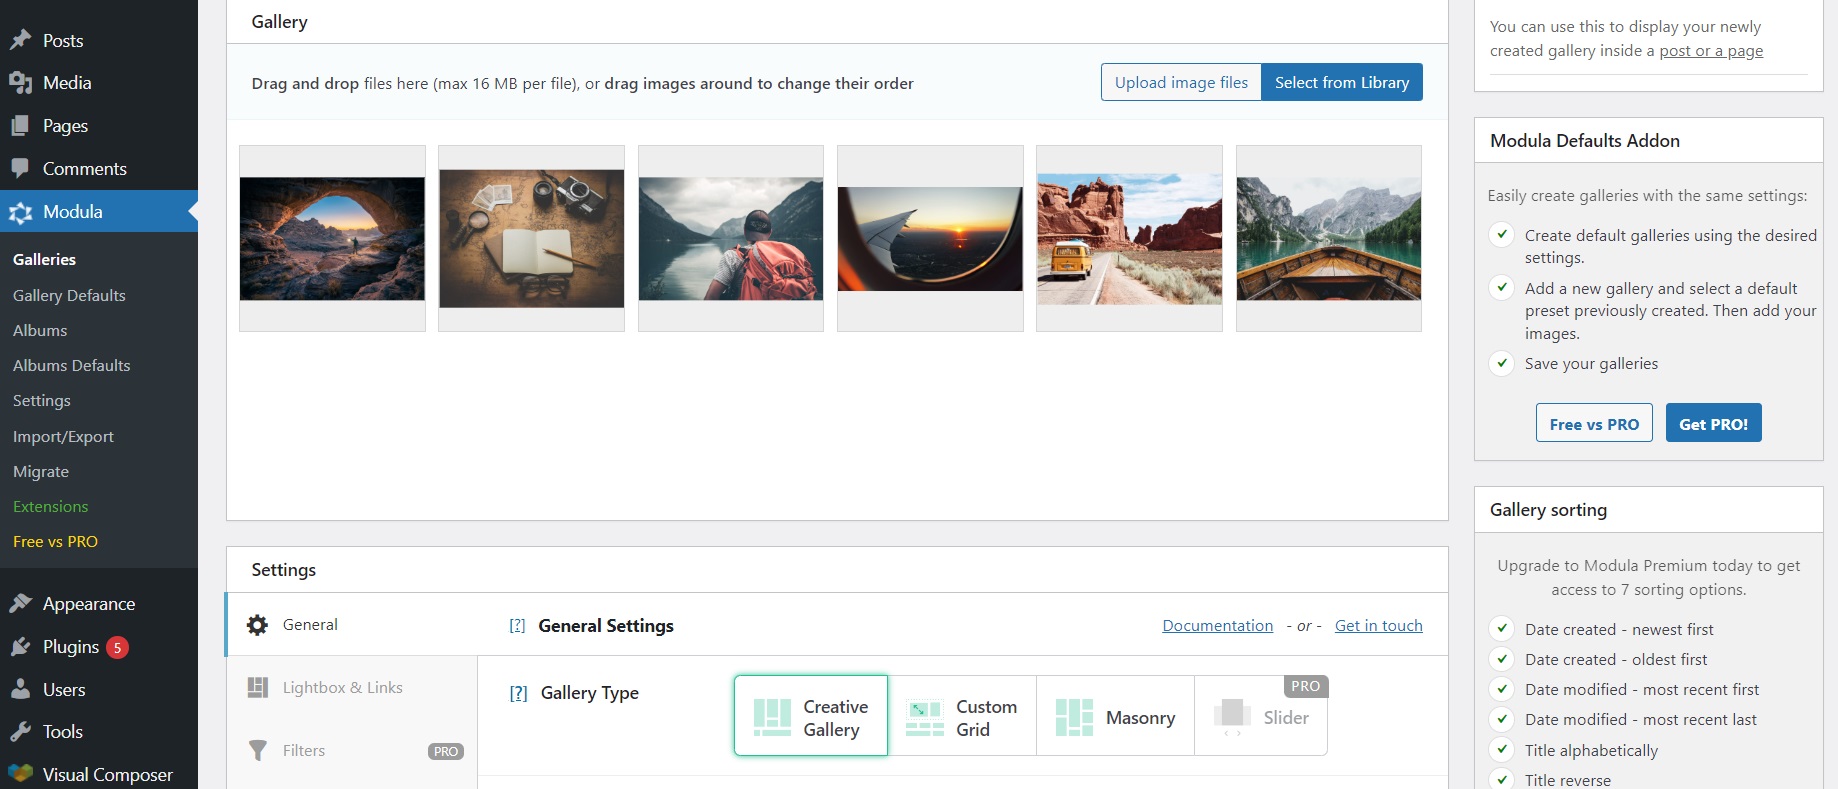
✔️ Uploading or Selecting Images: To begin, you must upload your desired images or select images from your WordPress Media Library. Select suggestive images for each video to make it easier to know which image corresponds to which video.
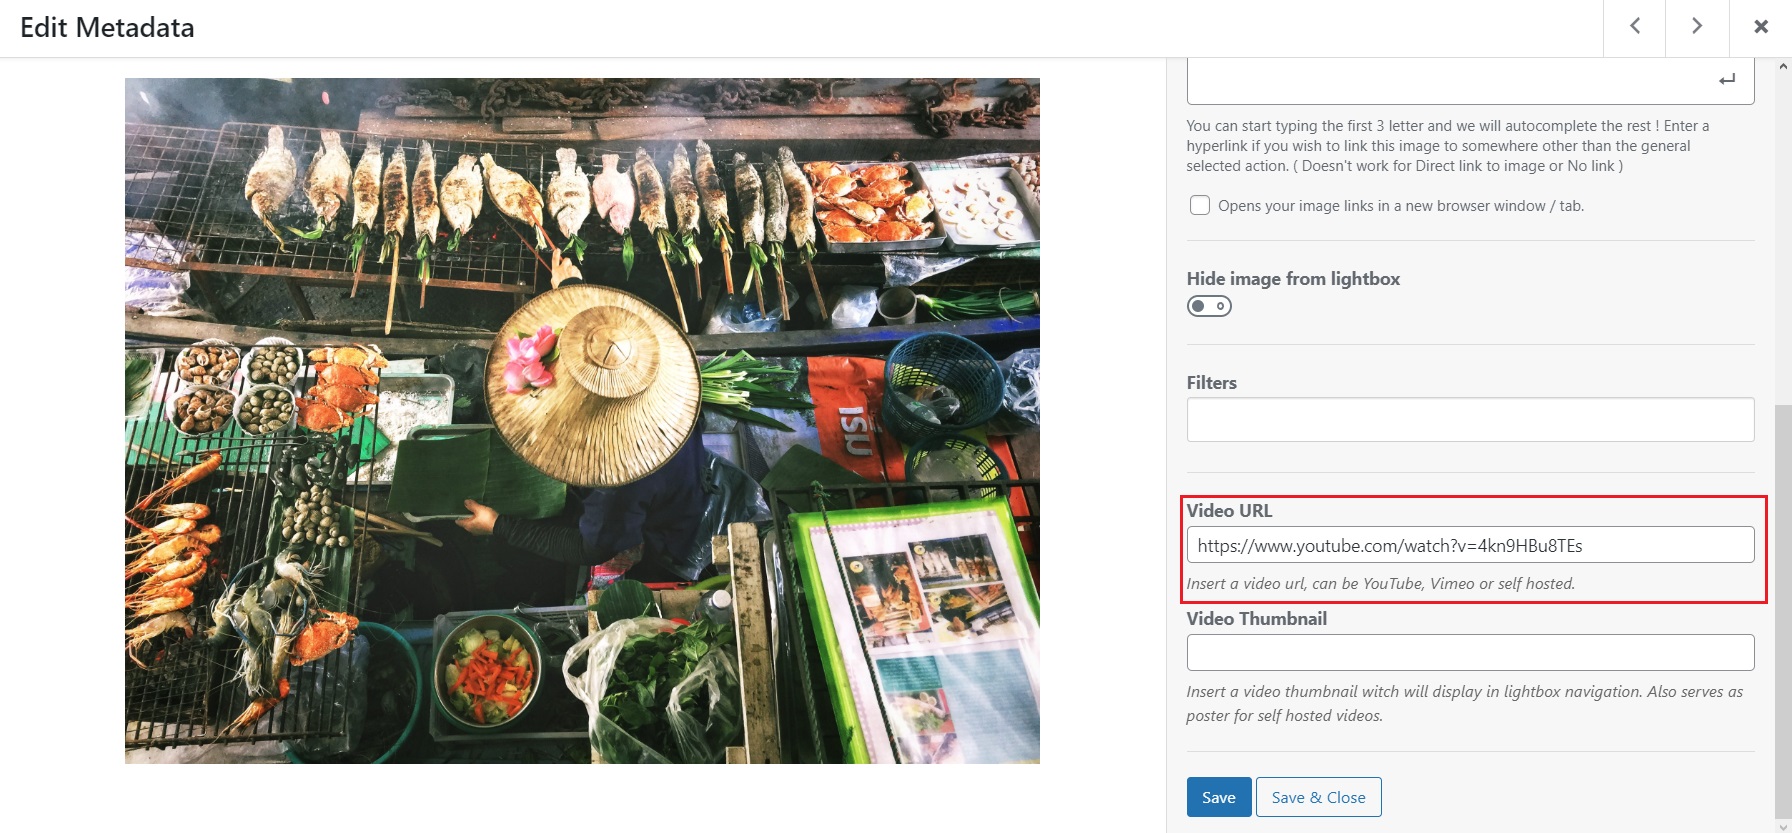
✔️ Adding Video URLs: Once your images are ready, it’s time to incorporate videos into your gallery. Click on the edit icon for each image, and scroll down until you find the “Video URL” section. Here, you have three options to choose from:
- YouTube video link: If your video is hosted on YouTube, paste the video’s URL into the Video URL field.
- Vimeo video link: Copy and paste the video’s URL into the Video URL field for Vimeo-hosted videos.
- Self-hosted video link: If your video is stored in your WordPress Media Library, enter the link to the video in the Video URL field.
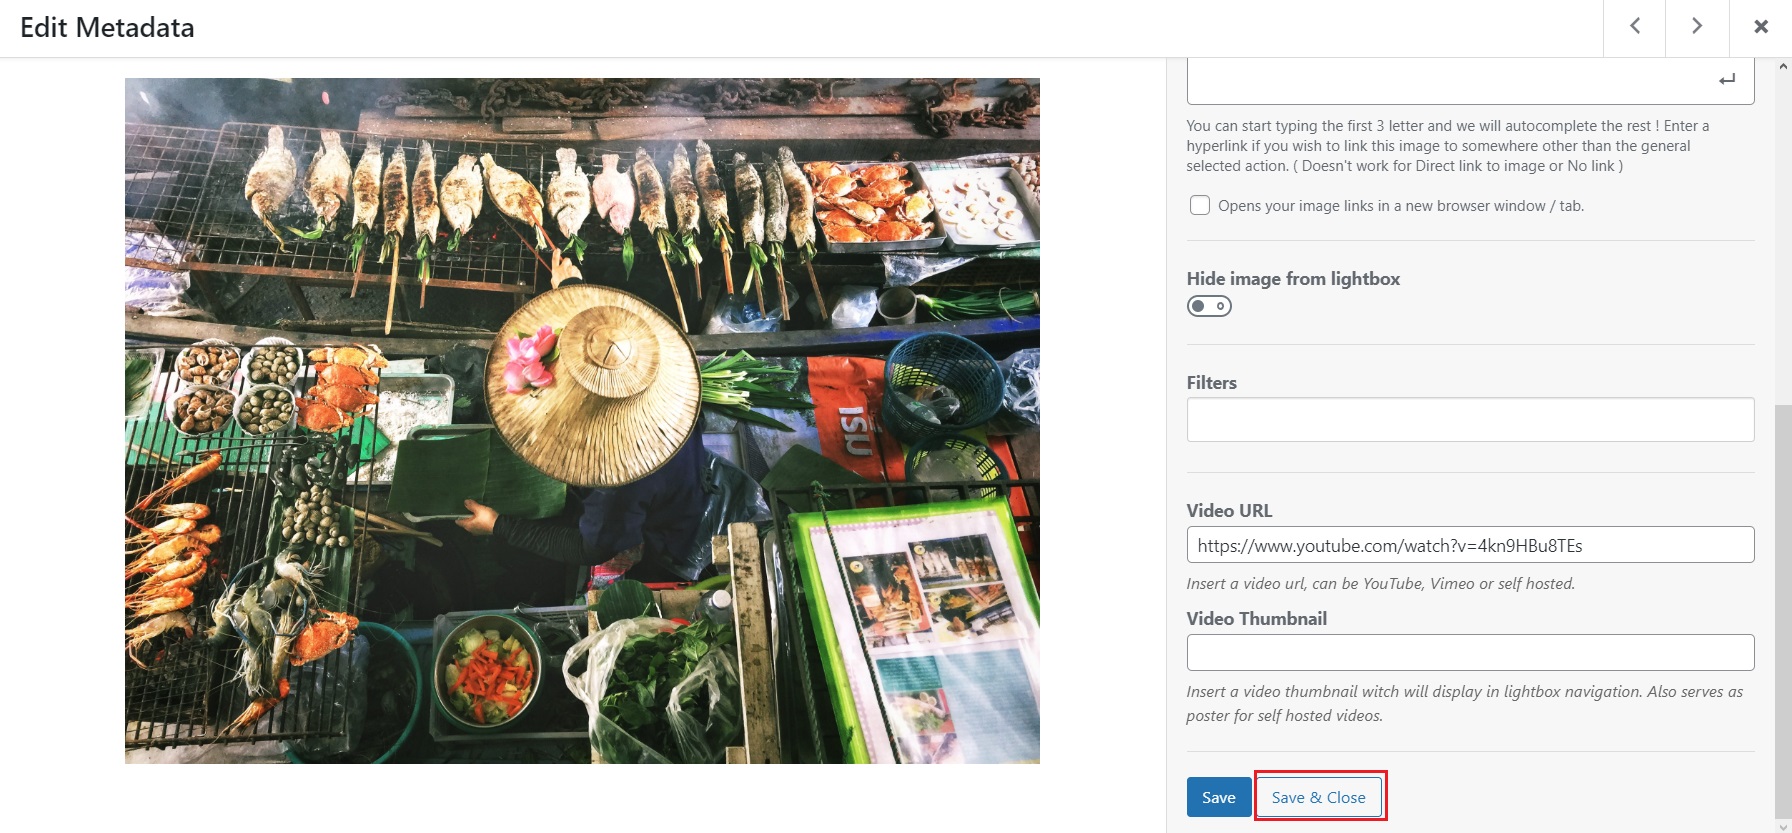
✔️ Saving changes: After pasting the appropriate video link, click the “Save & Close” button to save your changes for that particular image. Repeat this process for all the images you want to include in your video gallery, ensuring each image has its respective video URL attached.
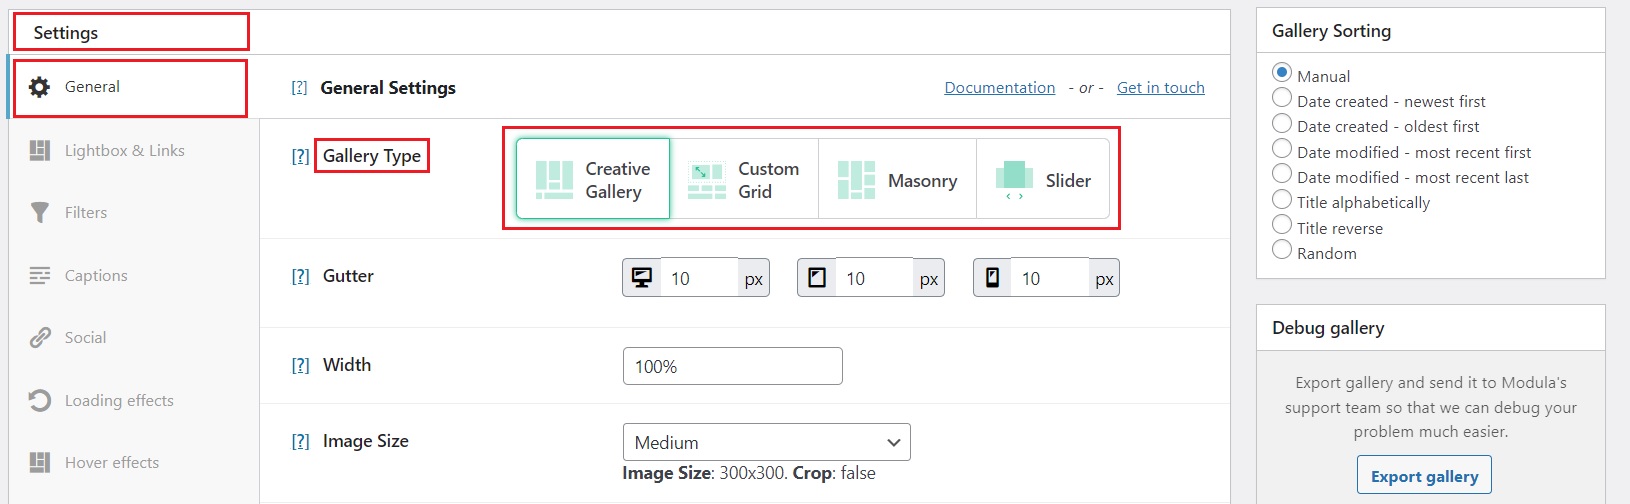
✔️ Selecting the gallery type: Once you’re satisfied with your image and video selection, scroll down to the “General Settings” section. Here are a few Gallery Type options for you to play around with.
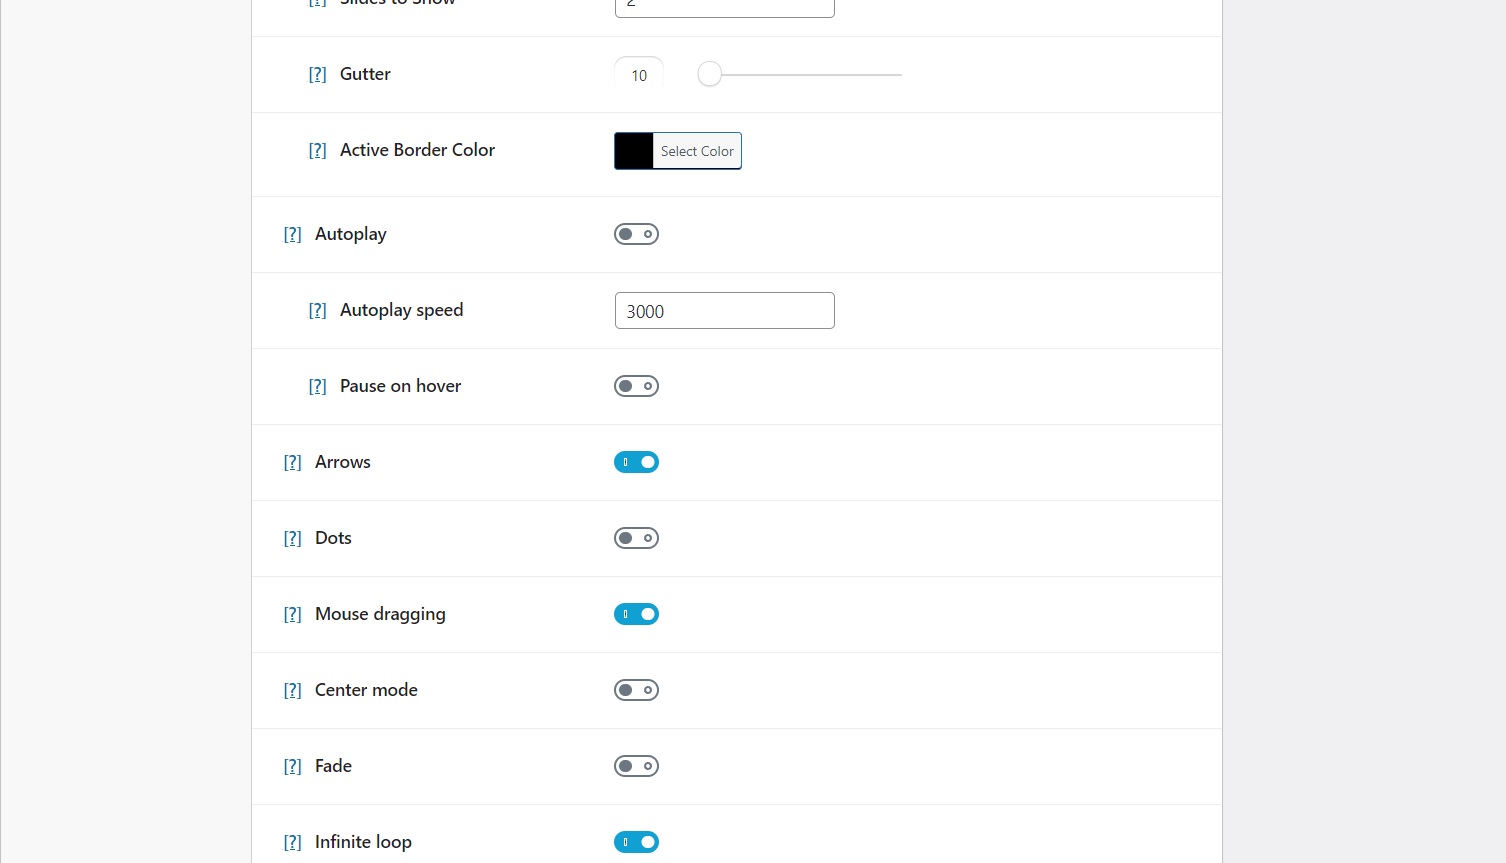
✔️ Customization: You have a few options for customizing your video gallery. You can loop videos, add borders around the video slider, change the play icon color, use a custom one, make the gallery loop infinitely, slider auto-play, and much more. Play around with the settings until you develop a video gallery that fits you best.
Displaying Your Modula Video Gallery on a Visual Composer Page
Now that we have our splendid Modula gallery ready, it’s time to effortlessly showcase it on your Visual Composer page.
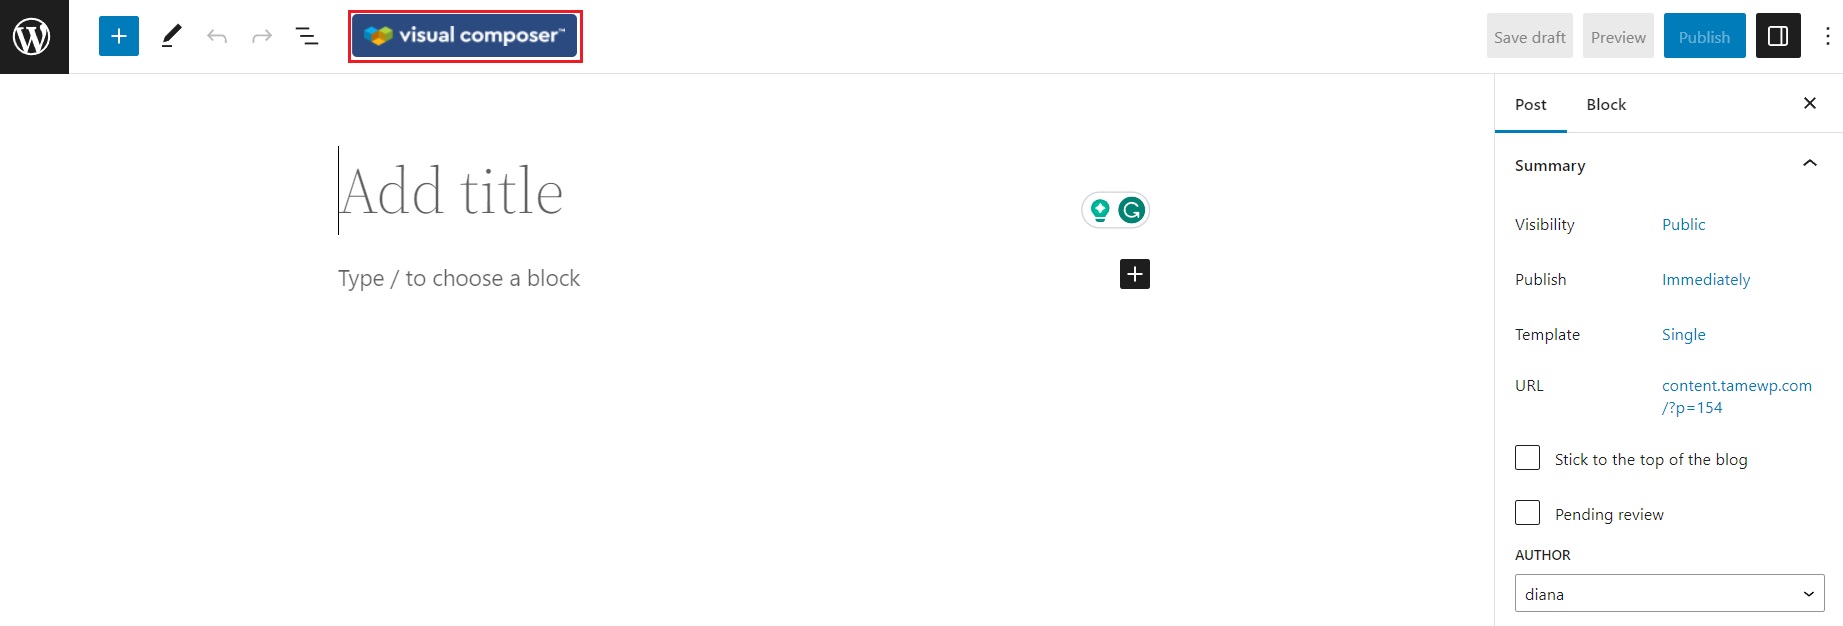
First, navigate to your desired page or post within your WordPress dashboard. Look for the Visual Composer interface. If you can’t spot it, no worries! You should find a handy “Visual Composer” button that you can click to switch to the editor mode.
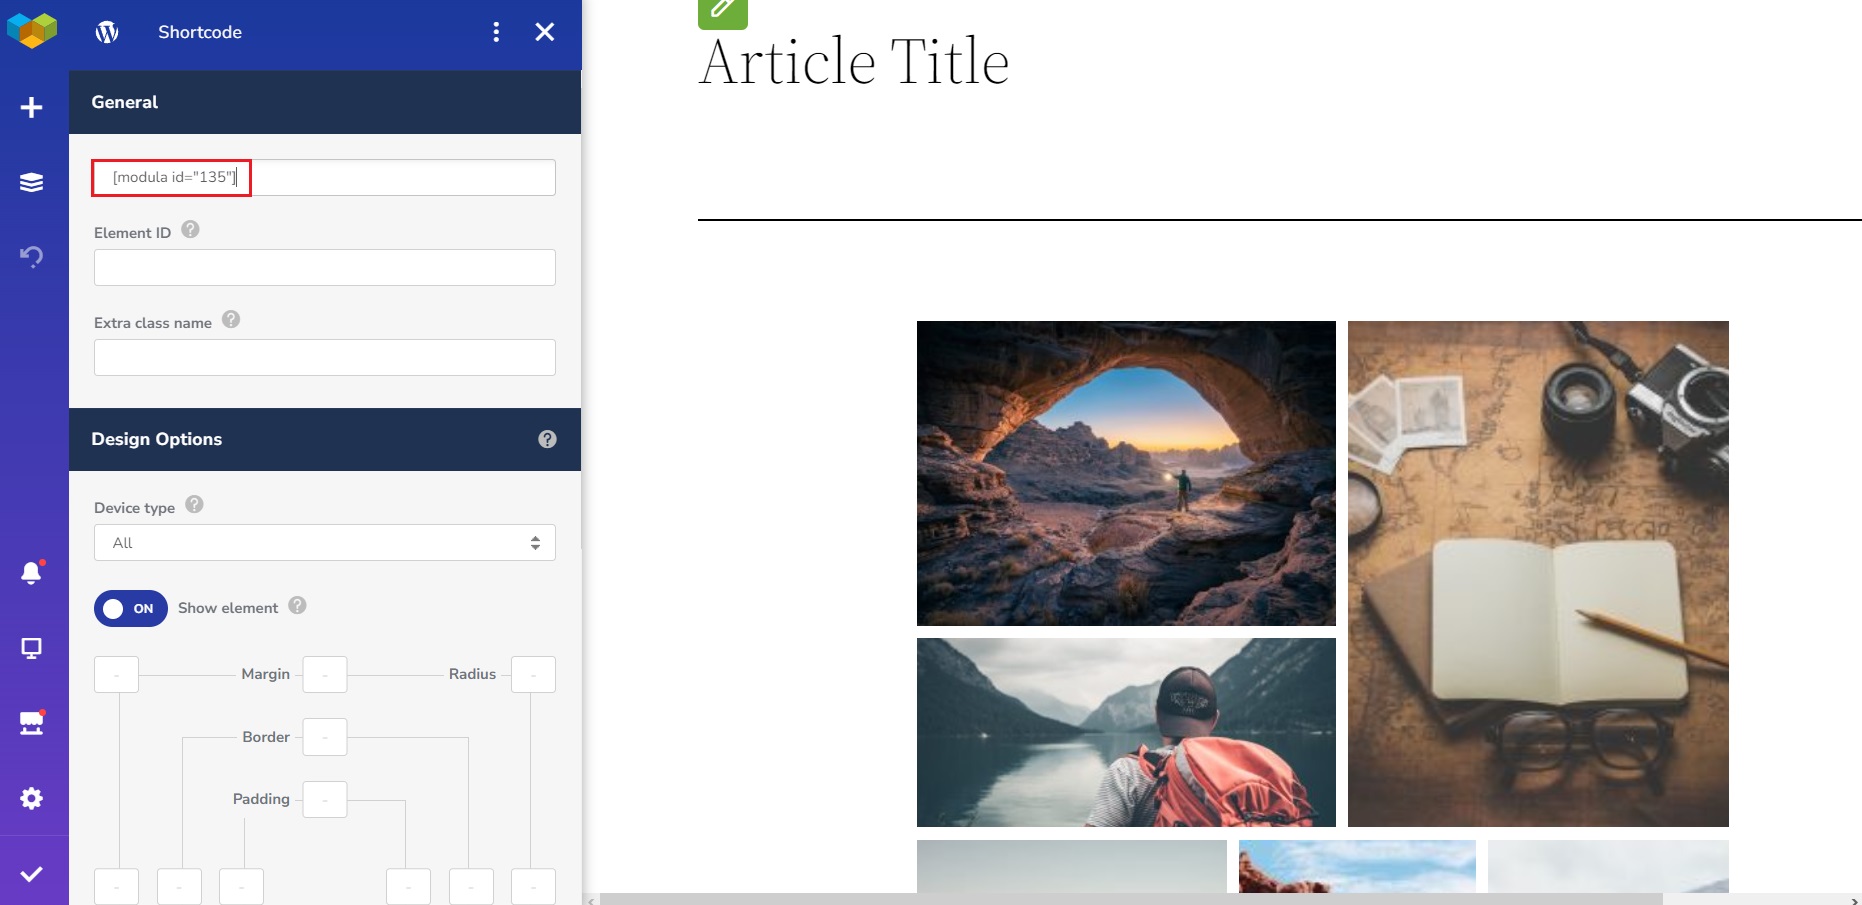
You’ll find a collection of icons in the left sidebar of the Visual Composer interface. Locate the “+” icon and click on it to reveal a new window. This window allows you to search for the Shortcode block. Drag and drop this block onto your page.

Now, it’s time to incorporate our Modula gallery into the mix. Grab the shortcode we copied earlier from the Modula gallery creation process and paste it into the Shortcode block.
Harnessing Visual Composers Editing Capabilities
Marvelous! At this point, you can leverage Visual Composer’s editing capabilities. Let’s delve into some compelling examples:
- Layout: Modula offers a delightful array of layout options, including grid, masonry, and carousel. You can also opt for a captivating lightbox or fullscreen mode to showcase your gallery.
- Image size: Take control of your gallery’s visual impact by adjusting the image sizes. You can opt for uniform sizes or let them automatically resize to fit the gallery container’s width.
- Margin and padding: Fine-tune the spacing around your gallery’s elements to create an aesthetically pleasing layout. Play around with margin and padding settings to achieve the desired visual balance.
- Captions: Add a touch of context and information to your gallery by displaying captions below the images. Captions can enhance the storytelling aspect and make your gallery more informative.
- Navigation: Provide a seamless browsing experience by incorporating navigation controls within your gallery. This enables users to effortlessly navigate through the images and immerse themselves in the visual journey.
- Lightbox: Elevate the viewing experience by enabling a mesmerizing lightbox feature. When users click on an image in your gallery, they will see a fullscreen view that truly showcases the beauty of each image.
These examples merely scratch the surface of Modula galleries’ abundant options and settings. Embrace your experimental spirit and tinker with these features to craft a gallery that resonates with your vision and captivates your audience.
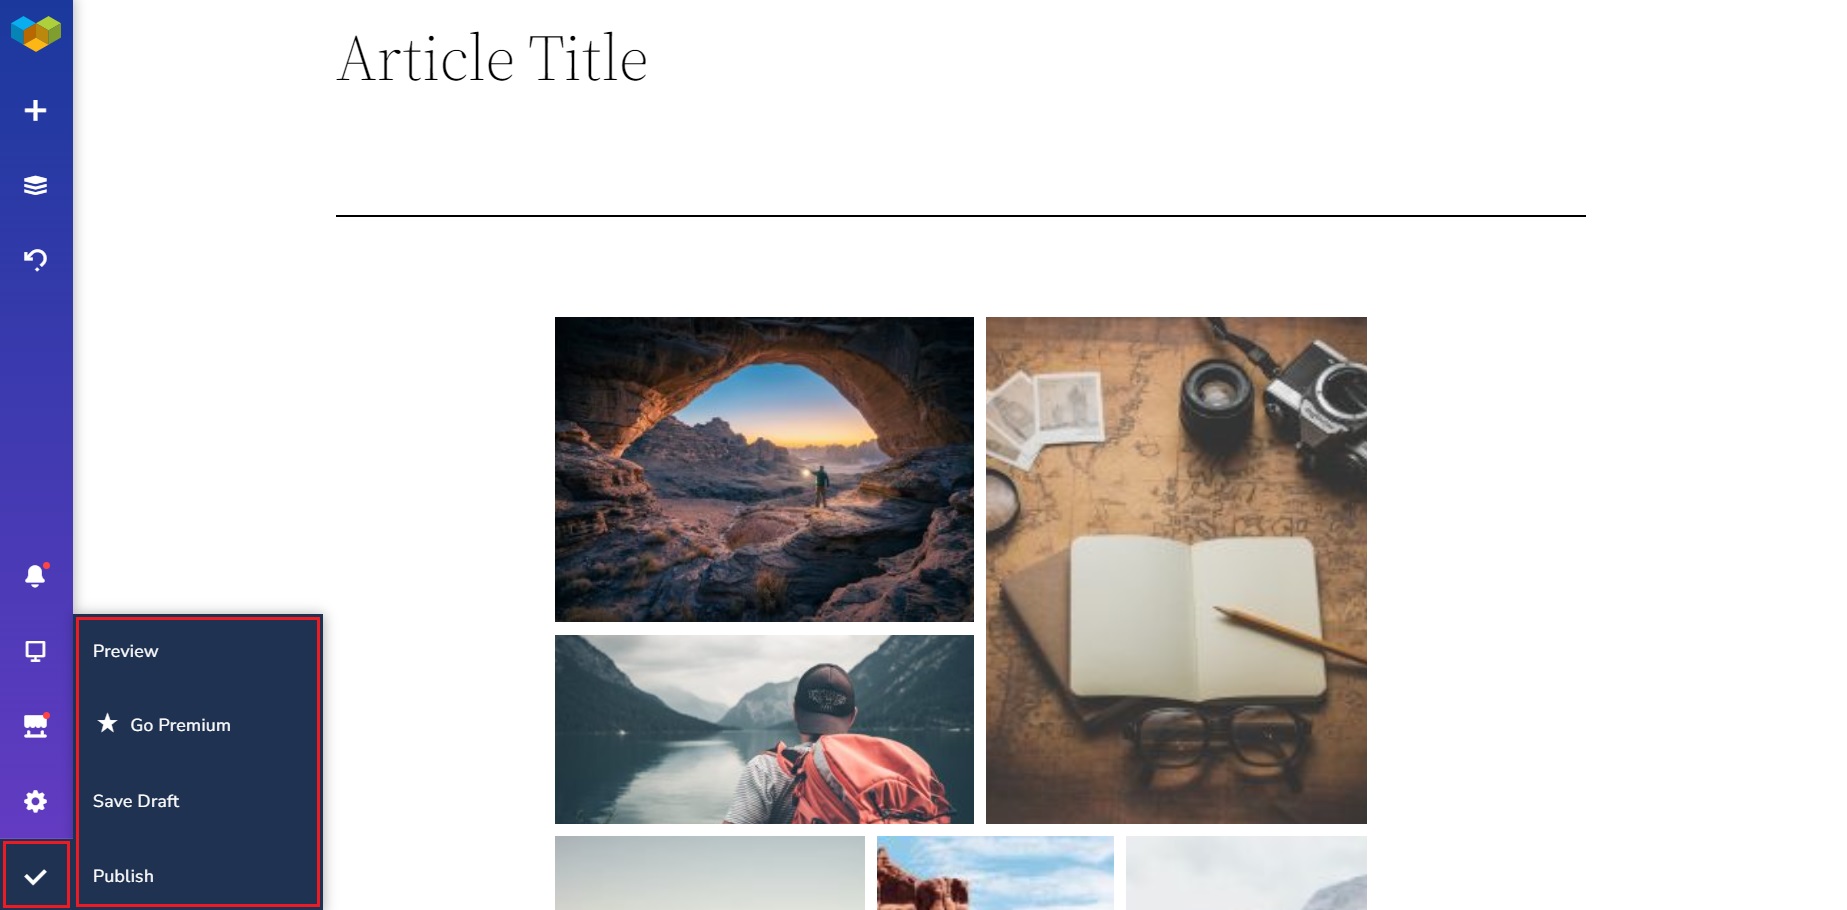
Once satisfied with the result, save your changes by clicking the checkmark in the left sidebar. Alternatively, you can hover over it and click “Preview Changes” to take a sneak peek before publishing your masterpiece.
Best Practices for Optimal Video Gallery Display
To ensure that your Modula galleries deliver the best possible user experience, consider the following best practices:
Choose the Right Video Format: Select video formats that are widely supported across different browsers and devices. MP4 is a popular format and is generally a safe choice.
Optimize Video File Size: Compress your video files without compromising quality to reduce their file size. This helps improve loading times and overall performance. You can use video compression tools or plugins to achieve this.
Consider Video Resolutions: Balance your videos’ quality and file size by choosing appropriate resolutions. Higher resolutions provide better visual clarity but can also increase file size. Find the right balance based on your website’s requirements and the capabilities of your target audience’s devices.
Regularly Check Video Links: As your website evolves, check the video links within your gallery to ensure they are still valid and accessible. Broken or outdated links can negatively impact the user experience.
Wrapping up…
This step-by-step guide has equipped you with the knowledge and skills to create captivating custom video galleries using Modula and Visual Composer. By leveraging the seamless integration between Modula and Visual Composer, you can effortlessly curate visually stunning displays that showcase your video content in the best possible light. From setting up the plugins to customizing and optimizing your galleries, you now have the tools to create an immersive and interactive experience for your website visitors.
So why wait? Try Modula and see how it can transform your video content into an immersive experience that keeps your audience returning for more.
Let Modula be your go-to tool for creating stunning video galleries that leave a lasting impression.
Modula Gallery Plugin
Create stunning, responsive photo galleries with ease. Showcase your work, captivate your audience, and boost engagement. You don’t need to do any coding.