Made in Europe, buy from Europe.
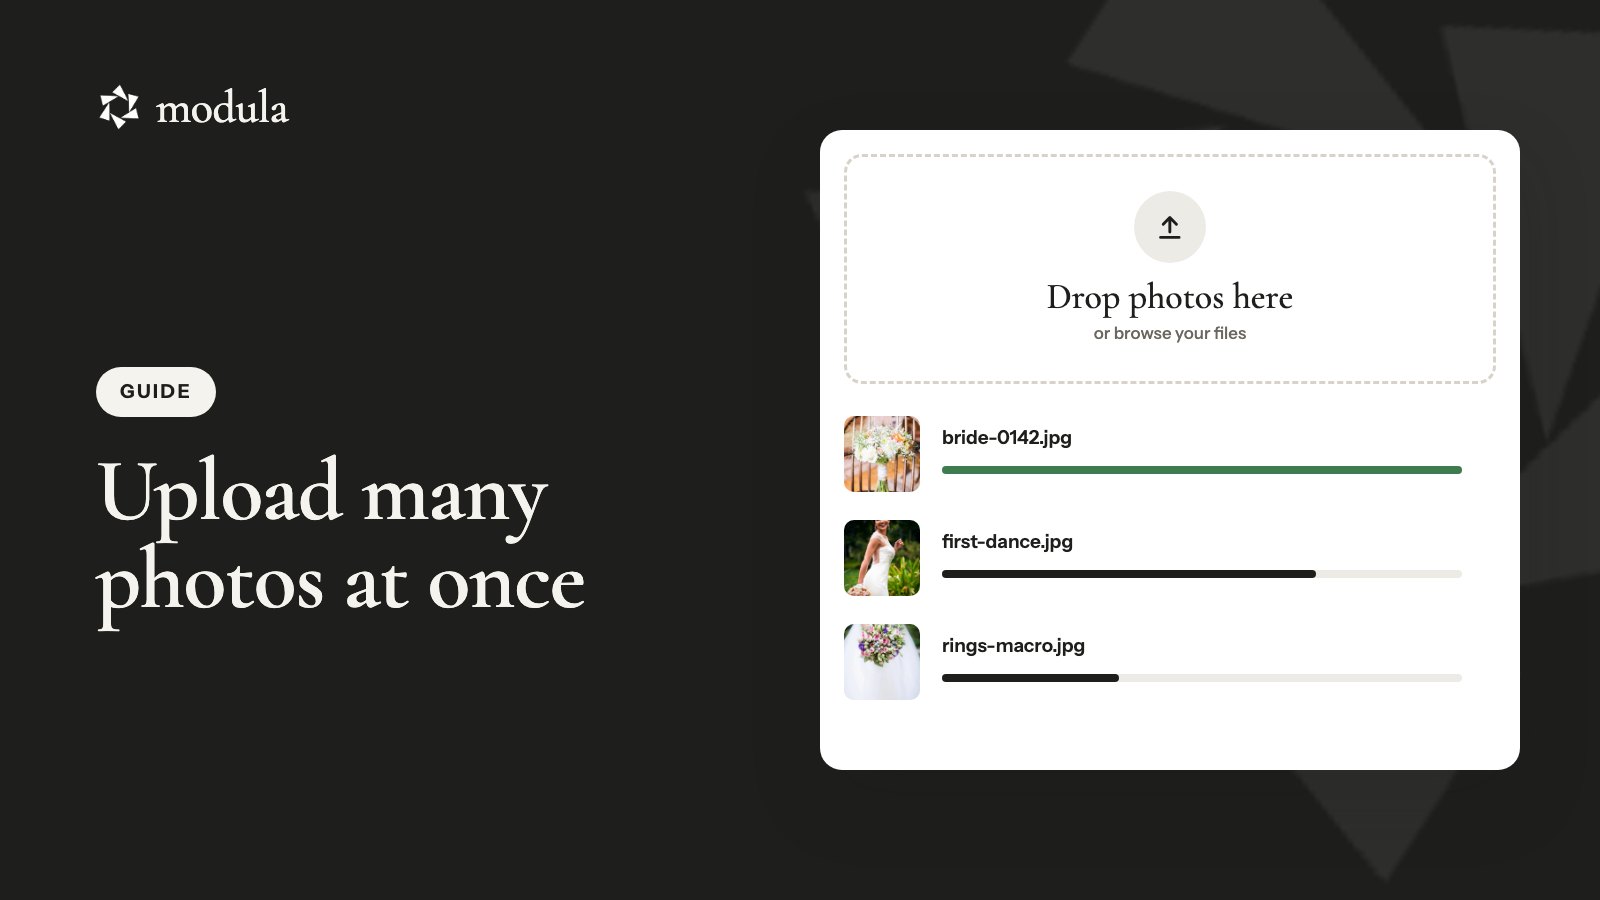
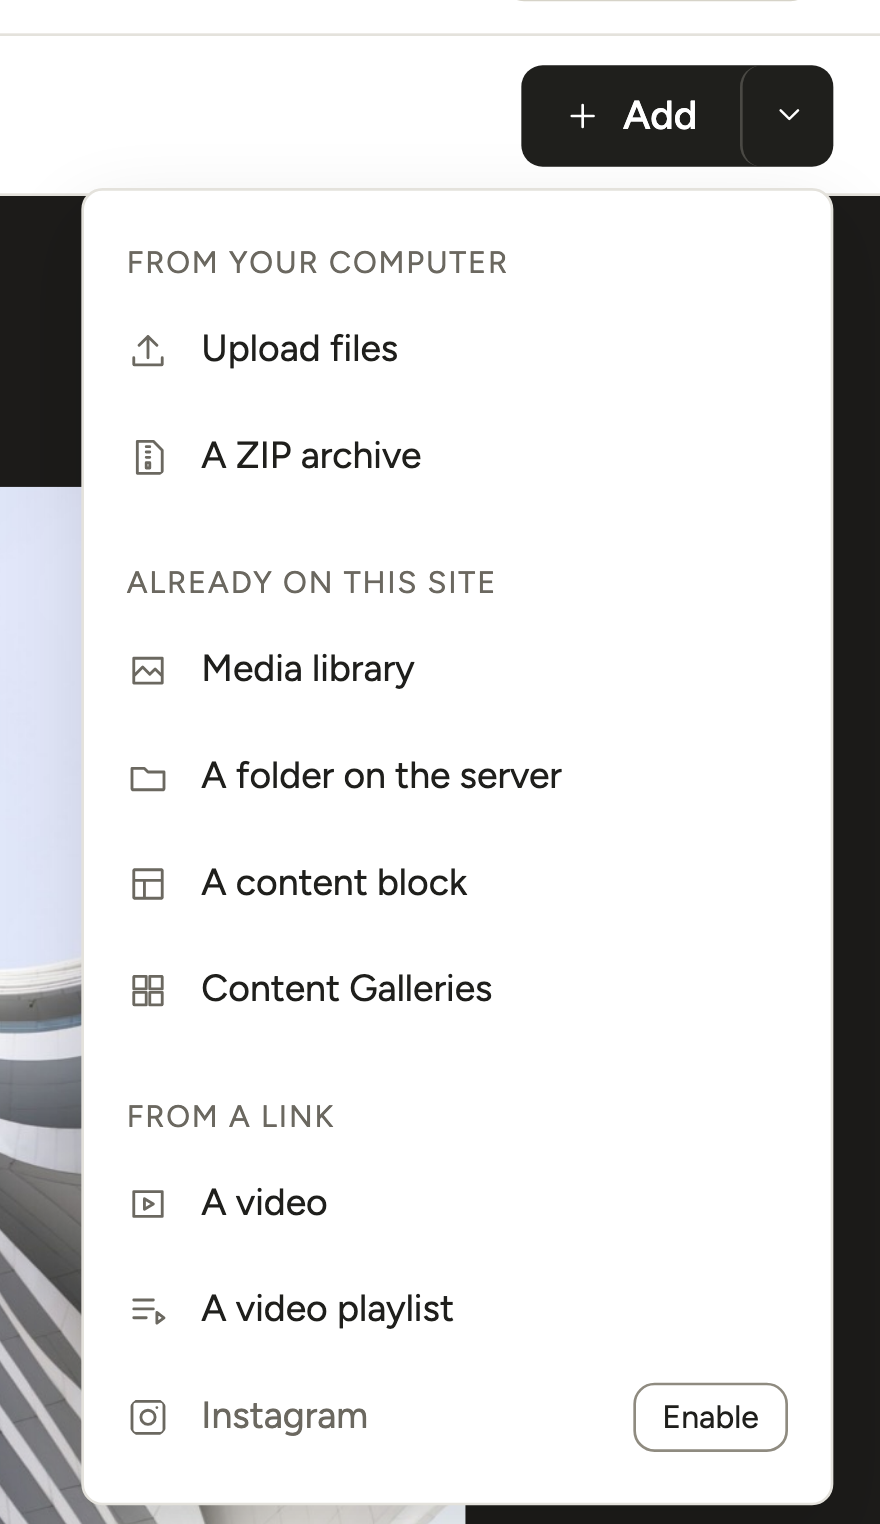
To add multiple images to a WordPress gallery at once, open the gallery, pick Upload files from the arrow next to + Add and drop in every photo.
Already uploaded them? Click + Add itself and tick them in your Media Library. Ten photos or 400, it’s the same few clicks.
Say you shot a wedding on Saturday, and by Tuesday 400 edited JPEGs sit in a folder on your desktop. That’s one upload, not an afternoon of clicking.
We make Modula, a free gallery plugin with 160,000+ active installations. We checked how every step below works in the Modula 3.0 code (Lite 3.0.16 and Pro 3.0.18, October 2026).
New to Modula? Install it from Plugins → Add Plugin (steps).
The short version
- Go to Modula → Content and open your gallery, or click New gallery.
- Click the arrow next to + Add and choose Upload files.
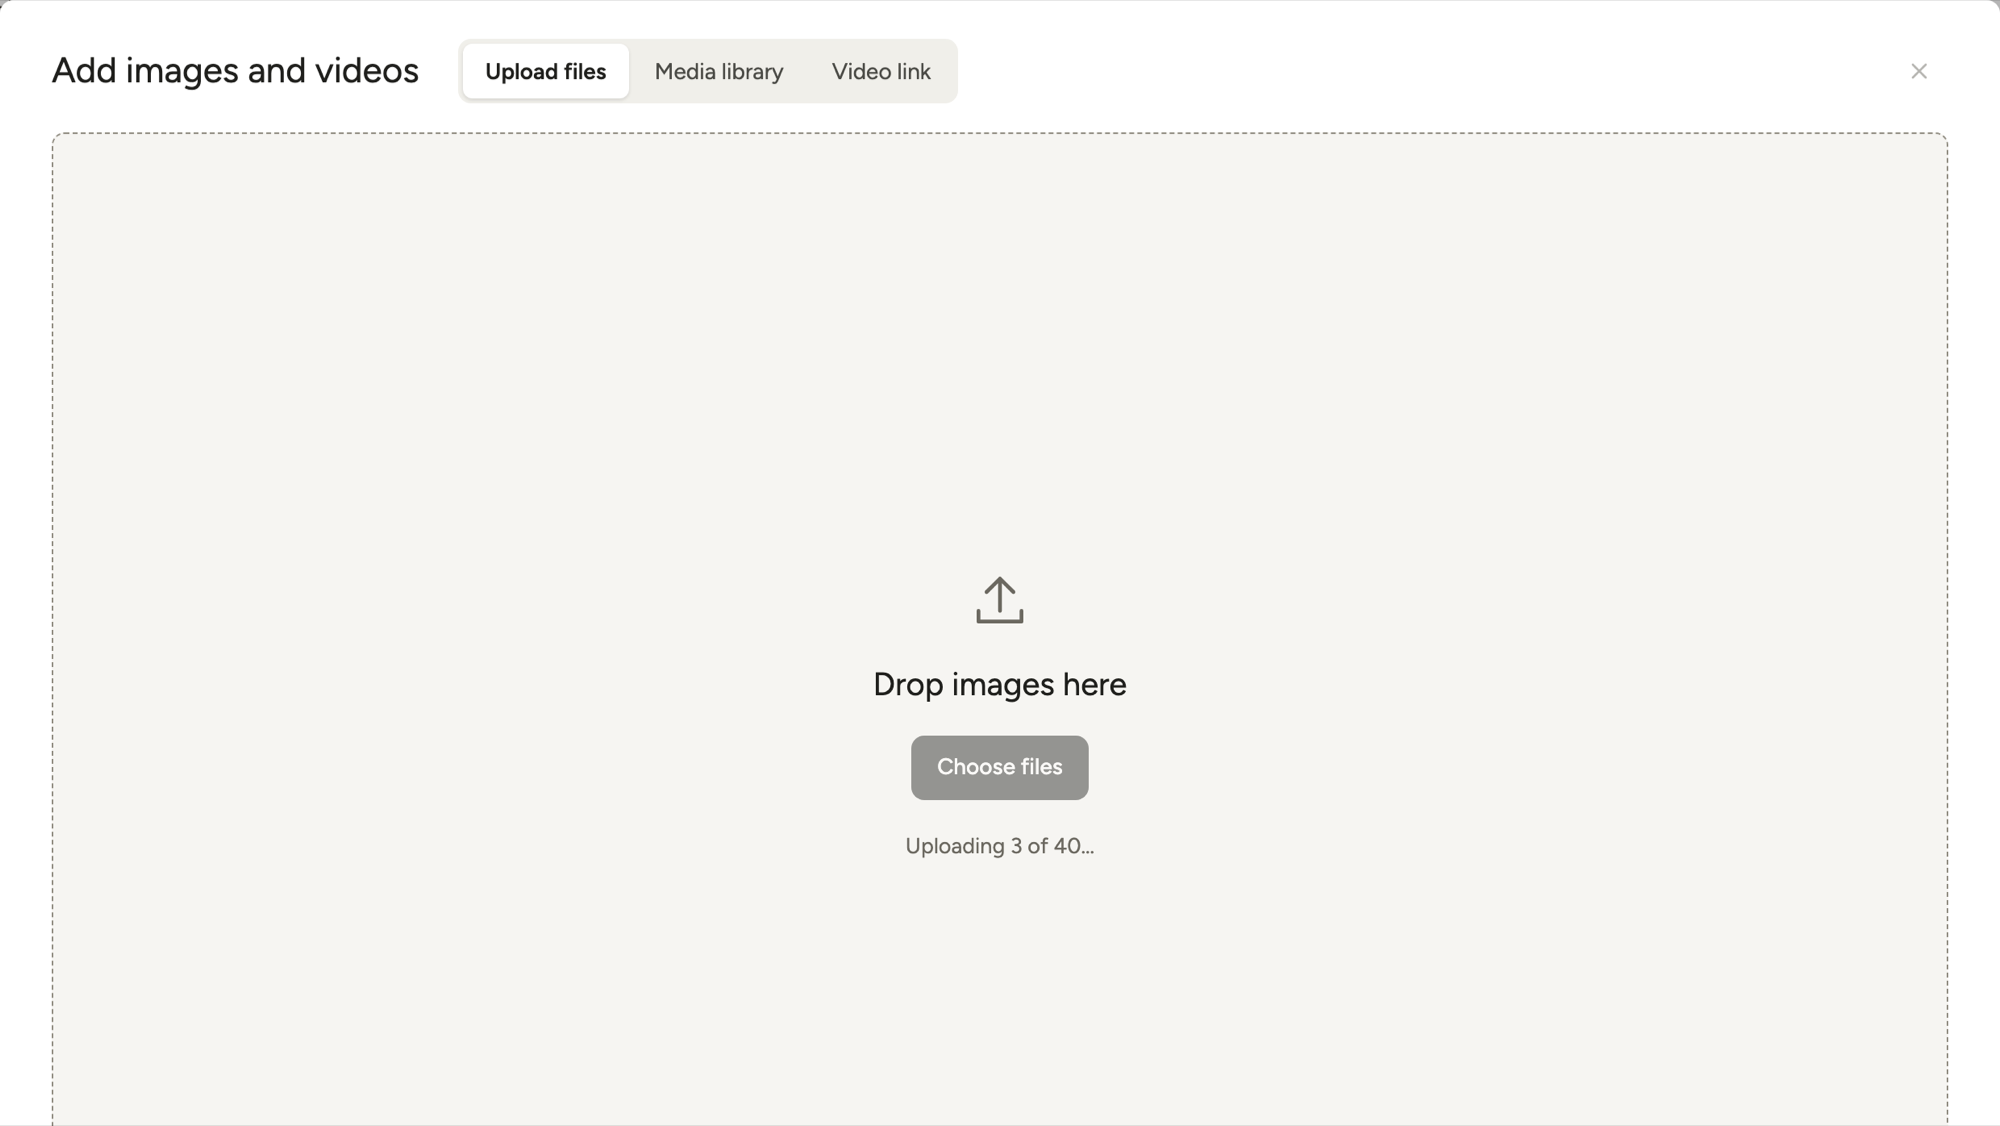
- Drag every photo onto the window, or pick them all with Choose files.
- Wait for the last upload, then click Save.
Pick the right way to add multiple images
Modula’s + Add menu has four ways in for photos, and the right one depends on where your photos are and how many you have. Each hits a different limit:
| Your photos | Use | Plan | Limit |
|---|---|---|---|
| On your computer | Upload files | Free | Each file must fit your upload limit |
| Already in your Media Library | Media library | Free | None |
| Hundreds, in one ZIP | A ZIP archive | Modula Pro, any plan | The whole ZIP must fit your upload limit |
| Thousands, or files too big to upload | A folder on the server | Modula Pro, any plan | No upload limit |
| Sent by a script or AI assistant | REST API or MCP | Free (ZIP and folder: Pro) | 8 MB per image |
Upload multiple images from your computer
Upload files is Modula’s free way to add a whole batch from your computer. You drop the photos onto one window, and Modula uploads them one by one, then adds them to the gallery.
- Click the arrow next to + Add and choose Upload files. (Clicking + Add itself opens the Media library tab instead.)
- Open your photo folder, press Ctrl+A (Cmd+A on a Mac) and drag the files onto Drop images here. Or click Choose files.
- Watch the status line count up, “Uploading 3 of 40…”, and keep the tab open.
- After the last file, Modula adds the whole batch to the gallery, at the end by default.
Want only some photos? In the file picker, Ctrl-click (Cmd-click) picks single files and Shift-click picks a range.
Drop the files, not the folder. Modula skips a dragged folder, because a folder isn’t an image. If a drop does nothing, or the window says “No images could be uploaded.”, that’s usually why.
There’s no cap on how many files you pick. Modula sends one file per request, so PHP’s max_file_uploads limit (20 by default, per php.net) never applies; only each file’s size counts. JPG, PNG, GIF, WebP, AVIF and BMP all work (file types).
Tip
Upload in the order you want them shown. In the free version, new photos always join the end, and there’s no drag-and-drop reordering. So add your three best shots first, then the rest.
Add photos already in your WordPress Media Library
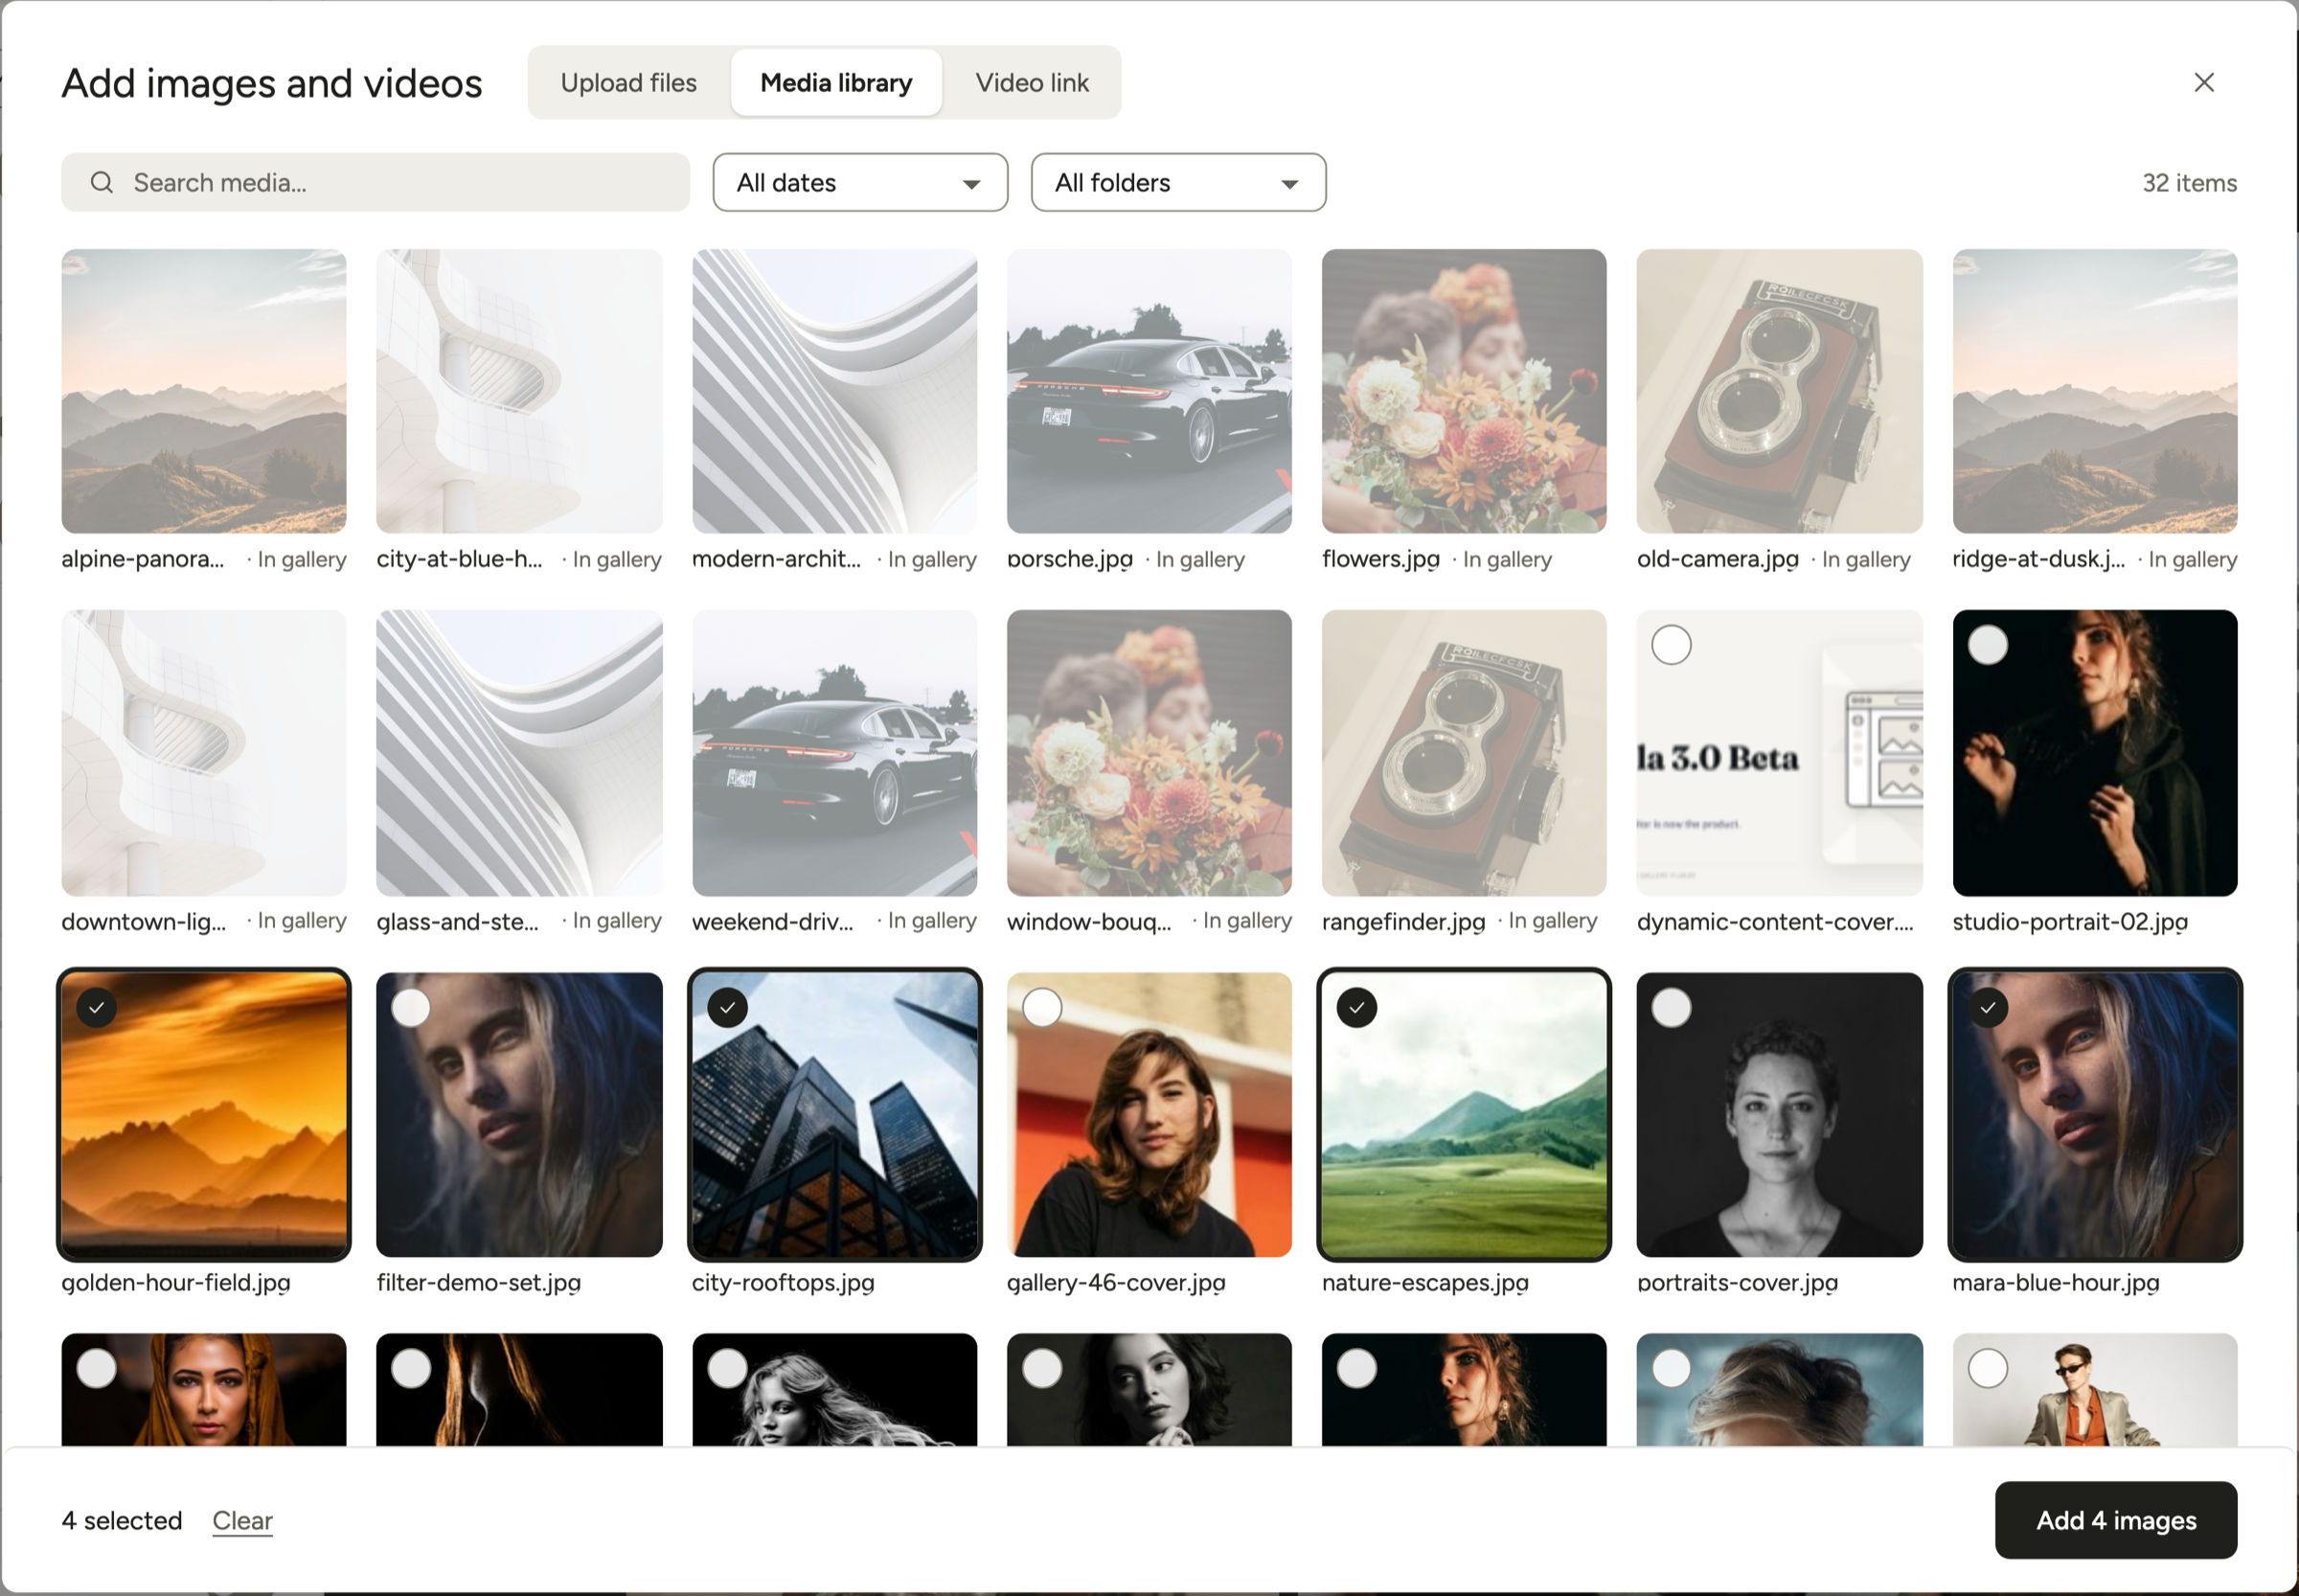
Modula reuses photos you’ve already uploaded, so there’s no second upload. Click + Add and the Add images and videos window opens right on the Media library tab.
- Find them. Search by name or filter by date; Load more pages through them 40 at a time.
- Skip duplicates. Photos already in this gallery say “In gallery”.
- Click everything you want. The footer keeps count (“4 selected”), and Clear starts over.
- Add them in one go with the button that names the count, like Add 4 images.
One photo can sit in as many galleries as you like: a potter might show the same 12 mug shots in “Mugs” and again in “New this season”.
It’s still one file, though, so a caption you fix in one gallery changes in all of them.
Hundreds of photos? Use a ZIP or a server folder
For big batches, every Modula Pro plan adds two imports: A ZIP archive and A folder on the server.
A ZIP archive
Pick A ZIP archive from the + Add menu and choose your file. Modula unpacks it into your Media Library and the gallery, sub-folders included, then deletes the ZIP. Only JPG, PNG, GIF, BMP, TIFF and WebP files are kept.
The catch: the whole ZIP must fit your upload limit, because it goes through the normal WordPress uploader. JPEGs barely shrink when zipped, so 400 photos at 10 MB each still make a 4 GB file.
Split a big shoot into several ZIPs, or use a server folder. Your server also needs PHP’s ZIP extension (ZIP steps).
A folder on the server
A server folder skips the upload limit, because the photos are already on your server and Modula copies them into the Media Library right there.
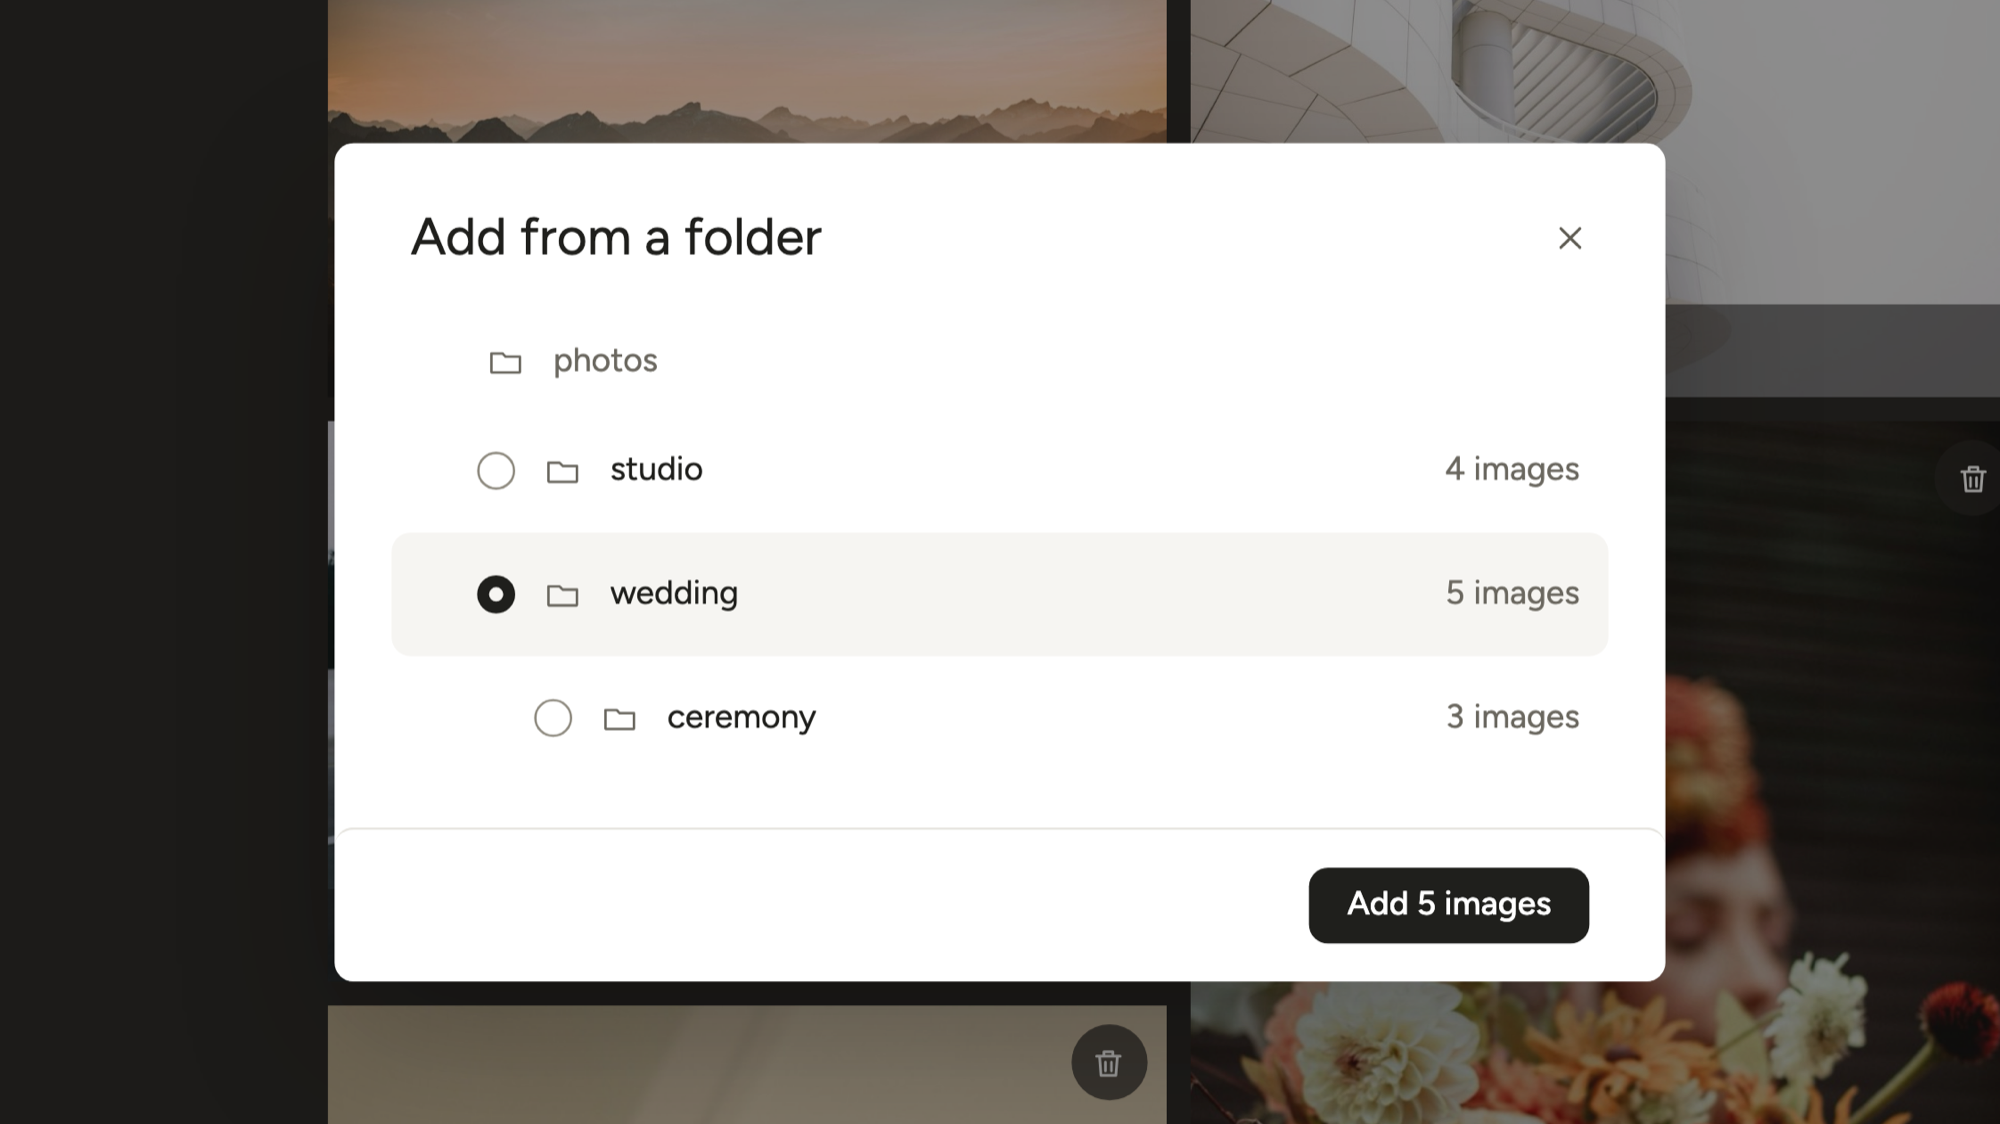
- With FTP or your host’s file manager, copy your photo folders into
wp-content/uploads/modula_folder_import. Modula creates that folder by the time you first open A folder on the server. - In the editor, choose A folder on the server from the + Add menu.
- In Add from a folder, select a folder.
- Click the button with the count, like Add 5 images.
Since Modula 3.0.3, the window browses only that import folder (folder steps).
When uploads fail: limits and error messages
Your WordPress site’s maximum upload file size decides how big each photo, or each ZIP, can be. WordPress shows it under Media → Add Media File: “Maximum upload file size: X.”
Raise the upload limit
The limit is the smaller of two PHP settings, upload_max_filesize and post_max_size. PHP’s defaults are just 2 MB and 8 MB (php.net), though hosts usually set their own. A full-size camera JPEG can easily pass 2 MB.
Change both in your host’s PHP panel, in php.ini or .user.ini, or with php_value lines in .htaccess (Apache with PHP as a module only). Keep post_max_size the larger of the two.
Skip the ini_set() snippet some tutorials put in functions.php. PHP accepts these two settings only from its config files, so ini_set() can’t change them (php.net).
Good to know
Fastest fix: ask your host to “raise upload_max_filesize and post_max_size to 64M”, then check the number in Media → Add Media File again.
What the error messages mean
Modula’s upload window repeats the server’s error word for word, not a bare “HTTP error”. The common ones:
- “The uploaded file exceeds the upload_max_filesize directive in php.ini.” The photo is over your limit. Raise the limit or export a smaller file.
- “No data supplied.” The upload was bigger than
post_max_size, so PHP dropped it before WordPress saw it. Raisepost_max_size. - “The server cannot process the image… Suggested maximum size is 2560 pixels.” WordPress’s own uploader shows this when the server runs out of memory or time on a huge image. In Modula’s window, the same problem shows up as a vaguer error. Either way, resize the photo to about 2,560 px on the long side.
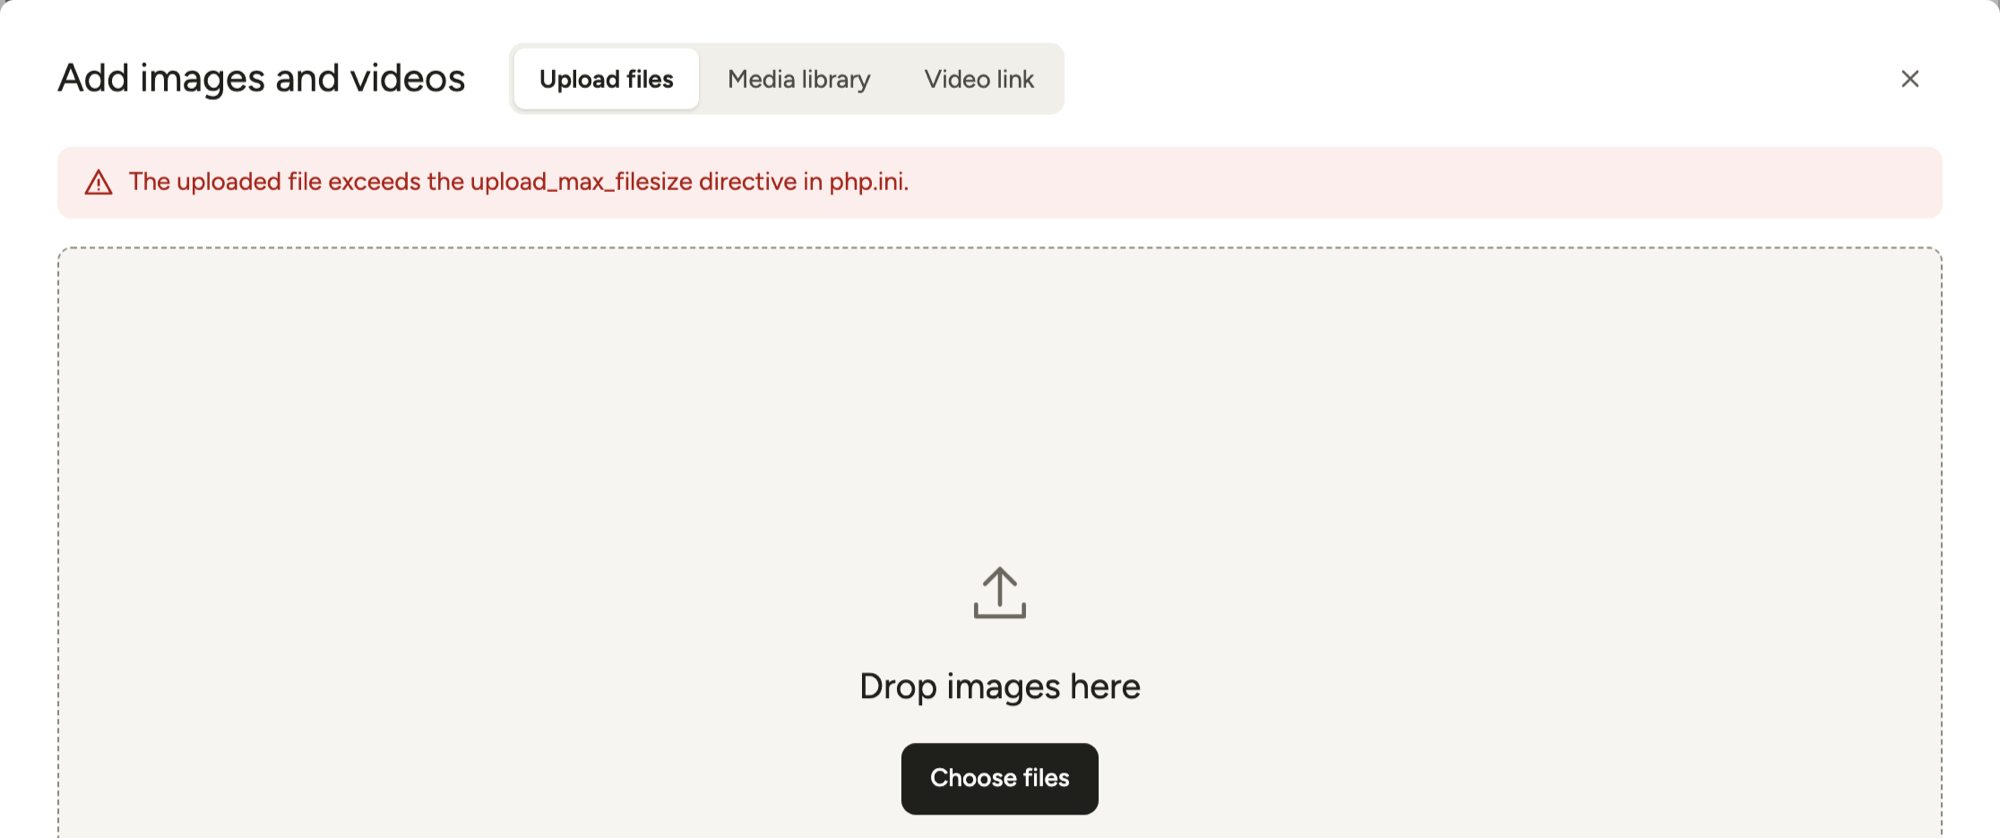
That resize costs you nothing on screen: WordPress scales any upload over 2,560 px down to a “-scaled” copy anyway, and that’s what Modula’s lightbox shows.
Seeing “You do not have the rights to upload files.” (Modula) or “Sorry, you are not allowed to upload media on this site.” (WordPress)? Your role can’t upload: Contributors can’t, Authors and up can.
A batch that stopped halfway
Modula adds a batch to the gallery only after the last file uploads. If file 23 of 40 fails, the upload stops there: files 1–22 sit in your Media Library but not in the gallery, and the rest never went up.
To recover, click + Add, pick the new photos on the Media library tab (the ones without “In gallery”) and add them. Then fix the failed file and upload it with the rest.
Fill in titles, alt text and captions in bulk
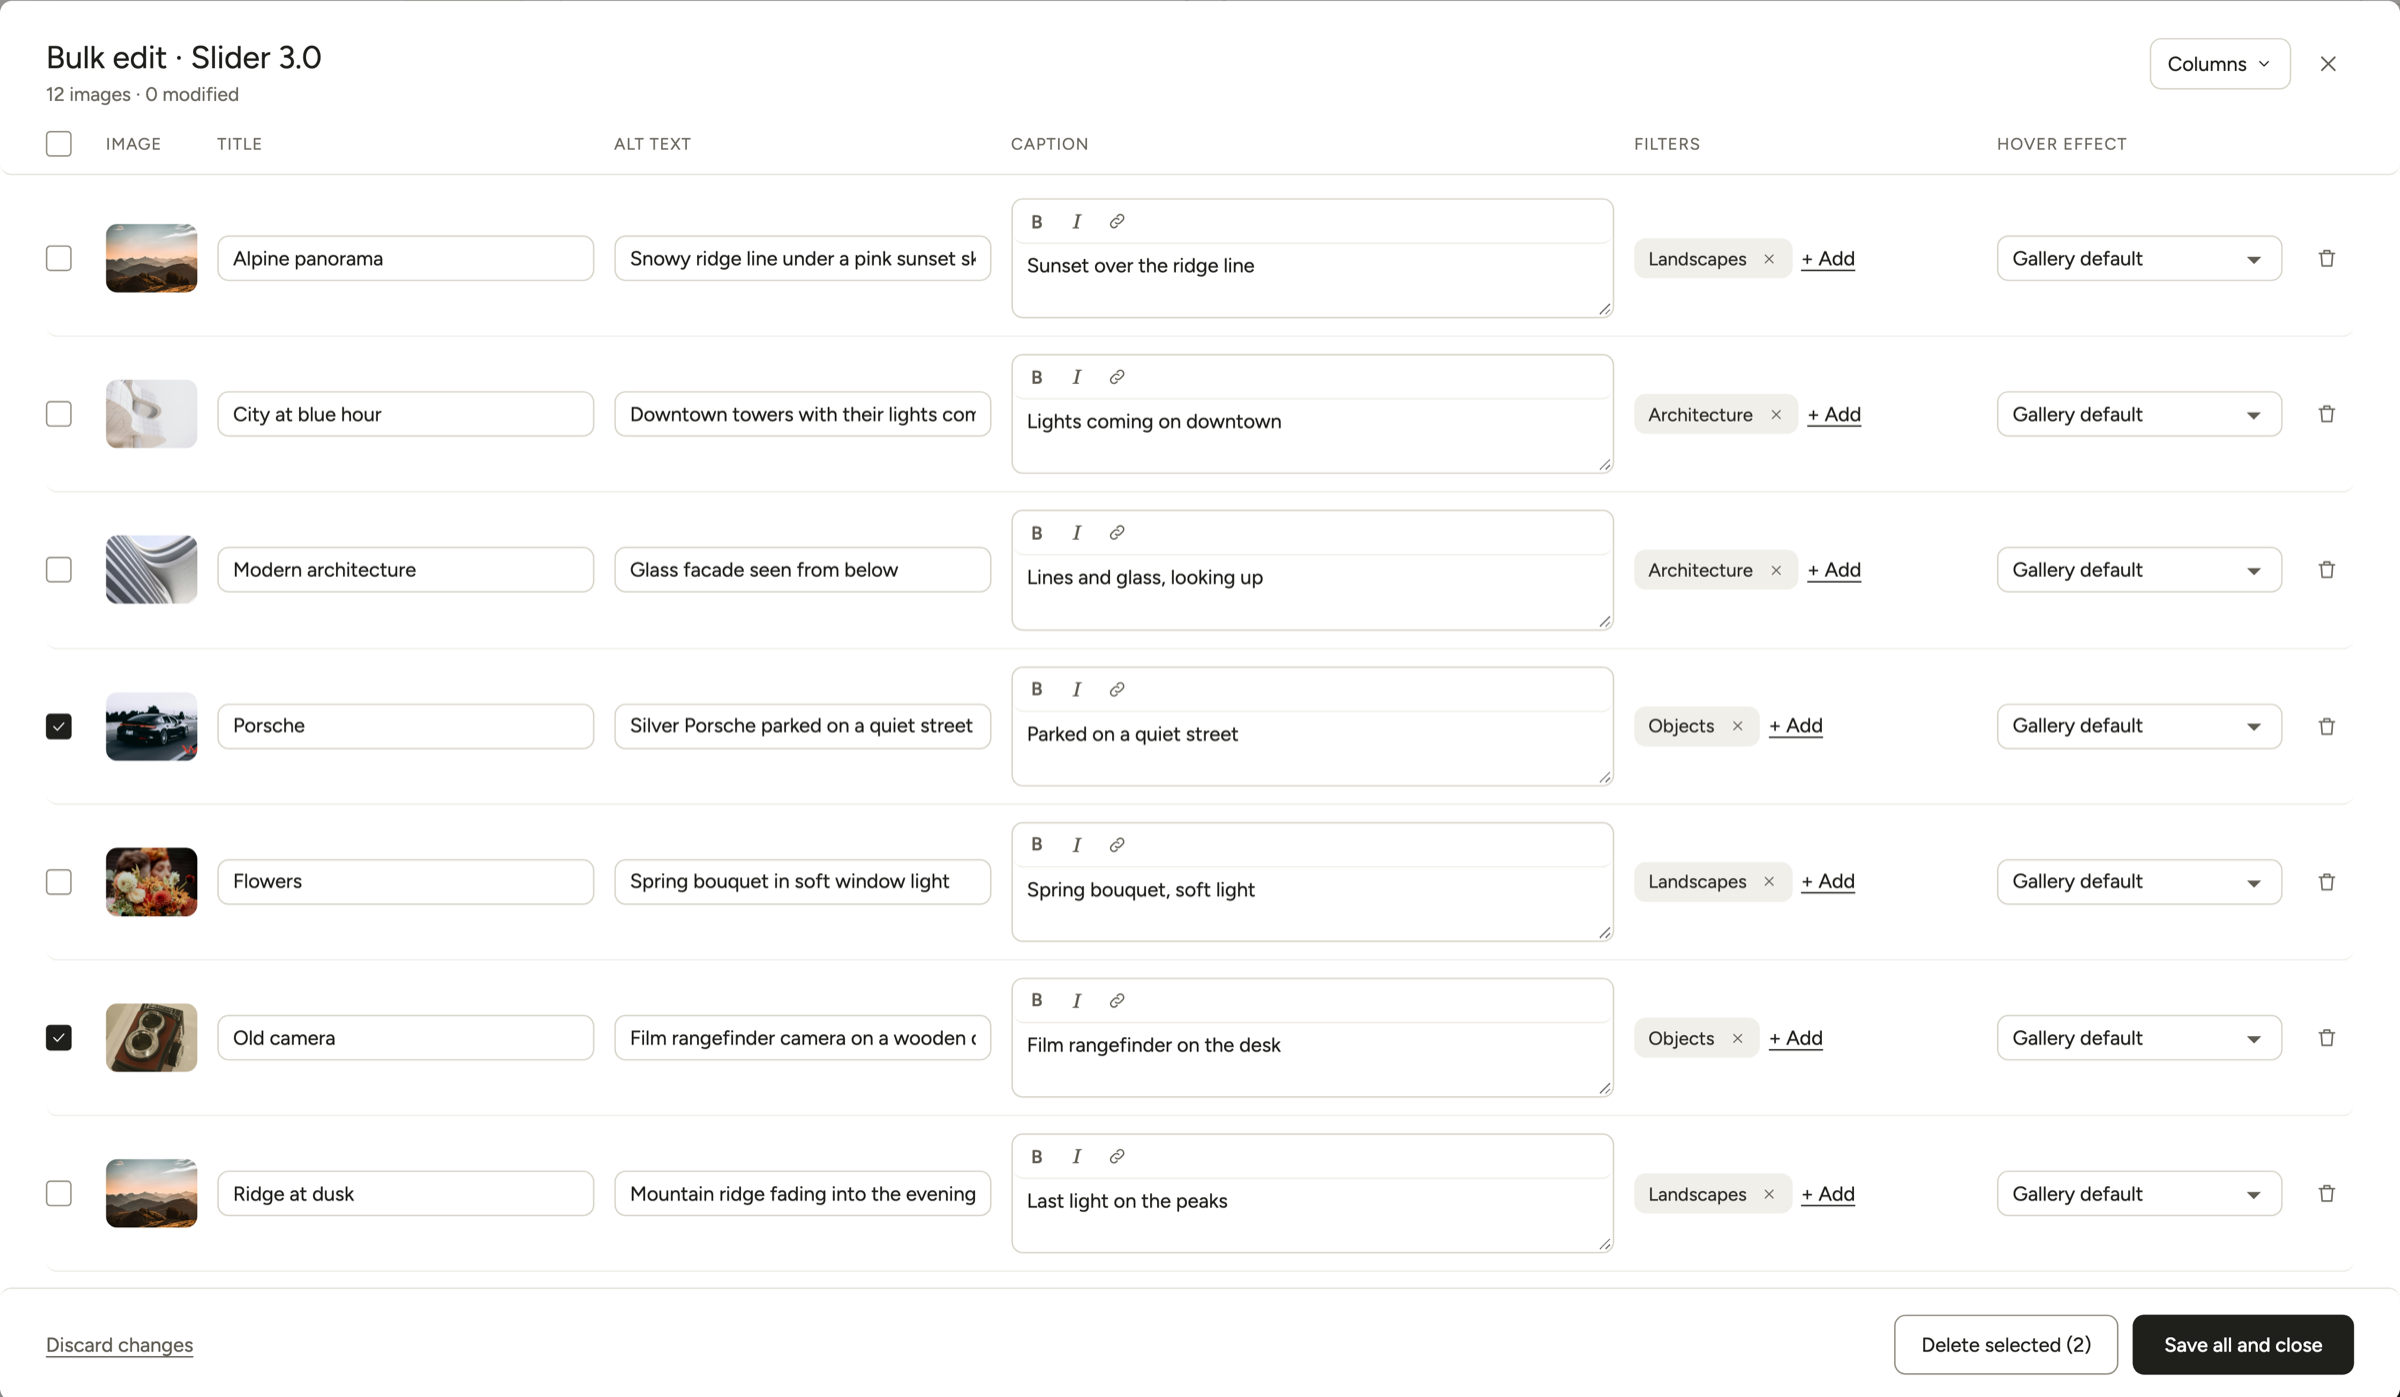
Modula 3.0’s Bulk edit turns a fresh batch into a table, one row per image, so you can type titles, alt text and captions without opening each photo. It comes with every Modula Pro plan, along with Select multiple.
Click Select multiple, click the images you want (or Select all), then click Bulk edit (N). With nothing selected, Bulk edit lists every image in the gallery. Type into the Title, Alt text and Caption columns, and click Save all and close.
Don’t skip the alt text: screen readers speak it, and it tells search engines what each photo shows. More in bulk editing your images and gallery titles and captions.
Remove images from a gallery without deleting them
Removing an image from a Modula gallery takes it out of that gallery only, and the file stays in your Media Library. We checked the Modula 3.0.16 code: none of its remove actions deletes the file.
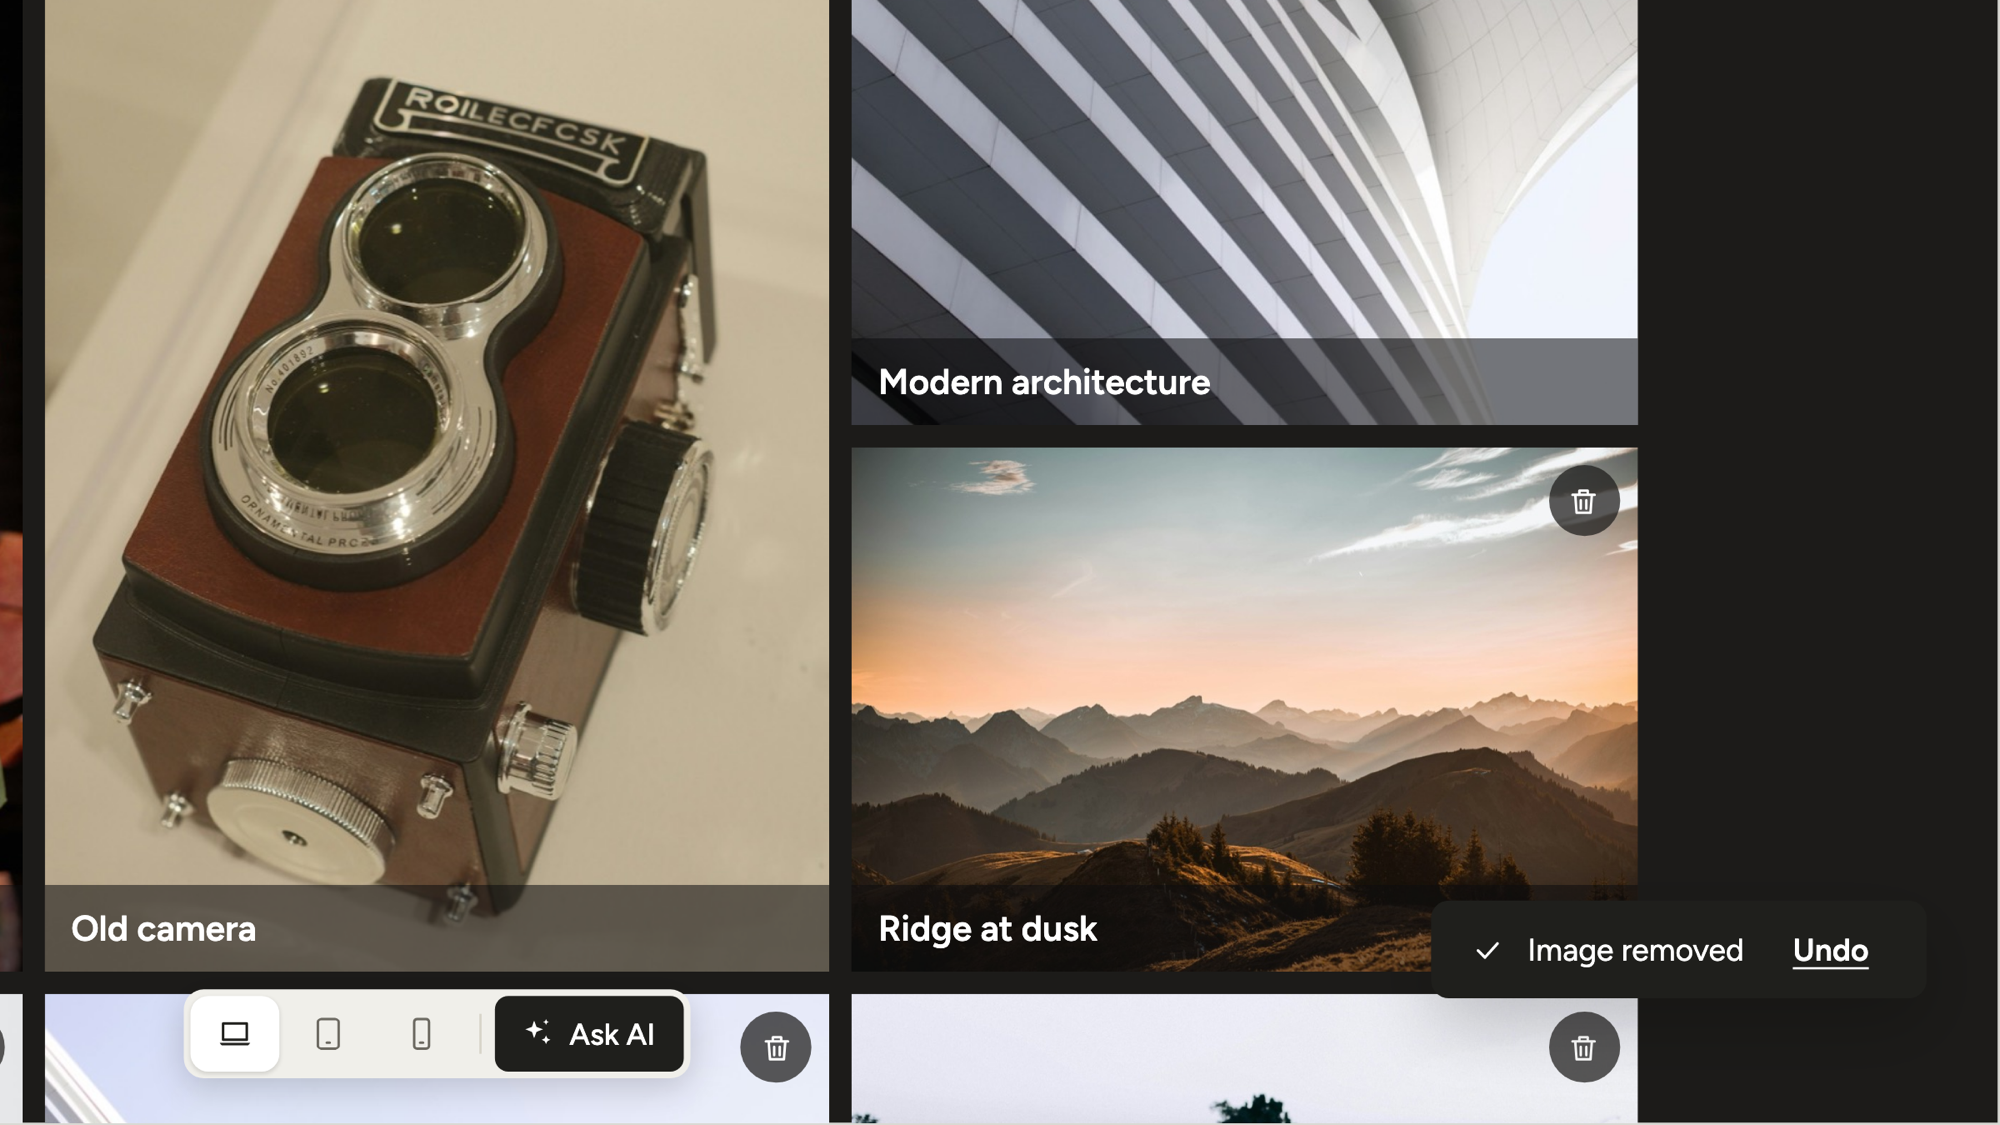
- Quick: point at a tile and click its trash icon. No confirm box, but an “Image removed” notice offers Undo.
- Careful: click the image, then Remove in its panel. Modula asks “Remove from this gallery?”, and Keep backs out.
- Many at once (Pro): in Bulk edit, tick the rows and click Delete selected (N). The prompt says: “They will be removed from this gallery. The files stay in your Media Library.” Click Delete to confirm.
Culling 400 wedding proofs down to the 250 the couple picked? Select the rejects, open Bulk edit, tick the header box to select every row, and delete them in one go.
Delete images from WordPress for good
To delete an image from your site completely, delete it in the WordPress Media Library, not in Modula.
WordPress 7.1.3 has no media trash unless a developer turns on MEDIA_TRASH. So the file is gone for good, along with every spot that showed it: galleries, posts and pages.
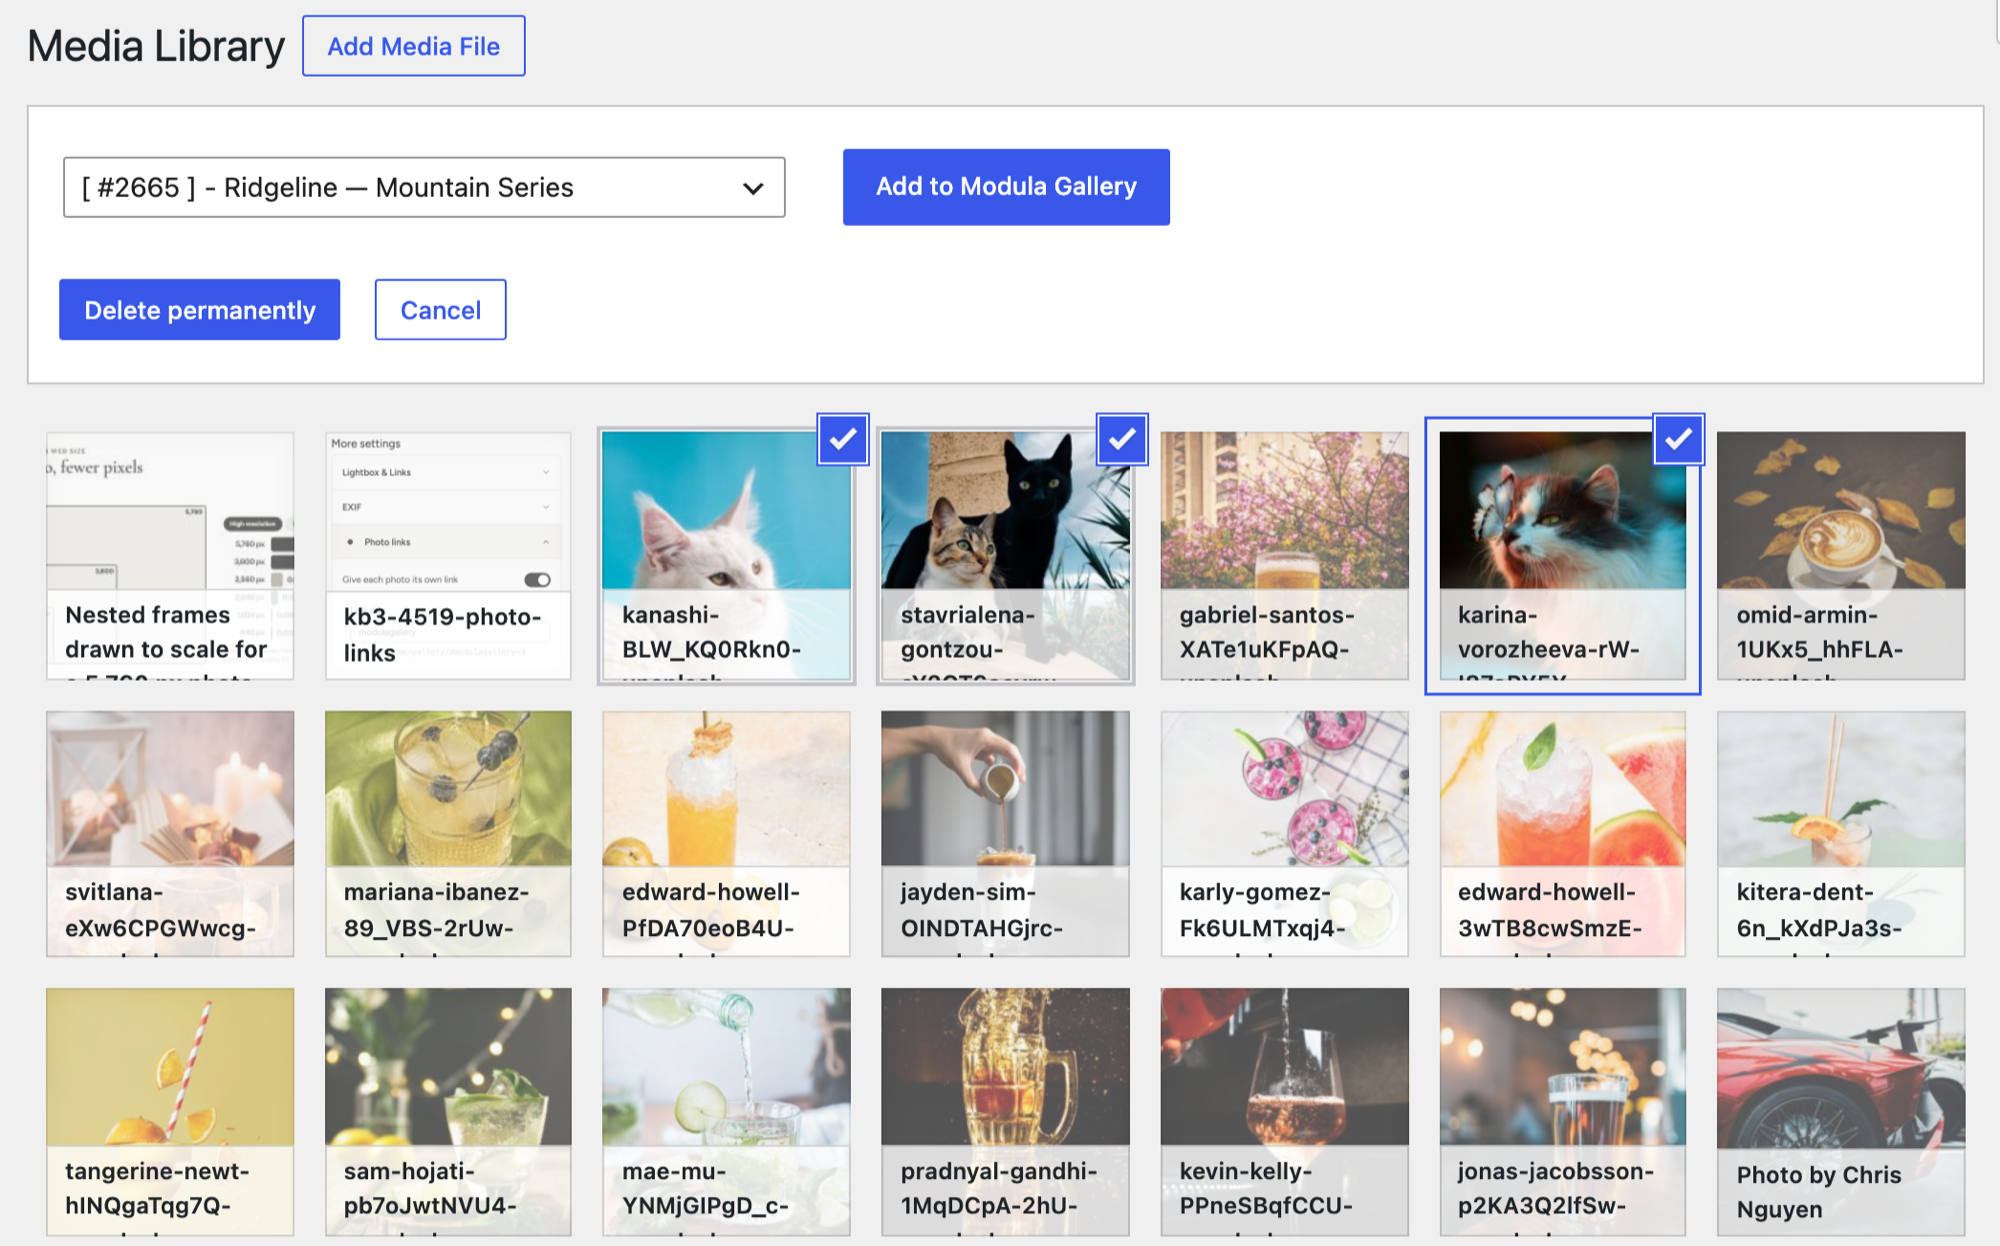
- One image: in Media → Library, click it, click Delete permanently and confirm.
- Many, grid view: click Bulk select, click each image (Shift-click picks a range), then Delete permanently.
- Many, list view: tick the checkboxes, pick Delete permanently under Bulk actions and click Apply.
Good to know
Not sure where else a photo appears? Remove it from the gallery and leave the file alone. Removing takes one click to undo. Deleting can’t be undone.
Sort and reorder your gallery images
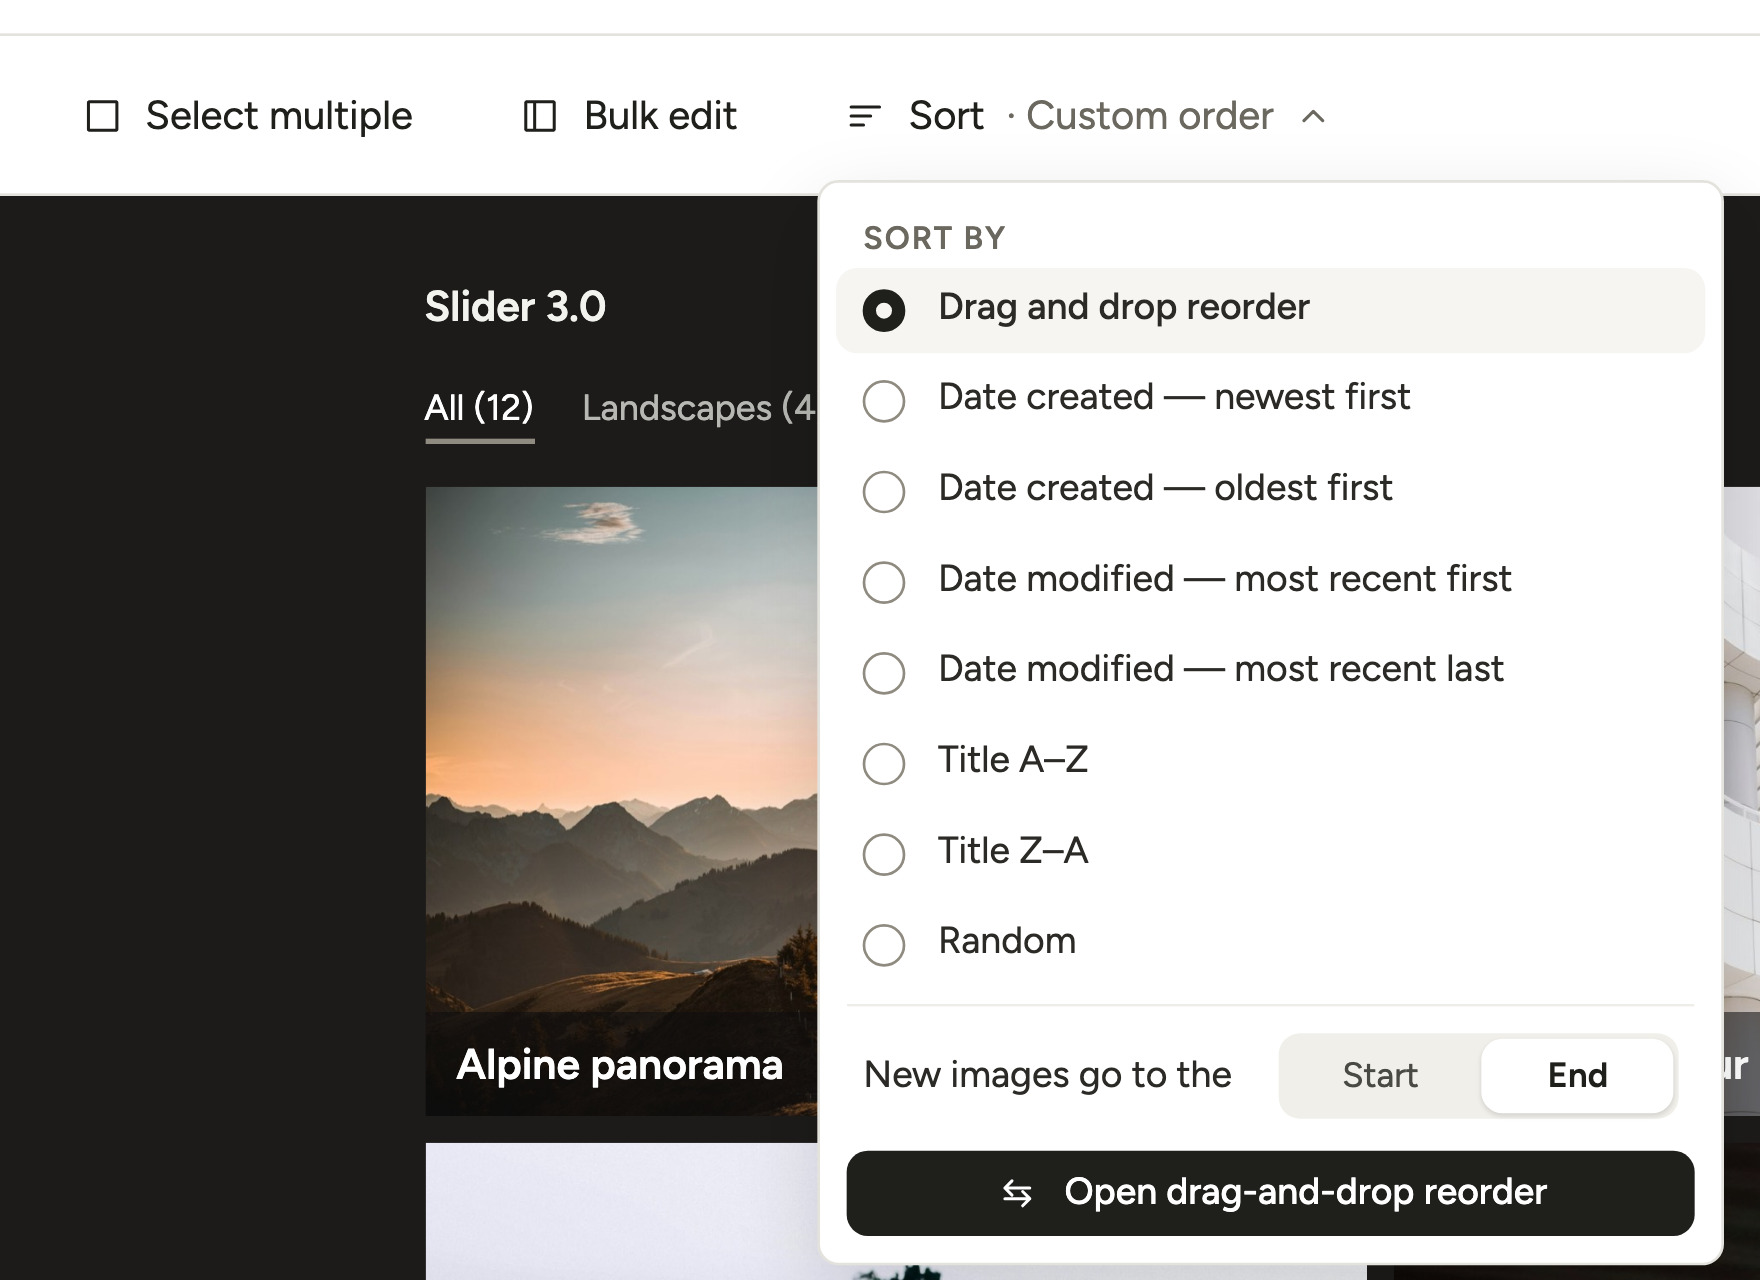
In Modula’s free version, images appear in the order you add them; to move one to the end, remove it and add it back. Any other order needs the Sort menu above the preview, part of Gallery Sorting on the Starter plan and up.
Click Sort and pick one of eight options:
- Drag and drop reorder: click Open drag-and-drop reorder, drag photos or use their arrows, then Save order.
- Date created (newest or oldest first) or Date modified (most recent first or last).
- Title A–Z or Title Z–A.
- Random: one shuffle, kept until you sort again.
Below the list, New images go to the Start / End decides where new photos land. Pick Start if your newest work should always lead.
The title trick: WordPress usually takes each title from the file name, so “IMG_4821” sorts by camera number. Rename titles to “01 First look”, “02 Ceremony” and so on, and Title A–Z follows your story. Bulk edit renames a whole batch on one screen.
A sort reorders the images once, so pick it again after adding photos. Details: sorting your images.
Show images in random order
Modula shuffles a gallery two ways. Randomize images (free) gives each visitor a fresh order on every page load, while Sort → Random (Pro) shuffles once and keeps that order for everyone.
A per-visit shuffle works well for portfolios and product galleries: returning visitors see something new up top, and every photo gets a turn in the first row. Switch on Randomize images under Layout.
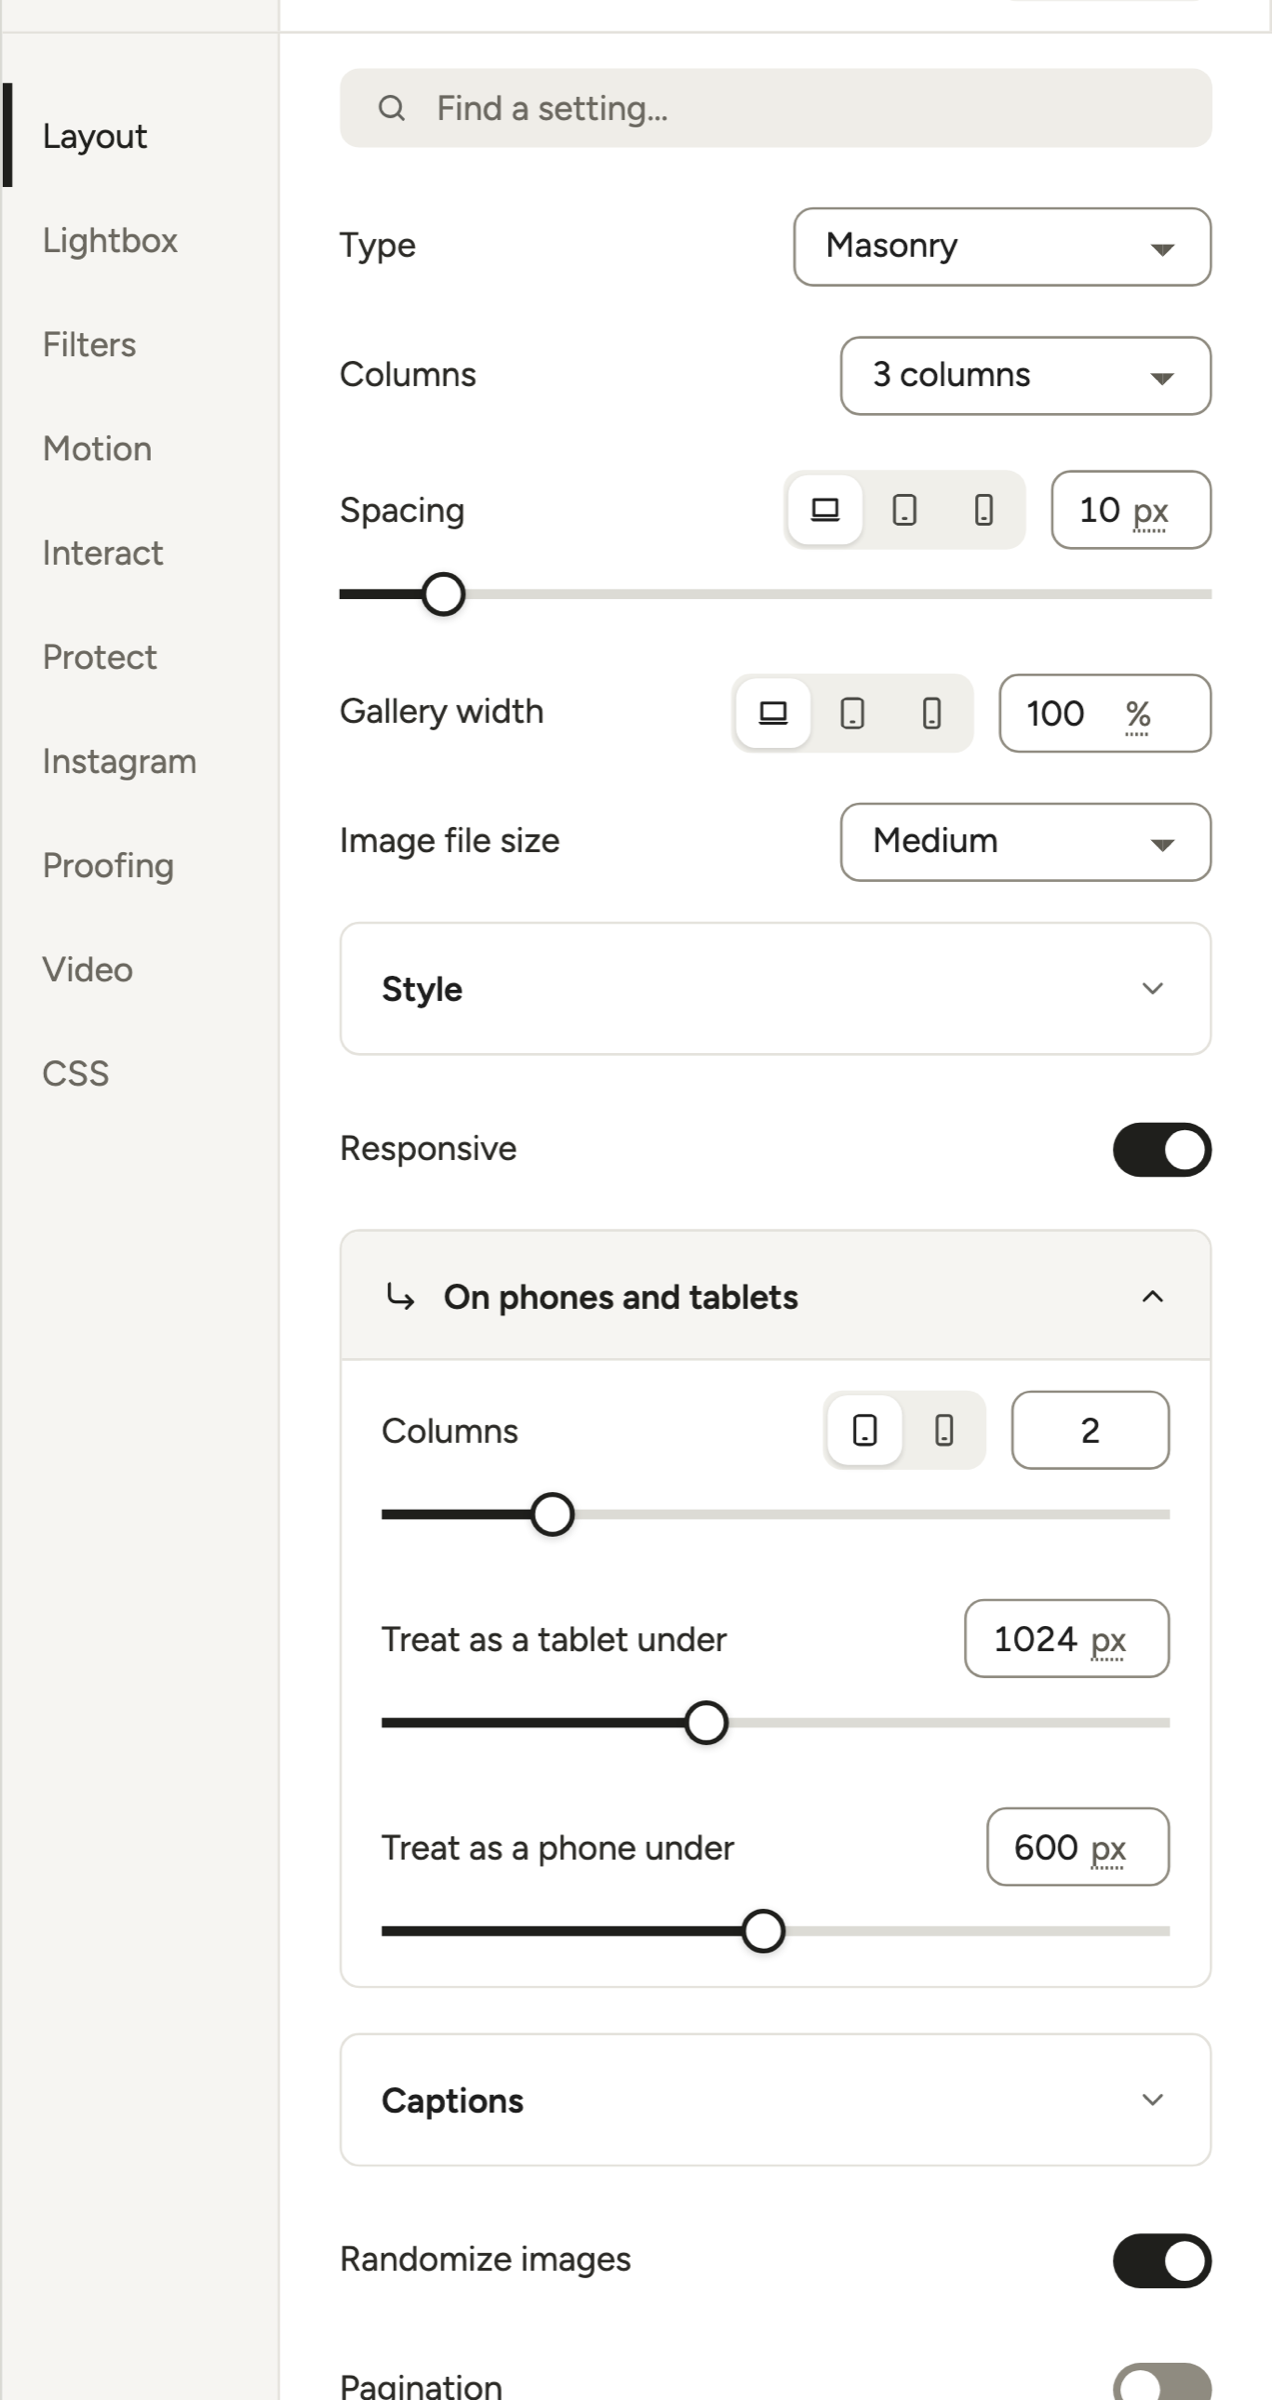
Before you rely on it:
- It works on these gallery types: Masonry, Uniform grid, Fit grid, Justified grid, Tiles, Polaroid, Parallax and Slider (the last two are paid types).
- Mixed galleries don’t shuffle. Content blocks or embedded items keep the saved order.
- The editor preview doesn’t shuffle. Check the live page.
- Page caching can freeze it until the cache refreshes.
Don’t confuse it with the Tiles type’s Randomness slider, which reshapes the tiles and leaves the order alone.
How Modula compares with the WordPress Gallery block
Like Modula, the WordPress Gallery block takes many images at once, and for a dozen photos in one post it’s often enough. In WordPress 7.1.3, its placeholder offers Upload, Media Library and the new Use attached images.
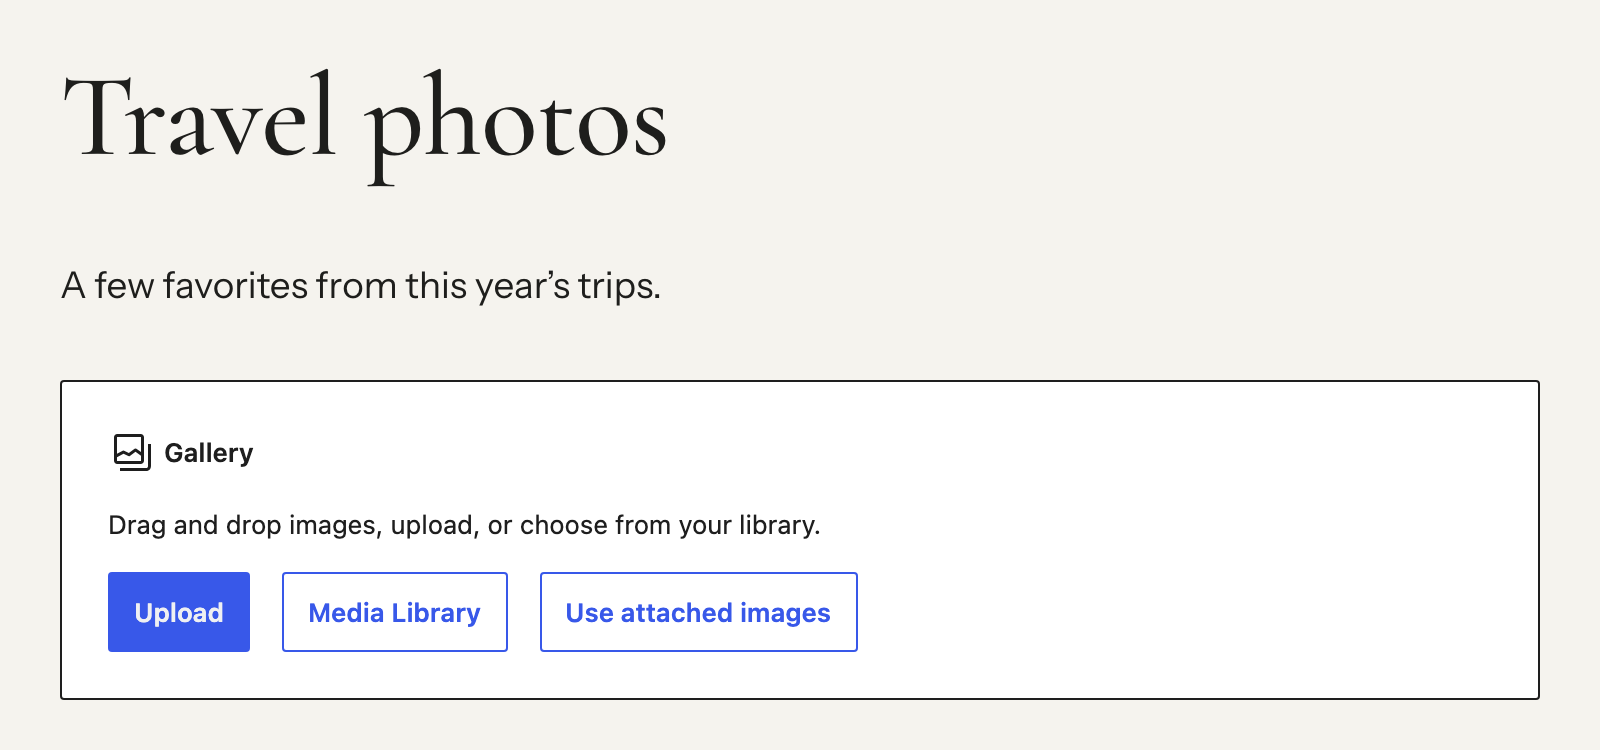
With Media Library, Ctrl/Cmd-click or Shift-click your photos, click Create a new gallery, drag them into place (or use Reverse order) and click Insert gallery.
| Task | Gallery block | Modula |
|---|---|---|
| Add many at once | Yes | Yes |
| Batches over the upload limit | No | Server folder (Pro) |
| Remove an image | Options menu → Delete | Trash icon, with Undo |
| Reorder | Move arrows or List View | Sort menu (Starter and up) |
| Shuffle | Randomize order | Randomize images (free) |
A Gallery block lives in one post, while a Modula gallery is one item you can embed anywhere. Reach for a plugin when the same gallery appears in several places or your batches run into the hundreds.
Skip the editor: REST API and AI assistants
A script can fill a Modula gallery without the editor, through the WordPress Abilities API (WordPress 6.9 and later), where plugins register actions scripts can call.
modula/upload-image takes one image of up to 8 MB (and within your upload limit), and modula/update-gallery-images changes the image list. The ZIP and folder imports have Pro abilities of their own.
The same operations work over MCP (Model Context Protocol), the standard AI assistants use to call tools, so Claude can do the job. See Modula galleries with the REST API and connecting an AI assistant.
Embed the gallery on your site
To show multiple images on a WordPress page, embed a Modula gallery once: photos you later add, remove or rearrange reach the page when you save the gallery, with no re-embed.
Click Embed in the editor and paste the shortcode, like [modula id="89"], into the post or page, or use Modula’s block, Elementor widget, Divi module or Beaver Builder module. See the gallery shortcode guide.
Frequently asked questions
Modula doesn’t cap images per gallery or per upload; file size and page speed are the real limits. For several hundred photos, Pagination or Load More (Business plan) keep the page quick (faster galleries).
In the WordPress media window, Ctrl-click (Cmd-click on a Mac) adds single images and Shift-click selects a range. In Media → Library, click Bulk select first. In Modula’s Media library tab, just click each photo.
Not by dragging the folder itself. Open it, select all the files with Ctrl+A or Cmd+A, and drop those on Modula’s Upload files tab. With Modula Pro, you can also zip the folder or copy it to your server.
No. Removing takes the image out of one gallery, in Modula and the Gallery block alike. Your Media Library keeps the file, and so does every other gallery, until you click Delete permanently there.
Yes. Modula saves titles, alt text and captions on the Media Library file, Bulk edit included, so the change shows in every gallery using that image. Want different captions in one gallery? Upload a second copy.
Not directly: the + Add menu has no cloud source. Download the photos first, then use Upload files, or a ZIP or server folder for big sets.
You need Modula Pro: Starter, the cheapest plan, already includes all three. Without it, you can still upload in bulk, remove images one at a time and shuffle with Randomize images (plans).