Have you ever thought about how to create and add a Modula gallery to a page with almost no effort?
By now, you’ll have realized just how easy Modula is to use. What if we said it gets even easier? This tutorial will show you how to add your newly designed image gallery to a page or post on your website.
In the process, amaze your visitors with stylish image galleries, highlighting your works with the best free WordPress plugin for image galleries.
In this article, you will find more about:
- How to add a Modula gallery to a page in WordPress;
- How to insert a Modula gallery into a post;
- More customization to style your gallery;
- And much more.
Table of contents
Why use Modula to add a gallery to a page in WordPress?
Images are an essential ingredient in any website. Whether that’s to break up the text, add context, or explain concepts. Visitors could leave your website in a heartbeat; imagery can keep them interested and make them stay for a while!
But why choose Modula? Modula is a user-friendly and mobile responsive plugin that comes with powerful features. You can password-protect your work, zoom your images to allow website visitors to see your masterpieces in more detail, add a watermark, and even mix photos with videos.
Modula is available as a free download, or you can upgrade to Modula PRO for even more features! Now, let’s look at how to create a new gallery and insert a Modula gallery into a post/page.

Modula Gallery Plugin
Create stunning, responsive photo galleries with ease. Showcase your work, captivate your audience, and boost engagement. You don’t need to do any coding.
How to add a Modula gallery to a page?
Before adding a Modula gallery to a page, we must install and activate the plugin. The following process will be the same for any free WordPress plugin.
Install and activate Modula
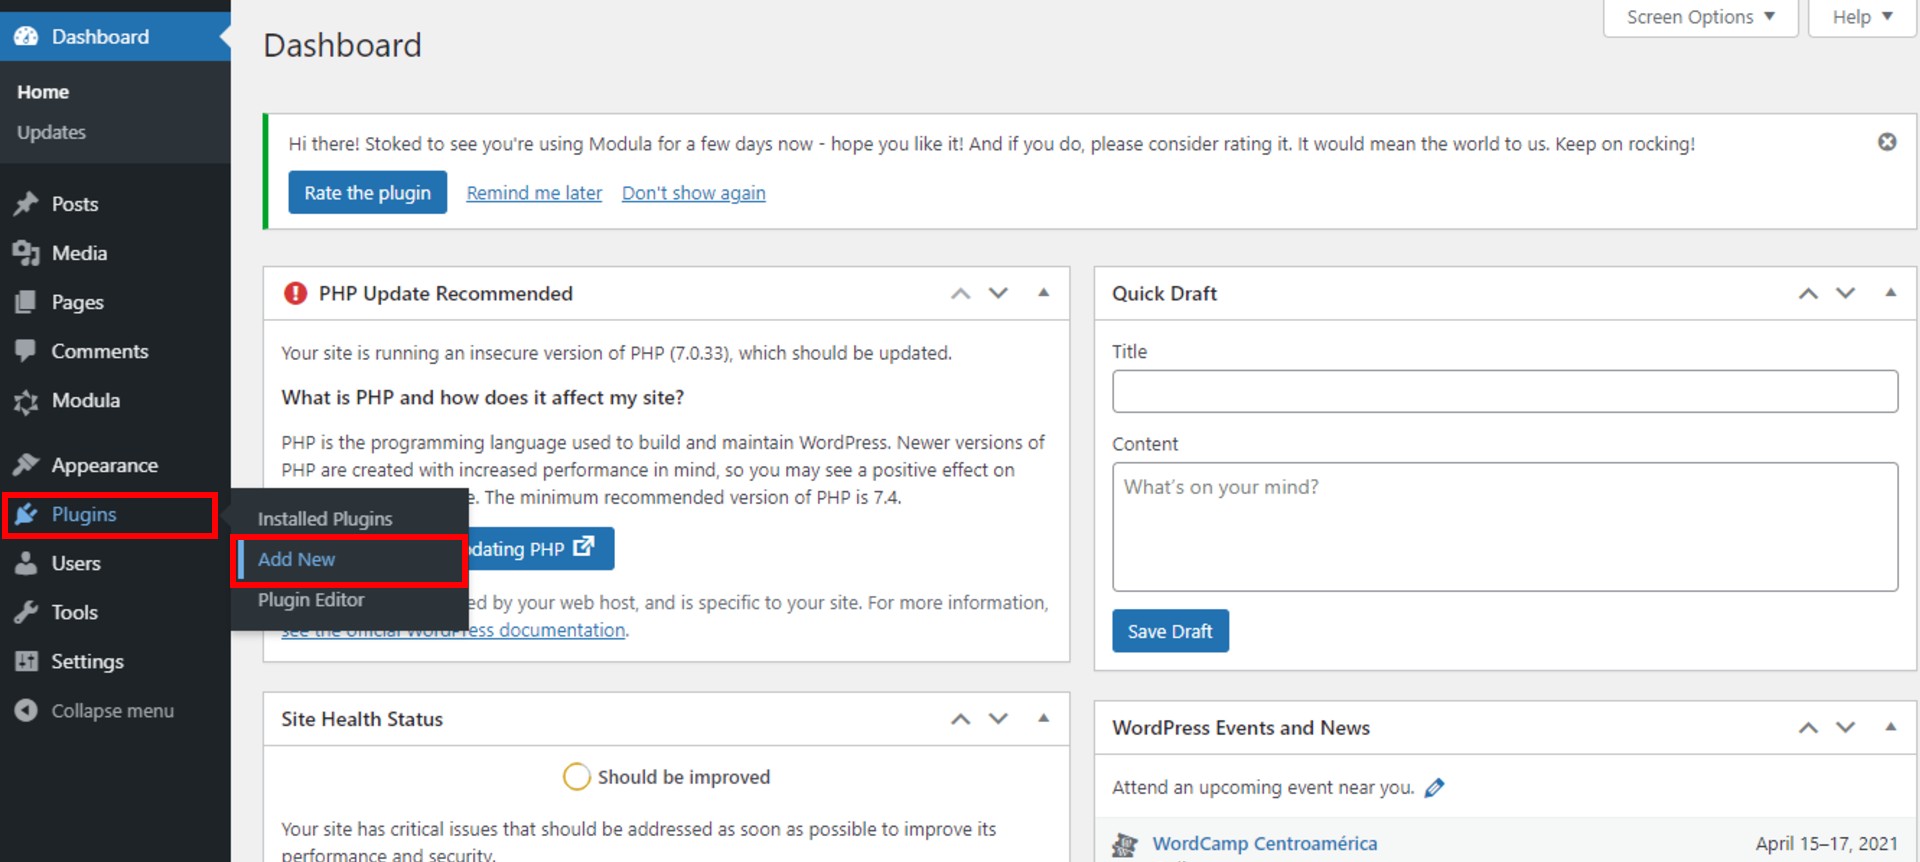
To install and activate Modula, go to WordPress Dashboard > Plugins > Add New.
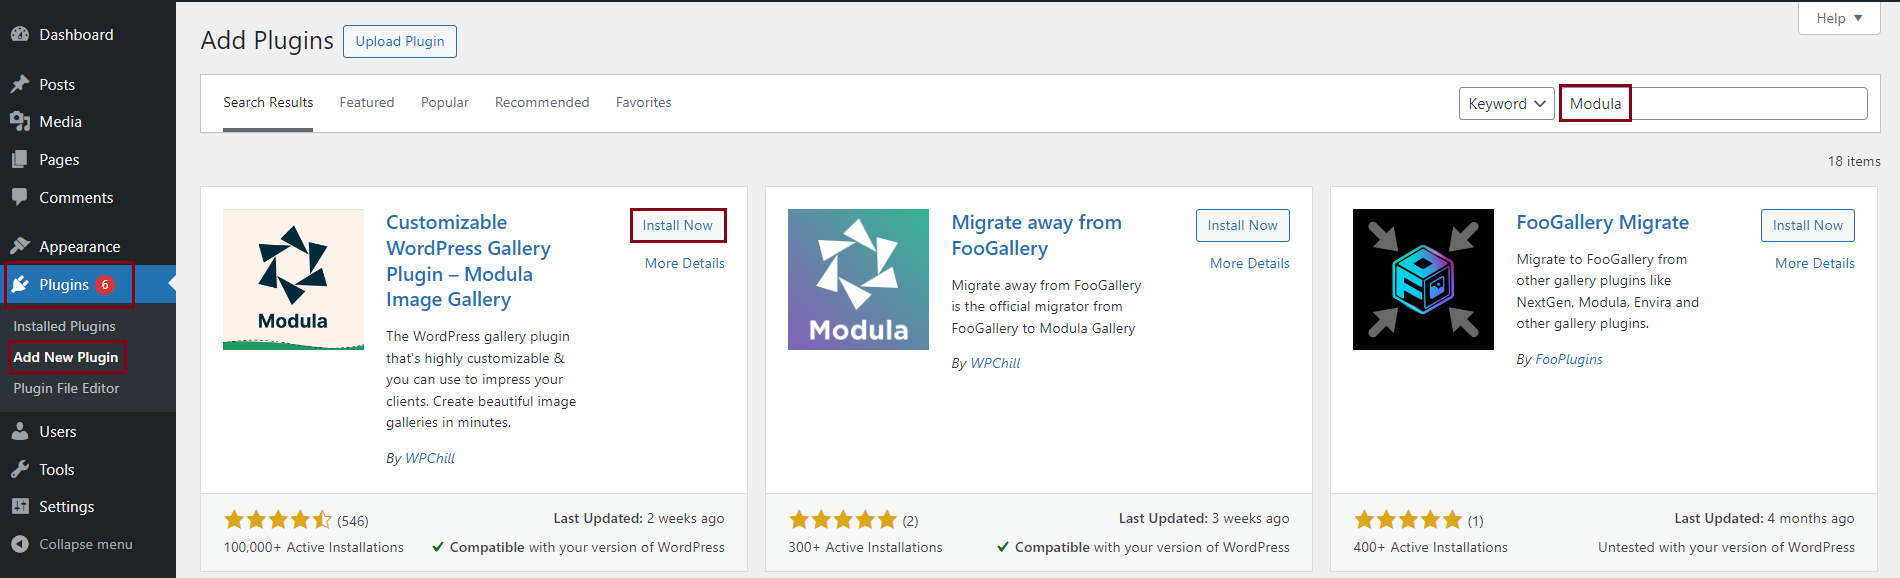
A new page with available WordPress plugins will appear in a few seconds. In the right search bar in the upper corner, type Modula. When you see it, click on Install Now.
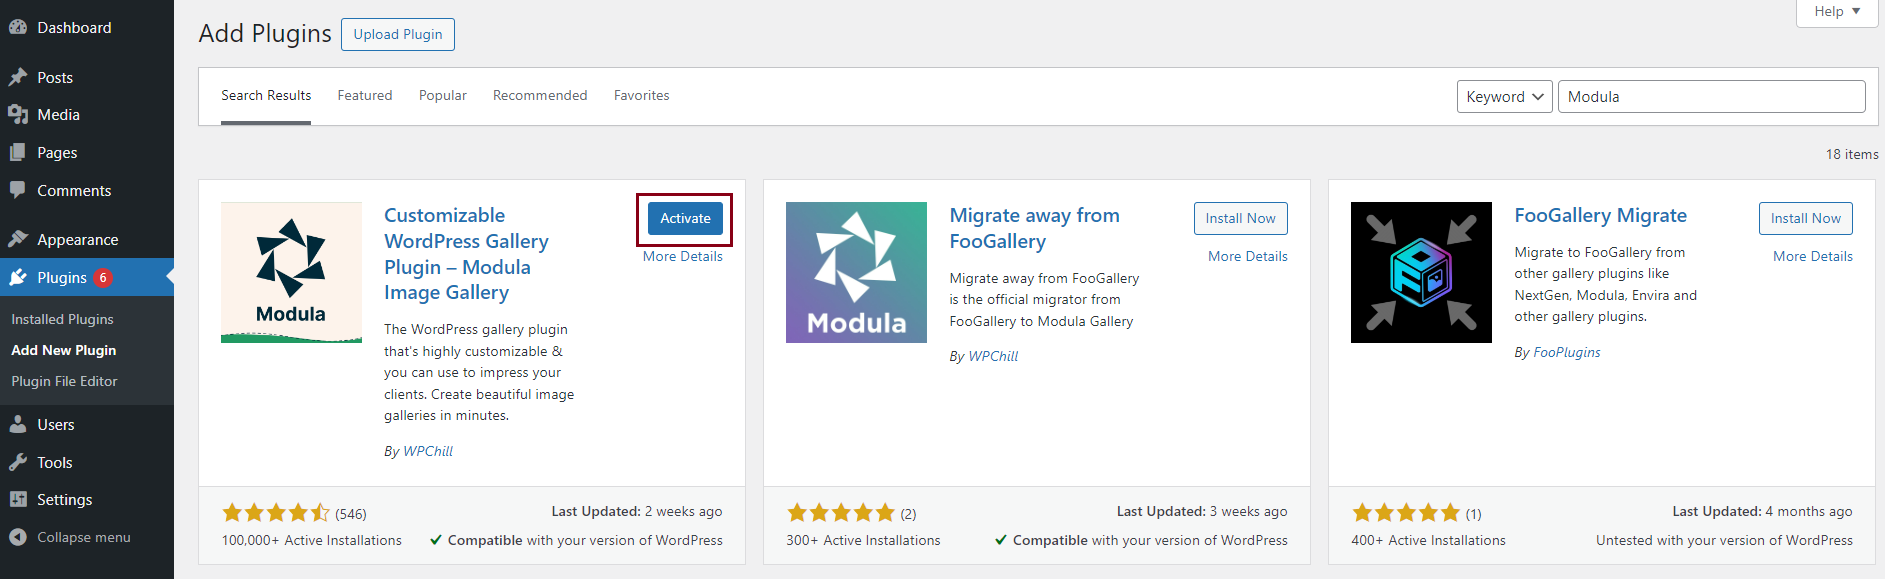
Next, click on the Activate button. If you do not activate the plugin, it won’t work!
Create a new gallery
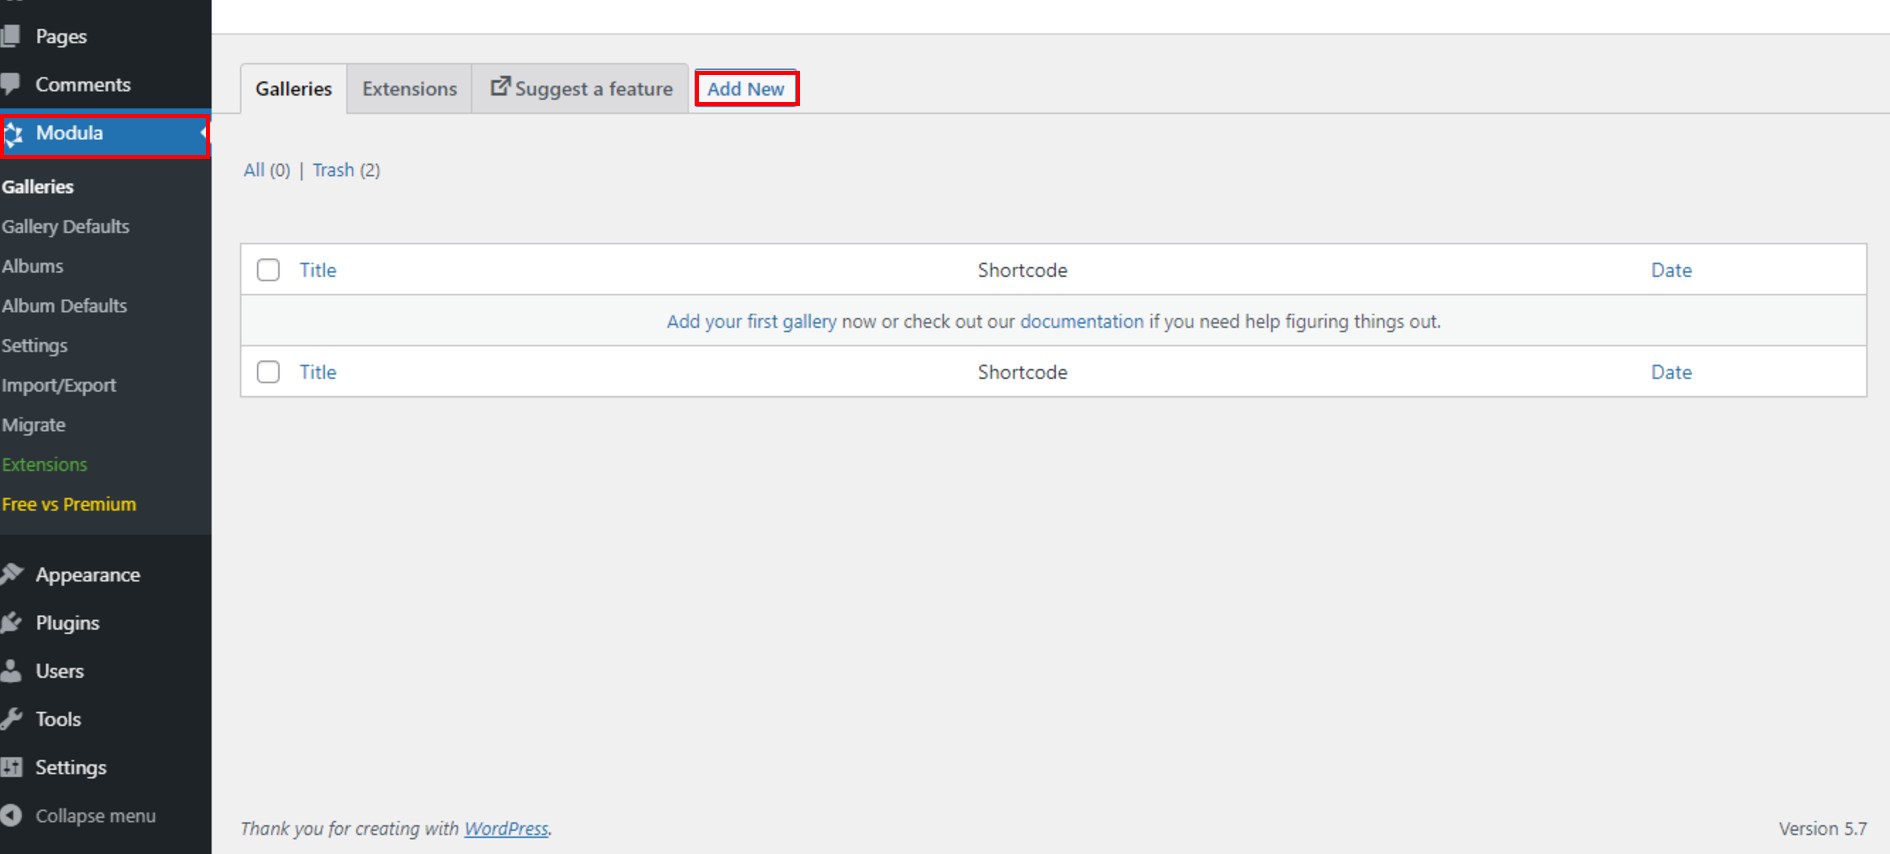
We can now create our new gallery as Modula is installed and activated. How do we create a new gallery? Go to Modula > Galleries > Add New.
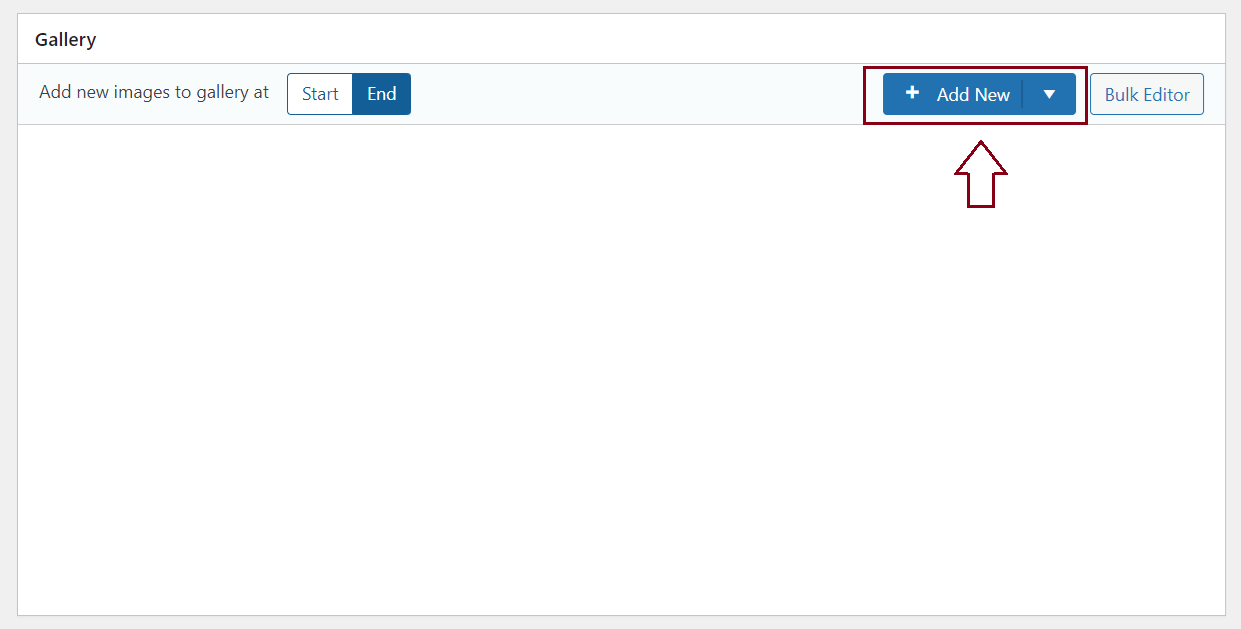
Continue to add a title and upload images to your gallery. Use the Upload images button to add pictures to your gallery, and then use the drag-and-drop builder to organize your photos as you, please.
Customize your gallery
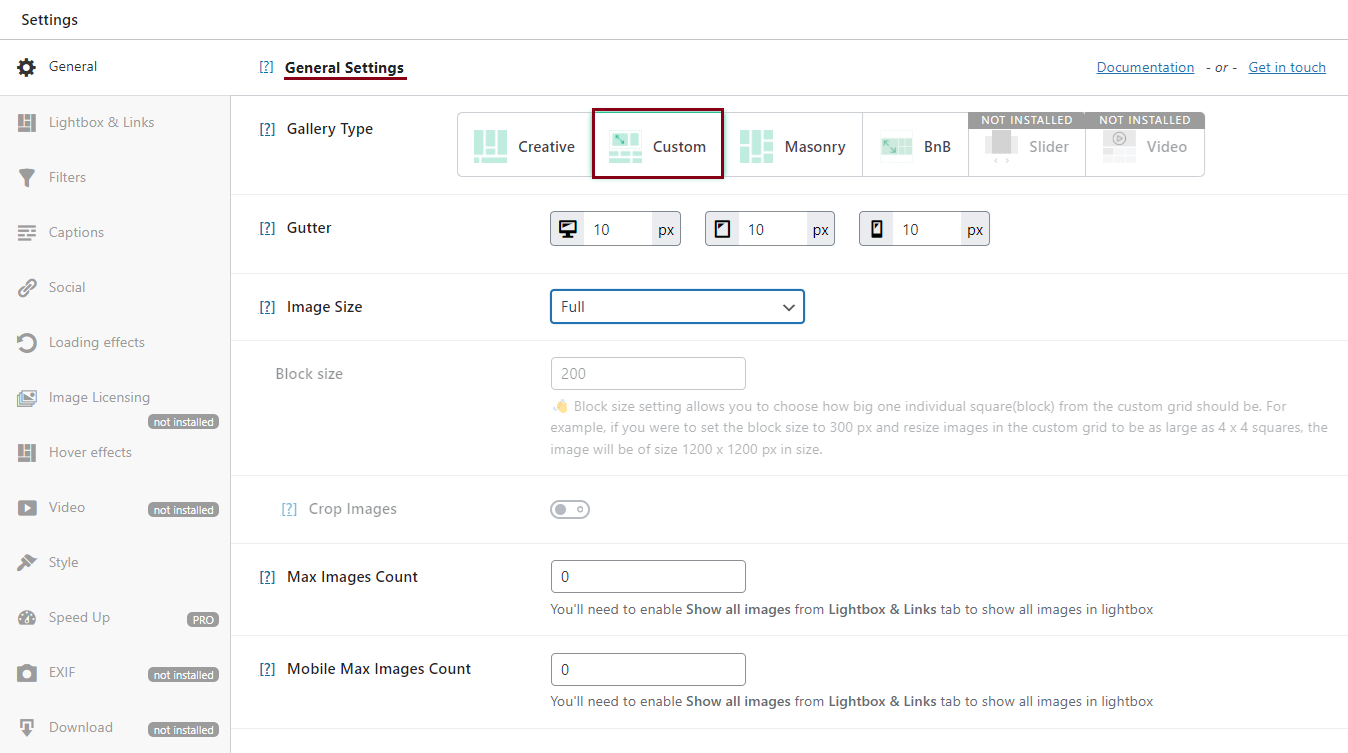
First, there are six different gallery types to choose from: creative, custom, slider, video, BnB, and masonry (columns). I’ve selected the custom grid, but you can choose whatever you want.
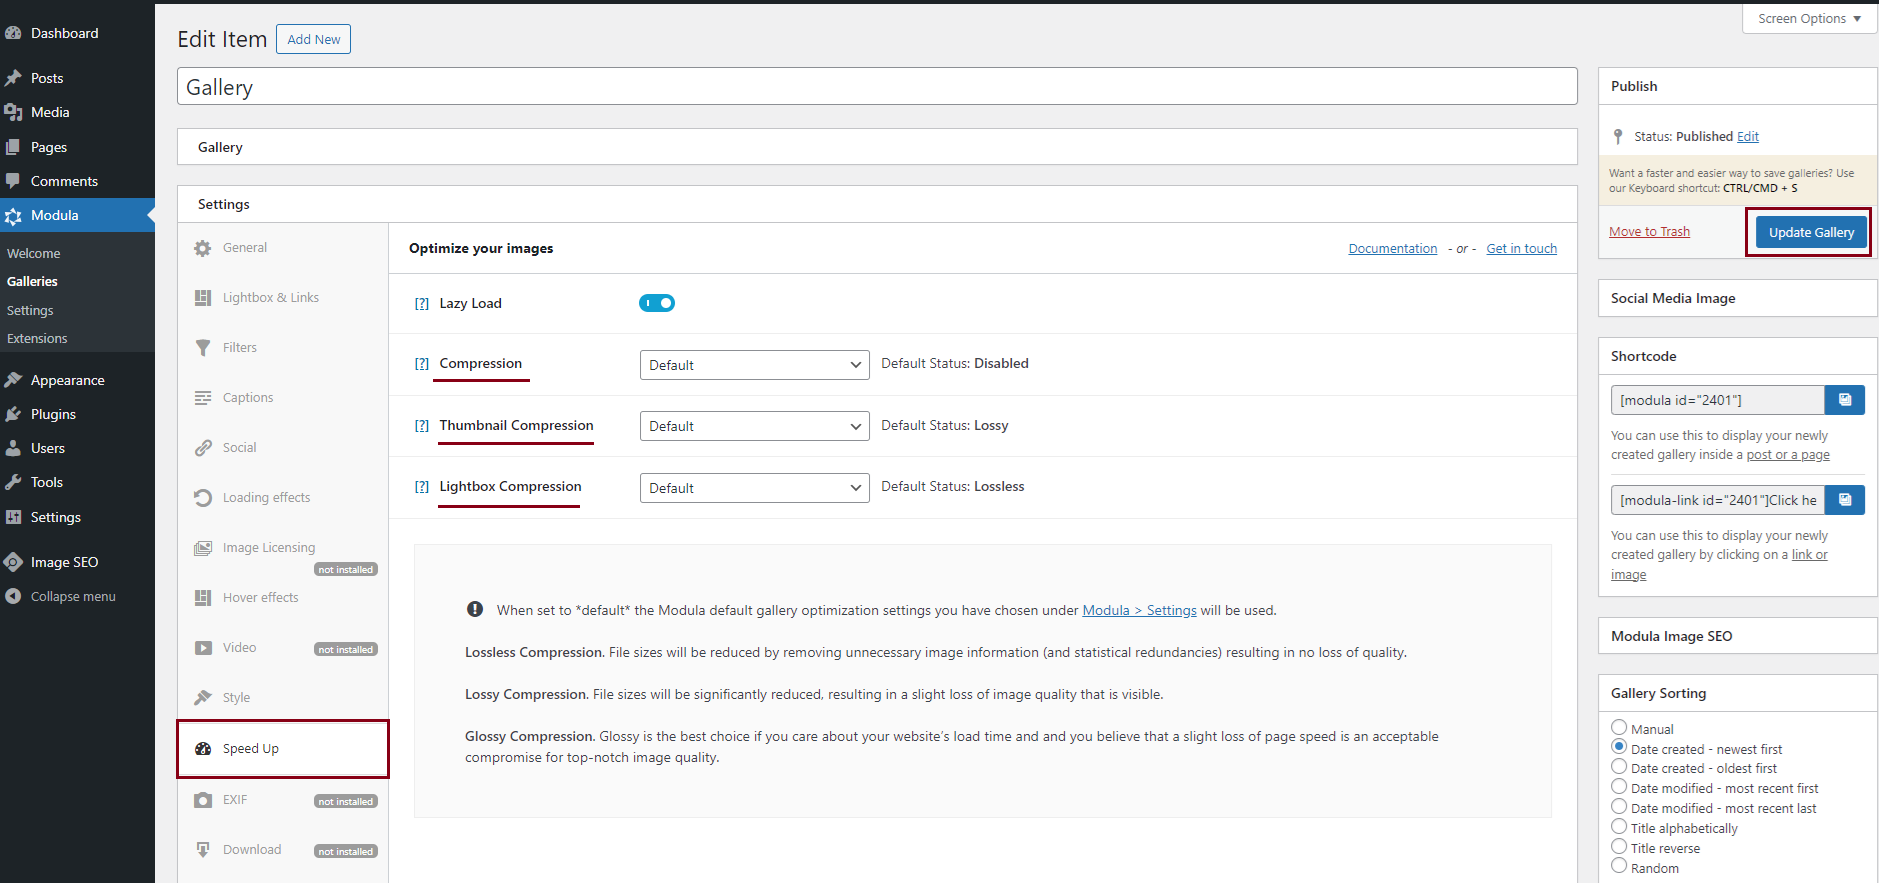
Next, let’s take a look at the Speed Up feature. Perfect if you have many pictures that need to be optimized and resized for faster website loading.
Go to Speed Up > Lazy Load and enable it to enable speed up.
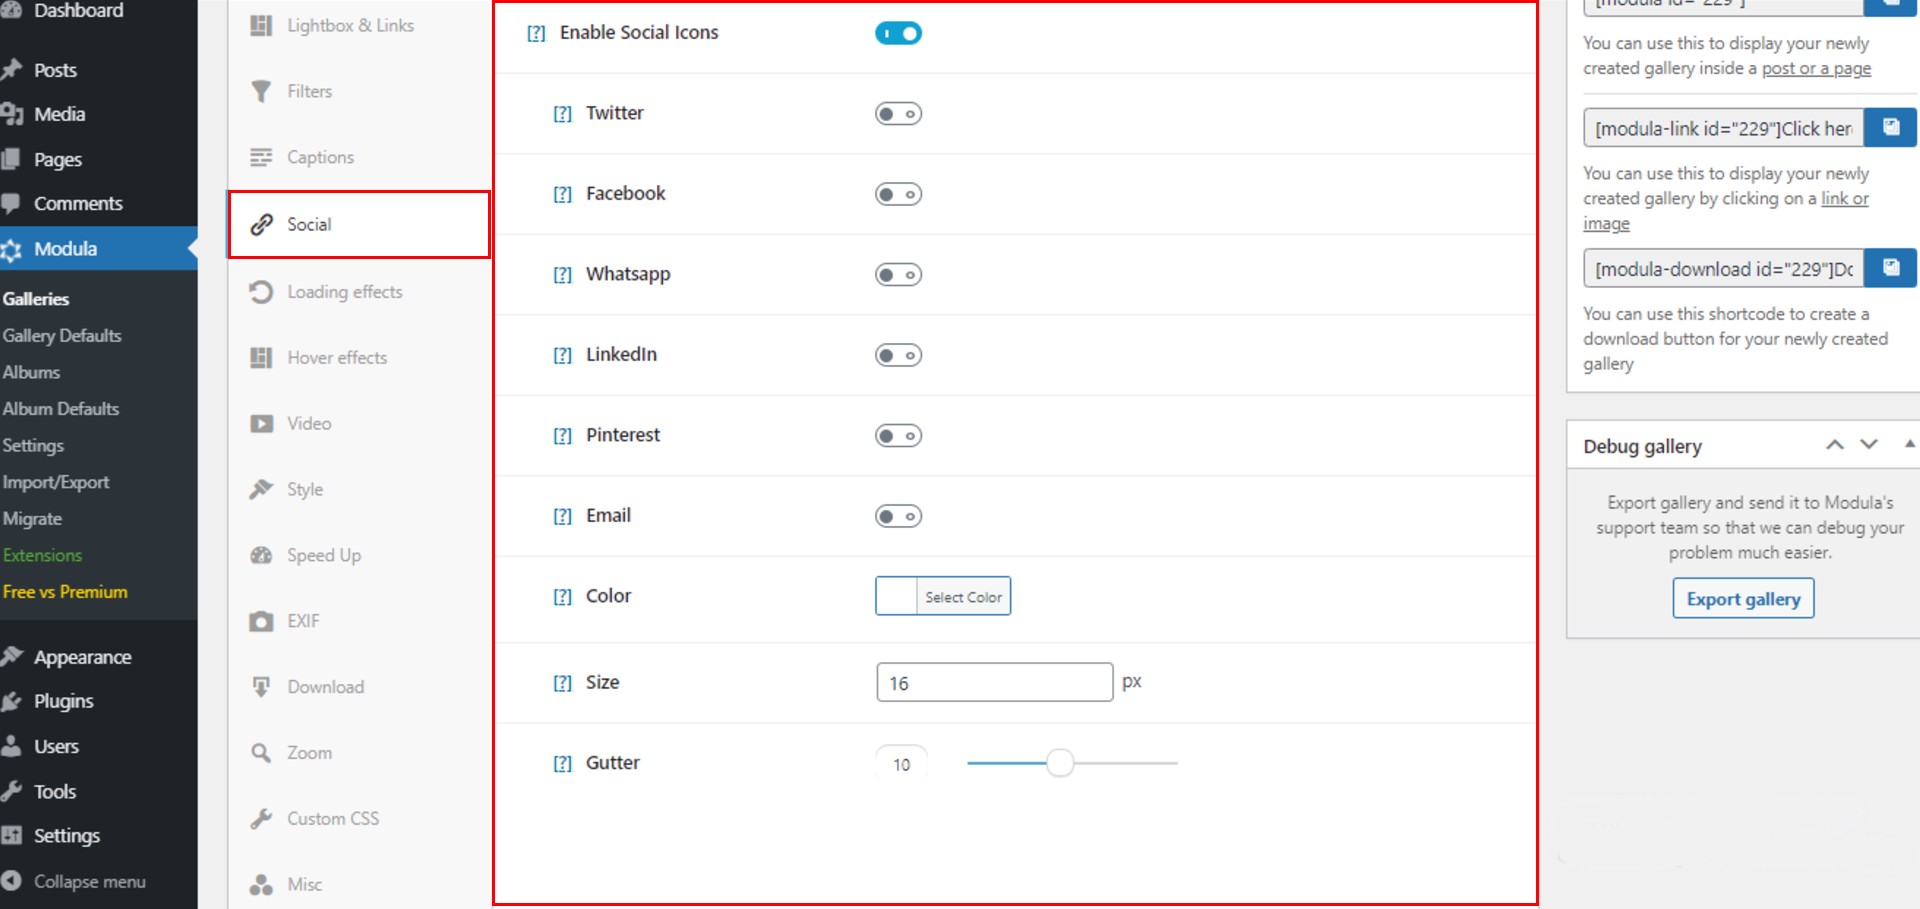
Now I want to add some social media icons. You can choose what social media icons you want to display and change the color of the icons, the size, and the gutter.
What does the gutter mean? It means the distance between the icons.
So how do you save your photo gallery? After you edit and style your gallery the way you like, save it by clicking on the Save Gallery button.
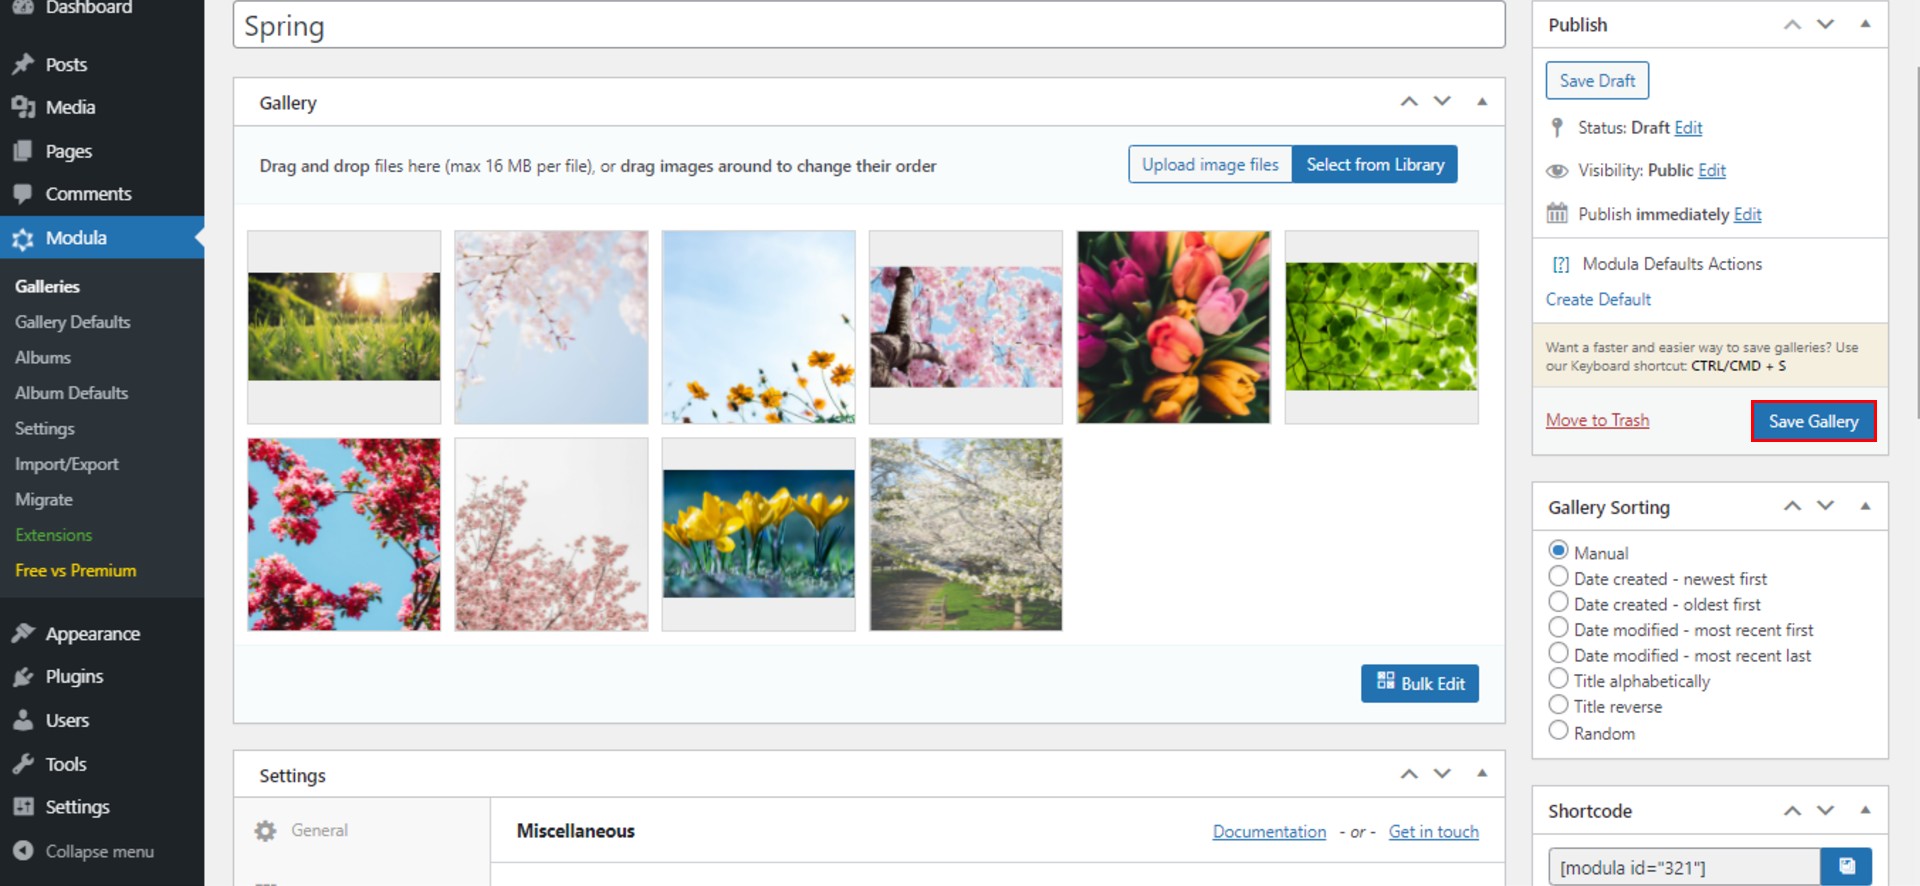
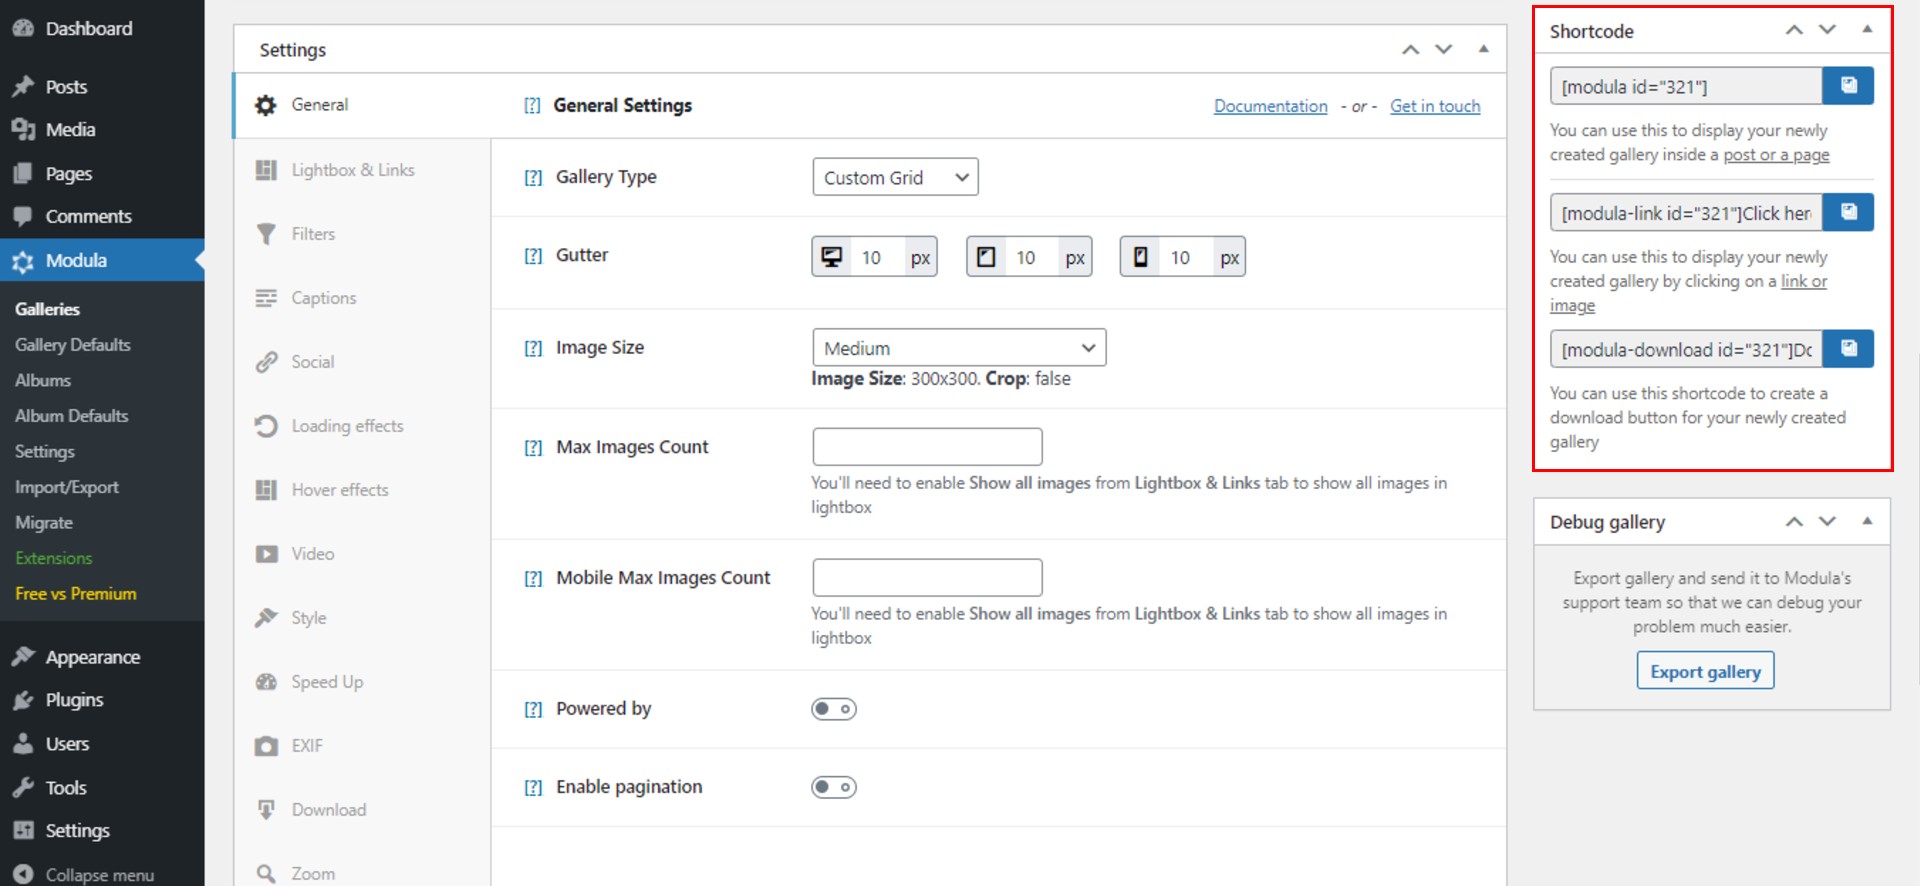
Modula will automatically generate three shortcodes. You can use these shortcodes to share your gallery within a post or a page.
How to add a gallery shortcode to a WordPress page/post?
Now that we have our gallery created, how can we add a Modula gallery to a page?
We’ve already talked about gallery shortcodes. To add a gallery to a WordPress post, we need to copy the shortcode and paste it into the WordPress page/post.
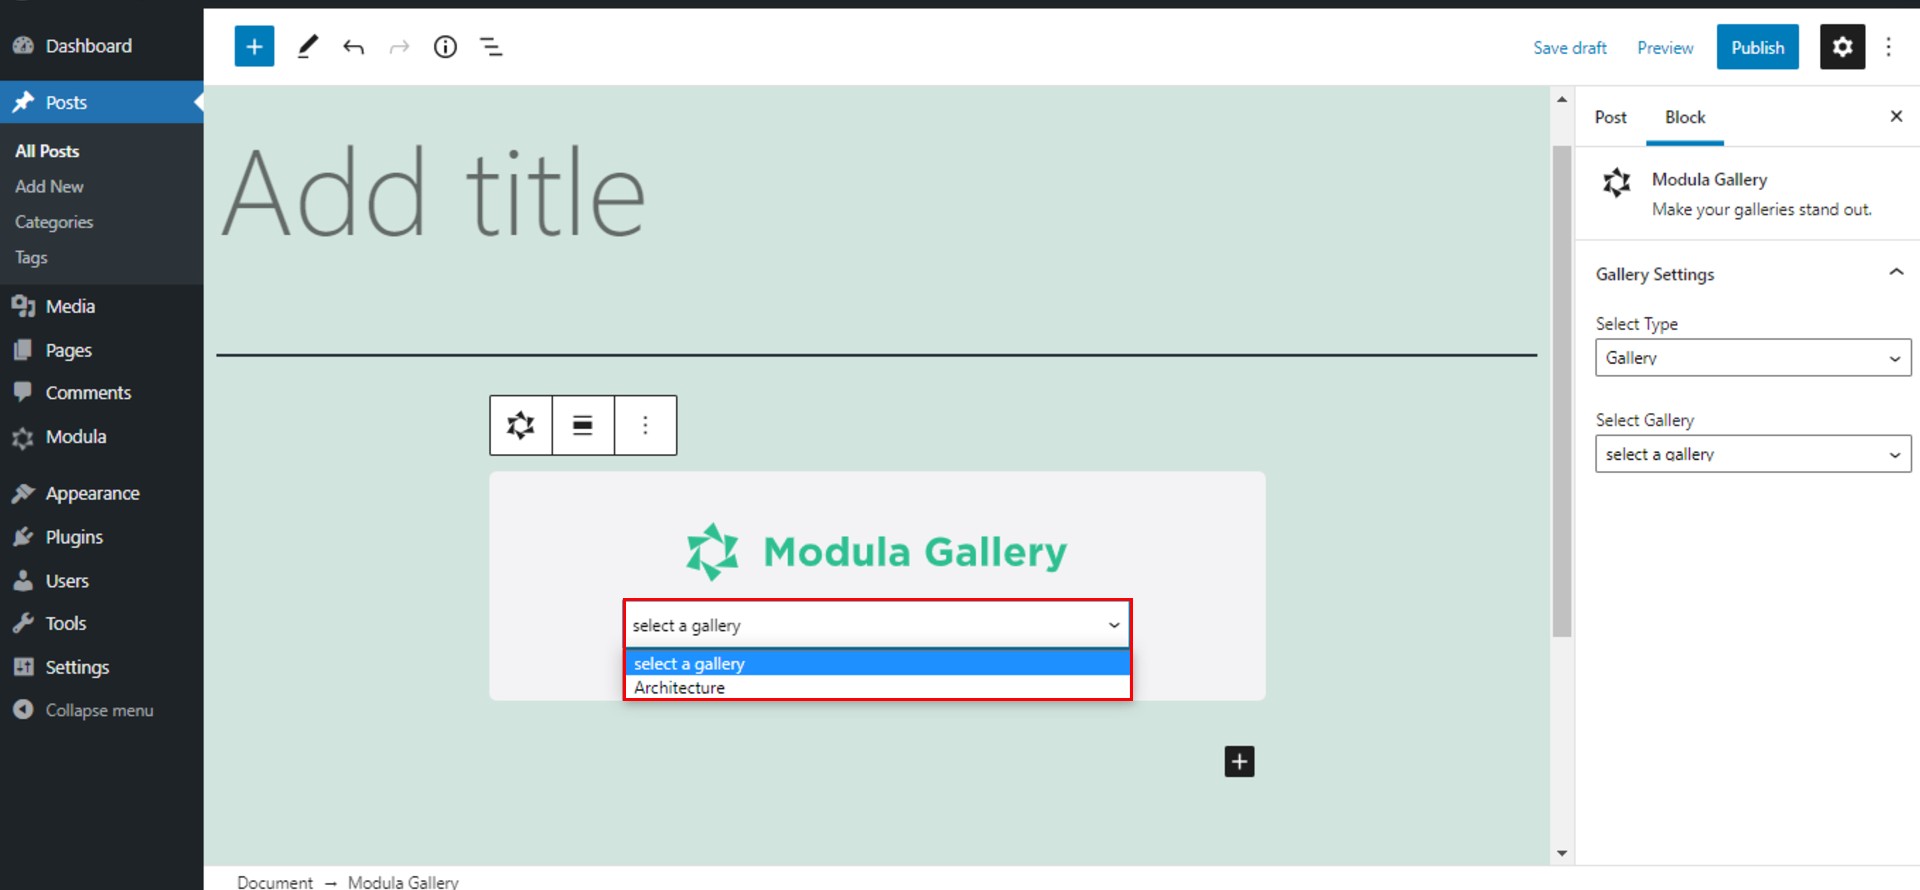
First, press the “+” icon and search for the Modula Gallery block.
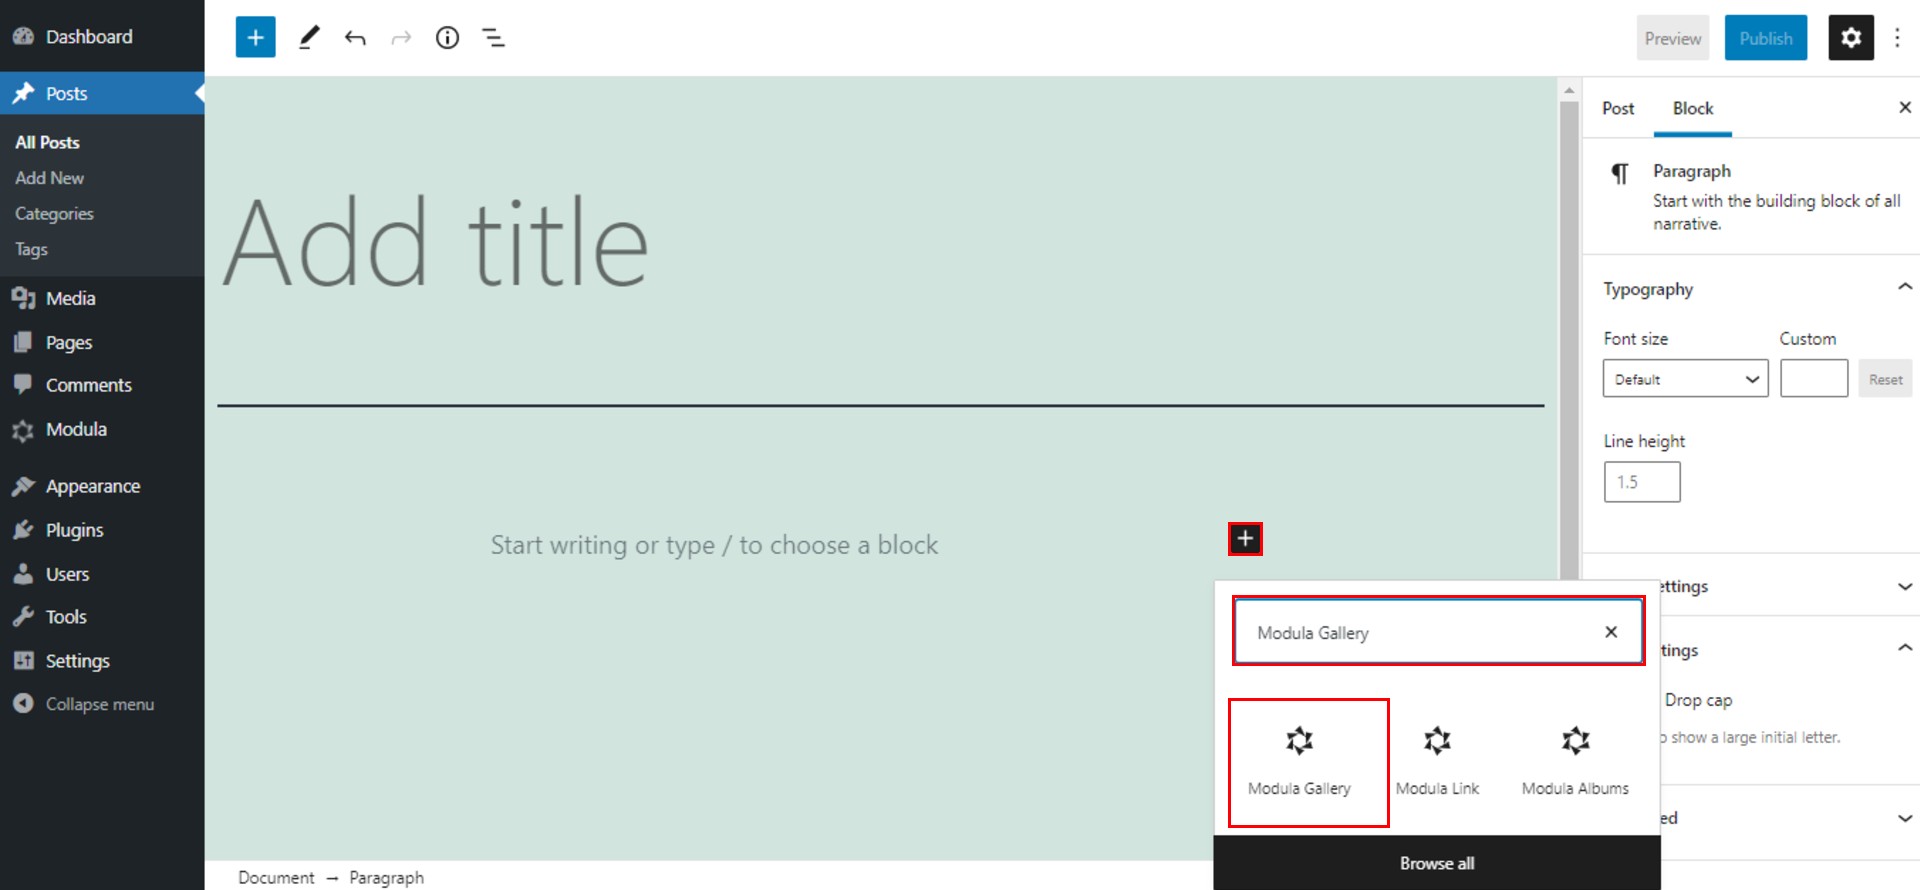
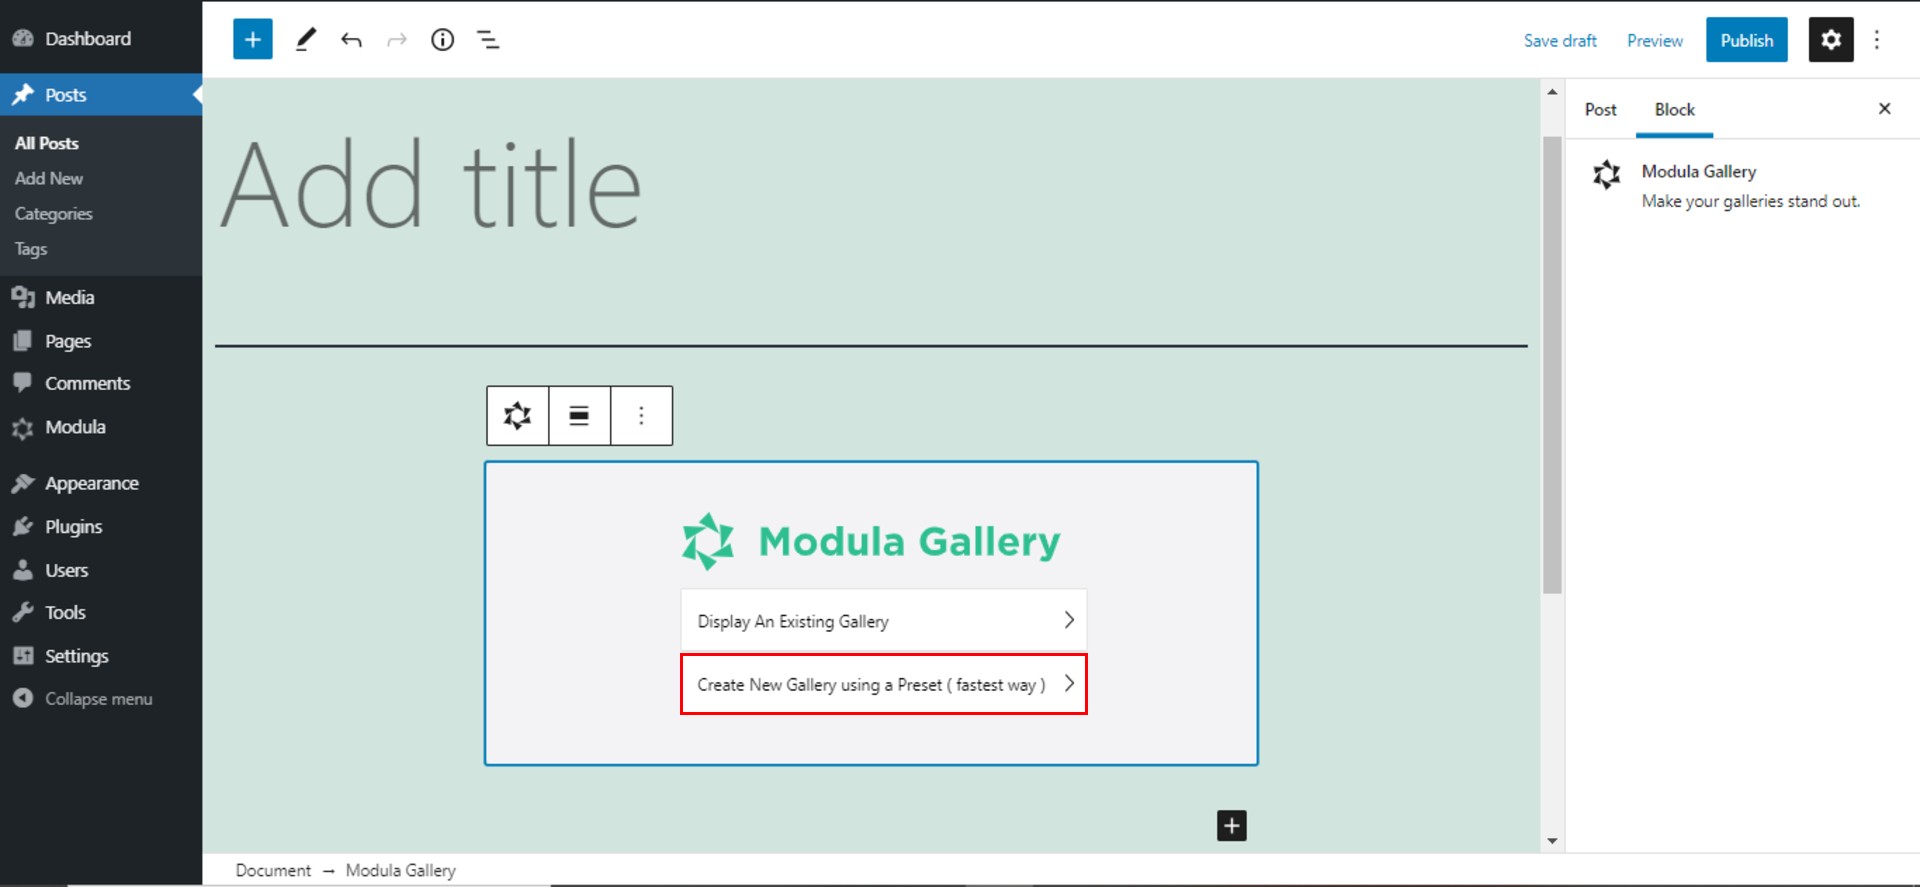
You can choose to display the gallery you want from the drop-down list.
If you didn’t follow the steps and need a gallery, you could create one by clicking on Create New Gallery using a Preset and following the steps I showed you above.
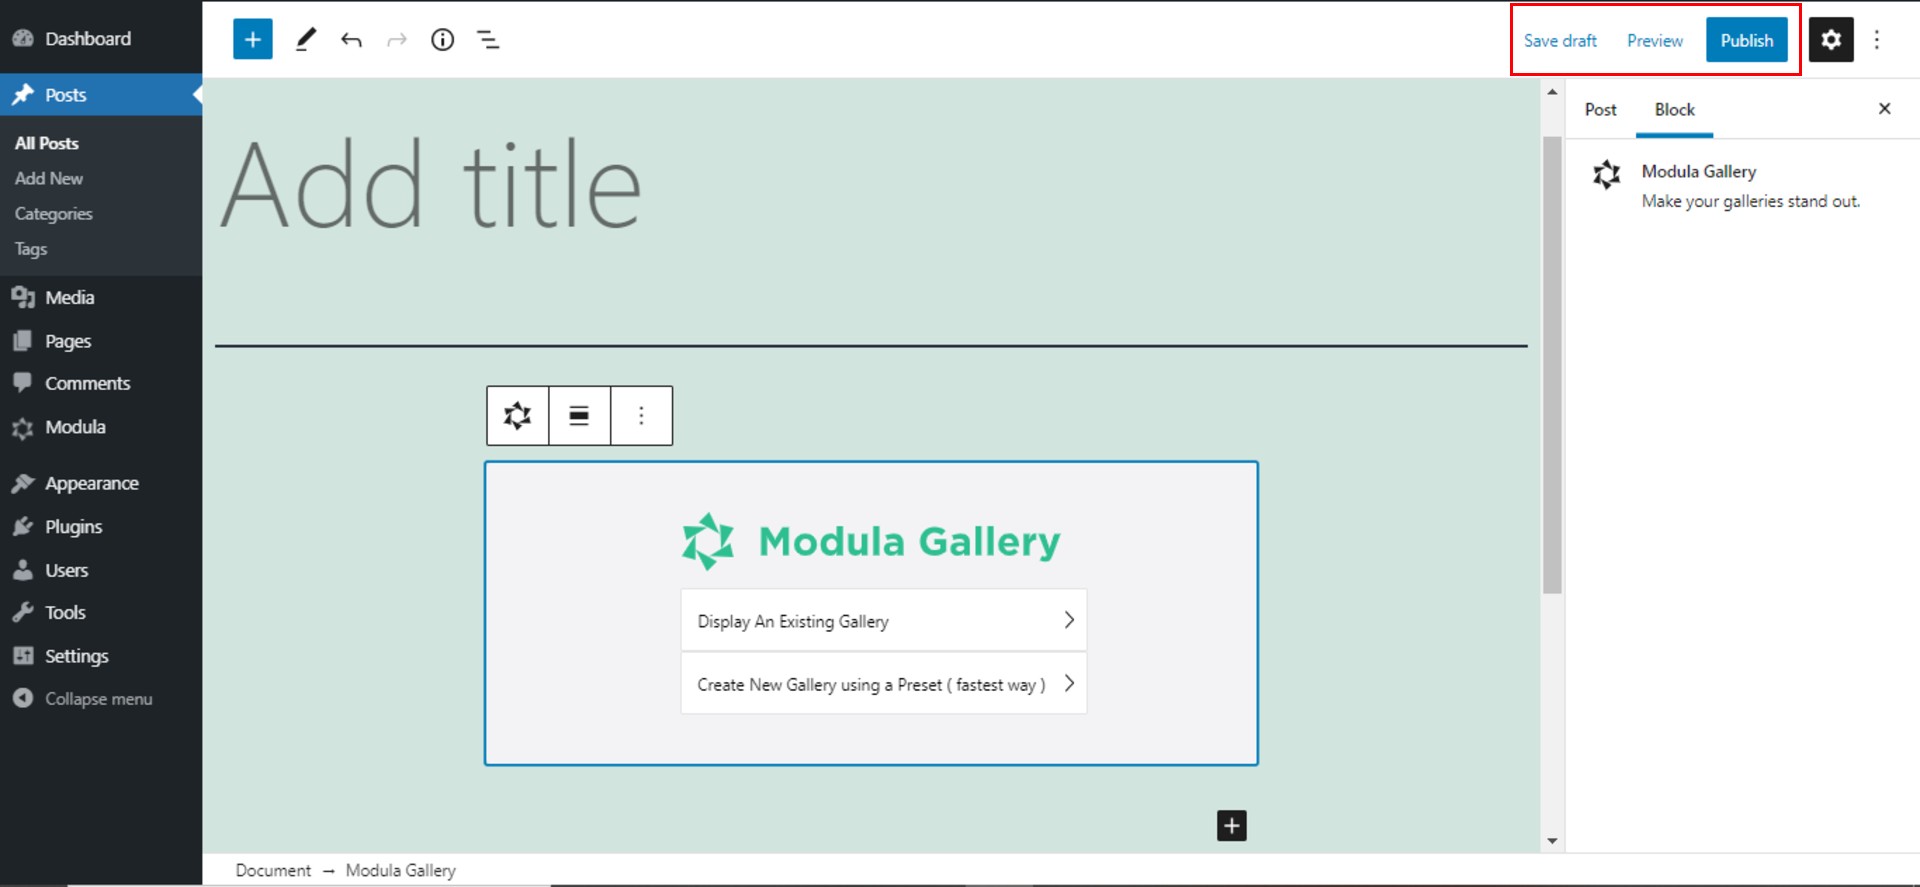
After you’ve added your gallery, remember to save the post as a draft or publish it. If you’d like to see what the post/page looks like before publishing, you can click on Preview. Once you’re happy with it, hit publish!
If you’re a visual learner, check out this YouTube tutorial that will go through the whole process of creating and displaying a gallery with Modula:
Final thoughts – How to add Modula to a page?
And we’re all done! Modula is ideal for any WordPress website. The user-friendly interface, the features, and the ease of use make it perfect for everyone.
Start creating unlimited galleries with Modula and share your work within your website!
Modula Gallery Plugin
Create stunning, responsive photo galleries with ease. Showcase your work, captivate your audience, and boost engagement. You don’t need to do any coding.
