This extension will help you add watermarks to your images and prevent them from being shared without proper credit.
Please follow the instructions from our article on how to install extensions on your site.
To see a demo gallery please click here.
Modula Watermark Settings
Watermark added to one gallery only
If you wish to apply the watermark only to the images in the gallery you are editing, please go to your WordPress dashboard > Modula > Galleries > Edit your gallery > toggle ON the ‘Enable Watermark’ option.
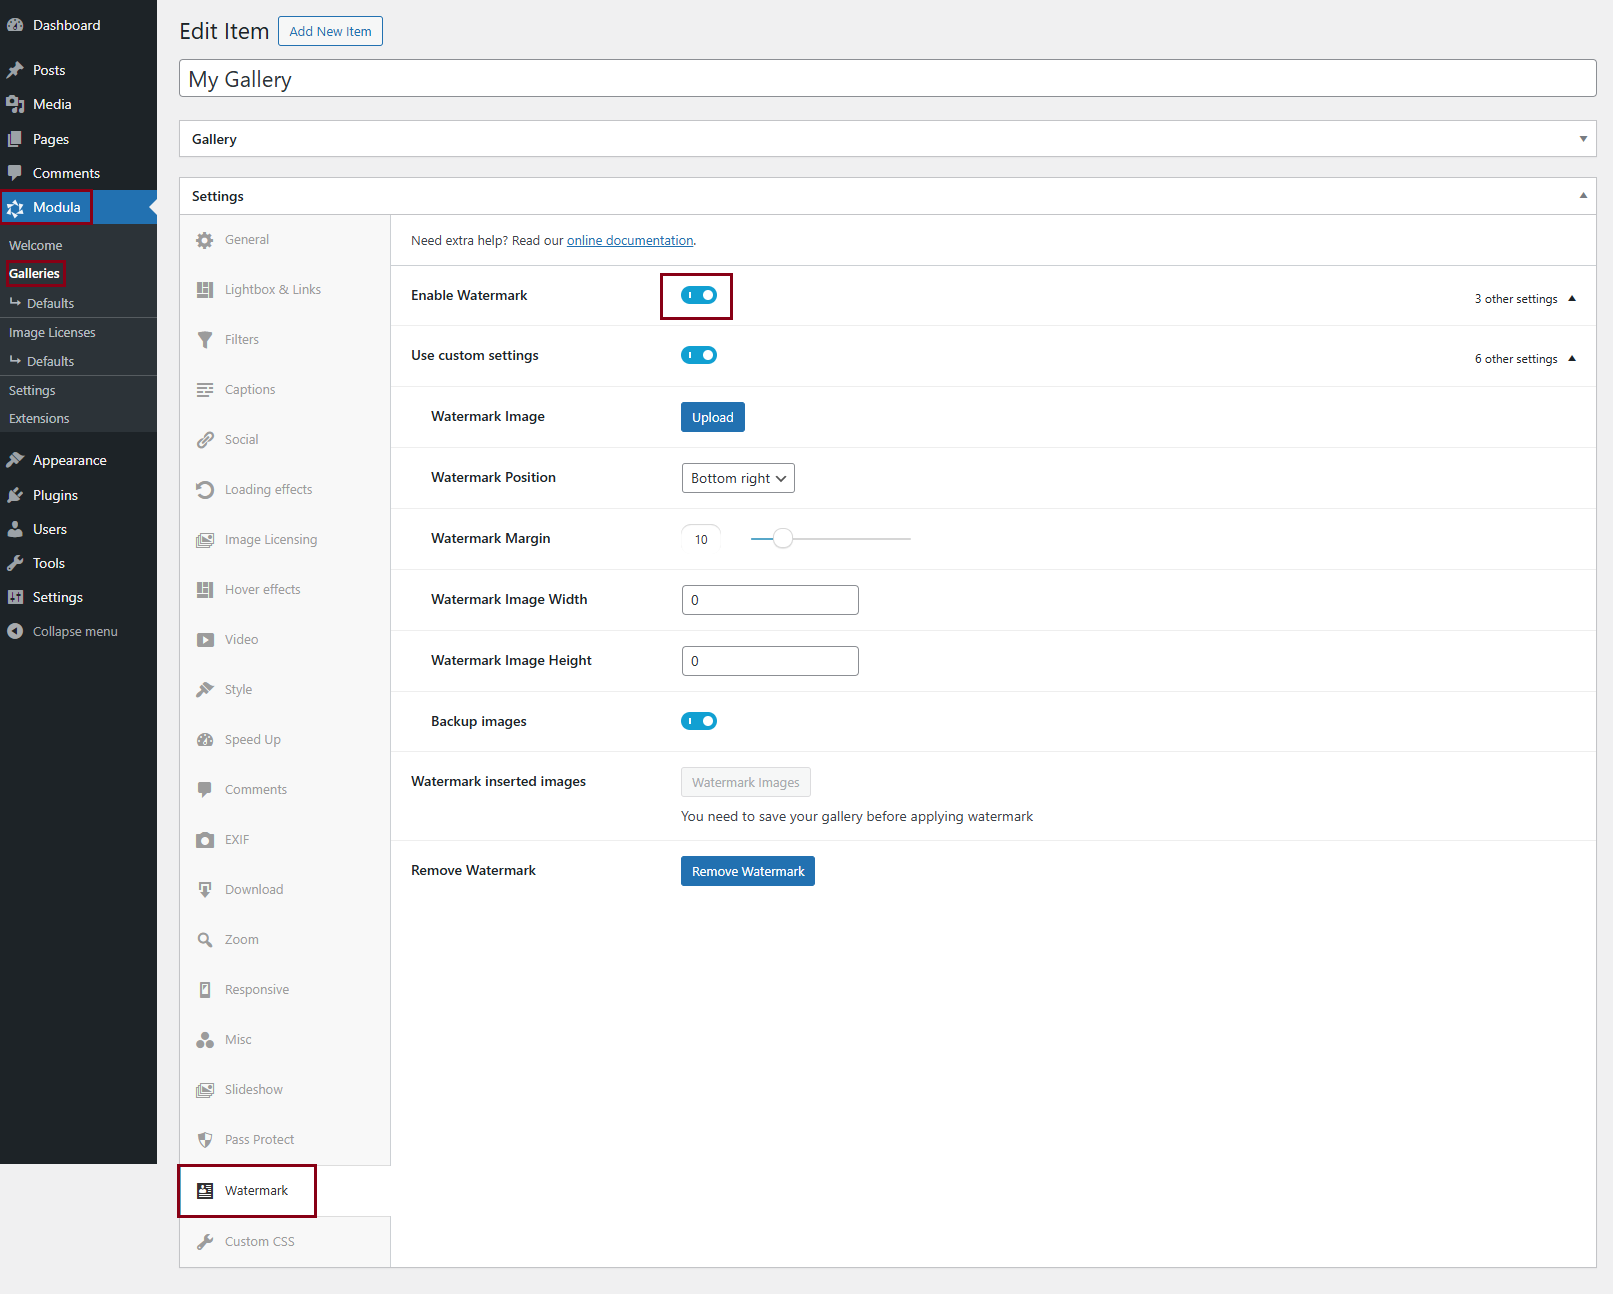
NOTE: toggle on the ‘Use custom settings‘ option to add your watermark image and set the settings you need
Watermark added to multiple galleries
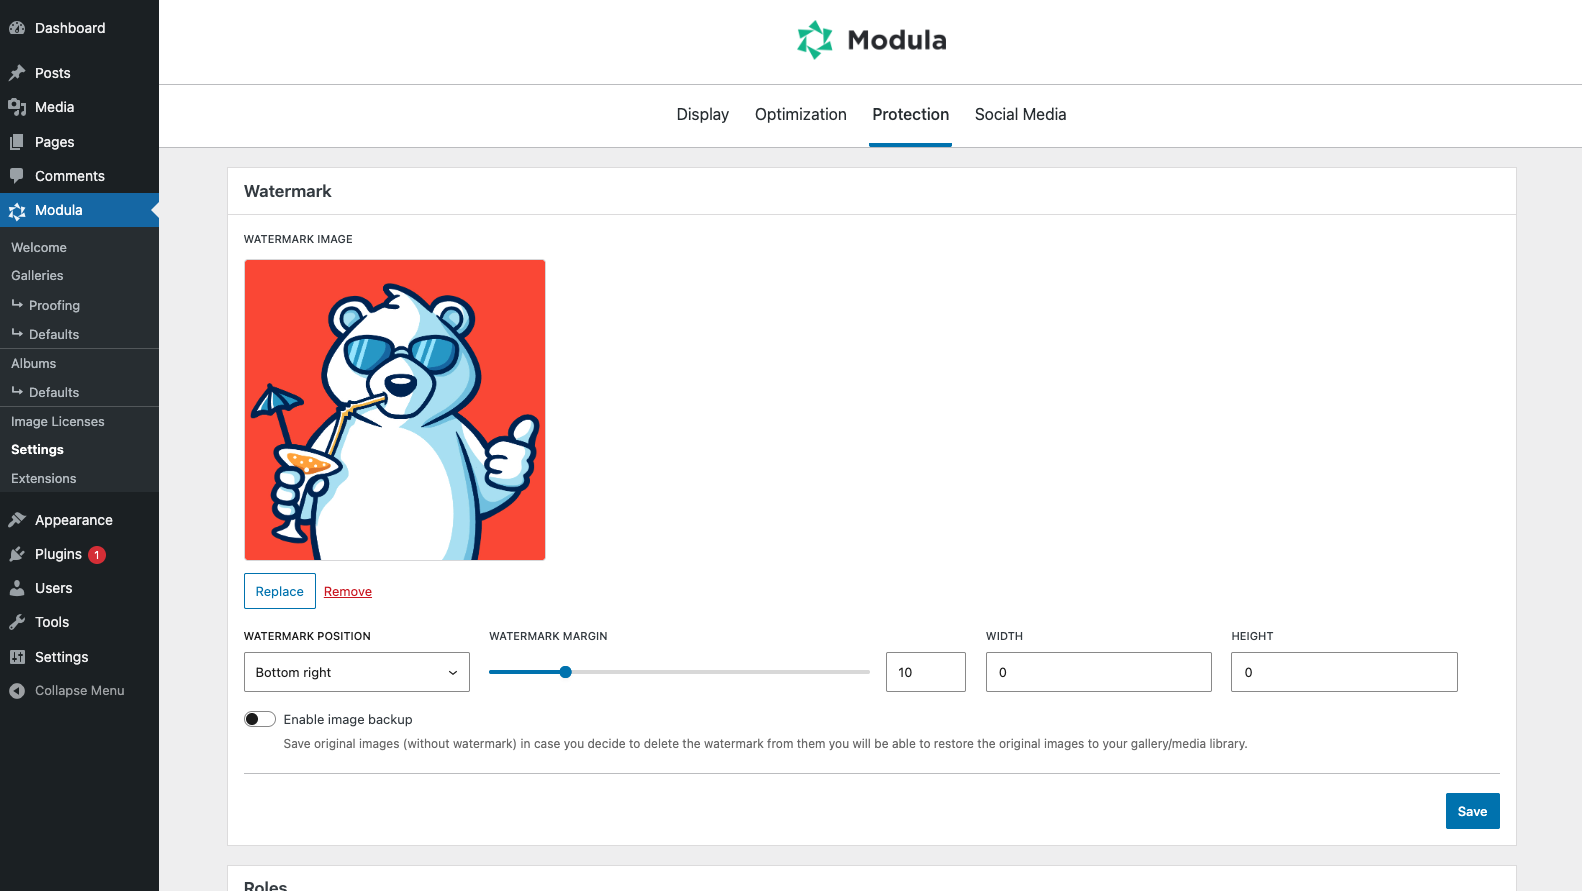
To apply your watermark to all of the galleries where this option is enabled, please go to your dashboard > Modula > Settings > Protection > Watermark.
-
Watermark Image
Upload here the watermark image you want to have on images.
-
Watermark position
Choose a position for the watermark. This is the location where the watermark will be added. You can choose between:
-> Top right
-> Top left
-> Bottom right
-> Bottom left
-> Center -
Watermark Margin
Set the space between the watermark and the margins of the image, in pixels.
-
Watermark image width and watermark image height
Specify the watermark image dimensions (width and height).
If one of the sizes (width or height) is set to “0” or left empty and the other is different than “0”, the watermark image will be scaled proportionally based on its size.
If both values are entered or they are greater than “0” the watermark image will be morphed to those specified sizes. -
Enable image backup
Save original images (without watermark) in case you decide to delete the watermark from them you will be able to restore the original images to your gallery/media library.
How to add the watermark?
-
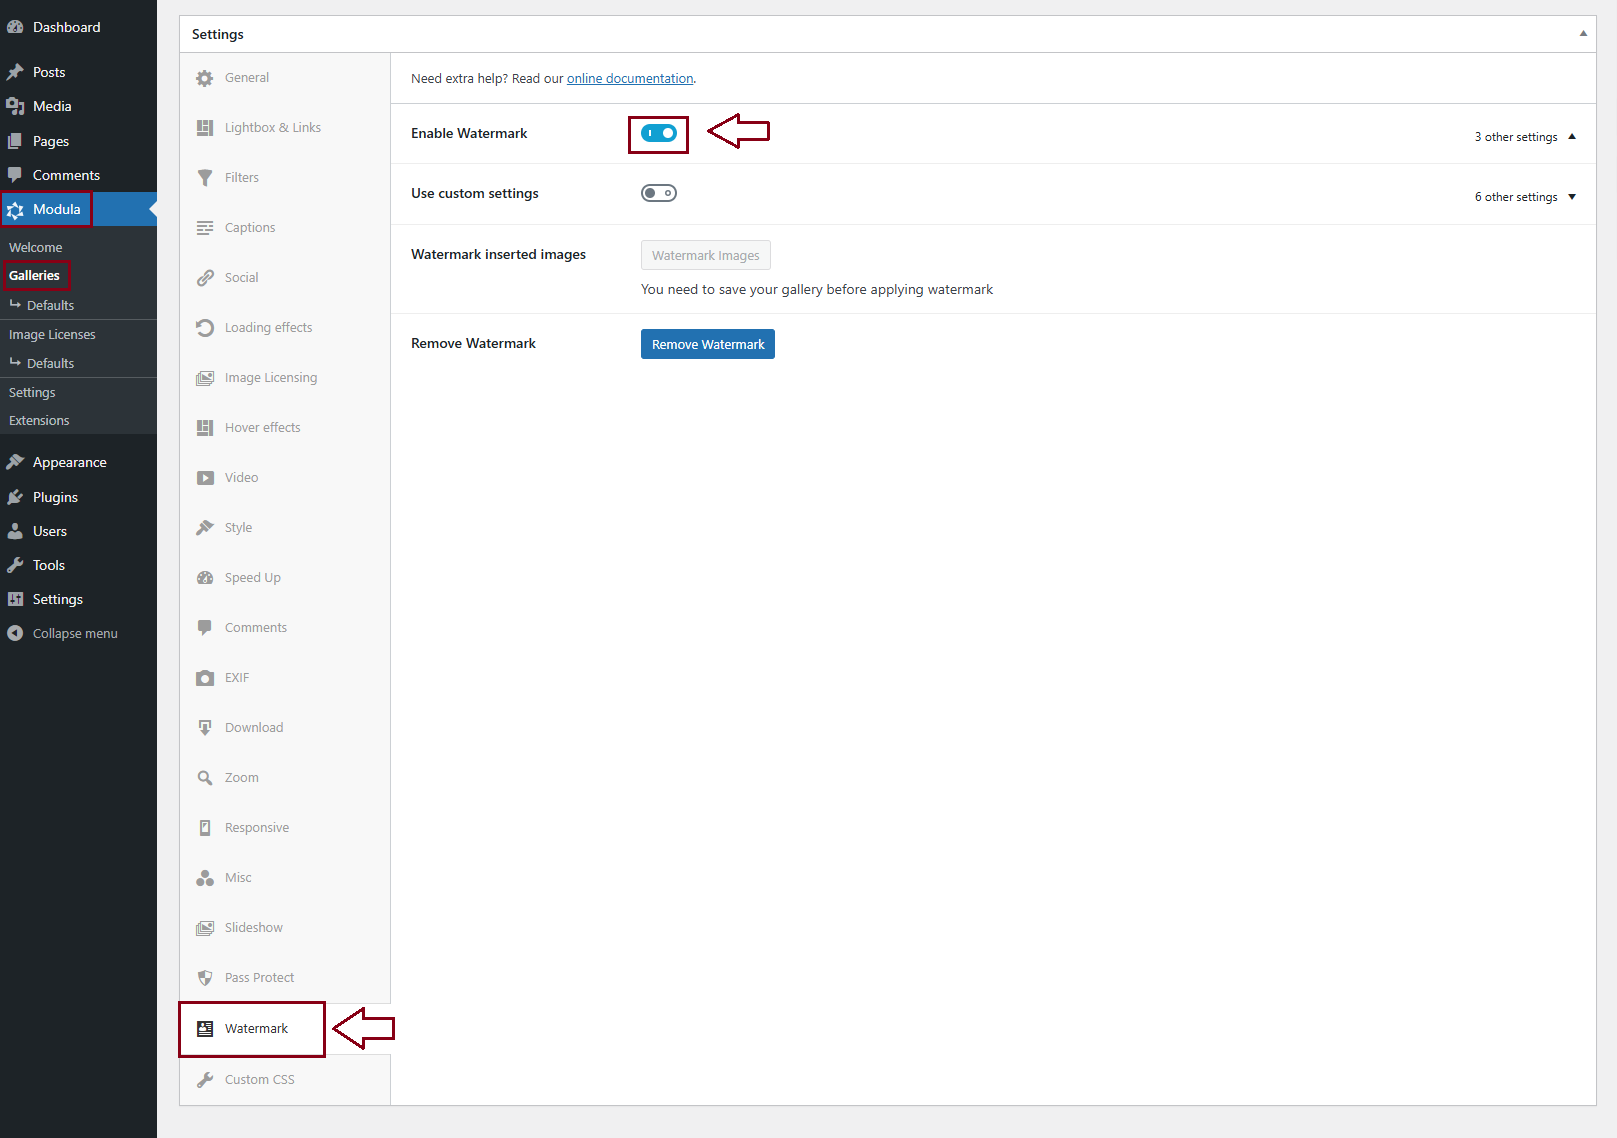
Enable Watermark
Once installed and active, you can enable it by going to your WP dashboard > Modula > Galleries > edit your gallery > scroll down to Watermark under Settings > and toggle it to ‘ON‘.
-
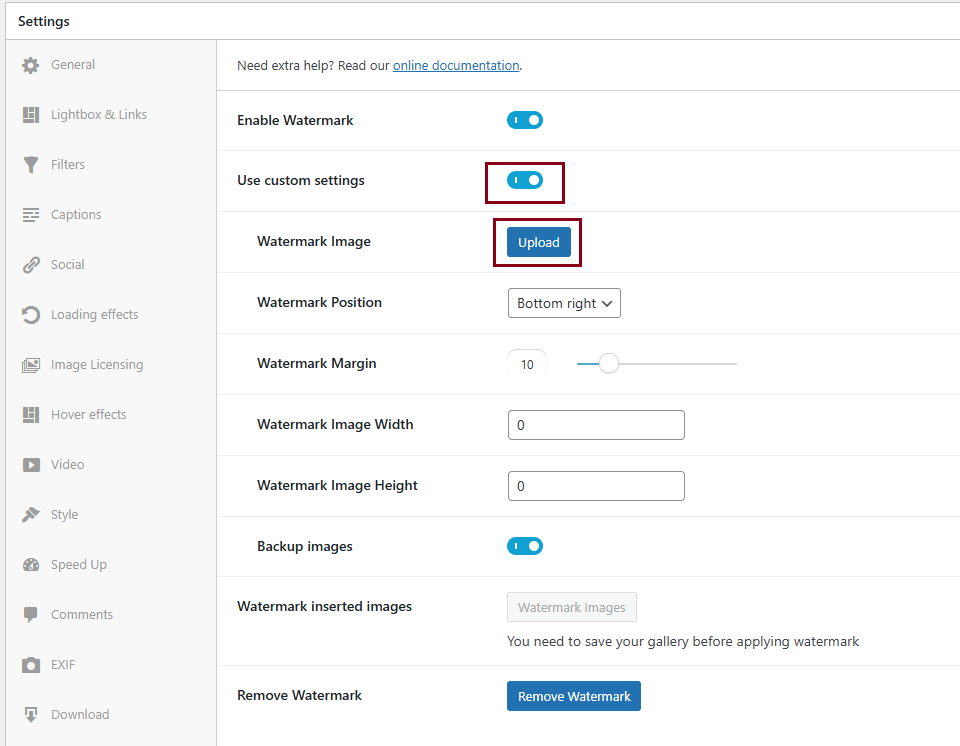
Add your watermark image
Enable the ‘Use custom settings’ option. Next to the ‘Watermark Image‘ option click on ‘Upload‘ > select the image you want.
-
Set watermark position, margin, image width, and image height
We recommend a value of at least 150x150px so the watermark will be displayed properly. After you set the values click on Update gallery > Watermark inserted images > Update gallery.
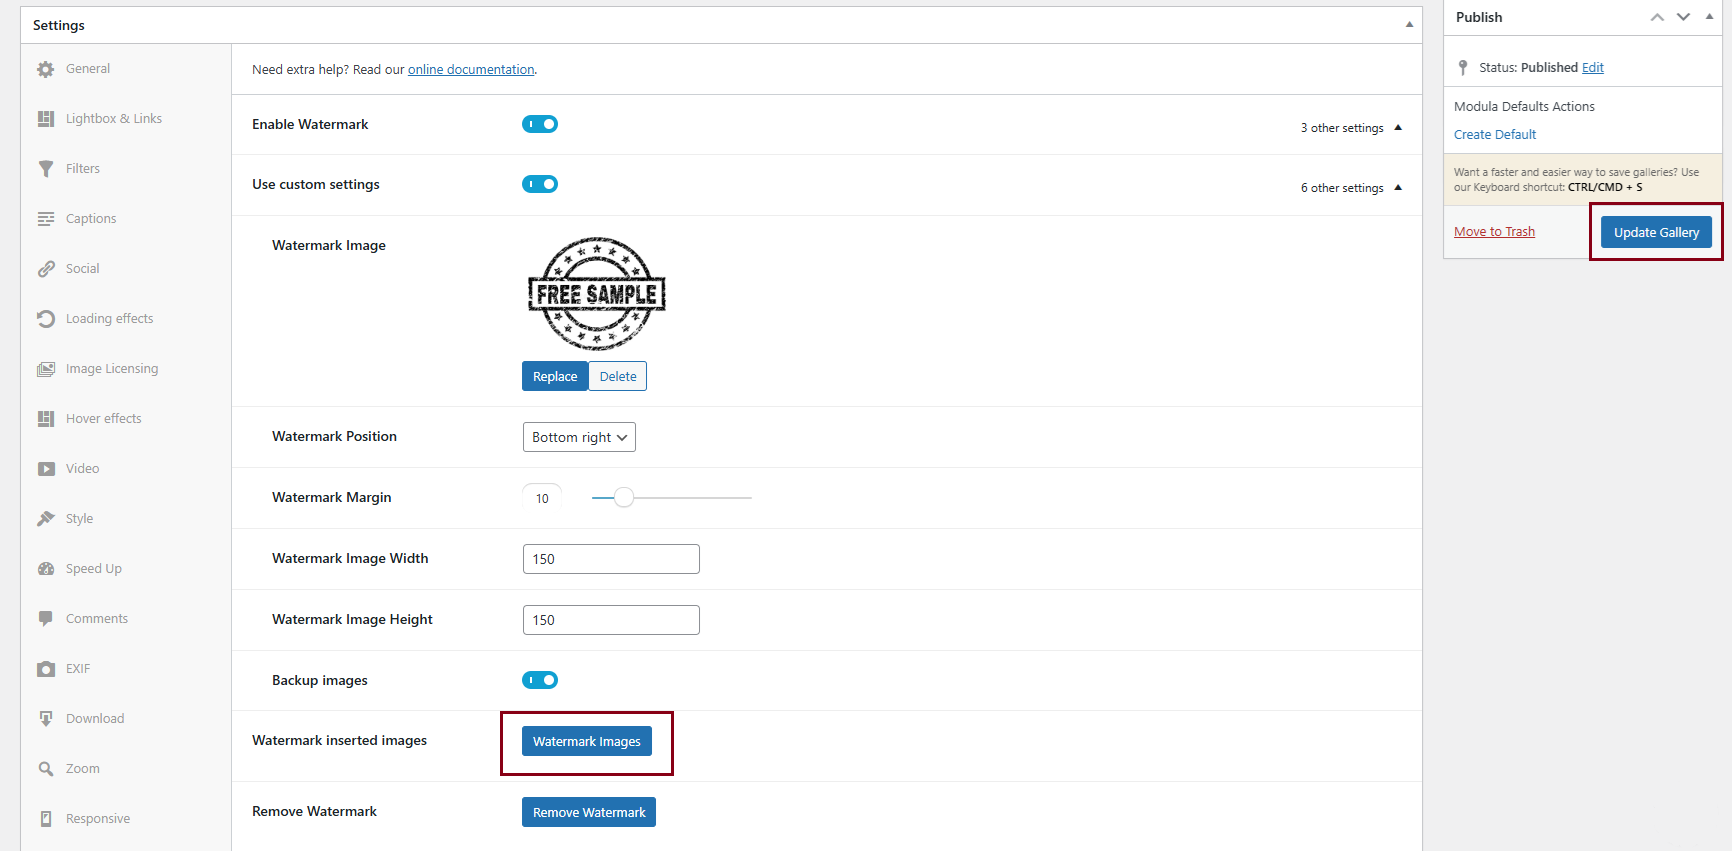
NOTE: If you cannot see the watermark displayed properly please go again to your gallery > Watermark > Remove watermark > Update gallery > Watermark inserted images > Update gallery > check if it works fine. If this is not helping, please follow the steps in this article.