Have you ever wanted to create a grid gallery without coding skills? Welcome aboard! We will walk you through all the steps of creating image galleries with a grid layout.
In WordPress, you can easily display images in a grid layout without touching a single line of code.
Many image gallery plugins are intended to beautify your website, but if you want a fully customizable gallery builder with a grid layout, go with Modula.
In this article, we will show you:
- how to make a grid gallery in WordPress;
- steps to follow when making an image gallery with a grid layout using a gallery plugin;
- features that will make your gallery more visually appealing;
- and much more.

Modula Gallery Plugin
Create stunning, responsive photo galleries with ease. Showcase your work, captivate your audience, and boost engagement. You don’t need to do any coding.
Table of contents
How to create a WordPress grid gallery
First, you must install and activate Modula, a WordPress grid gallery plugin that will increase your workflow and simplify the creation process.
Unlike other gallery plugins, Modula offers a functionality that allows you to resize images and choose a custom size. Let’s see how it works!
Step 1: Create an image gallery
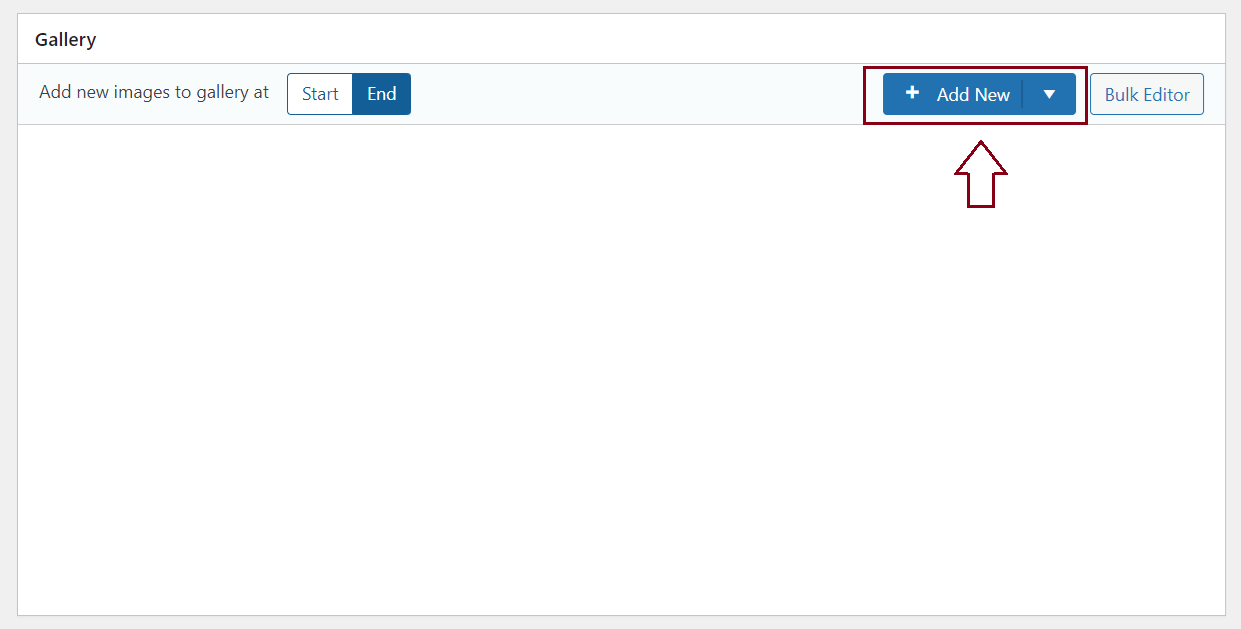
From now on, every time you want to create an image gallery using this plugin, go to the Modula icon and click on Add New.

Add a descriptive title to your WordPress gallery to prevent forgetting later. Then, you can start uploading your images and arranging them as you please.
Step 2: Add a grid layout to your WordPress gallery
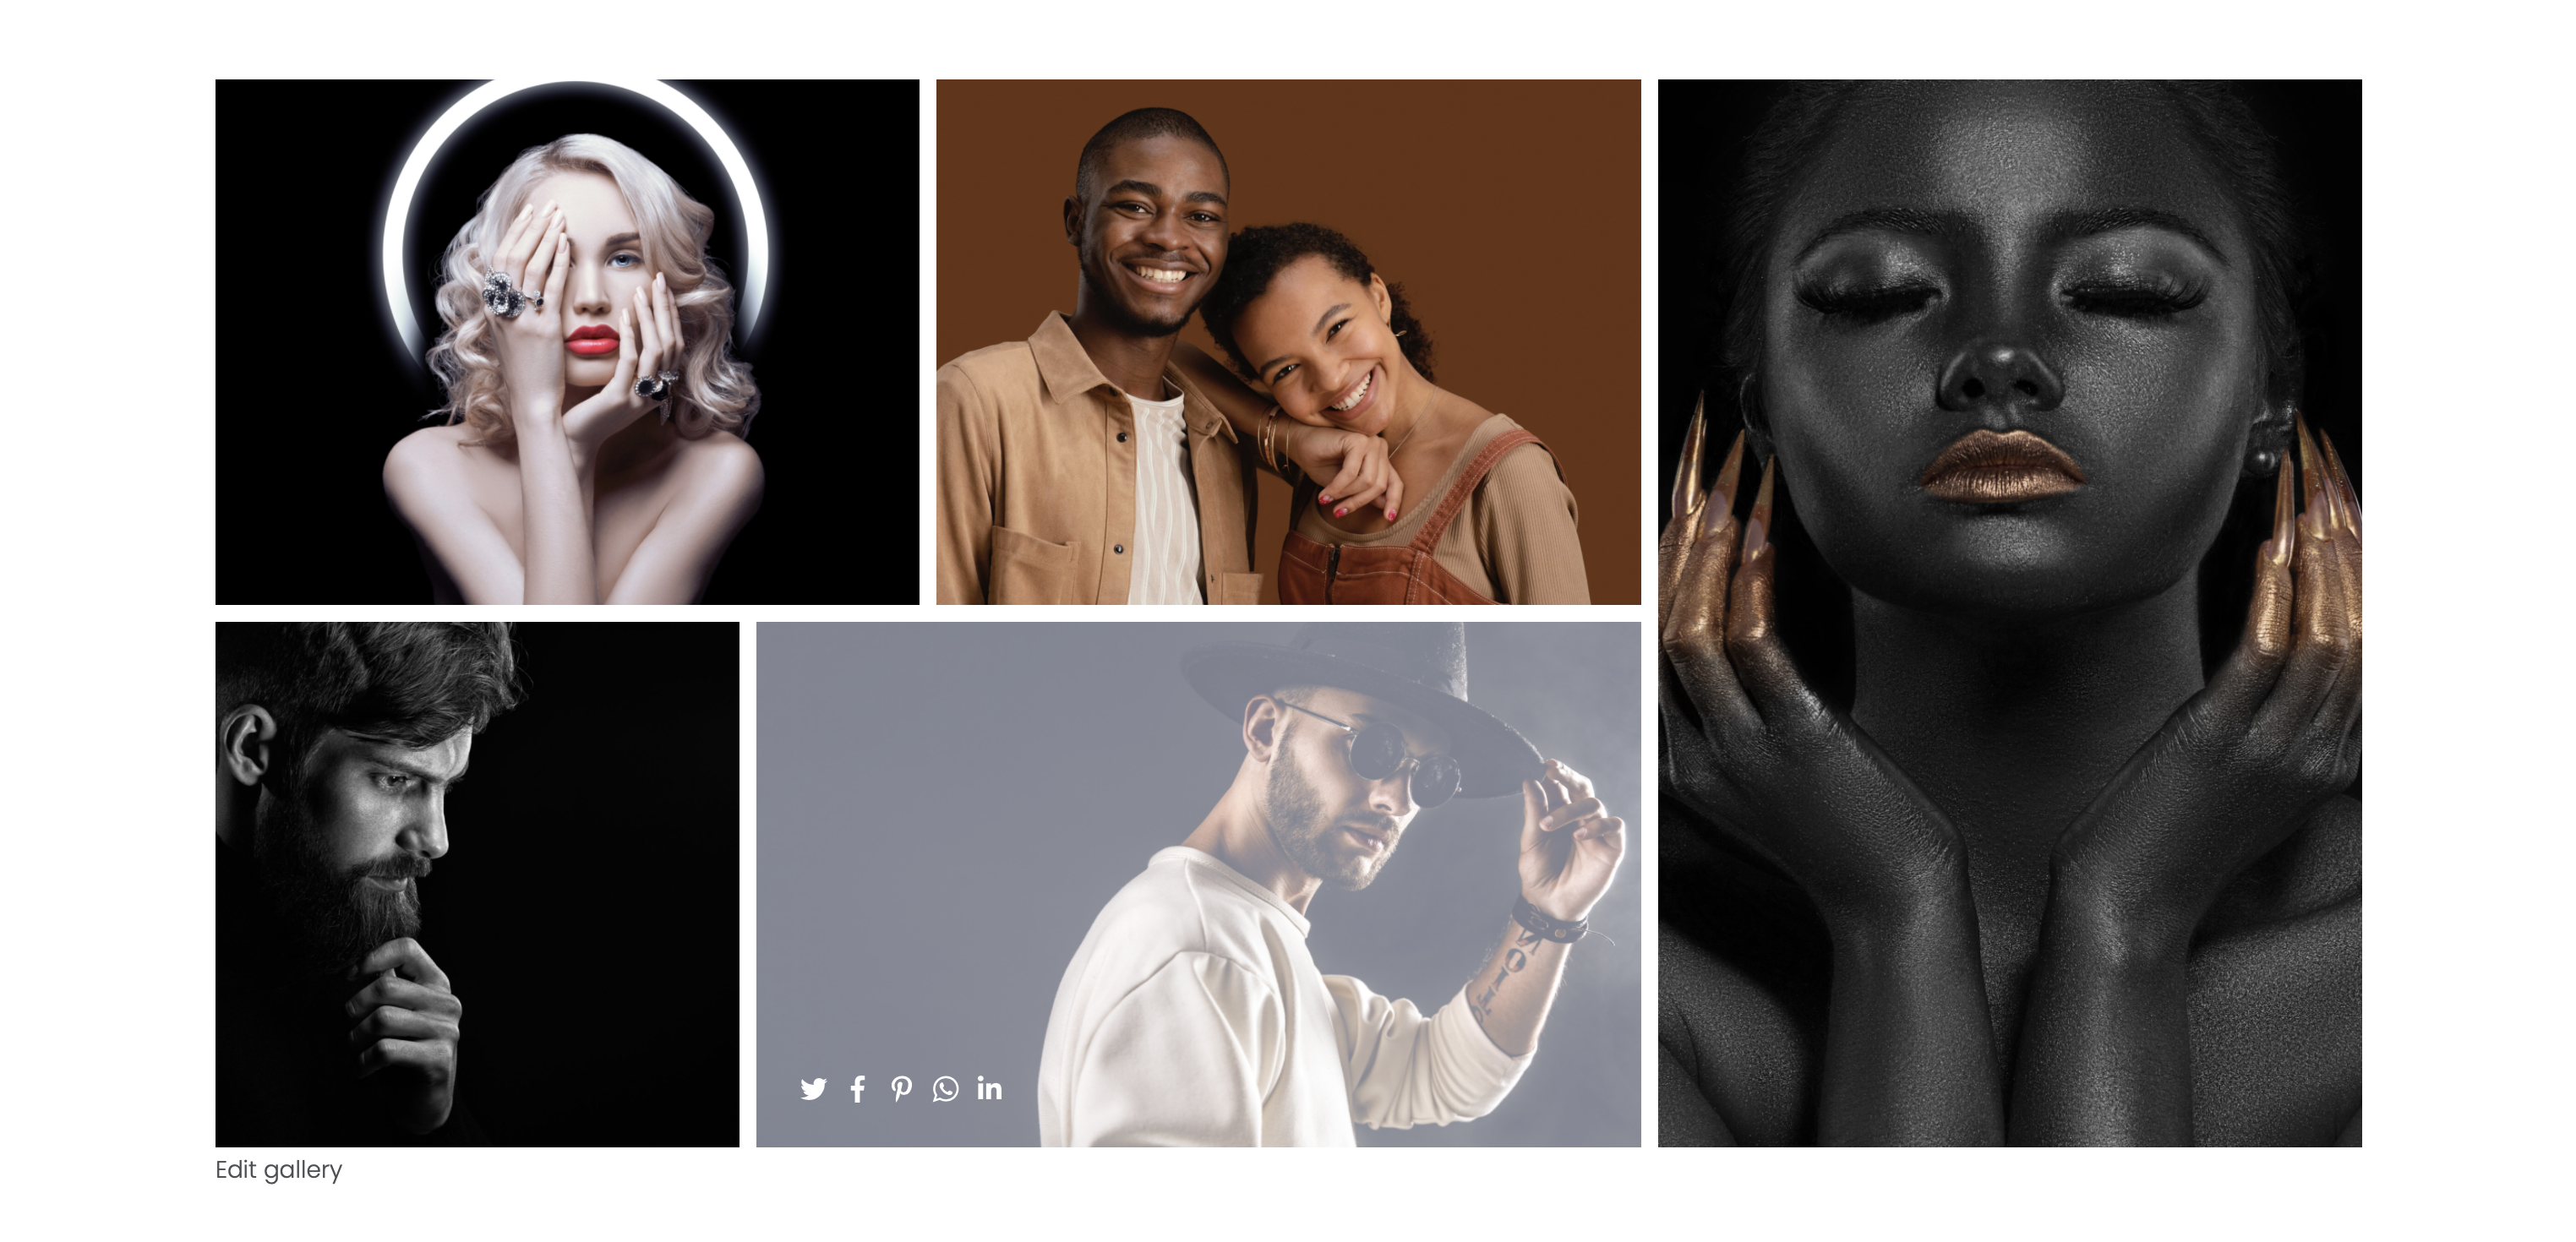
One of the best things about Modula is that you can customize your galleries as you wish and add various gallery types: creative, custom, masonry, video, BnB, and slider. You can also create galleries with thumbnails or multimedia galleries, but I’ll teach you how to create a grid gallery right now.
After you upload your images, scroll down and go to General Settings. Here, you will find all the customization options Modula provides.
In the gallery type, choose the Custom.
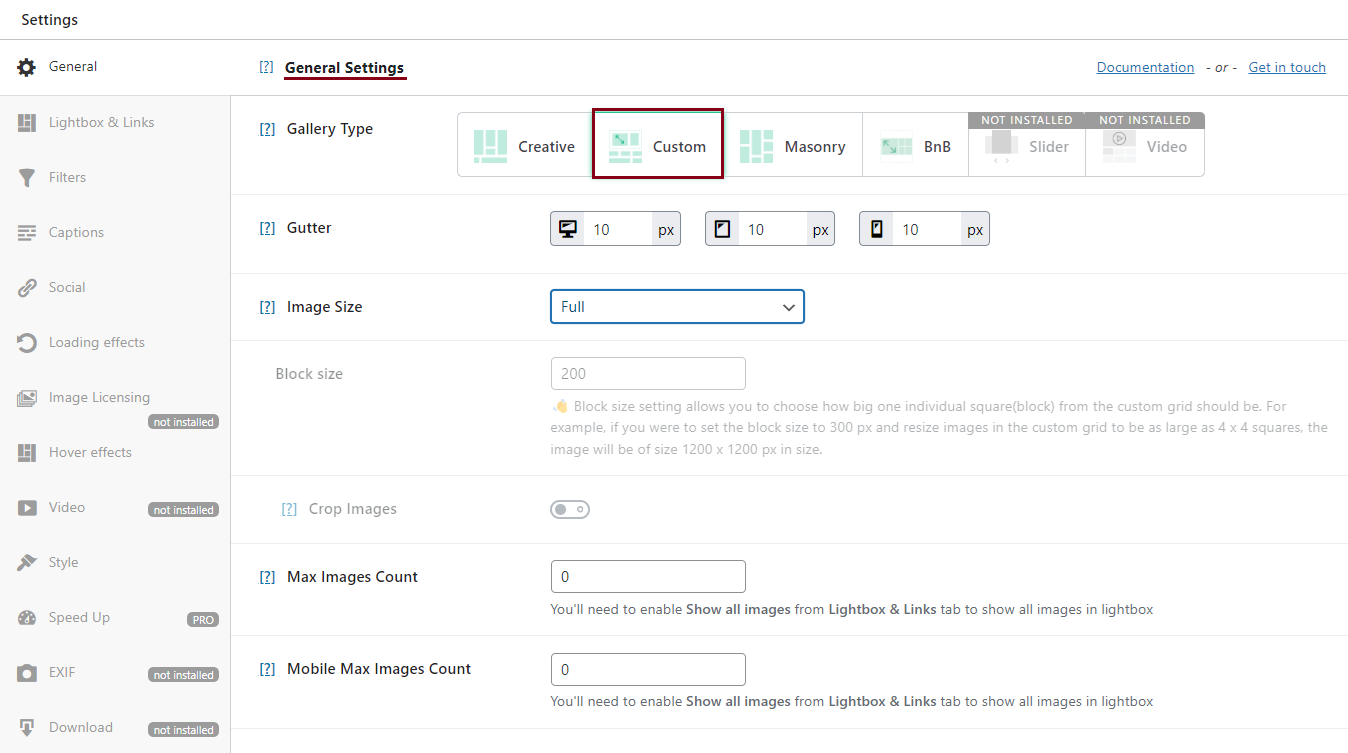
You can resize your pictures by changing heights, widths, and aspect ratios.
Step 3: Add more customization options
There’s more. Everything here is customizable, and you can add a lot more options to beautify your galleries with Modula PRO:
- Hover effects;
- Loading effects;
- Social media icons;
- Lightbox slideshow;
- Filterable galleries;
- Add title and caption;
- And much more.
However, if you think about upgrading to the premium version, you will benefit from more advanced features:
- Albums creation – to organize your galleries according to your style;
- Password protection and the ability to add a watermark to your pictures;
- Migration tool – to move your galleries to another plugin;
- Video extension – to include videos in your galleries or create video galleries;
- Speed up extension – to load your images as fast as possible;
- Zoom extension – so that your website visitors can see your masterpieces in detail;
- EXIF extension – to display data from your image directly into your gallery and lightbox view;
- …And give it a try to discover more!
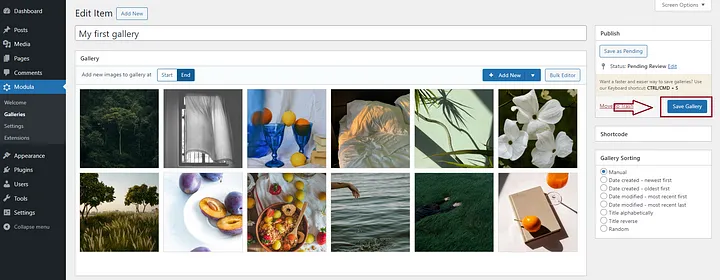
Step 4: Save your grid gallery and add it to your website
Does your WordPress grid gallery look the way you want it to? If so, let’s see how you can add it to your WordPress website.
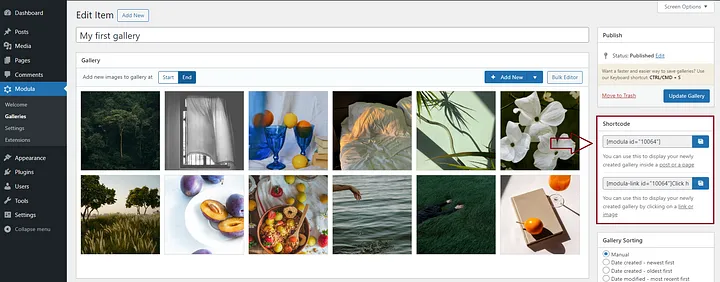
First, click Save Gallery, and it will automatically generate a shortcode.
Next, copy and paste the gallery shortcode wherever you want – into a page or post. Easy as that!
Last words
Thanks to Modula and its whistles and bells, creating a grid gallery in WordPress is easier than you might think. And don’t forget – you can create various galleries for different purposes and enhance your website’s look.
Modula Gallery Plugin
Create stunning, responsive photo galleries with ease. Showcase your work, captivate your audience, and boost engagement. You don’t need to do any coding.
