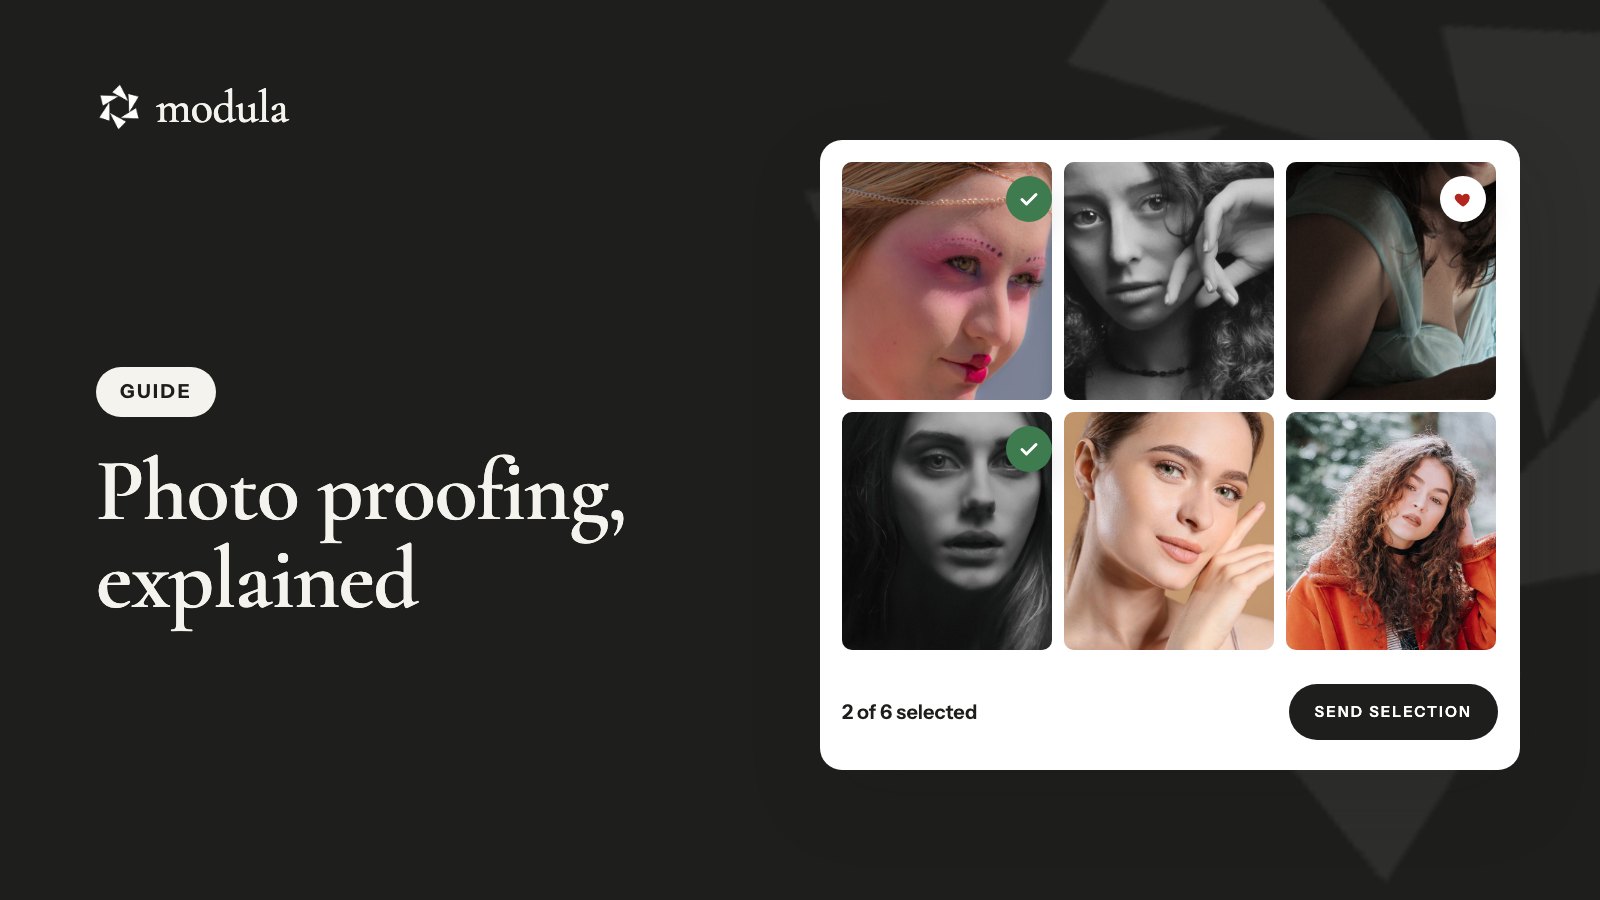
Photo proofing is the step between the shoot and the final edit. You share lightly edited previews, called proofs, in a private online gallery. Your client picks the ones they want, and you fully edit and deliver only those. The page where that picking happens is a proofing gallery.
Why bother? Because you stop guessing. You spend your editing hours on the 25 photos the client actually wants, not the 80 you think they’ll like. And nobody digs through an email thread looking for “the one where Grandma’s laughing.”
Below, we’ll walk through one full round, including the parts that go wrong.
What photo proofing means (and what a proof is)
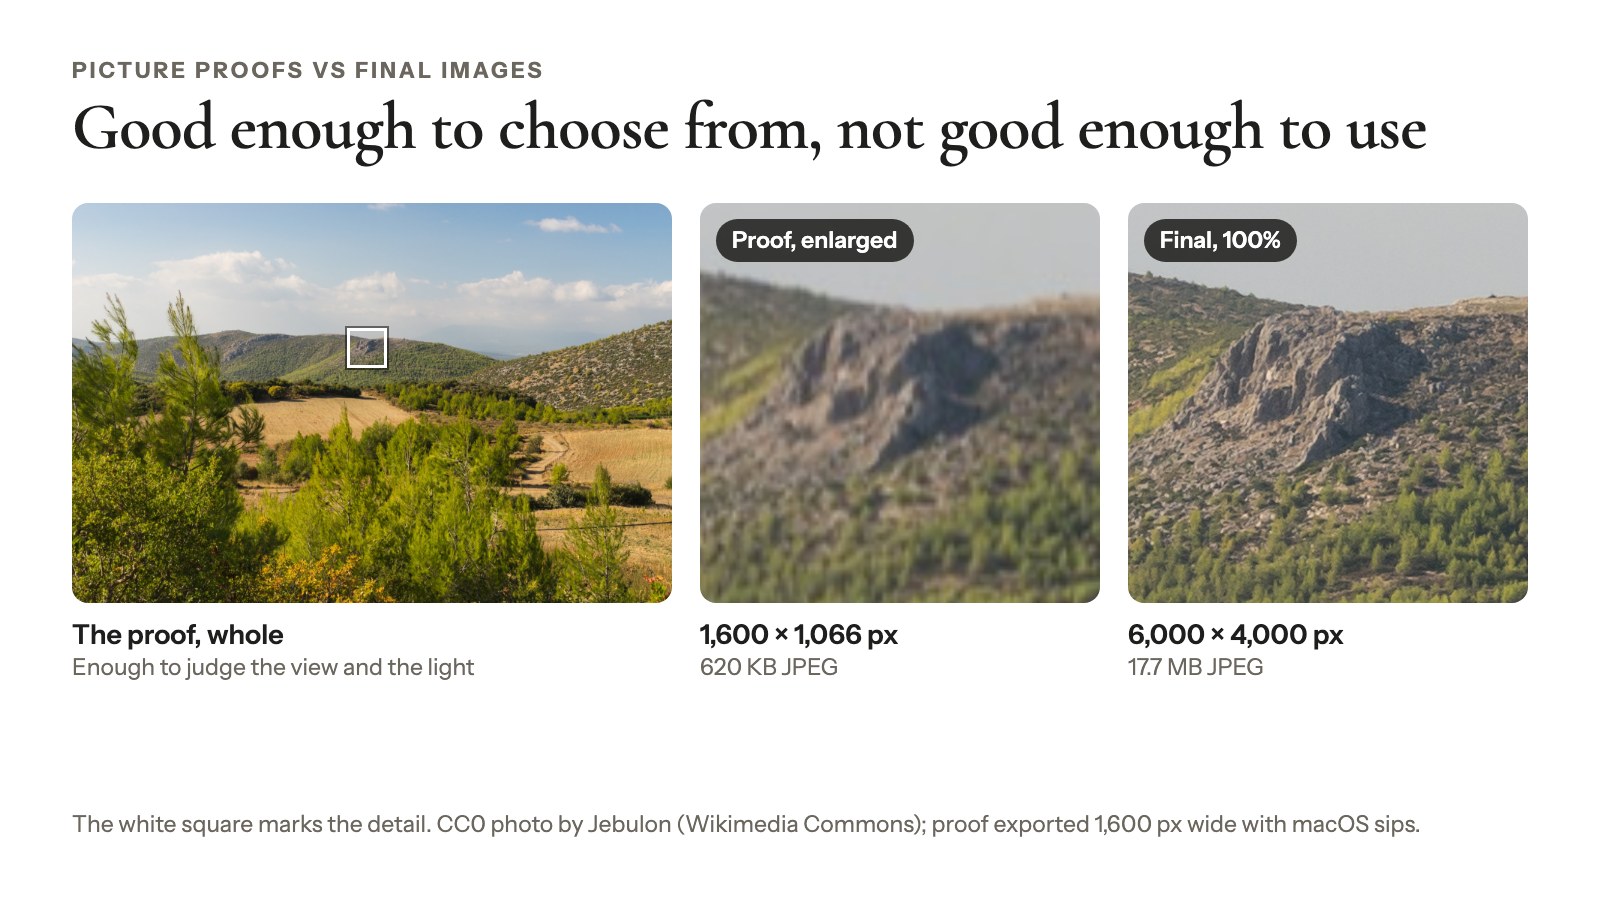
Photo proofing means your client chooses from proofs, and a proof is a preview, not the product: good enough to judge expression, pose and composition, and nothing more. The final image is the one you finish after the client has chosen.
Picture proofs vs final images
| Proof | Final image | |
|---|---|---|
| Size | Web size, smaller than the original | Full resolution |
| Editing | Rejects removed, your base look applied | Fully retouched |
| Watermark | Often | No |
| Client can download it | Usually not | Yes |
| What it’s for | Choosing | Printing, sharing, keeping |
From contact sheets to proofing galleries
Proofing is older than the internet. Film photographers printed a whole roll of 35 mm or 120 film onto one sheet, a contact print, and the frames worth printing were marked by hand. A proofing gallery does the same job; the pen mark just became a tap.
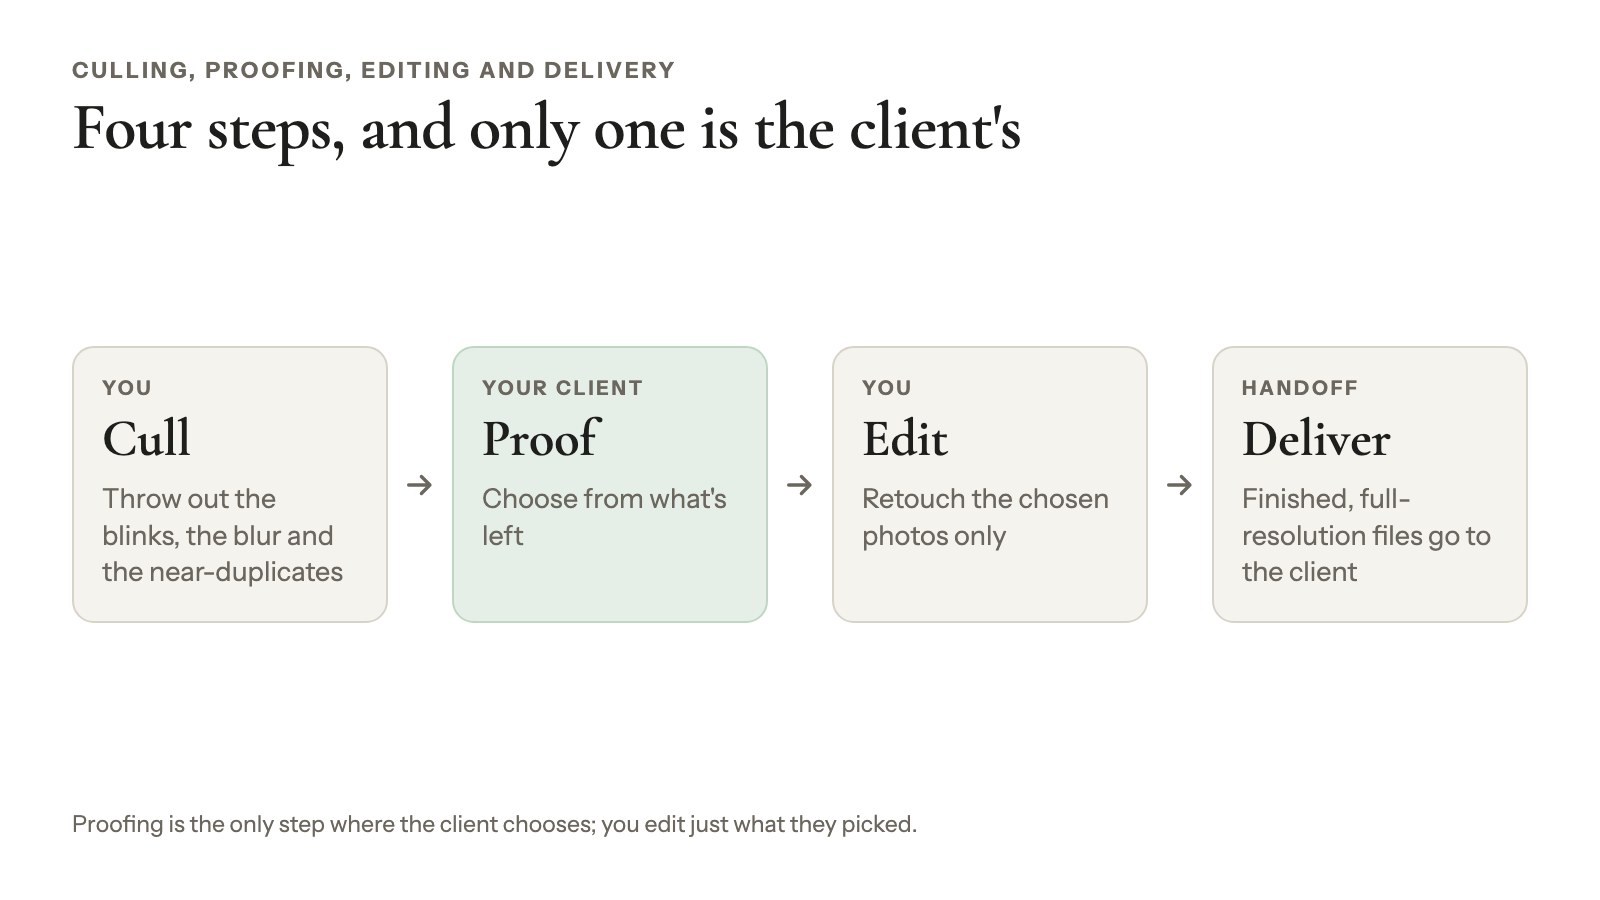
Culling, proofing, editing and delivery are separate steps
Here’s who does what:
- Culling is yours. You throw out the blinks, the blur and the near-duplicates.
- Proofing is the client’s turn. They choose from what’s left.
- Editing is yours again. You retouch the chosen photos only.
- Delivery is the handoff. Finished, full-resolution files go to the client. That’s its own job, covered in our guide to delivering photos to clients.
When a proofing round is worth it (and when to skip it)
A proofing round pays off whenever the client’s choice decides what you edit.
- Packages with a set number of edits. Portraits, headshots, family and senior sessions. “Ten retouched images” only works if the client picks the ten.
- Selling extras. Pixieset’s proofing guide (September 2026) suggests no selection limit, then billing the extras.
- Album and print picks. The client chooses which frames go on the spread or the wall.
- Commercial and product approvals. The art director signs off before you retouch 40 product shots.
- Several decision-makers. Each person gets their own invite and their own submission, so you’re not refereeing a group chat.
Skip it when a round would only slow you down, like an event with next-day turnaround. And if your package already includes every keeper, there’s nothing to choose.
How an online proofing gallery works, step by step
Every online picture proofing tool runs the same loop: you upload previews, send a private link, the client picks and submits, and you get back an edit list.
It beats email for a simple reason: a folder of proofs won’t fit through it. Personal Gmail caps attachments at 25 MB, and replies like “I like the third one” don’t tell you which file they mean.
Cull and lightly edit before you upload
Cull hard first. Ten versions of the same pose don’t help anyone choose; they just make the gallery longer.
Then apply your base look, so the proofs look like your work. Clients choose with their eyes. A flat, unedited frame can lose the vote to a weaker one that just happens to be brighter.
Good to know
Keep the original file names. Don’t rename on export. The client’s picks come back as a list of file names, and that’s how you’ll find the originals in Lightroom Classic or Capture One.
Set the rules before you send anything
Decide these before the link goes out:
- how many picks the package includes
- what an extra image costs
- the deadline
- whether there’s a second round
Put them in your contract or booking email, so nothing turns into a negotiation later.
Protect the previews
Proofs should be good enough to choose from and not good enough to use. Four things get you there:
- Smaller files. Upload web-size previews, not full-resolution exports.
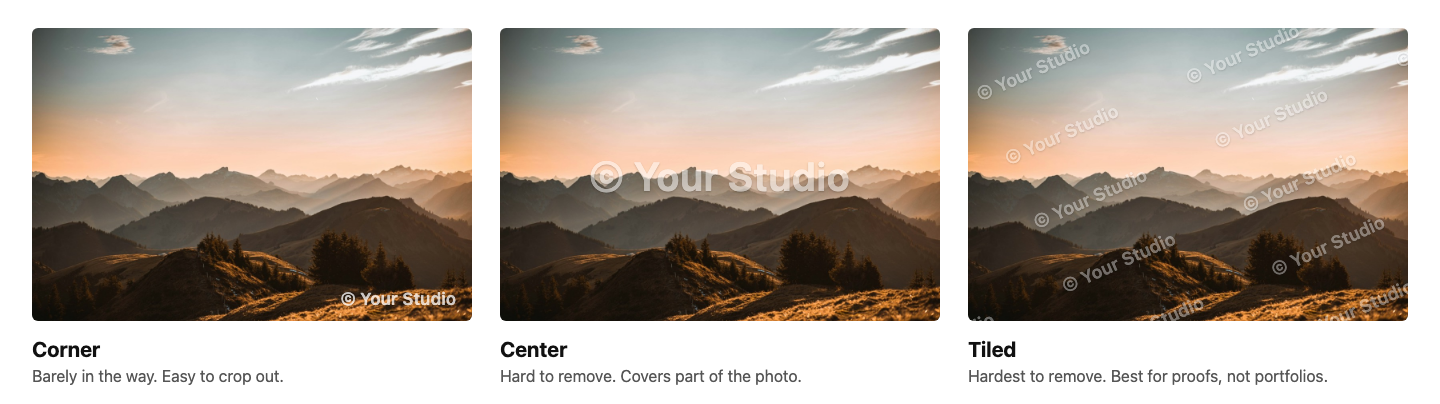
- A watermark. A corner mark is easy to crop out; a tiled one is hard to remove but sits over the photo. Here’s how to watermark photos.
- Downloads off. Turn them on for delivery, not during proofing.
- Private access. Only invited people should open the gallery, or at least it should sit behind a password.
Send a private link
Your client should get one link that opens the gallery on any device. Send the gallery link itself, not your WordPress login page: a client who logs in there lands in your dashboard, not in the gallery.
The client picks, saves and submits
Good proofing tools separate saving from submitting. Saving keeps the picks, so the client can come back after dinner or show their partner first.
Submitting is final. It tells you the choice is made. Notes travel with the submission, so “a bit brighter, please” arrives right next to the picks.
Turn the picks into an edit list
When a submission comes in, export the list of file names and paste it into your catalog’s filter to pull up those originals. Edit them, then hand over the finals through a downloadable gallery or however you normally deliver.
What your client sees (and a message you can send them)
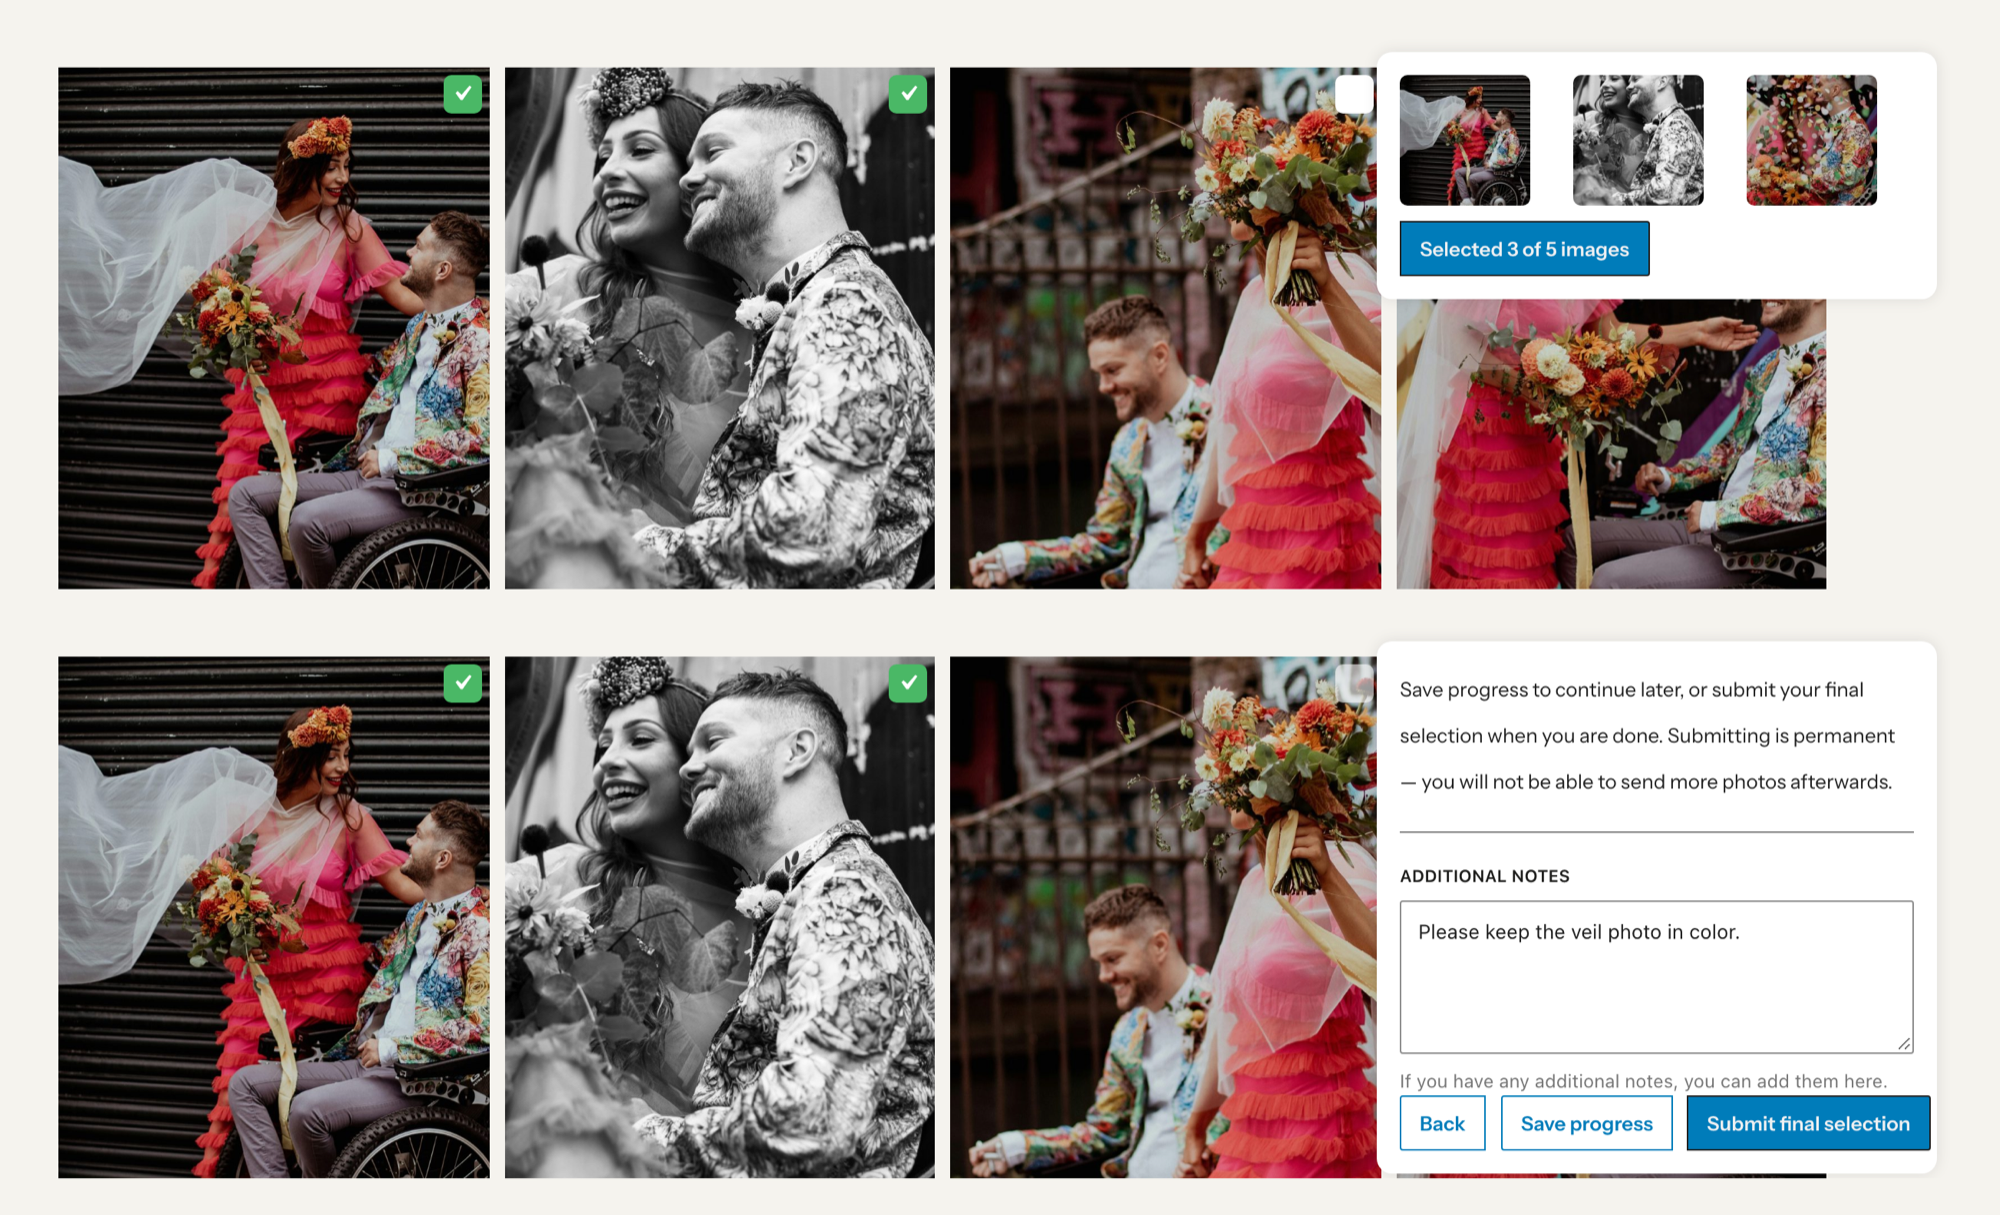
Client photo selection happens on previews: your client clicks the small box on each photo they want, then saves or submits. Tell them five things before they open the link:
- These are previews. The final photos will be edited and full size.
- Click or tap the small box in the corner of a photo to select it. A counter shows how many you’ve picked.
- Save progress keeps your picks if you want to come back later.
- Submit final selection is for when you’re sure. After that, the photographer takes over.
- The Additional notes box is for anything you’d like changed.
Those are Modula 3.0’s button names; other tools use similar ones.
Here’s a message you can copy, fill in and send with the link:
Example
Hi [name], your proofs are ready! Here’s your private gallery: [link]
Your package includes [number] edited photos. Extra photos are [price] each.
Not sure yet? Click Save progress and come back anytime before [date]. When you’re happy, click Submit final selection. Anything you’d like changed? Write it in the notes box before you submit.
These are previews, so color and skin aren’t final yet. I’ll finish those in the edit, and your photos will be ready about [number] days after you submit.
How to run an image proofing round in Modula
Modula’s Image Proofing runs the whole round on your own WordPress site. Full disclosure: we make Modula. Image Proofing is a Modula Pro extension included in the Business plan: $99 for the first year, then $198/year, for 5 sites, with a 14-day money-back guarantee (pricing, October 2026).
There’s no separate add-on to buy: you switch it on in Modula → Extensions. The exact clicks are in the Image Proofing docs; here’s the round in plain terms.
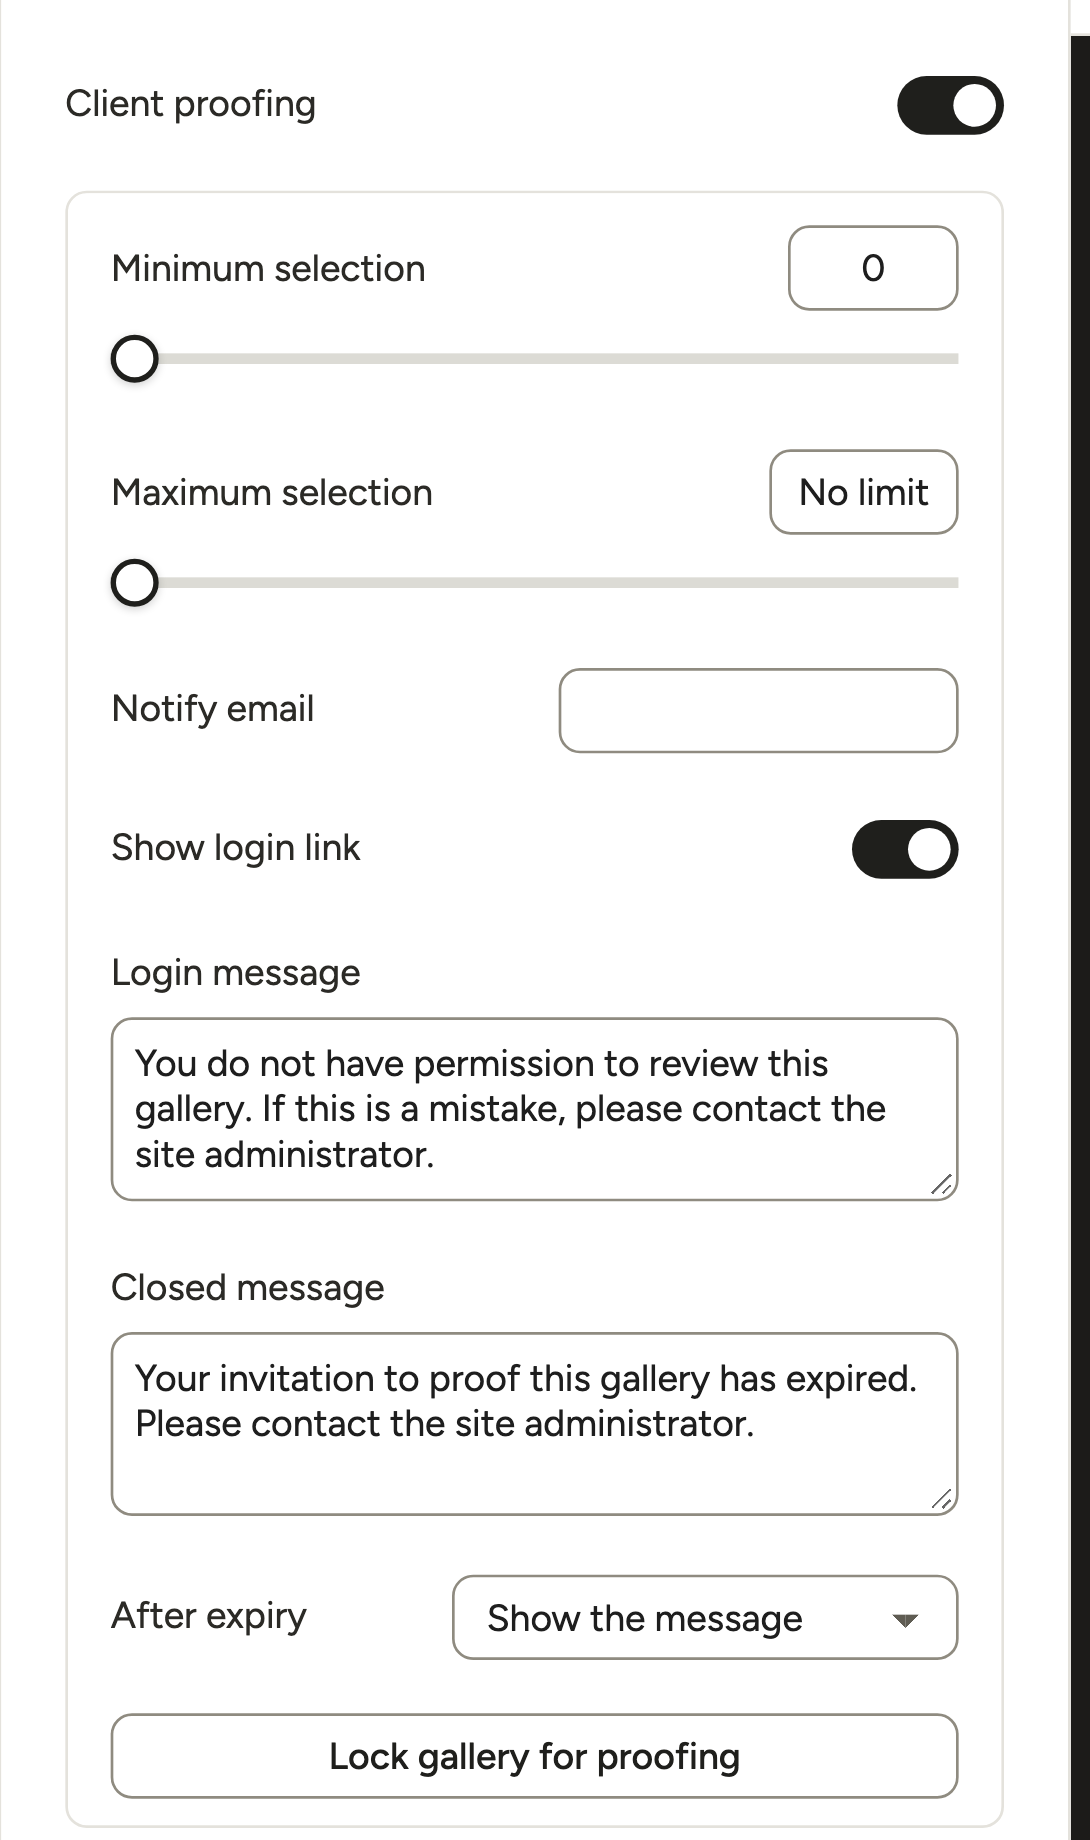
Turn on Client proofing and set the limits
Open the gallery, click Proofing in the left rail and switch on Client proofing. Then set:
- Minimum selection and Maximum selection. The slider goes up to the number of photos in the gallery, and 0 means no limit.
- Notify email. Where submission alerts go (the gallery owner, by default).
- Show login link and Login message. What an uninvited visitor sees (here’s our demo).
- Closed message and After expiry. What someone with an expired invite sees, and where you point them next.
For a 10-photo package with no extras, set both limits to 10. If you offer extras, set the maximum higher and bill the difference yourself, outside Modula.
Lock the gallery and invite your clients
Add your photos, then click Lock gallery for proofing. Client proofing already limits the gallery to you and your invitees, and Modula hides the download-all button (Download the whole gallery) while it’s locked. Other downloads stay off until you switch on Enable download. Open proofing brings you back to the round later.
Watermark (Business, under Protect) is written into the image files, so leave Keep originals without watermark on: Modula keeps clean copies you can restore for delivery.
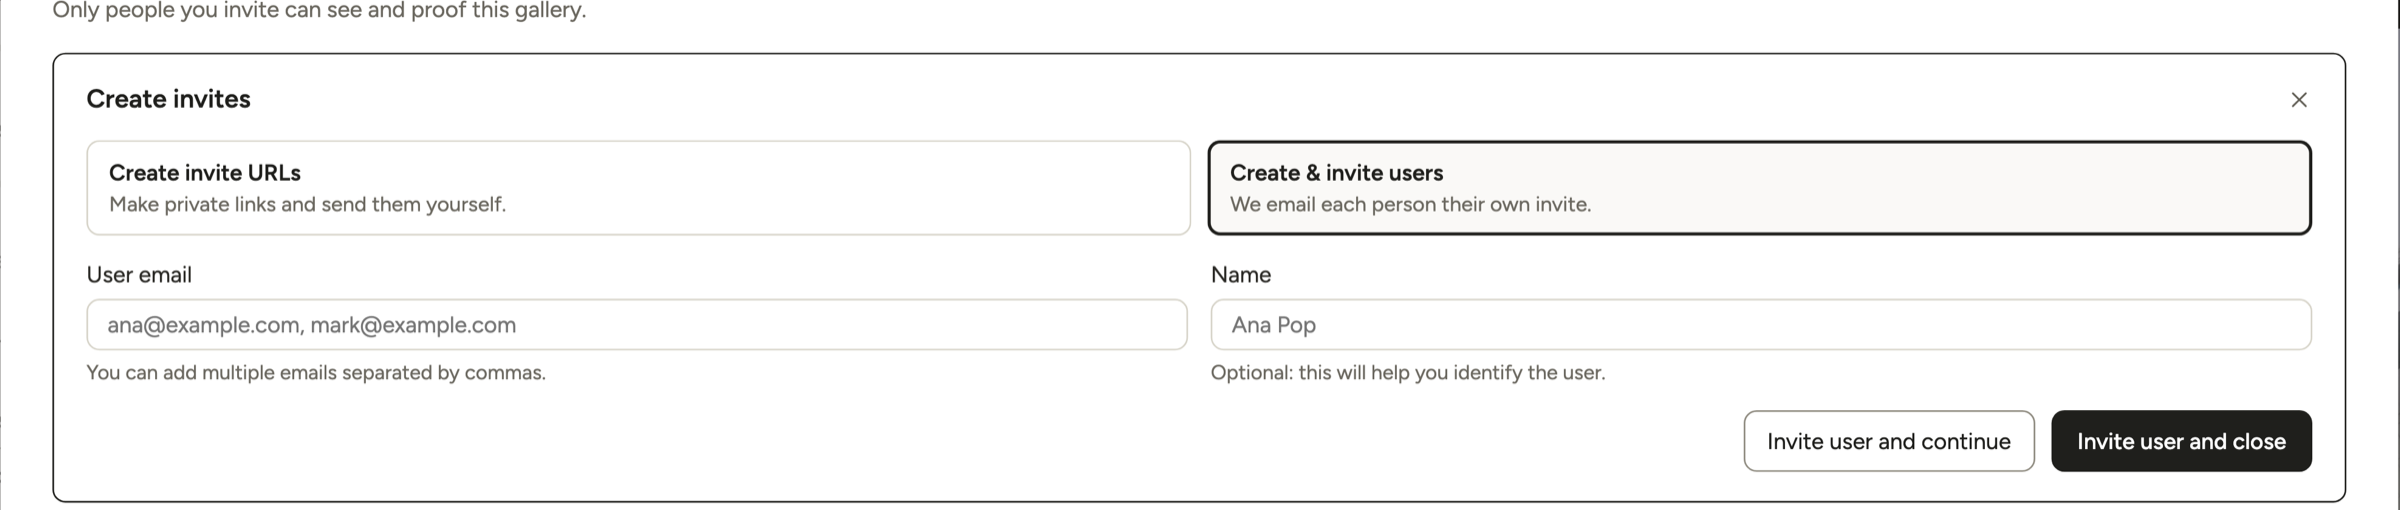
Next, Create invites gives you two options:
- Create invite URLs makes private links you send yourself. Add a name if you like; the URL is copied for you.
- Create & invite users creates a client account on your site and emails that person the invite.
The Invitations tab tracks every invite: its Invite status (Active, Submitted or Expired), its Invite URL, and buttons to Send email, Expire invite or Activate invite, and Delete.
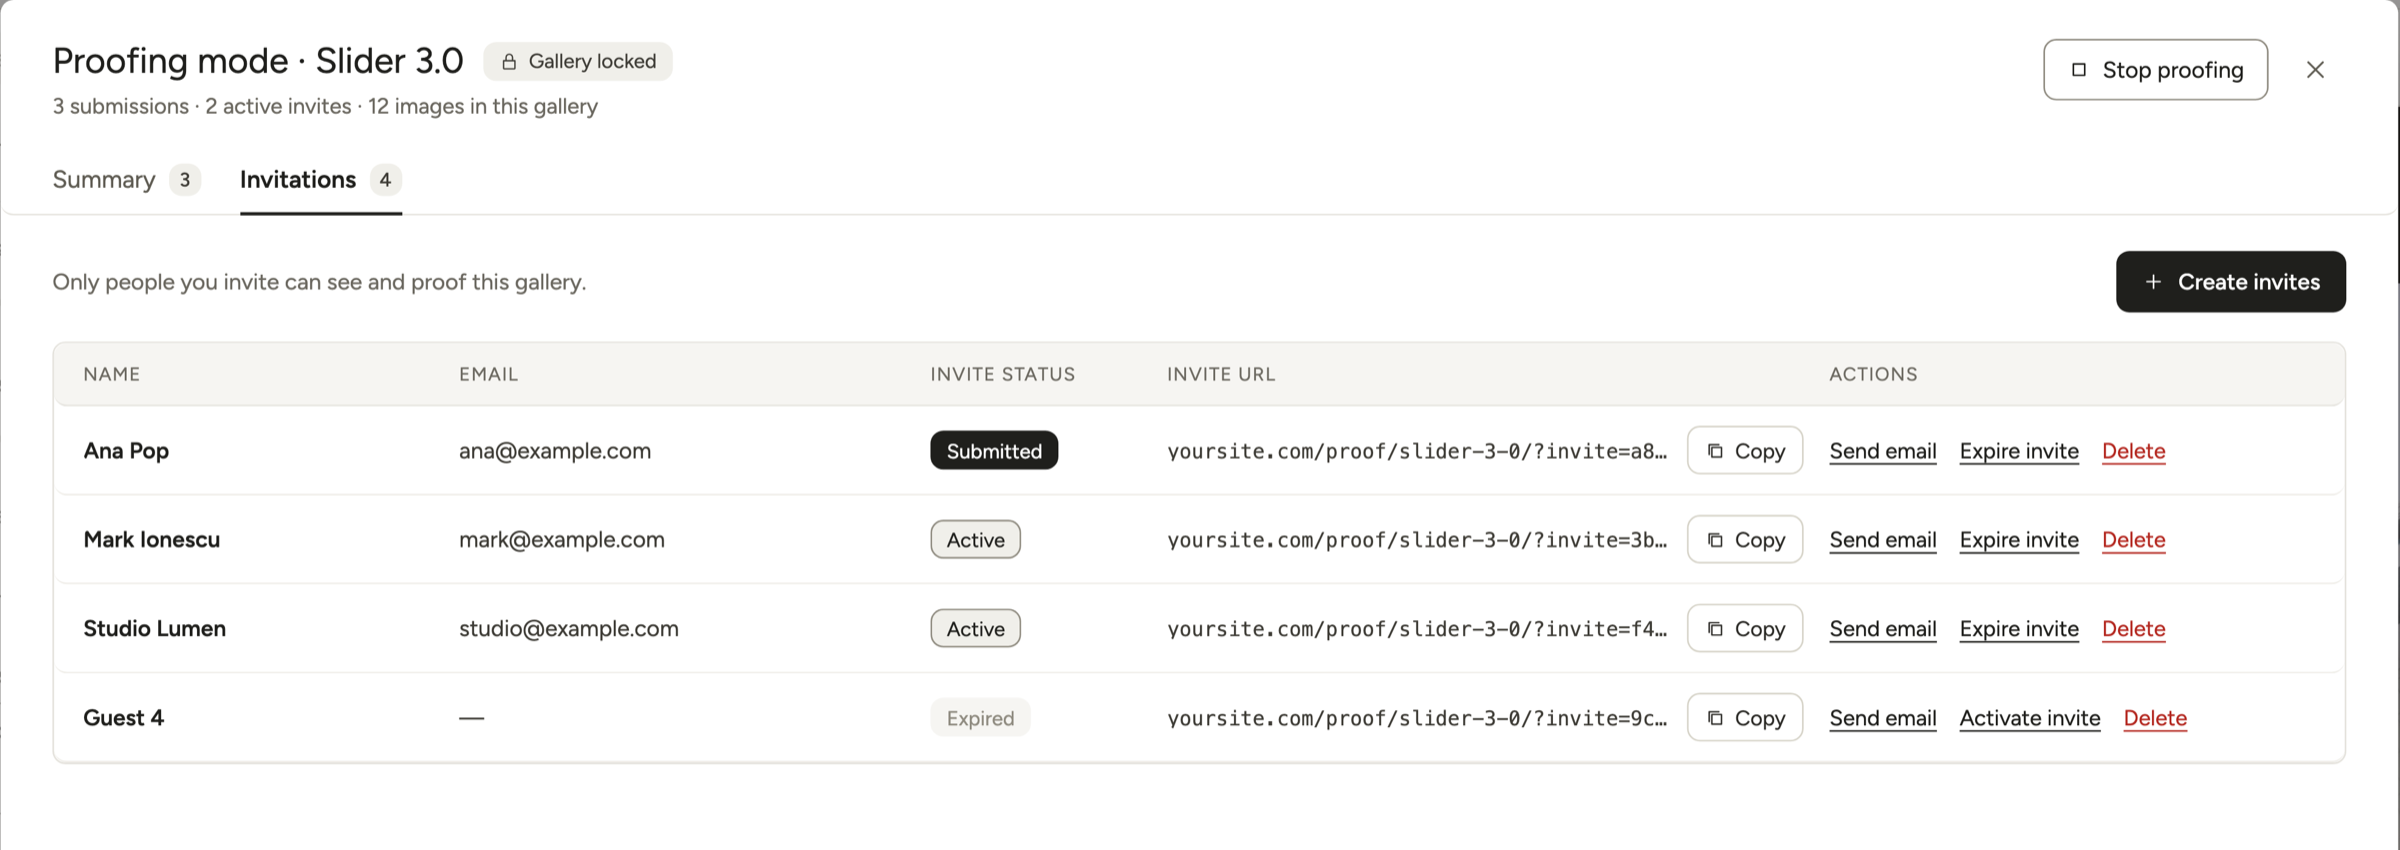
Invites don’t expire on their own, so put the deadline in your message and click Expire invite when it passes.
Review the picks in Summary
In the Summary tab, four numbers show where everyone stands: Total images, Fully proofed (submitted), Partially proofed (started, not submitted) and Pending (not opened yet). Below them, each client gets a row with their picks, the file names and their Client notes.
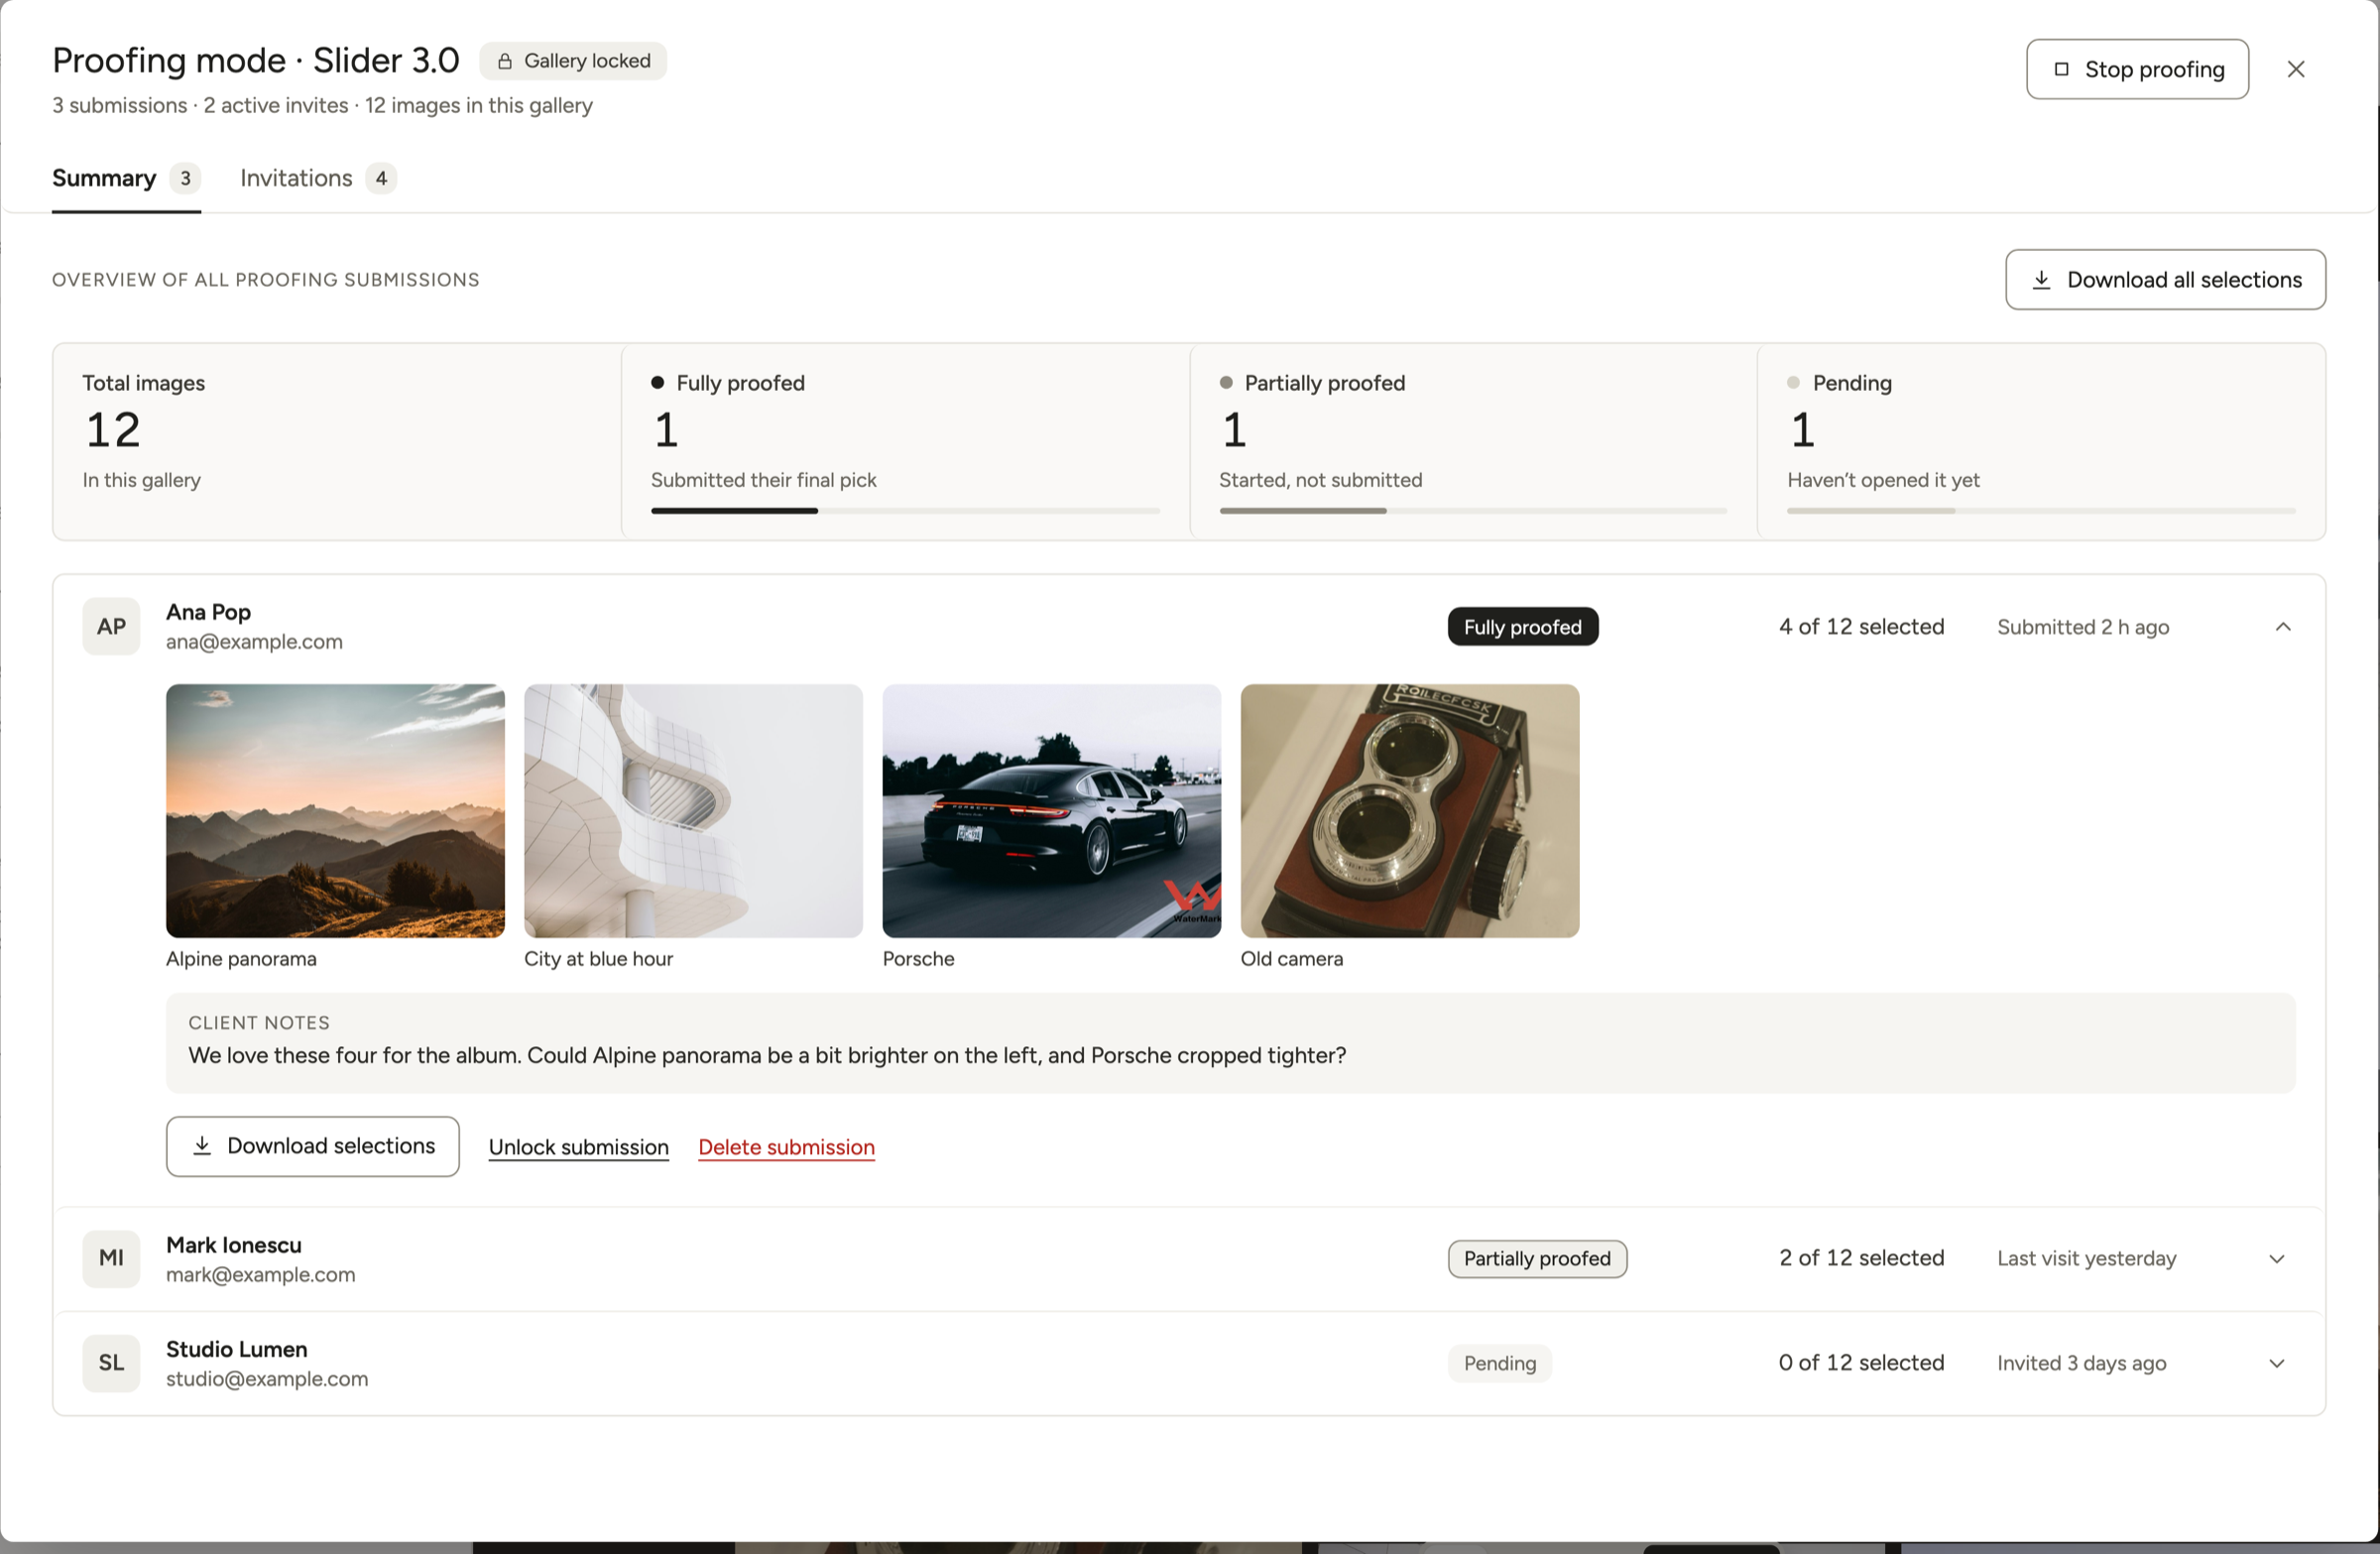
Download selections gives you one client’s picks as a CSV file: ID, file name and link. Download all selections puts everyone’s picks in one CSV, showing who picked each file. These are lists, not the photos, and a list is exactly what your edit needs.
Tip
If you upload photos wider or taller than 2,560 px, WordPress scales them down and adds “-scaled” to the file name. So the CSV might say IMG_0412-scaled.jpg. The start of the name still matches your original.
Reopen a round, or end it
Clients change their minds. You’ve got three controls:
- Unlock submission lets one client change their picks again, on the same link. No new invite needed.
- Expire invite closes one person’s link.
- Stop proofing ends the round for everyone.
Watch out
Stop proofing makes the gallery public again. Invitees see “This proofing round has ended,” but everyone else sees the gallery wherever it’s published. If those photos should stay private, unpublish the gallery, take it off the page, or switch on Password protect first.
Put your logo on the invitation email
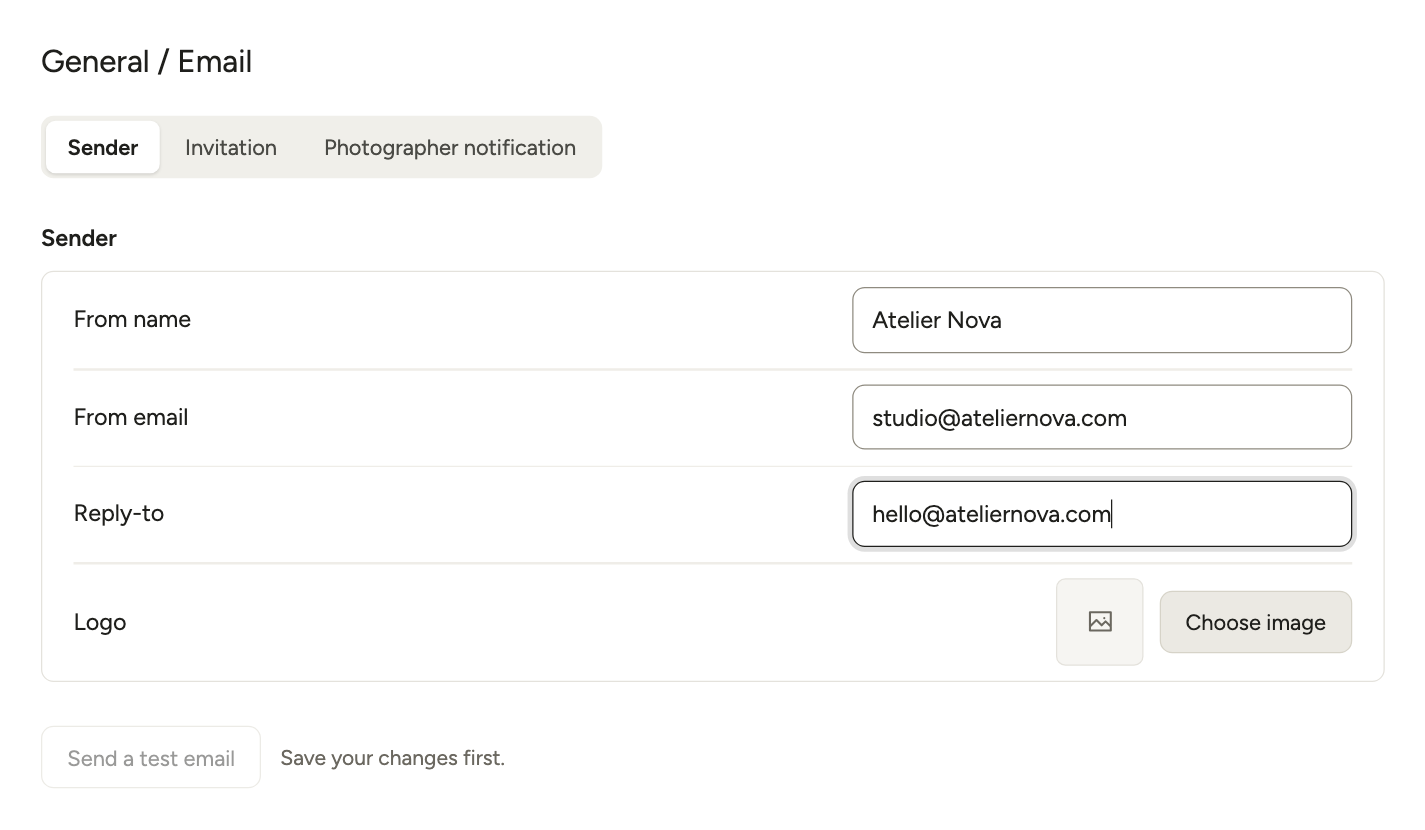
Go to Modula → Settings → Email. On the Sender tab, set the From name, a From email on your own domain, a Reply-to address and your Logo, then click Send a test email.
The logo appears wherever the {{logo}} tag sits in the Invitation message (the default one starts with it), which you can edit in Visual or Code view. Photographer notification is the email you get when someone submits.
When proofing doesn’t work: fixes from real support cases
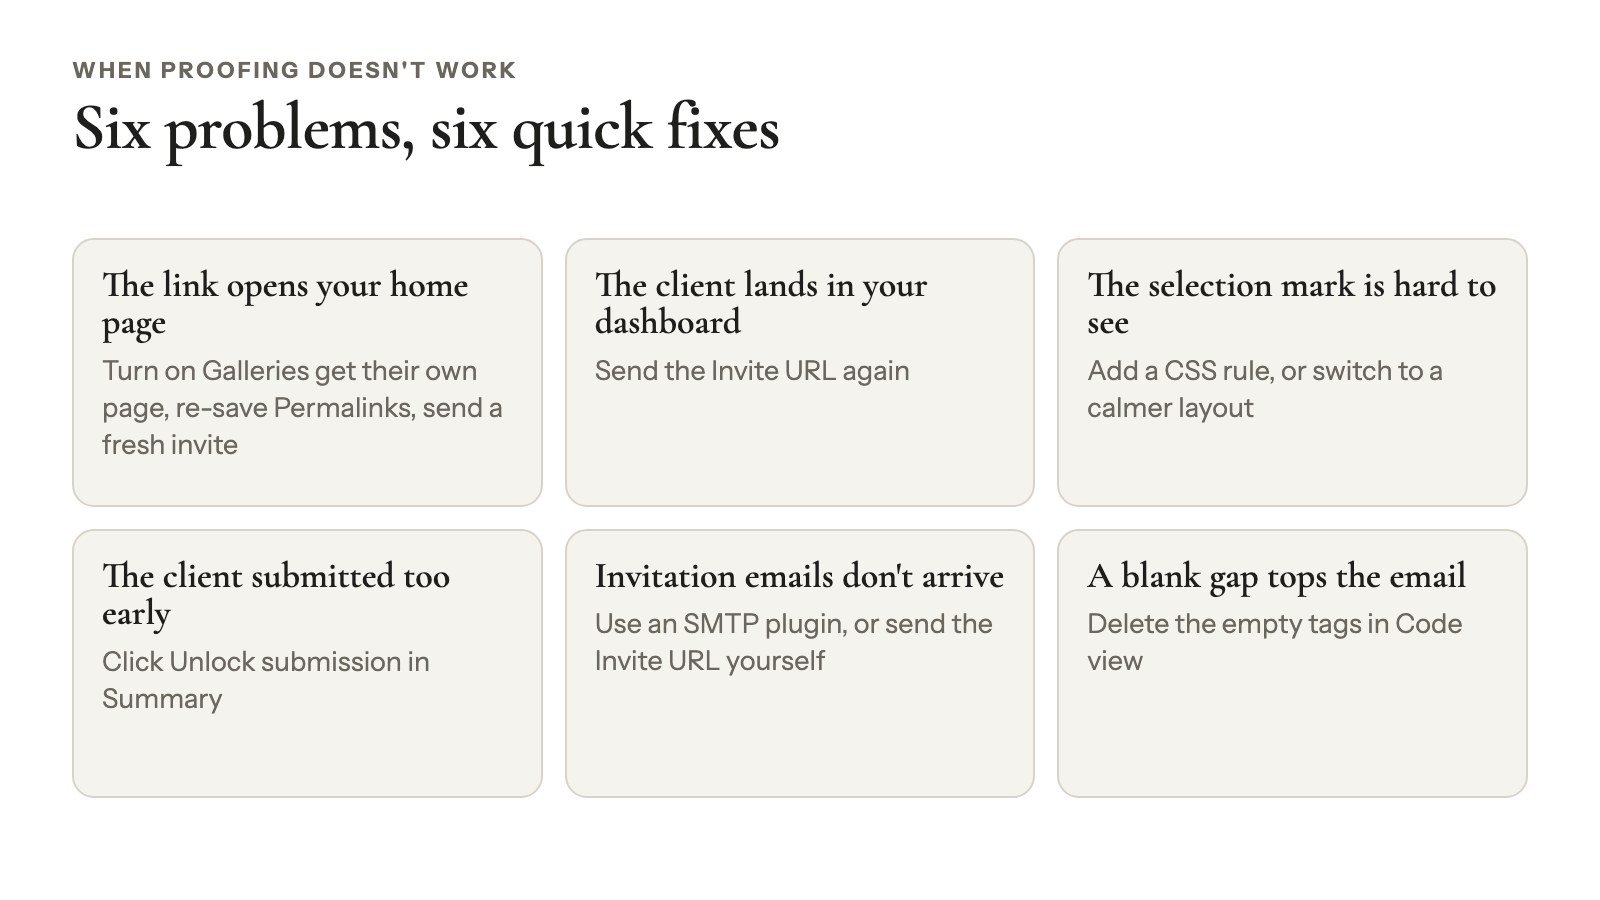
Six common Modula proofing problems have quick fixes; five come from real support cases.
The link opens your home page. An invite URL points to the gallery’s own address. If your galleries don’t have their own pages, the link has nowhere to go. Make sure Galleries get their own page is on in Modula → Settings → Galleries (Standalone, included in Business). Then re-save Settings → Permalinks, clear your cache and create a fresh invite.
The client lands in your WordPress dashboard. They logged in instead of opening the link. Send the Invite URL again; the gallery opens on the front of your site. Clients with an account can also sign in from the gallery’s Login link.
The selection mark is hard to see. On bright photos, a white selection box can disappear. Add a small rule in the gallery’s CSS section to make it stand out, or switch to a calmer layout. A three-column Masonry grid did the trick in one real case.
The client submitted too early, or wants more photos. Click Unlock submission in Summary, and their link works again. Next time, tell clients to use Save progress until they’re sure.
Invitation emails don’t arrive. WordPress sends them from your server, and plenty of servers are bad at email. Use a From email on your domain, add an SMTP plugin that sends through a real mail service, or send the Invite URL from your own inbox.
There’s a blank gap at the top of the email. Empty lines in Visual view become empty paragraph tags. Switch to Code view and delete the empty tags above {{intro_text}}. Modula 3.0 shows this tip right under the message.
Where to proof: a photo proofing site or your own WordPress site
Online photo proofing works on a hosted photo proofing site or on your own WordPress site; hosted platforms add storage and a print store. Here’s how the main options compare (prices checked October 2026):
| Tool | Price | Storage | Proofing | Store and prints |
|---|---|---|---|---|
| Pixieset | Free (3 GB, 15% commission on store sales); paid $8–$40/mo yearly, $10–$50 monthly | 3 GB to unlimited | Favorites, notes per photo, selection limit, file names | Store and lab fulfillment |
| Pic-Time | Free (10 GB, later cut to 3 GB); paid US$7–$42/mo yearly. Client Selections from Professional, US$21/mo yearly | 10 GB to unlimited | Client selections, album proofing | Store and lab fulfillment |
| Modula (WordPress) | Business: $99 first year, then $198/year, 5 sites | Your hosting | Min/max picks, notes per submission, invites you expire, Summary, CSV | None |
| FooGallery Client Proofing (WordPress) | $39.99/year, 1 site | Your hosting | Approve/reject and notes per photo, link expiry date, CSV/JSON | Through PRO Commerce, with WooCommerce |
| picu (WordPress) | Free core; Pro $149/year, 1 site | Your hosting | Approval; comments and markers in Pro | Image sales in Pro |
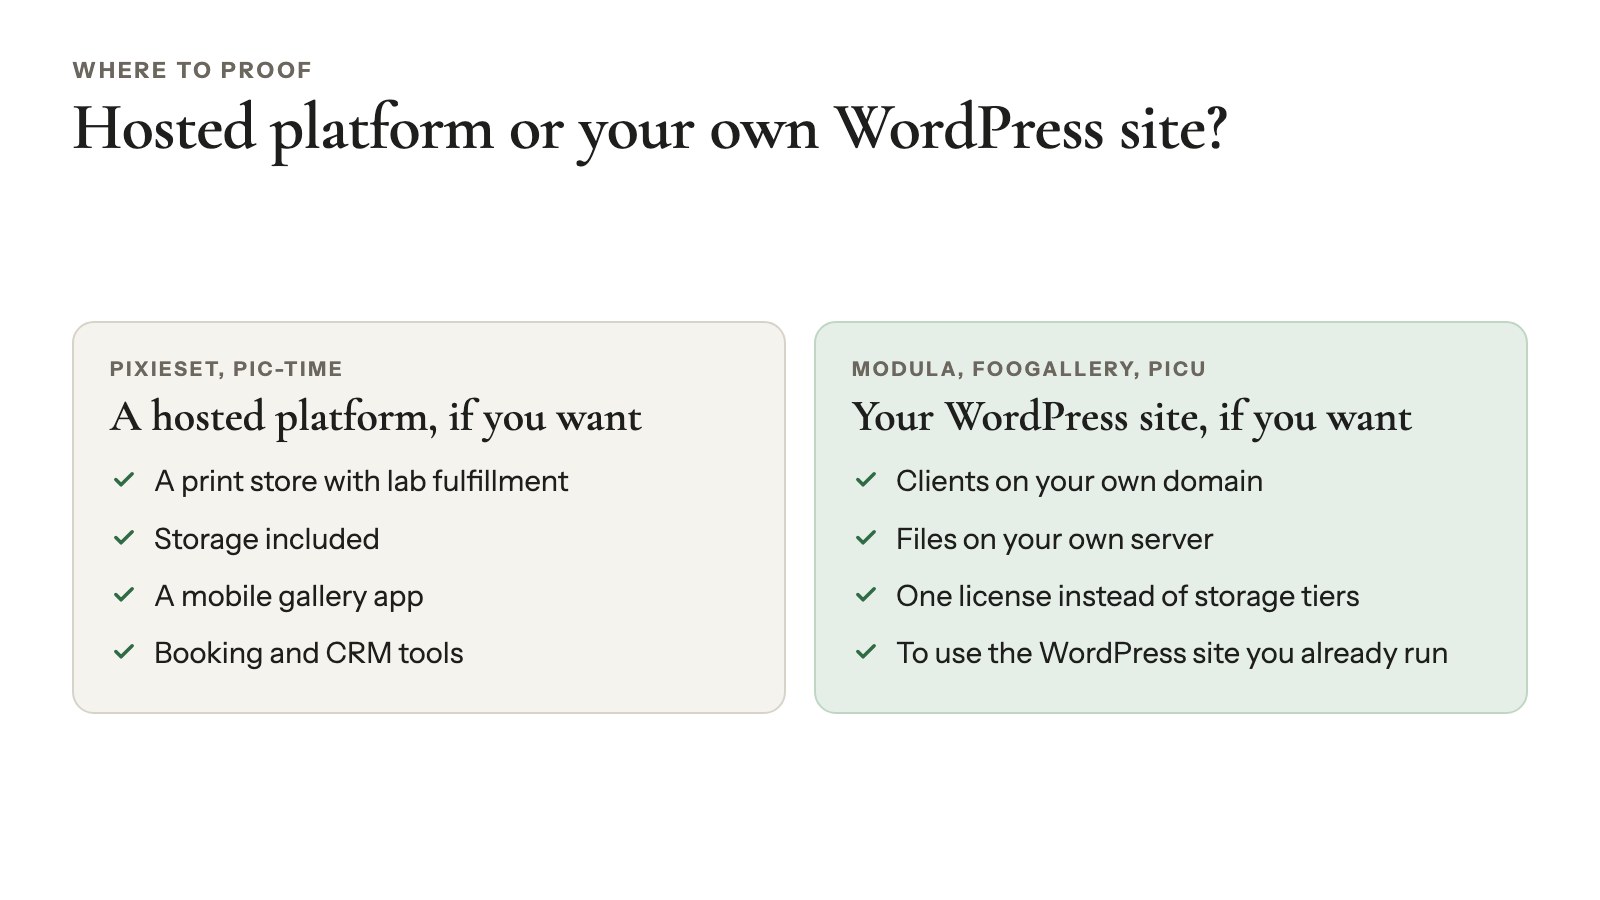
Choose a hosted platform if you want a print store with lab fulfillment, storage included, a mobile gallery app, or booking and CRM tools.
Choose your own WordPress site if your clients should stay on your domain, your files should stay on your server, and you’d rather pay one license than climb storage tiers. That goes double if you already run WordPress, like 39.6% of all websites (W3Techs, October 2026).
Here’s what Modula doesn’t do: no store, cart, print fulfillment or file sales, and no included storage (photos live on your hosting). No mobile app, face search, CRM, contracts or bookings.
In Modula, clients select photos rather than approve or reject each one, and invites don’t expire on a date. If you need those, a hosted platform or FooGallery’s add-on fits better. For a closer look, see our Pixieset alternative and Pic-Time alternative comparisons.
Ready for your first round? Follow the Image Proofing setup guide, or see everything Modula Image Proofing includes.
Frequently asked questions
Picture proofs are the previews a photographer shares after a shoot so the client can choose which photos to finish. Proofs are smaller than the originals, often watermarked and lightly edited; finals are the fully retouched, full-resolution versions of the picks.
Photographers usually don’t charge for proofs separately: proofing is part of the session package. Extras are set in the contract, typically images beyond the package or extra rounds of edits. There’s no industry price list, so set your own and put it in writing.
No industry standard sets how many proofs to send. Send every frame worth choosing after a hard cull, minus the near-duplicates, in a count your client can review in one sitting. In Modula, Maximum selection then caps the picks at the package size.
No industry rule sets how long a client gets to choose. Pick a deadline that fits your turnaround and put it in the invite message. Modula invites don’t expire on a date: click Expire invite on the deadline, or Activate invite to give more time.
Clients don’t need an account in every proofing tool: some platforms ask them to sign up, others open straight from the link. In Modula, an invite URL works without an account, and Create & invite users makes one for each person if you prefer logins.
Yes, several people can pick from one proofing gallery if each gets their own invite. In Modula, each submission stays separate, and Download all selections lists everyone’s picks in one CSV, showing who picked each file. One invite shared by two people would merge their picks.
In Modula, proofing notes cover the whole submission, not single photos. For one photo, turn on Comments (Business): visitors comment in the lightbox, under your WordPress Settings → Discussion rules. Pixieset and FooGallery’s add-on allow per-photo notes in proofing.