Modula Image Proofing is an essential tool for photographers, designers, and other creatives seeking to streamline client feedback on visual projects. This extension allows clients to select images from a gallery, providing a clear and structured way to request edits or approvals. For instance, a wedding photographer can upload event photos and let clients choose which images they’d like professionally edited.
Below, we’ll cover how to set up and customize Image Proofing for a seamless client collaboration experience.
Installation & Requirements
To use Modula Image Proofing, ensure the following are installed and activated:
- Modula Lite (the core plugin)
- Modula Pro
- Image Proofing Add-on
For installation steps, refer to this guide.
Setting Up Image Proofing
-
Create Your Gallery
Begin by creating a gallery in Modula.
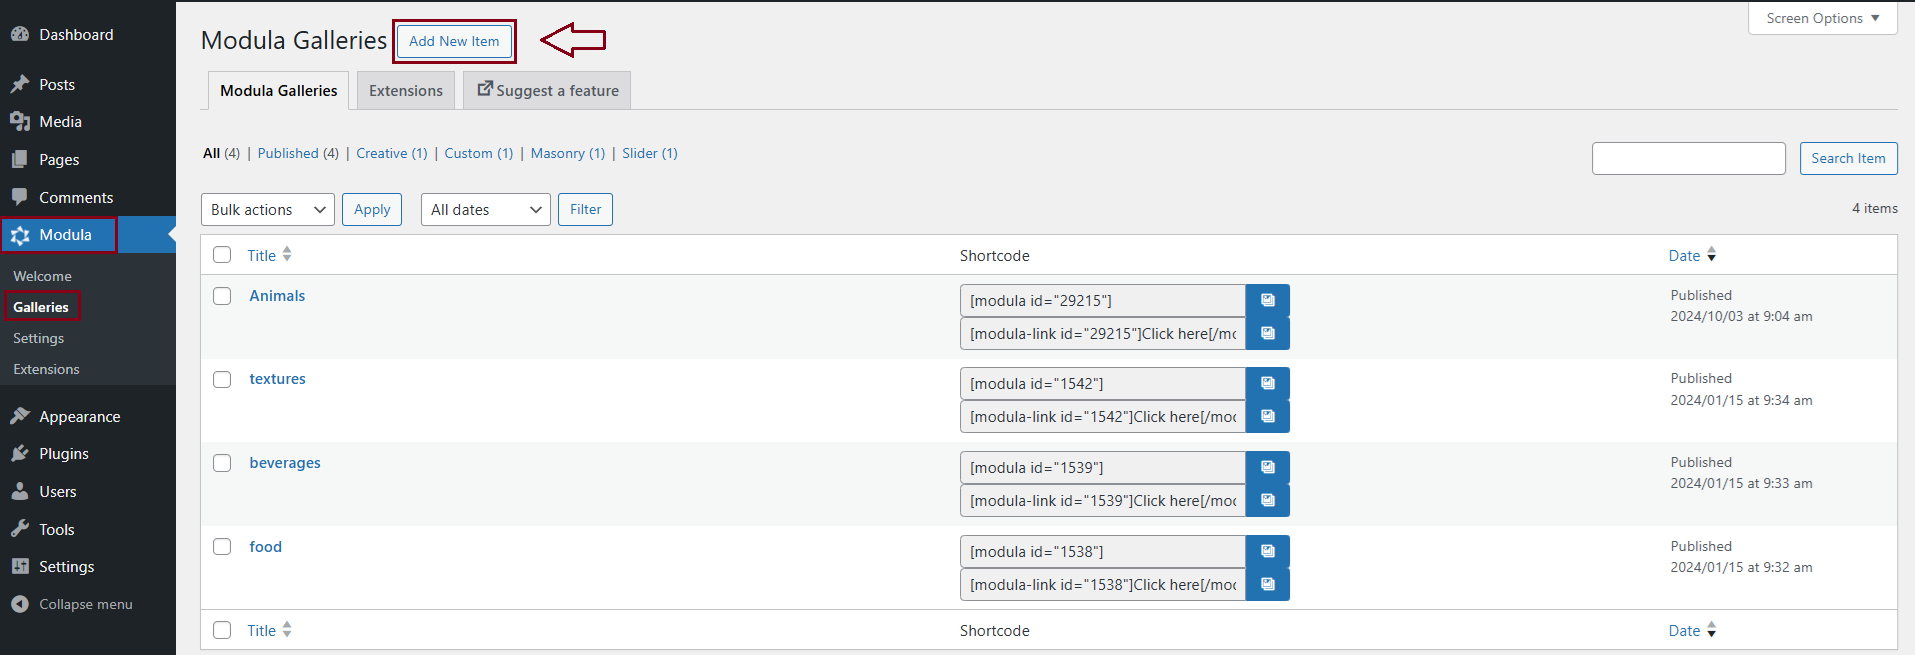
Upload your images by clicking on the Add New button and selecting the location you’d like to update them from.
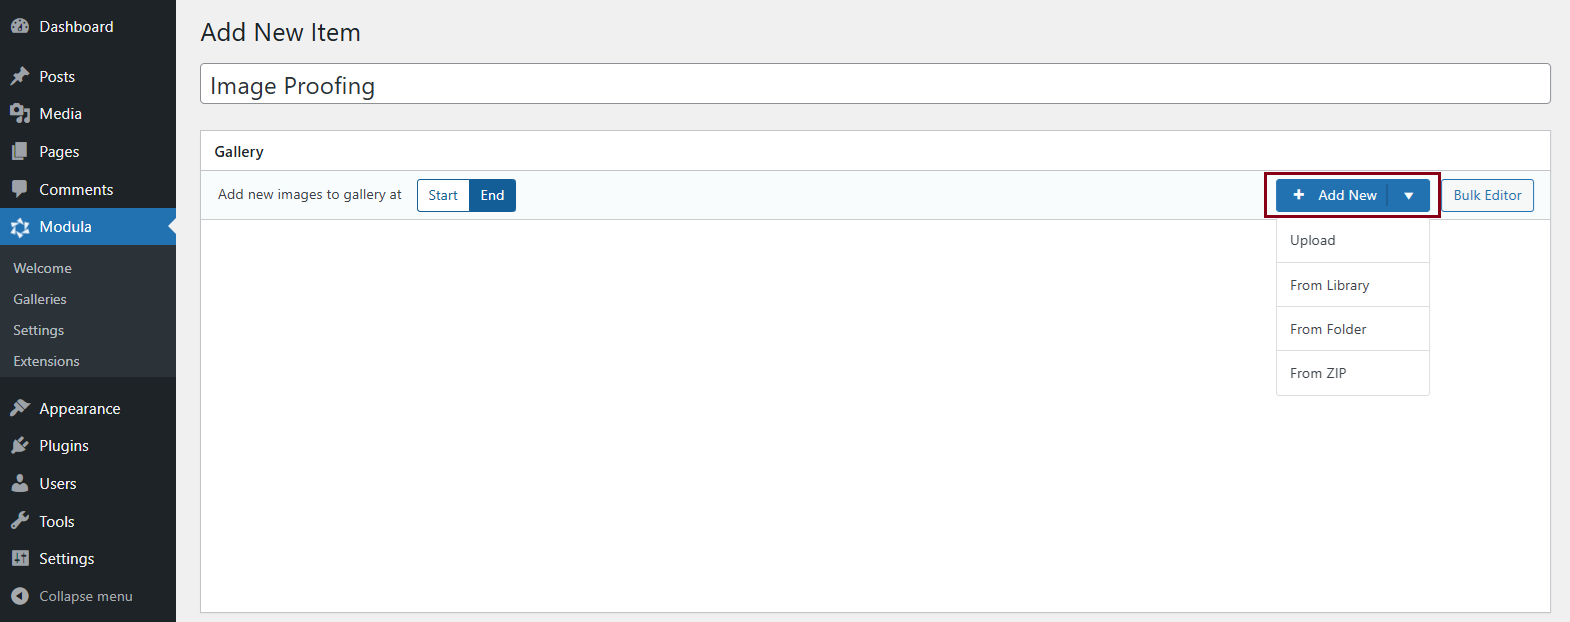
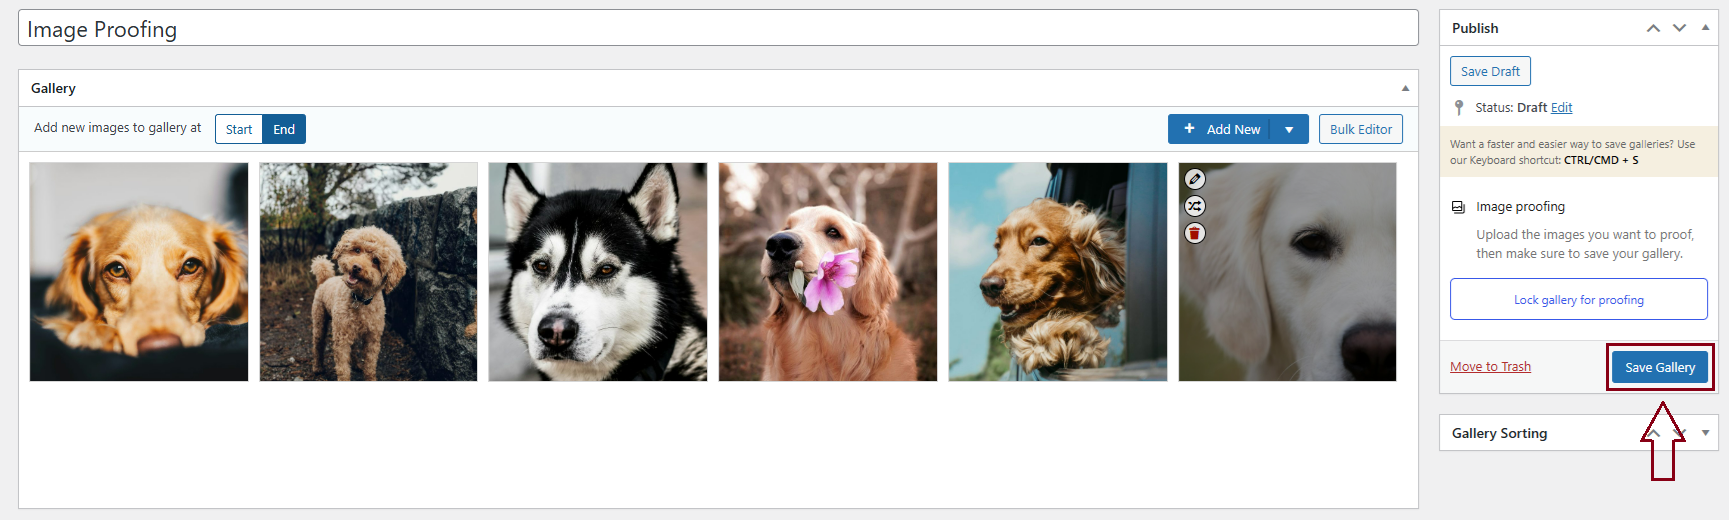
Save your gallery.
-
Enable Proofing
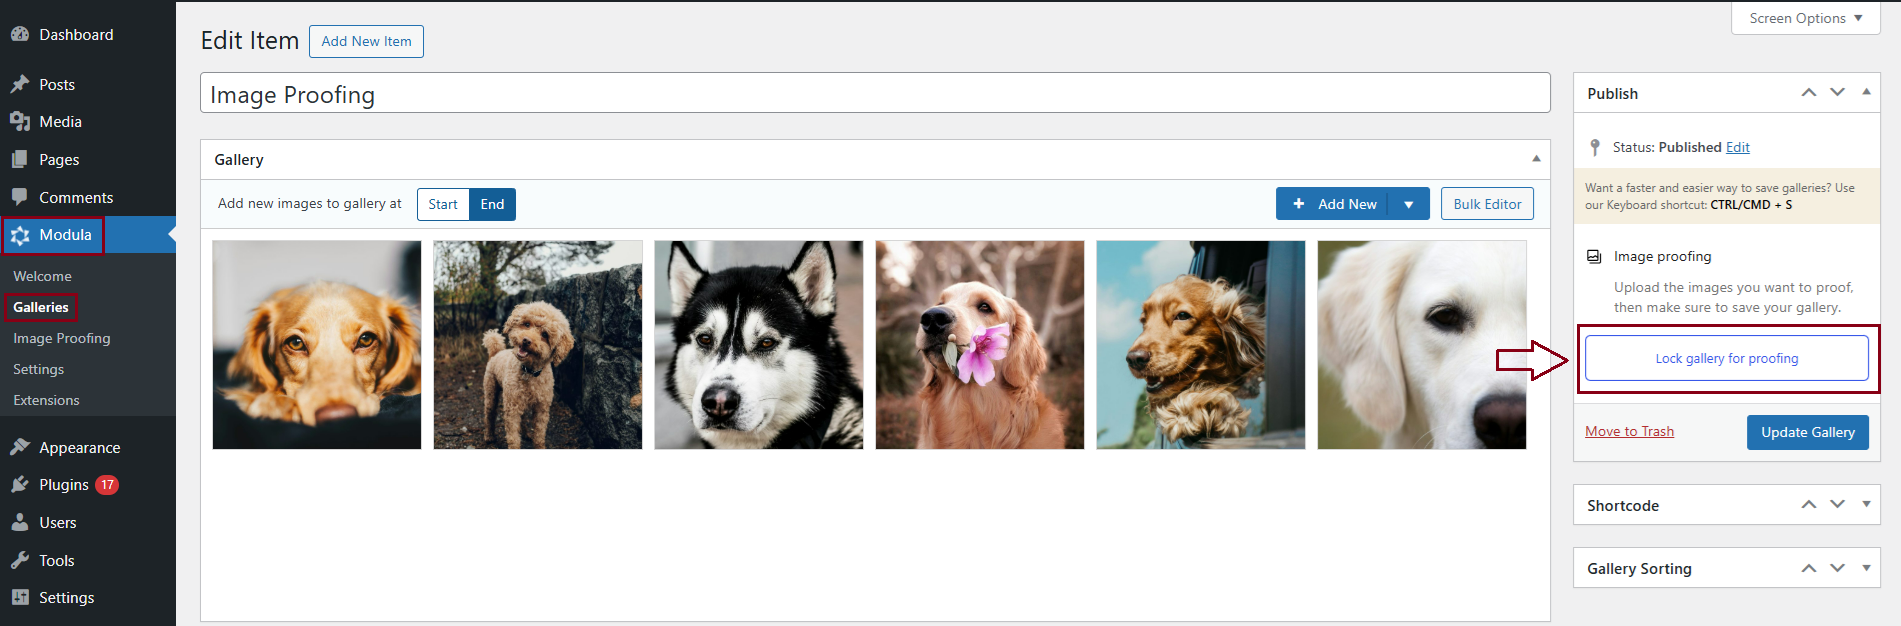
Once the gallery is saved, go to WordPress Dashboard > Modula > Galleries > Edit Gallery > Image Proofing. Click the Lock gallery for proofing button to enable proofing.
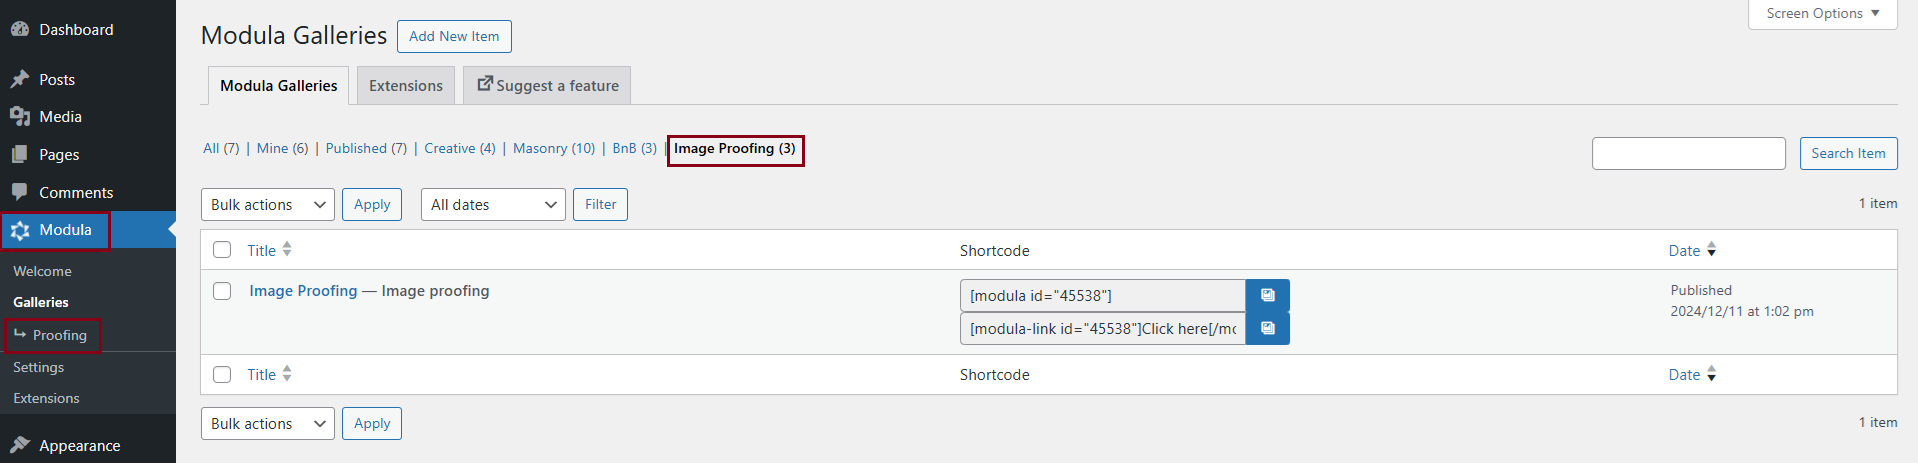
Additionally, you can access the ‘Image Proofing’ section under WordPress Dashboard > Modula > Image Proofing, where you can view galleries locked for proofing.
-
Image Proofing Settings
After enabling proofing, you can customize the following:

- Minimum Number of Images
- Set the minimum number of images a client must select (default: 1).
- Maximum Number of Images
- Specify the maximum number of images a client can choose. By default, this is set to the total number of images in the gallery.
- Log-in Required Message
- Customize the message displayed to unauthorized users attempting to access the gallery.
- Show Login Link
- Add a link to the default WordPress login page, allowing clients to easily find the login form.
- Proofing Invitation Expired Message
- Create a custom message displayed when a client’s invitation link has expired.
- Add Link to Contact Page
- Provide a link to your desired contact page, the URL will need to be manually entered in the following field.
Inviting Users
To send an invitation, go to the Create Invites section.
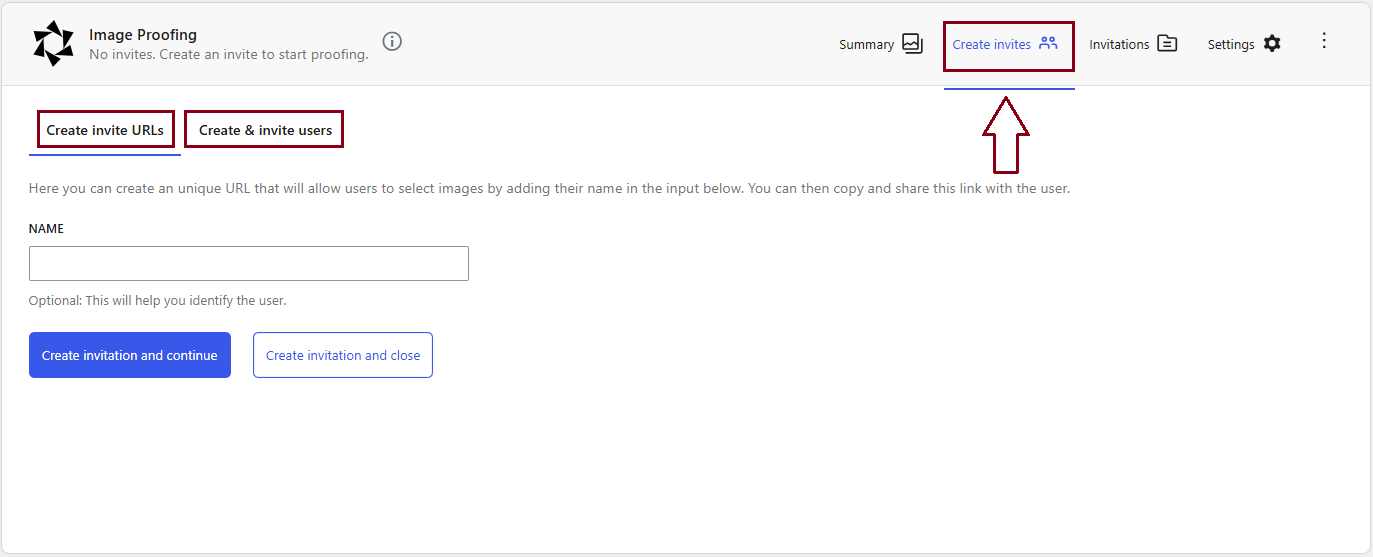
- Create Invite URLs
- Enter a name (optional), if this field is left blank a unique identifier will be generated.
- Create & Invite Users
- Create a new user by entering their email address. Modula only requires the email field, making it quick and straightforward.
- Copy the invite URL to share with the client.
Invitations
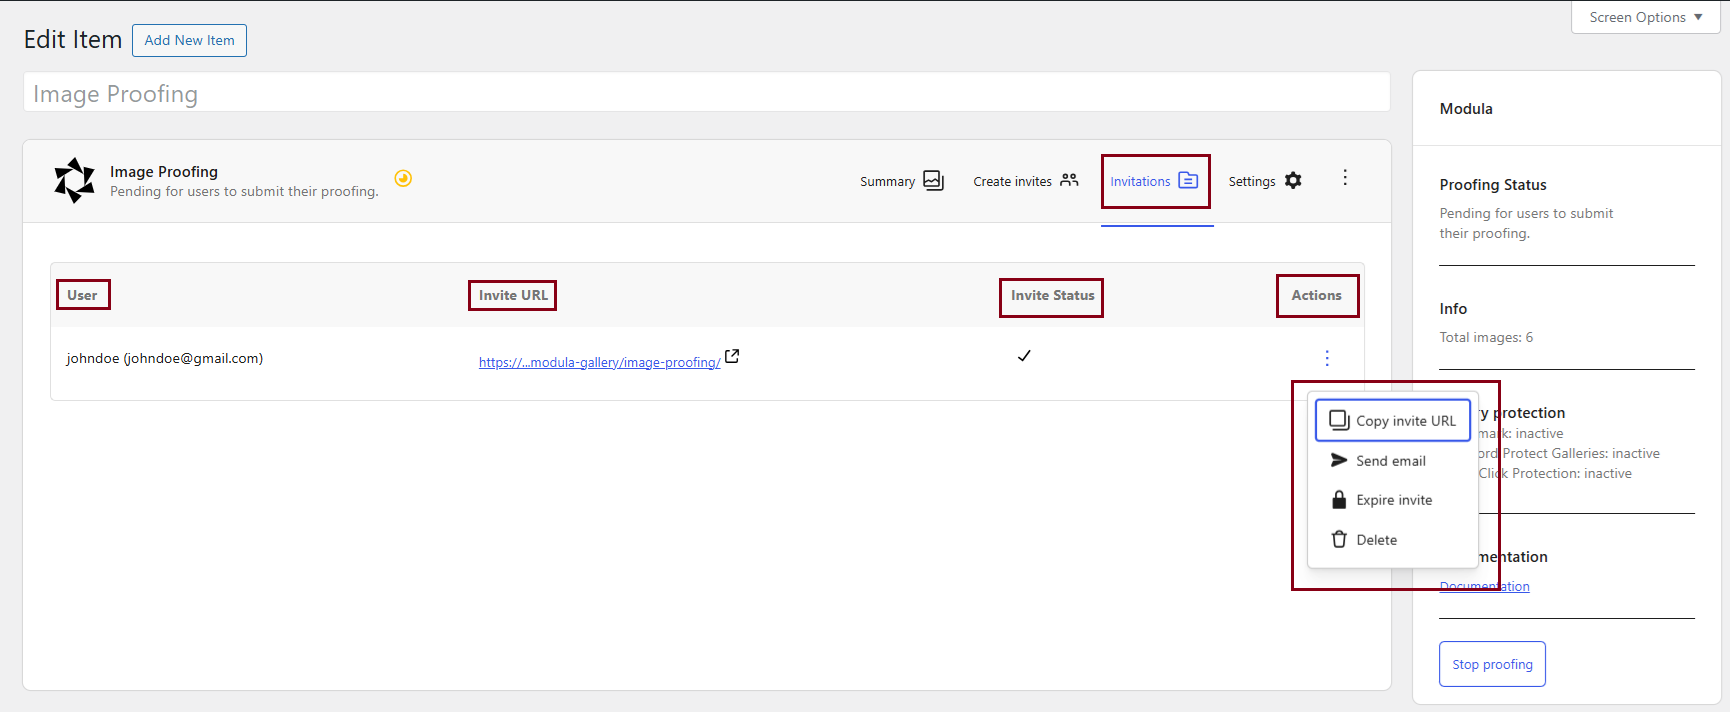
Invitations tab
- User Name/Email: View recipient details.
- Invite URL: Check the unique invite link.
- Invite Status: See the current status (e.g., active, expired).
- Actions:
– Copy Invite URL: Quickly copy the invitation link to share via email or chat for client access.
– Send Email: Resend the invitation email with the invite URL if the client didn’t receive it or misplaced it.
– Expire Invite: Disable an invitation link so clients can no longer make selections from your gallery.
– Delete: Permanently remove an invitation entry; this action cannot be undone.
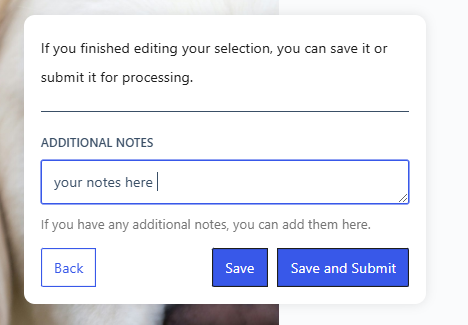
Client Experience & Notes
When a client receives an invite, they’ll access a gallery interface where they can select images.
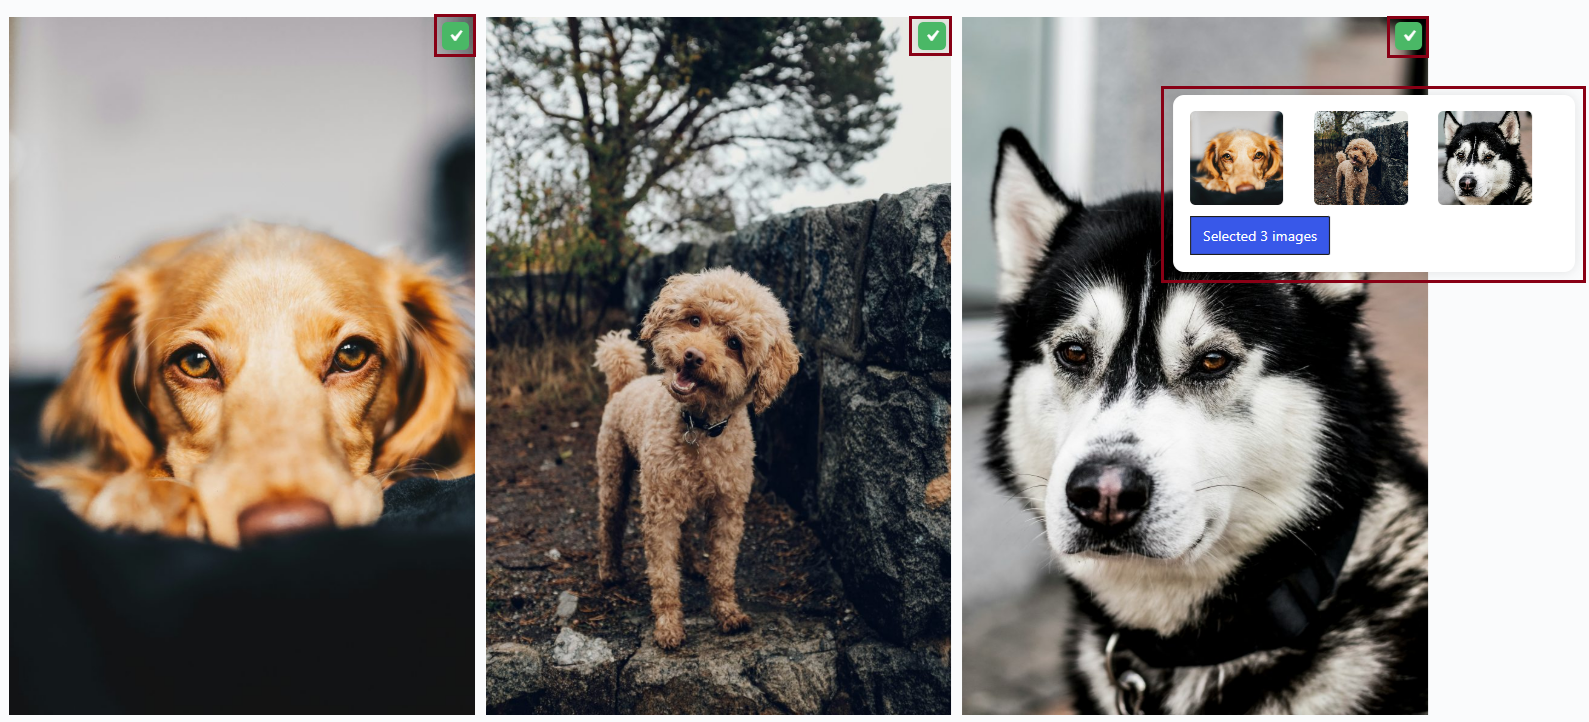
Clients can also leave submission notes, allowing them to communicate additional preferences or requests for the entire selection process.
Important: Notes are added per submission, not per image. This ensures clear communication between you and your client.
Managing Multiple Proofers
The Image Proofing extension supports collaboration with one or multiple proofers, making it versatile for a range of projects. Whether you’re working with a single client or multiple stakeholders (e.g., for a wedding or corporate event), you can easily track their individual submissions and notes.
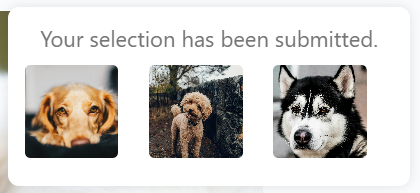
Here’s how the interface appears for a single proofer:
And this is how it looks when managing feedback from multiple proofers:
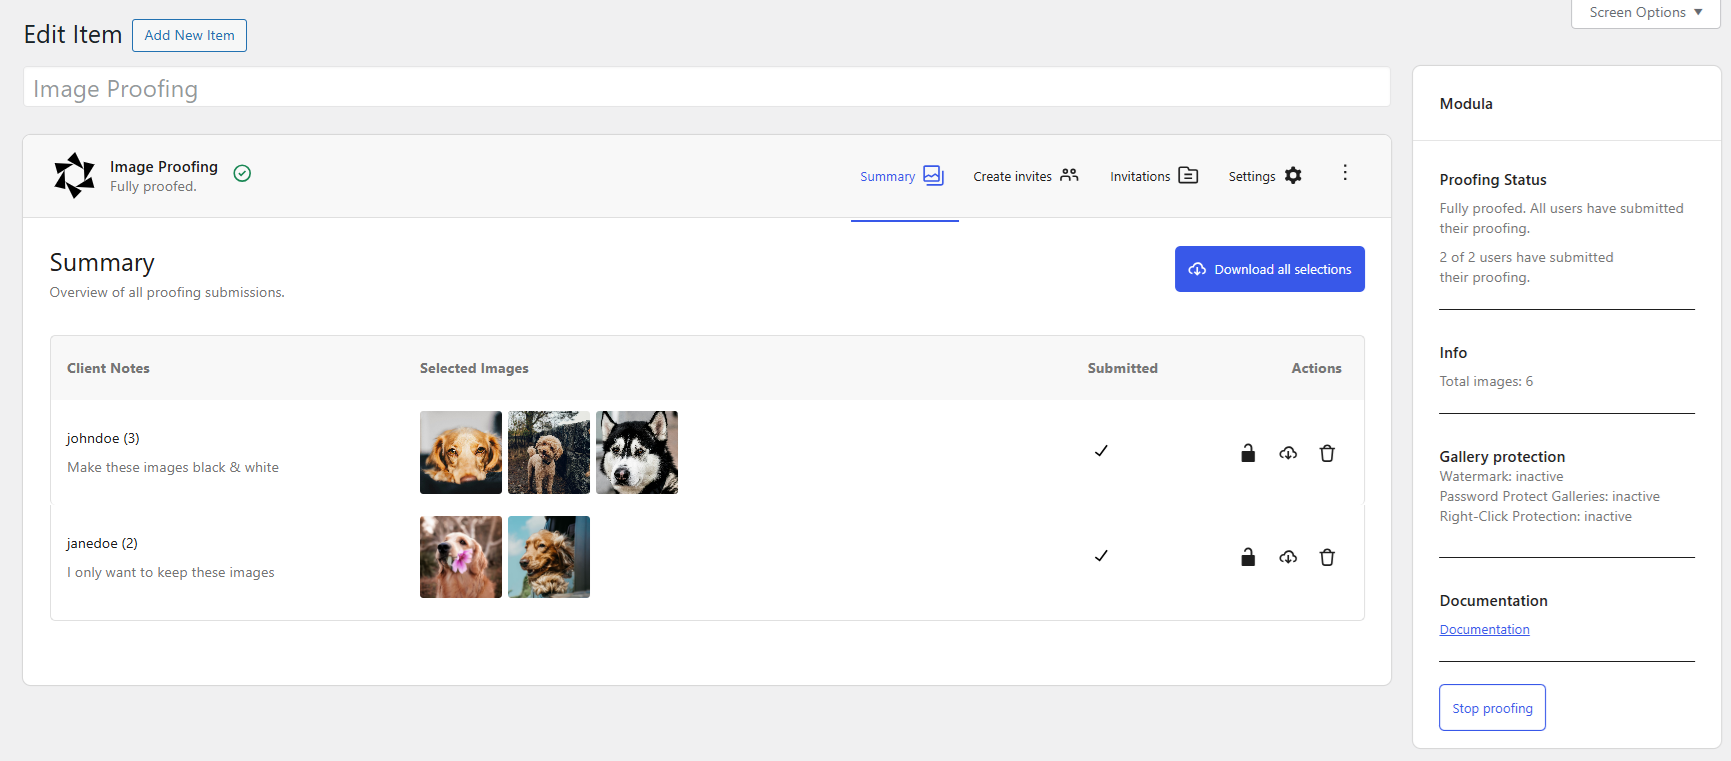
By clearly distinguishing submissions, you can efficiently manage preferences and ensure everyone’s needs are addressed.
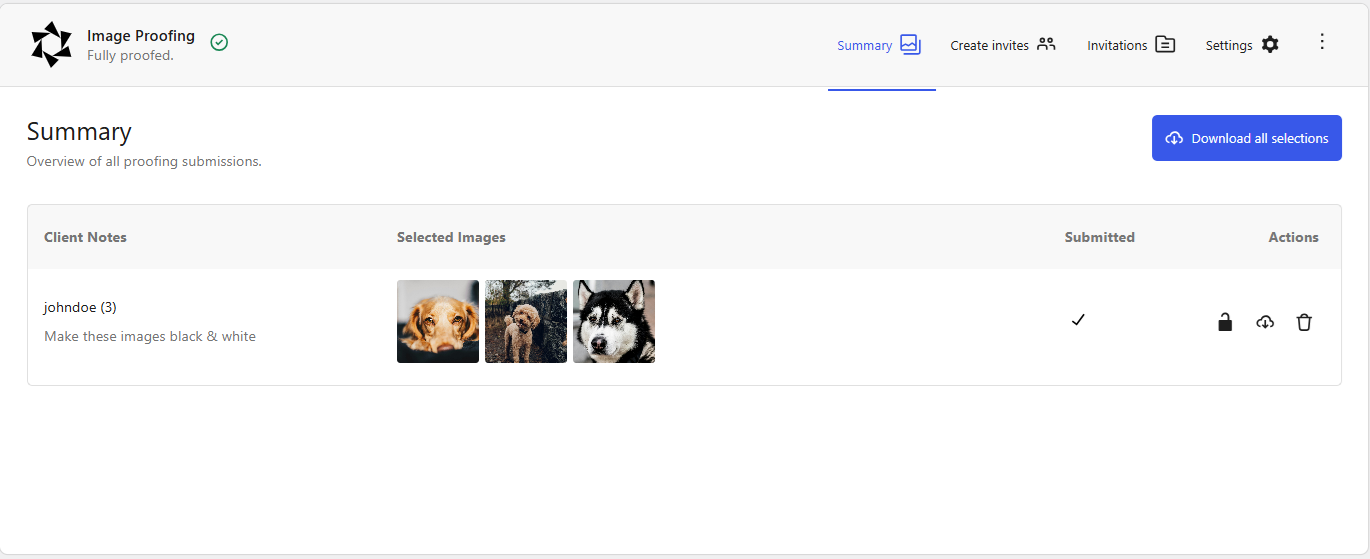
Summary Tab
After clients make their selections, review their feedback in the Summary Tab, which includes:
- Client notes: Review any additional feedback or instructions provided by the client.
- Selected images: View the images chosen by the client for final edits or approval.
- Download All Selections
- This option allows you to quickly download all submitted images in a single click. This feature simplifies the process by bundling all selected images into one download, improving efficiency for users managing multiple files.
Actions
- Unlock Submission: Allow the client to change his selected images. Normally when a submission is made, that particular client can no longer change his selections.
- Download the user’s selections: Quickly export the client’s selected images for processing.
- Delete Submission: Remove a submission permanently to clear outdated or unnecessary feedback.
This centralized view simplifies the review process, helping you focus on delivering client-ready work.
The Modula Image Proofing extension provides an efficient and user-friendly way to collaborate with clients.
From managing invitations to reviewing submissions, Image Proofing ensures clear communication and smooth workflows.
By addressing client feedback in a structured way, this tool helps enhance client satisfaction and save valuable time for photographers and designers alike.