Are you eager to construct a unique gallery with filterable options using the Modula Pro plugin? With Modula, you can effortlessly craft galleries that showcase images based on selected filters. This comprehensive guide will walk you through the process of creating your very own filterable gallery using the Modula plugin.
Prerequisites
Before diving into the tutorial, ensure you have the following:
- Modula and Modula Pro Plugins: Install and activate both the Modula and Modula Pro plugins on your WordPress site. These foundational plugins lay the groundwork for creating a filterable gallery.
- Modula Pro License: Activate your Modula Pro license key, which unlocks access to premium features including filters. You can purchase a license key effortlessly through the official Modula website.
Installation
Follow these steps to install the Modula and Modula Pro:
- Install Modula lite/free: The lite/free plugin is the main plugin for Modula. Without it, you cannot create galleries. You can install it by:
-> Logging into your WordPress dashboard -> Navigate to “Plugins” and click on “Add New.” -> Search for the Modula plugin and click “Install Now.” -> Activate the plugin from “Plugins“.
For a more detailed tutorial please refer to our comprehensive guide on how to install Modula WordPress plugin. - Purchase the Pro plugin: Acquire Modula Pro from the official Modula website. All plans will have access to filters.
- Install Modula Pro in WordPress
-> Log in to your WordPress dashboard -> Navigate to “Plugins” and click on “Add New.” -> Choose the “Upload Plugin” button -> Select the downloaded zip file and click “Install Now.” -> Activate the plugin once the installation is complete.
If you have trouble, kindly refer to our guide on installing Modula Pro.
Setup
-
Create or Edit a Modula Gallery
Start by creating a new gallery or editing an existing one. If you’re new to crafting Modula galleries, refer to our documentation here on how to create your first Modula gallery.
-
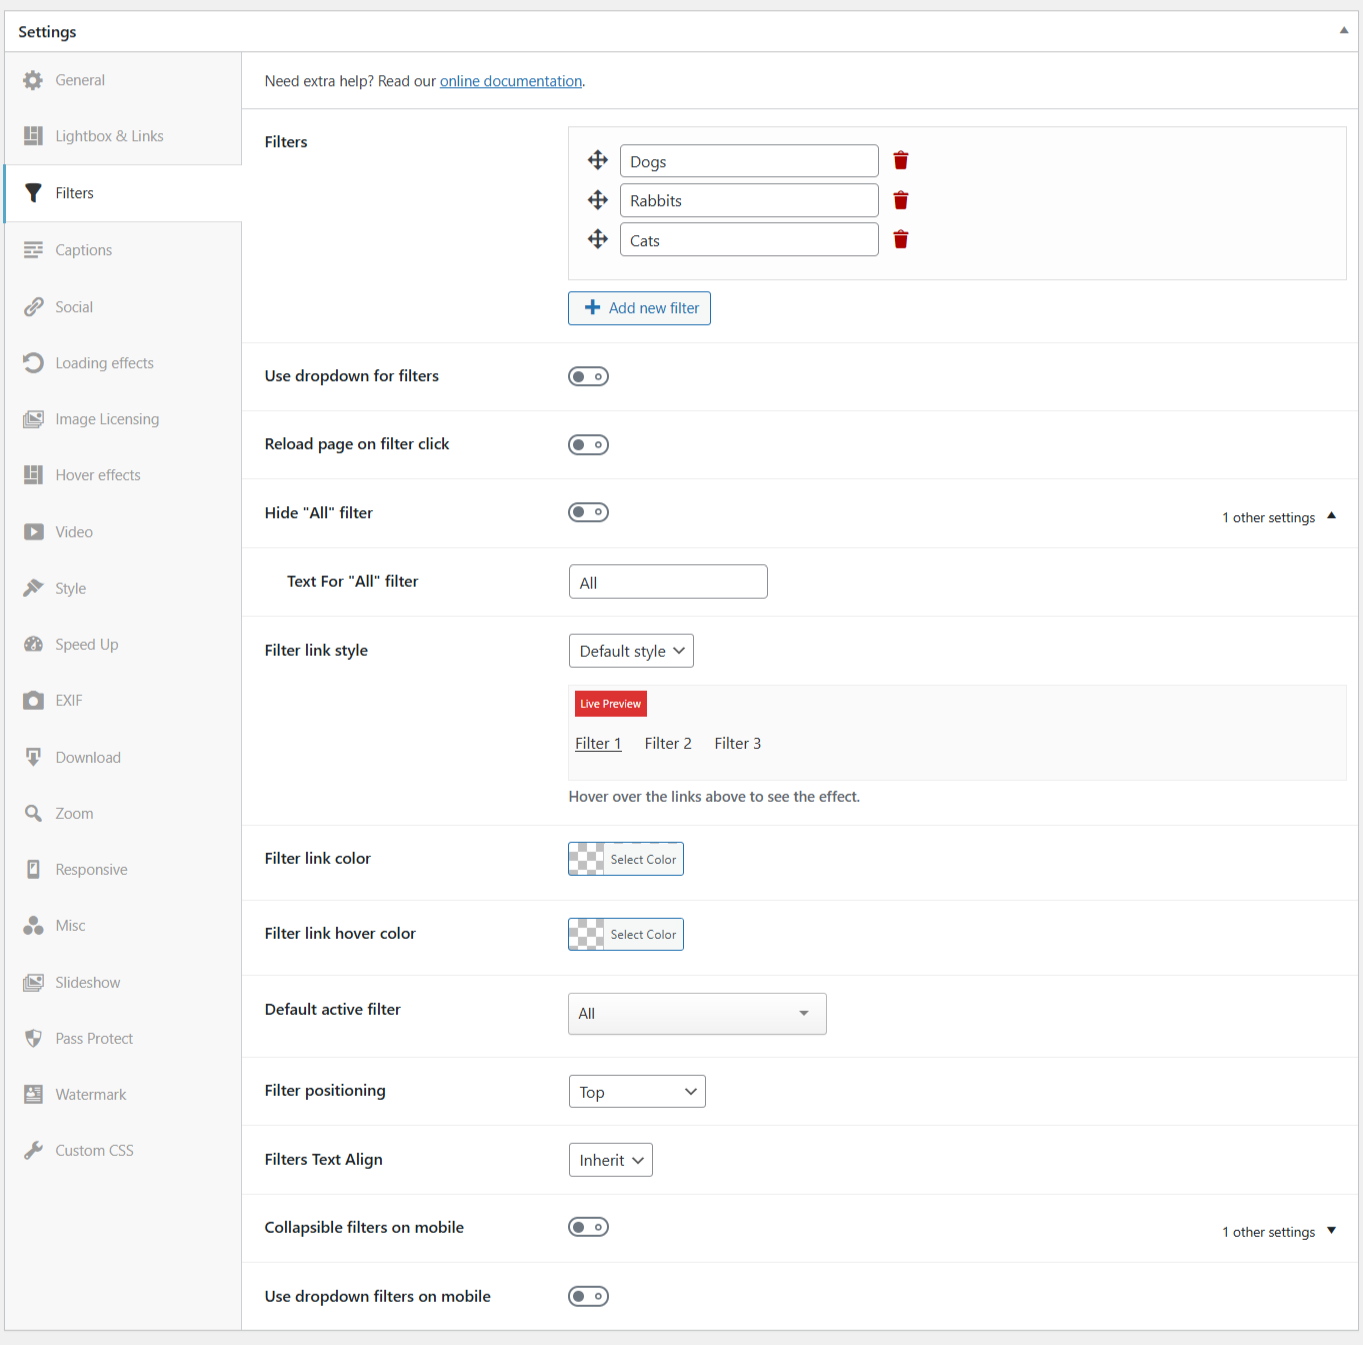
Add Filters to the gallery
Now, it’s time to incorporate filters into your gallery. This can be achieved by going to your WordPress dashboard > Modula > Galleries > Edit your gallery > Filters > click on “Add new filter” > enter its name in the filter field > and repeat to add as many as you’d like.
You can also customize your filters by adding a filter link style, changing color, hover color, text alignment, filter positioning, and much more.
-
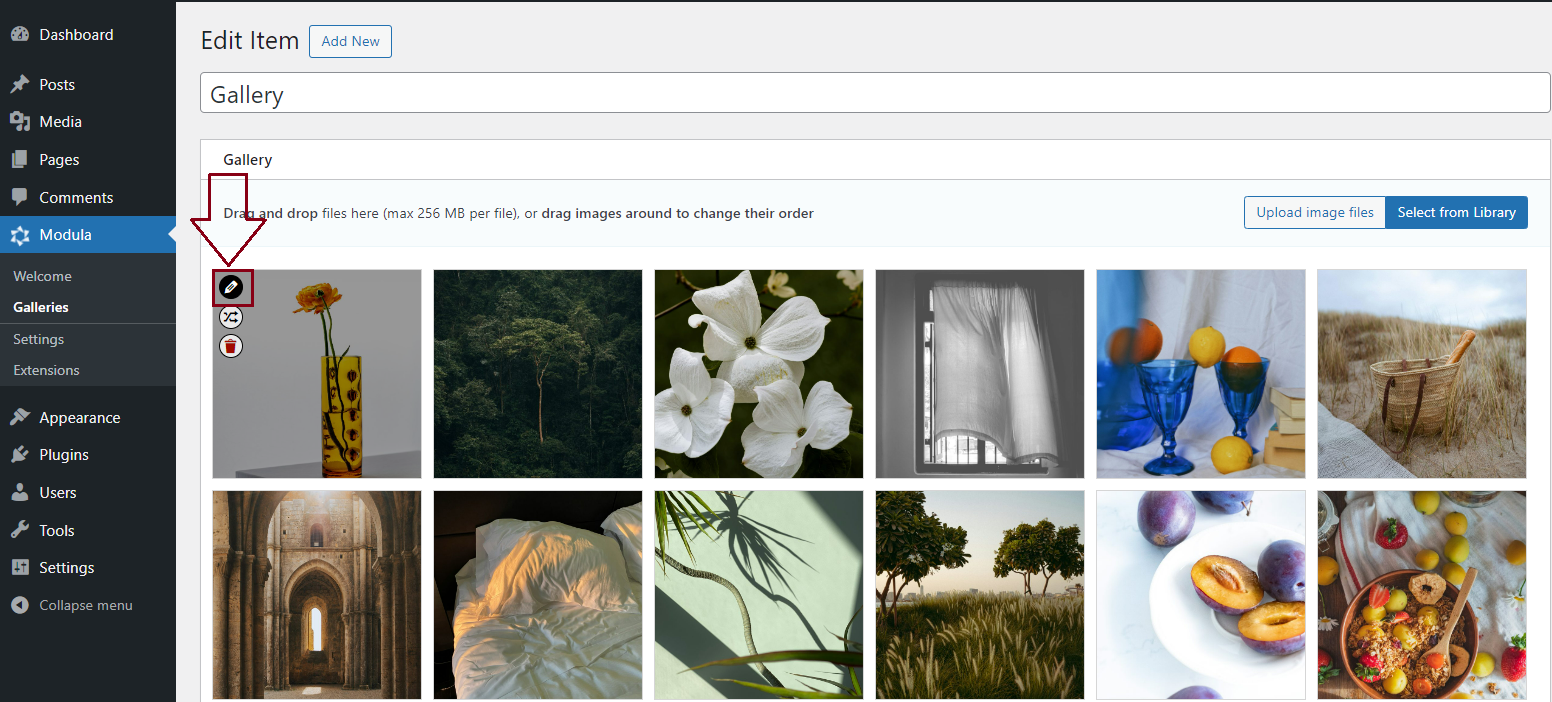
Assign Filters to Images
Scroll back to the top of your gallery where you can see all your images. Then click on the Pencil icon to edit an image. Just like you see in the screenshot below.
You’ll be redirected to edit the image’s metadata pop-up. In this section, you can add a title, alt text, caption text, URL, and filters to your pictures.
Clicking on the filter box will bring up all previously created filters.
Then add the filters that match your image > Save and move on to the next image and repeat the process until all images have filters assigned to them.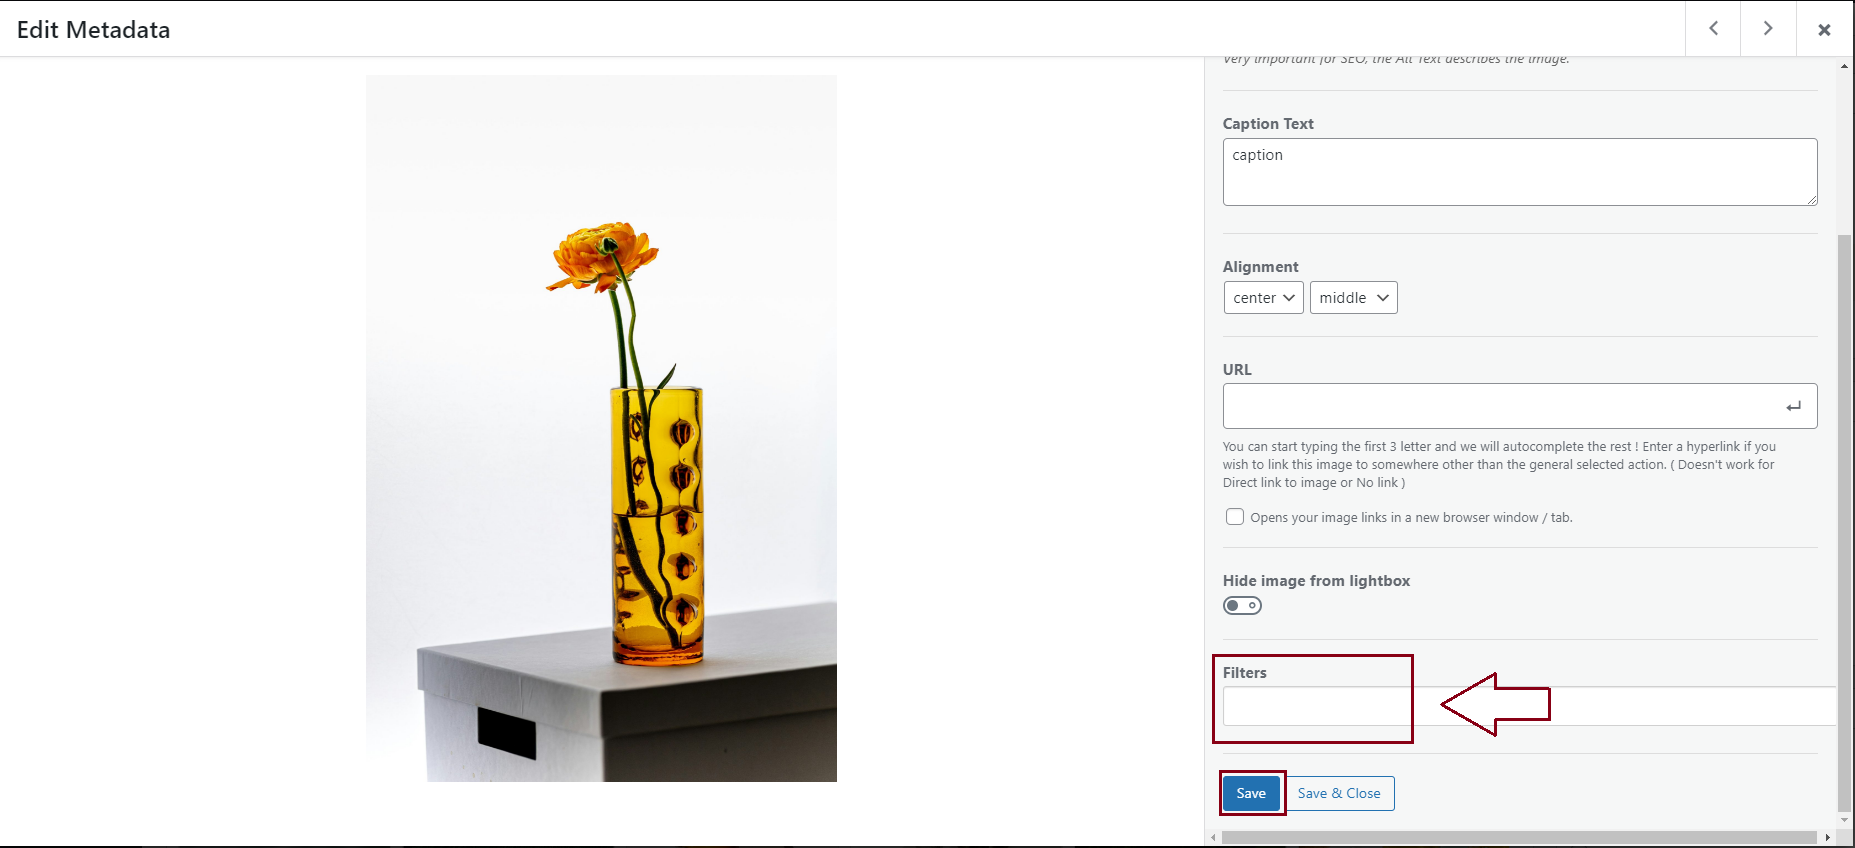
Congratulations! You’ve successfully crafted a Modula filterable gallery using the Modula Pro plugin.
If you’re interested in delving deeper into creating filterable galleries, explore all the features of Modula filters and how to use them.
Explore our Demos
Witness the results of a filterable Modula gallery in action by checking out our demos here.