 Made in Europe, buy from Europe.
The style settings add rounded corners, a border and a shadow to your gallery images. They change the images on the page only. The images in the lightbox, the large view that opens on click, stay as they are.
Add rounded corners in the gallery editor
- Go to Modula → Galleries and open your gallery.
- Click Layout in the left rail.
- Click Style to open the section.
- Drag the sliders or type a value. The preview shows the result right away, and your changes are saved as you make them.
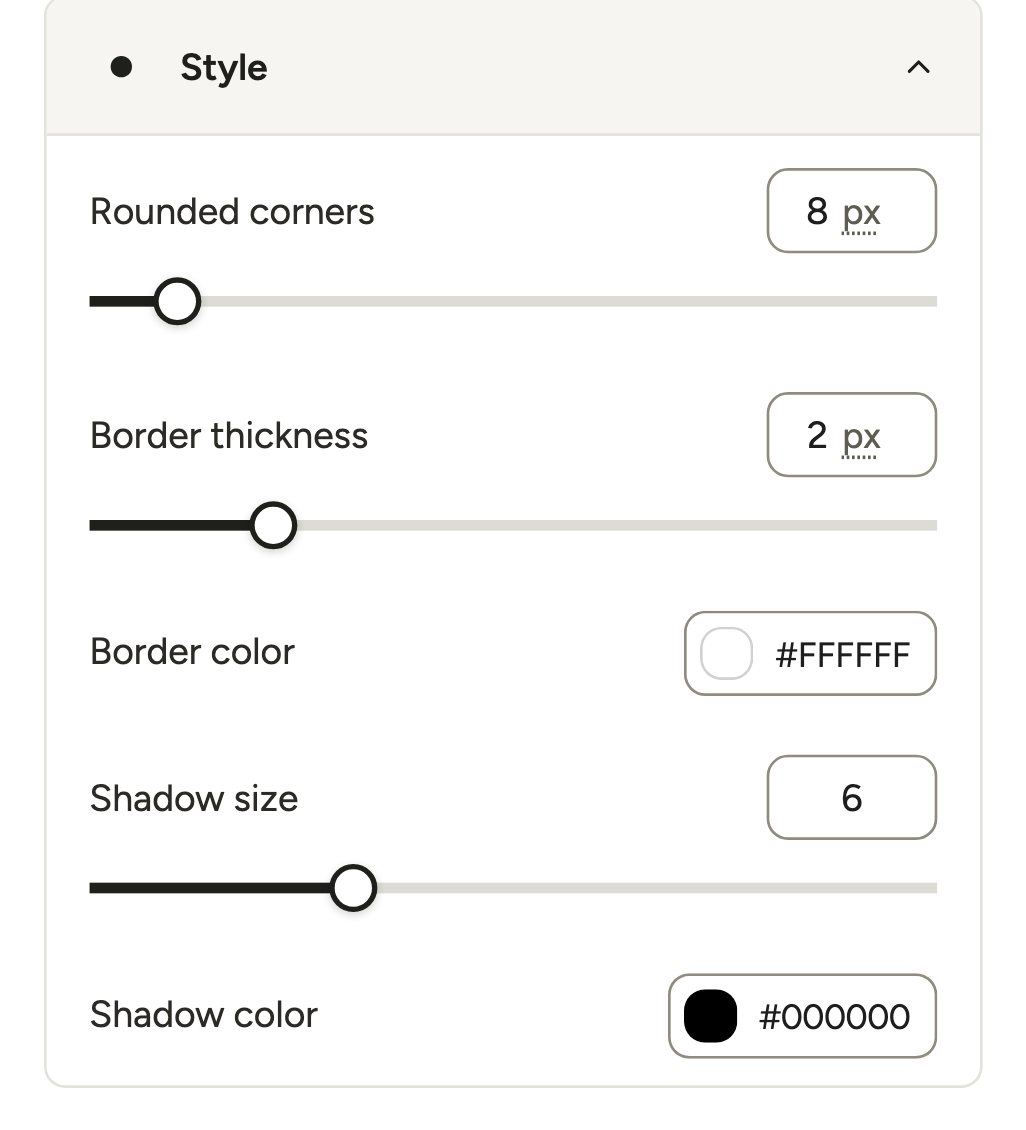
Each setting changes one part of the look:
- Rounded corners: Sets how round the corners of each image are. At 0 the corners stay square.
- Border thickness: Adds a border around each image, from 0 to 10 pixels. The same border goes around every image.
- Border color: Sets the color of the border. It appears once Border thickness is above 0.
- Shadow size: Adds a shadow under each image, from 0 to 20.
- Shadow color: Sets the color of the shadow. It appears once Shadow size is above 0.
Note: The section only shows the options that fit the gallery type. Some types, such as Story, have fewer of them.
You can change more of the look with custom CSS, which is code that styles the page. To change what happens when the mouse moves over an image, see hover effects.