The Modula Video Settings extension enhances your Modula galleries by allowing you to seamlessly integrate videos.
This guide provides detailed instructions on configuring the video settings, including autoplay options, display preferences, and adding YouTube/Vimeo videos or self-hosted videos to your galleries.
How can the extension be installed?
Please follow the instructions from our article on how to install extensions on your site.
Settings explained
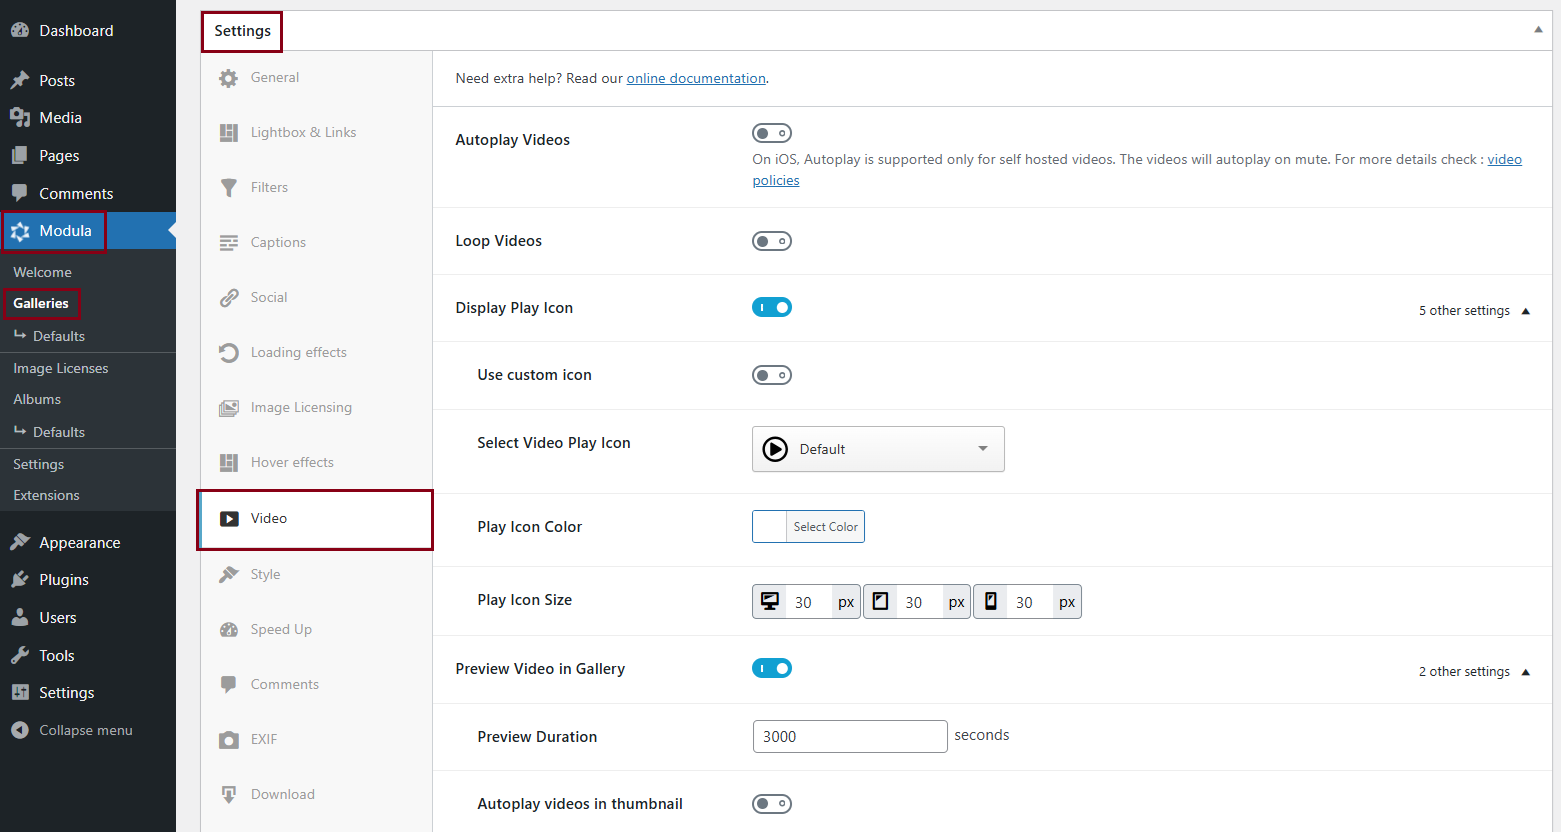
You will see the Video options when you go to your WordPress dashboard > Modula > Galleries > Edit a gallery > Video.
-
Autoplay Videos
Autoplay starts the video instantly after it loads, without the need to click the play button.
Note: On iOS, Autoplay is supported only for self-hosted videos. Videos will autoplay on mute. For more details check video policies.Click here to see a demo.
-
Loop Videos
Enable this option to loop your videos in the lightbox.
-
Display Play Icon
Show or hide the button to start the video. Click here to see a demo.
-> Use custom icon – Activate this option to upload a custom icon for the start button of the video. Demo here.
-> Select Video Play Icon – select your favorite video play icon.
-> Play Icon Color – Change the color of the play icon. Click here to see a demo.
-> Play Icon Size – Adjust the size of the icon in pixels. See a demo. -
Preview Video in Gallery
Allows the users to preview the video in the gallery’s thumbnail on hover.
-> Preview Duration – the duration of the video preview on hover. If you set it to ‘0’, the full video will be displayed.
-> Autoplay videos in thumbnail – enable this option so videos will autoplay when the gallery is loaded disabling the hover to preview.
Adding YouTube/Vimeo Video URL on your images
-
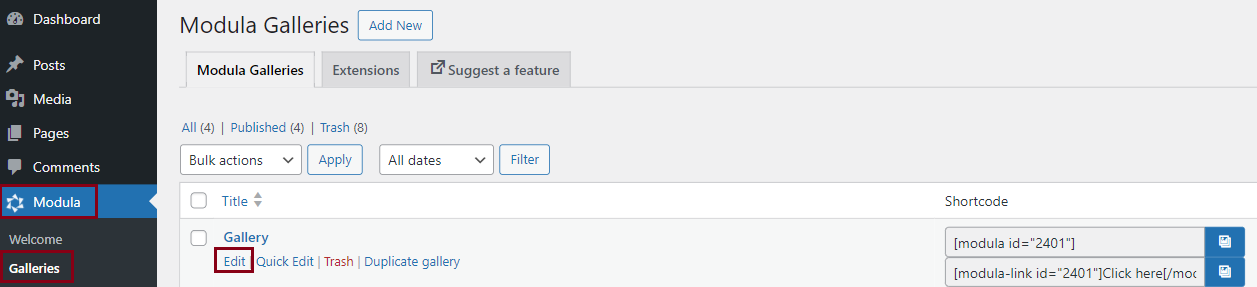
Go to your WordPress dashboard > Modula > Galleries > Edit your gallery.
-
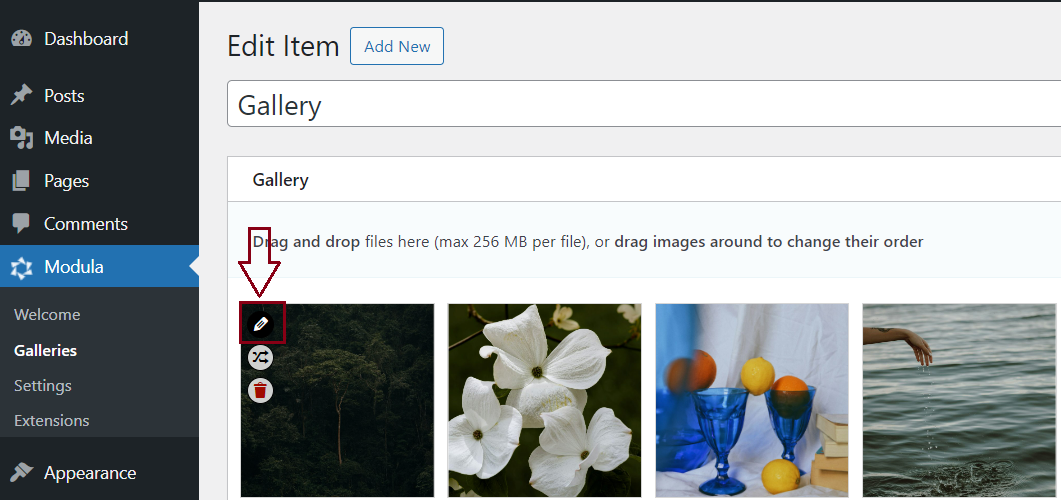
Click on the edit icon (pencil) for the image where you want to insert a video.
-
Insert your video URL > > Save by clicking the “Update” button.

Click here to see a gallery with YouTube videos and click here to see a gallery with Vimeo videos.
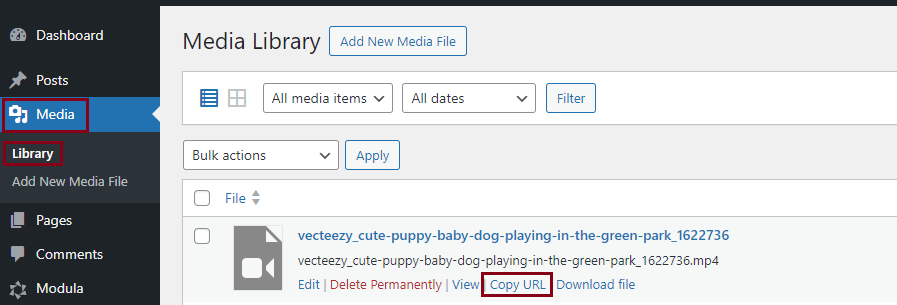
Adding Self-Hosted Video to your images
-
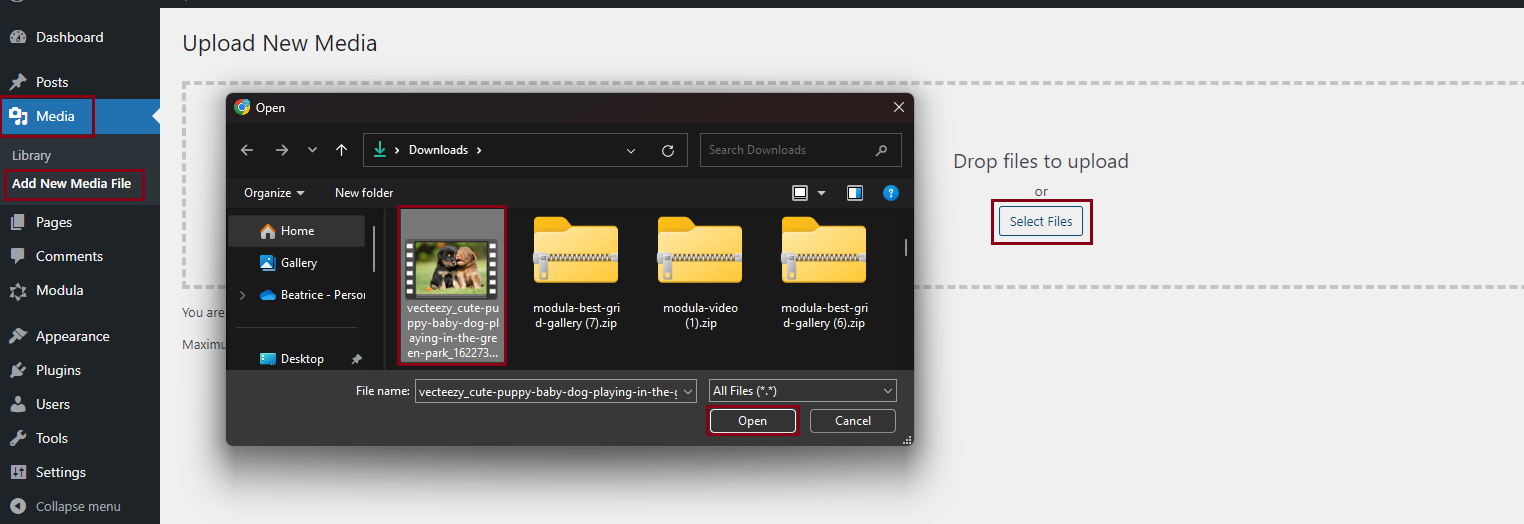
Go to your WordPress dashboard > Media Library > Upload the self-hosted video.
-
Select the .mp4 video > Copy its link.
-
Go to Modula > Galleries > Edit your gallery.
-
Click on the image where you want to insert the self-hosted video.
-
Insert the video link in the Video URL link field.
Demo gallery with self-hosted videos.
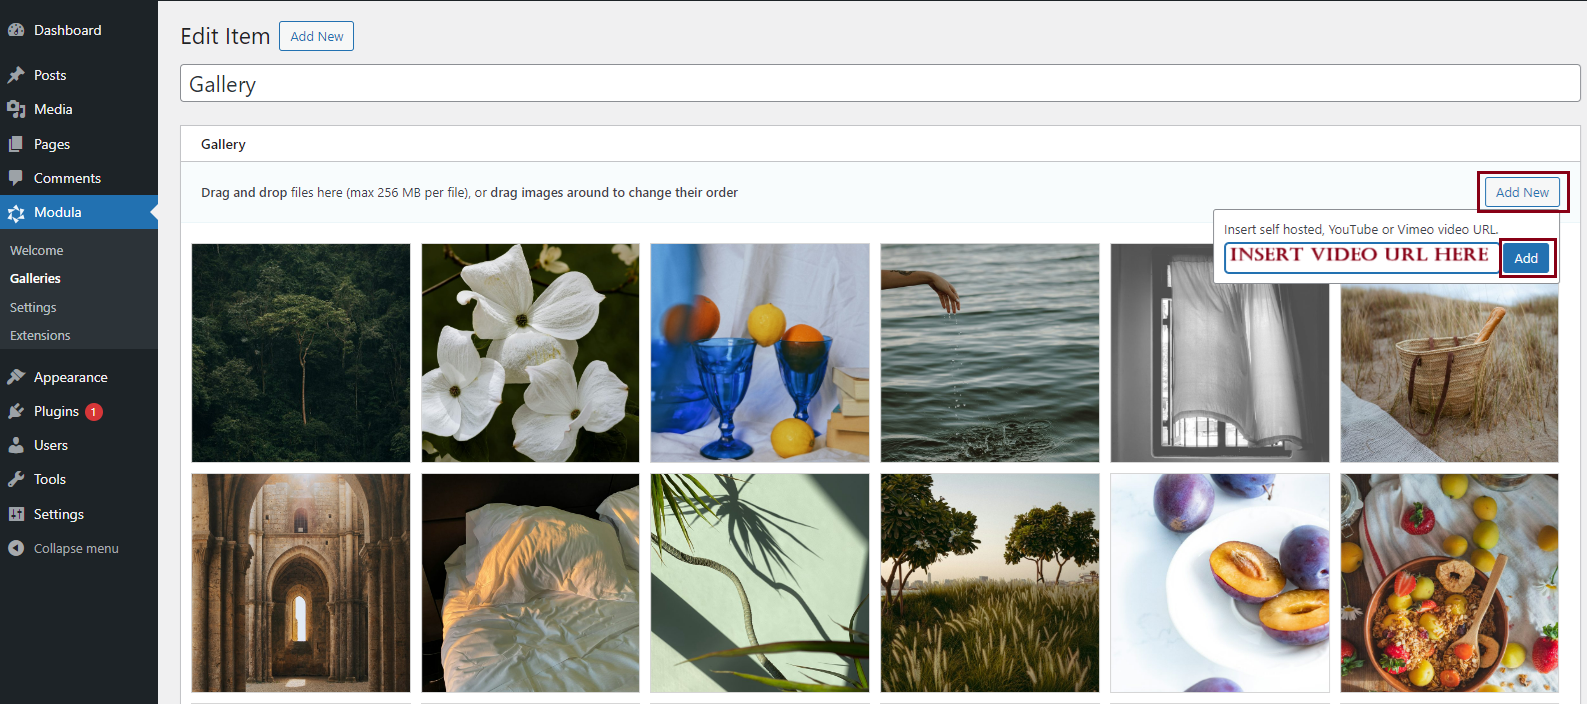
Creating a gallery with videos and images
Looking to create a gallery with both images and videos? We’ve got you covered! Just follow these simple steps to easily add YouTube, Vimeo, and self-hosted videos to your gallery.
-
Go to Modula > Galleries > Edit your gallery.
-
Click on Add New > Video > Insert your self-hosted, YouTube, or Vimeo video URL.
By following this guide, you can effectively configure the Modula Video Settings extension to customize the behavior and appearance of videos within your galleries.