 Made in Europe, buy from Europe.
If your images are already on your server, Modula can turn the whole folder into a WordPress gallery. You don’t need to upload the images again. This works for a folder you uploaded by FTP (a tool that copies files to a server) or with your host’s file manager.
Note: A folder on the server needs Modula Pro.
Before you start
The folder list starts in a working folder called wp-content/uploads/modula_folder_import. It does not start in your whole uploads folder.
Modula creates this folder the first time you open the folder window. Copy the folders you want to import into it first.
Note: Developers can point Modula to another start folder with the modula_gallery_upload_default_dir filter. A filter is a small piece of code that changes how a plugin works.
Create a WordPress gallery from a folder
Once your images are in the working folder, you can add them to a gallery.
- Go to Modula → Galleries.
- Open your gallery, or click New gallery to start a new one.
-
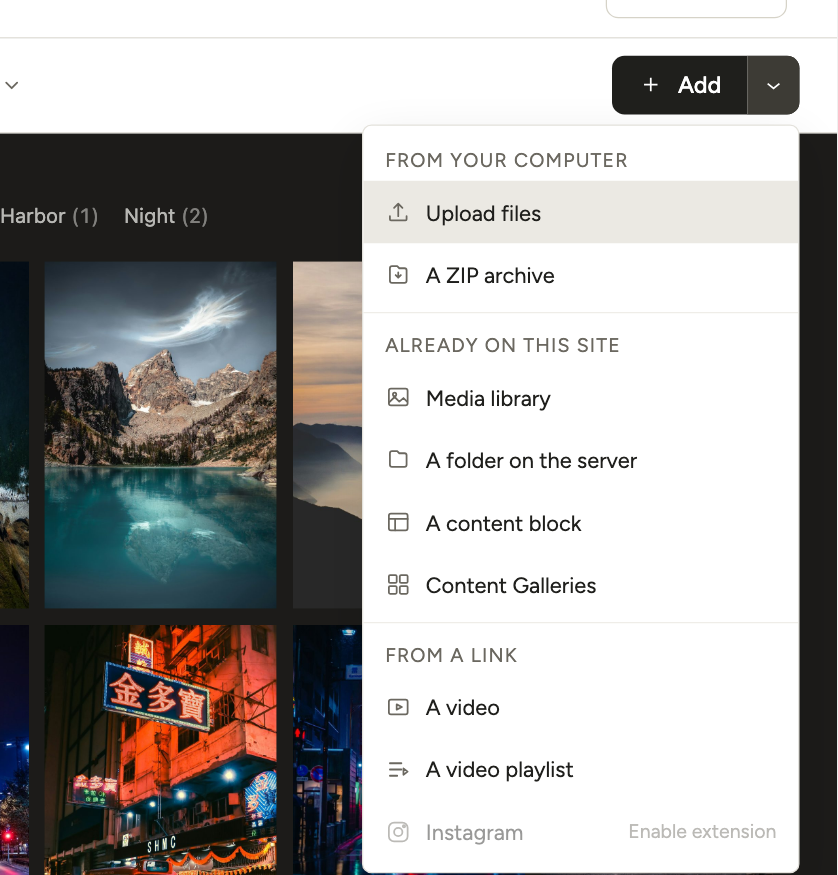
Click the arrow next to Add, at the top right of the editor, and choose A folder on the server.
-
In the Import images from folder window, tick the folders you want to import. To see the folders inside a folder, click the arrow next to it.
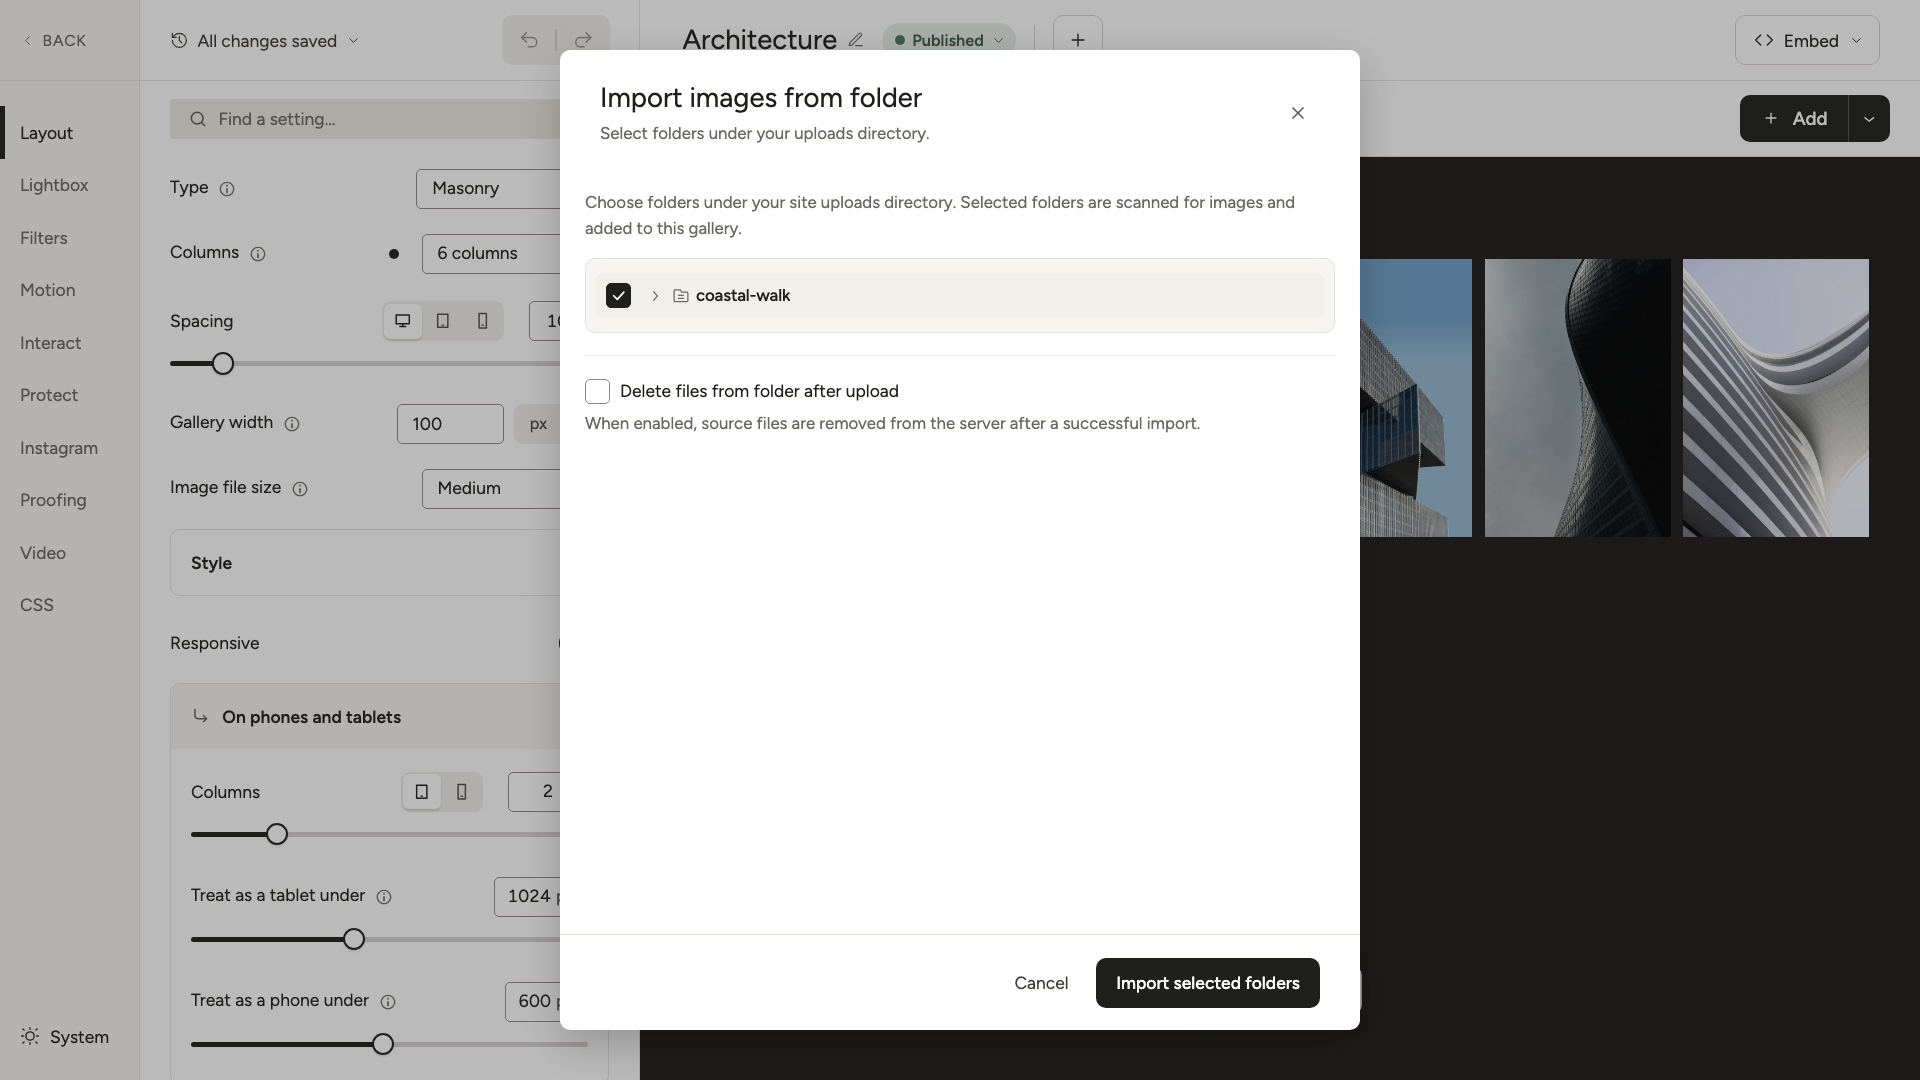
- Decide what happens to the original files. Delete files from folder after upload is on by default. Once the images are imported, Modula removes the original files from the folder. The copies in your Media Library stay. To keep the originals in the folder, untick this option.
- Click Import selected folders. Modula adds the images to your Media Library and to the gallery. The editor saves the gallery on its own.
Other ways to add images
Images that are already in your Media Library can be added from there instead. See how to add images from the Media Library to your galleries.
To add the images from a ZIP file, see how to create a gallery from a ZIP file. If you are new to Modula, start with Create your first gallery.