 Made in Europe, buy from Europe.
The WordPress gallery lightbox settings in Modula decide what happens when a visitor clicks an image. The click can do nothing, open a link, or open a lightbox. A lightbox shows the image large on a dark background, with arrows to move through the gallery.
Note: The free plugin has On click and Prev and next arrows. The other lightbox options need Modula Pro. The Lightbox section isn’t shown for the Slider, Story and Video gallery types.
Choose what a click does
Start with the On click setting. Here is how to find it in the gallery editor.
- Go to Modula → Galleries and open your gallery.
- Click Lightbox in the left rail.
- Pick an option in On click.
Each option gives the click a different result:
- No link: Clicking the image does nothing.
- Go to URL: Each image opens the link you set on it. See links on images.
- Open in lightbox: The image opens in the lightbox. If an image has its own Custom link, it goes to that link instead.
- Lightbox, or link when set: Images with a link open that link. All other images open the lightbox. Older versions of Modula Pro worked this way.
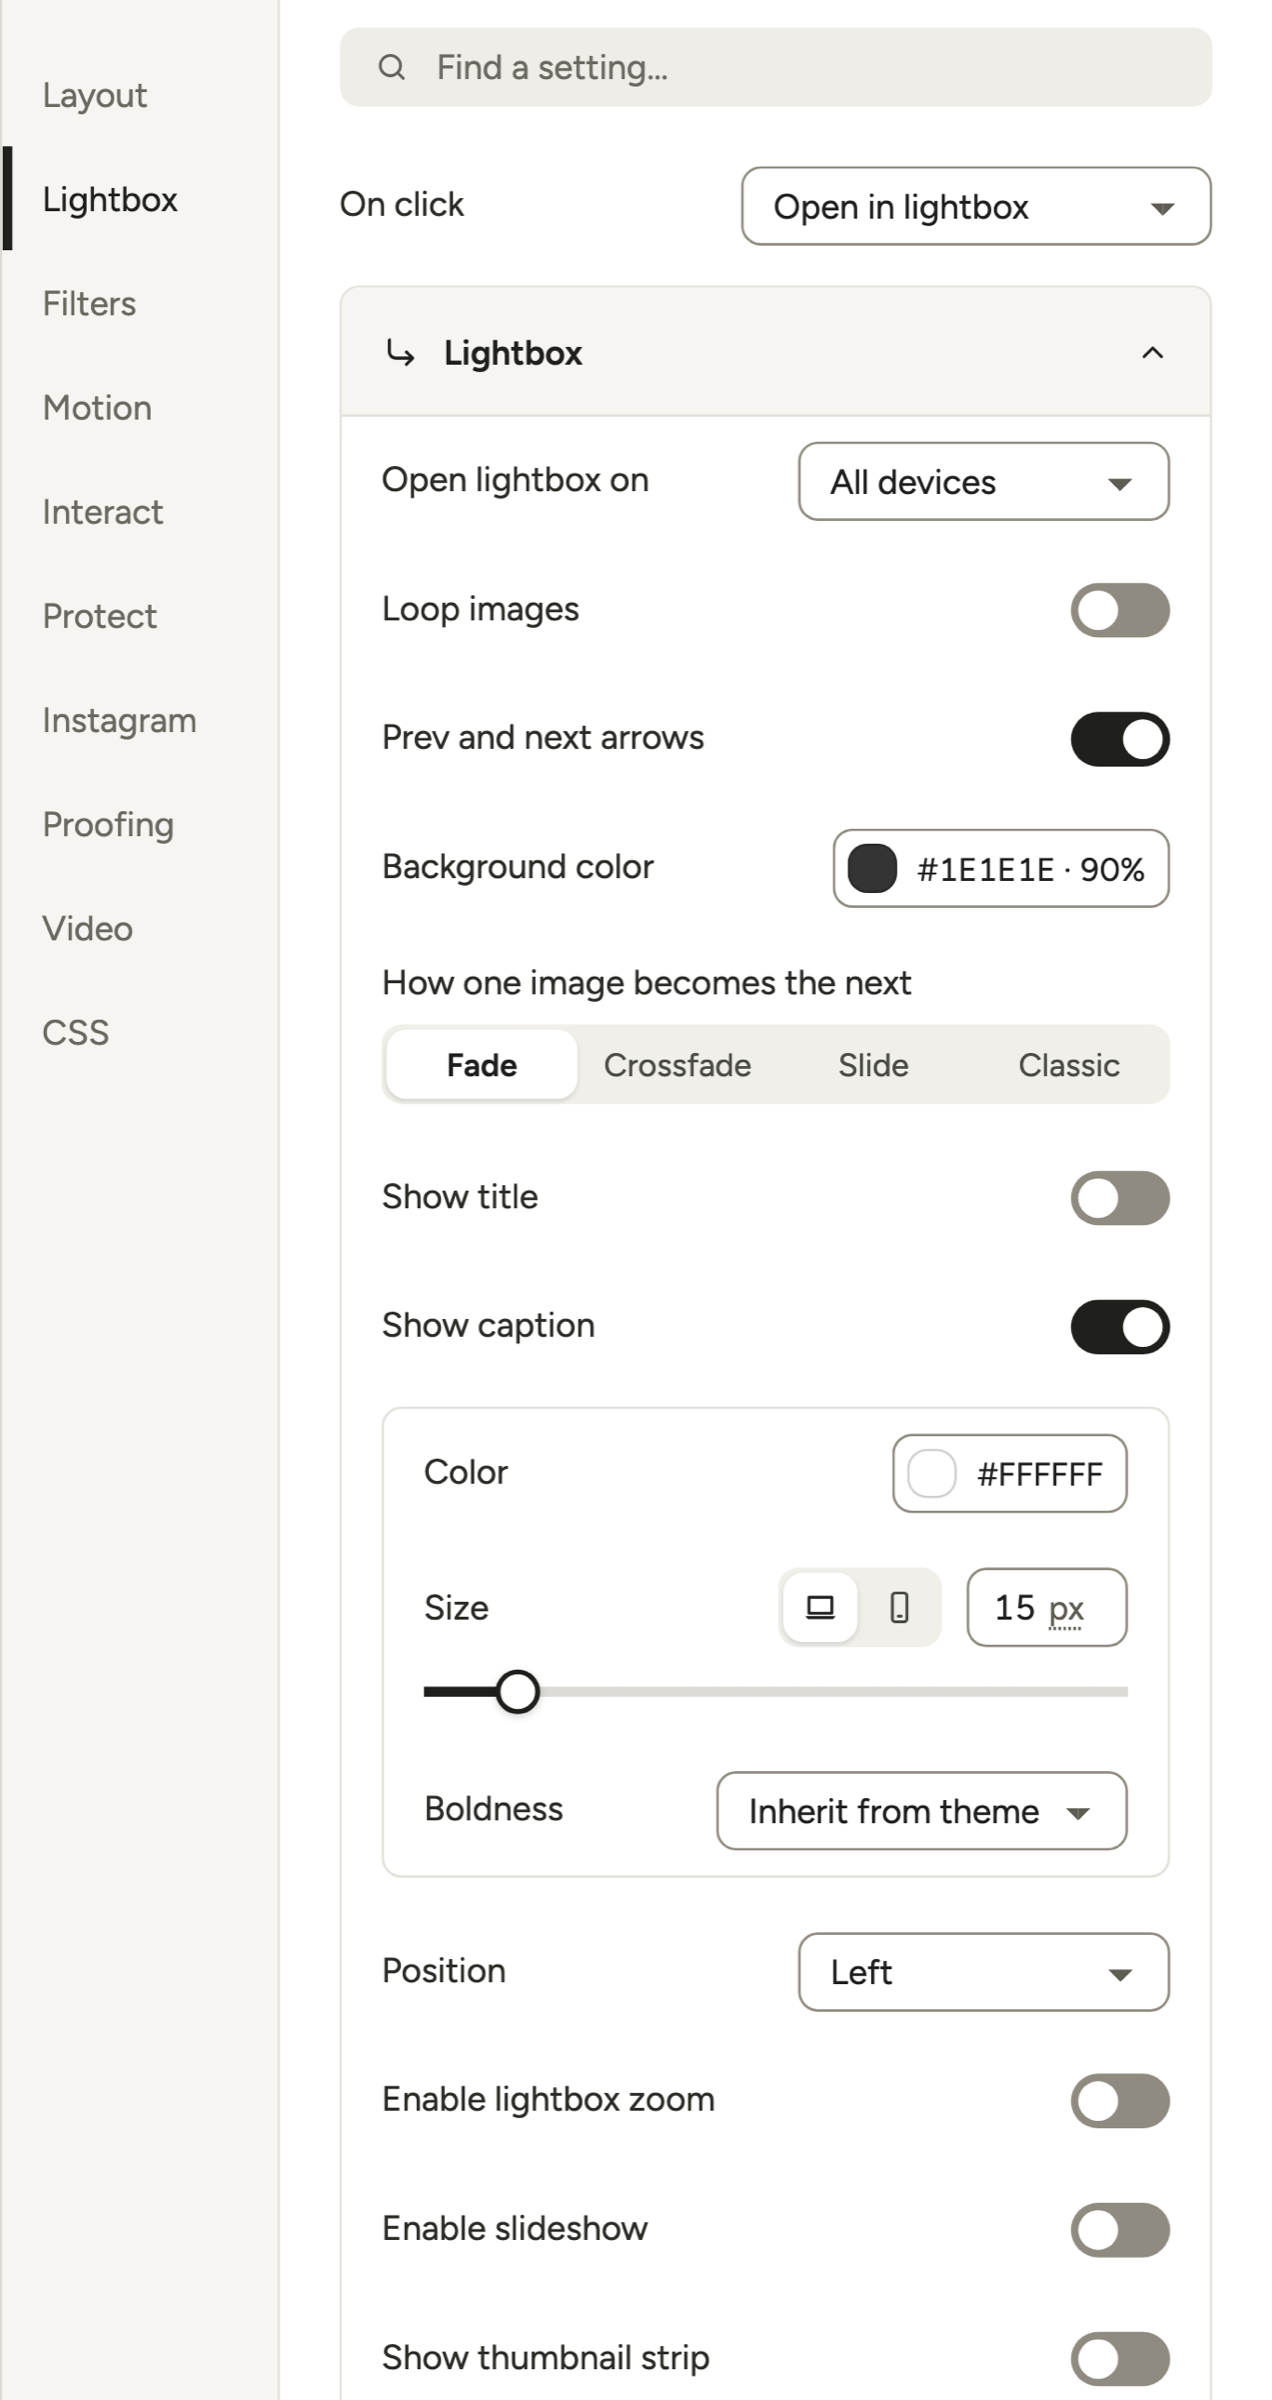
Lightbox options for your gallery
When On click opens the lightbox, the Lightbox card below it holds these options:
- Open lightbox on: Pick All devices, Desktop only or Mobile only.
- Loop images: After the last image, the next arrow goes back to the first one.
- Prev and next arrows: Shows the arrows that move between images.
- Background color: Sets the color behind the image. Lower its opacity to let the page show through.
- How one image becomes the next: Pick Fade, Crossfade, Slide or Classic.
- Show title and Show caption: Show the image title and caption under the image in the lightbox. Each one has its own color, size (desktop and mobile) and boldness. Position aligns them Left, Right or Center.
- Enable lightbox zoom: Lets visitors zoom into the image. See Modula Zoom.
- Enable slideshow: Plays the images one after another. You can set Autoplay, Pause when hovering and Time between slides. See Lightbox Slideshow.
- Show thumbnail strip: Adds a row of small images in the lightbox. Place it at the Left, Bottom or Right.
More lightbox settings
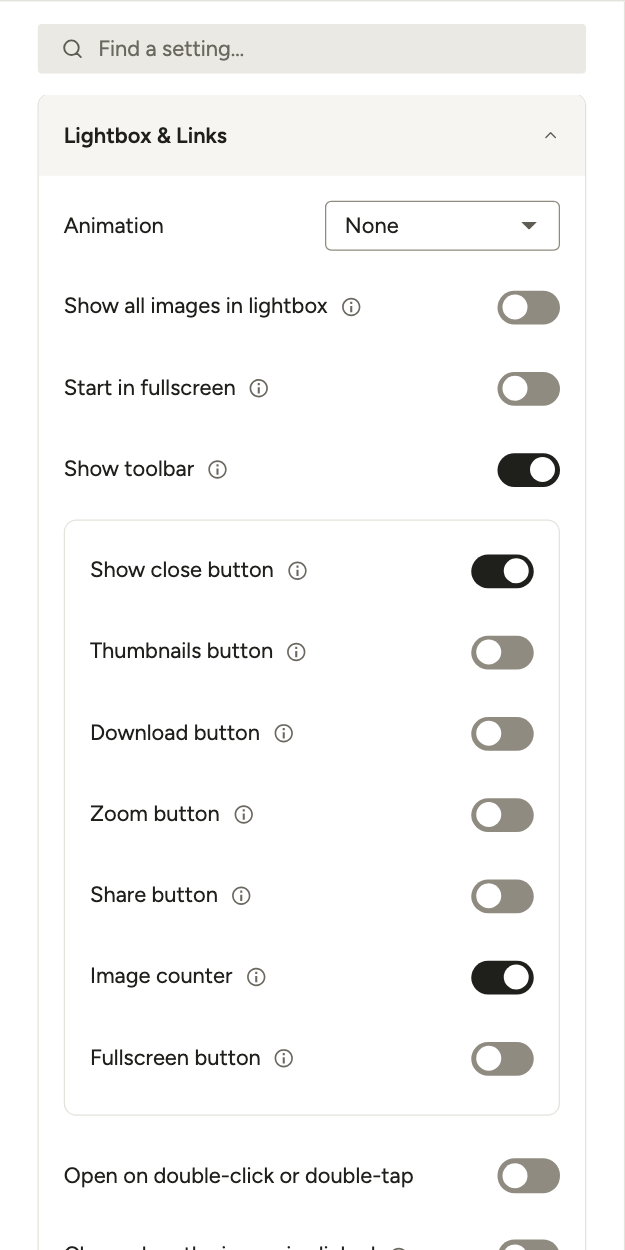
Under More settings at the bottom of the section, open Lightbox & Links for the rest:
- Animation: Sets how the lightbox opens and closes. Pick None, Fade, Zoom or Zoom in and out.
- Show all images in lightbox: When the gallery is split into pages, the lightbox still goes through every image.
- Start in fullscreen: The lightbox fills the whole screen when it opens.
- Show toolbar: Shows the buttons at the top of the lightbox. These are Show close button, Thumbnails button, Download button, Zoom button, Share button, Image counter (for example 3 / 12) and Fullscreen button. The matching extensions add Download all button and Comments. When Show toolbar is off, none of these buttons show.
The EXIF card shows camera details under the image (Modula EXIF). Photo links gives each image its own address (Modula Deeplink).
Change the settings for one image
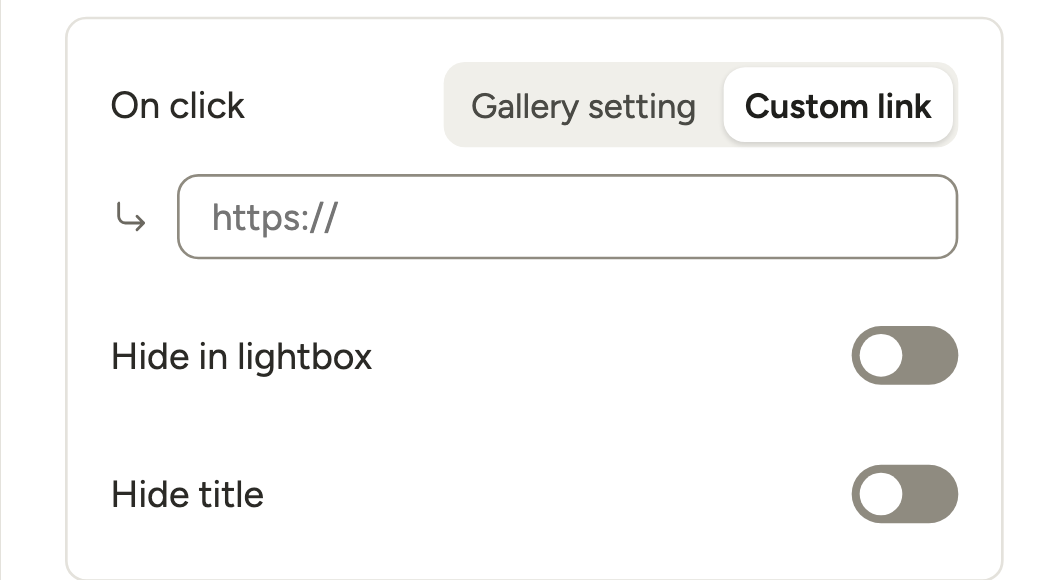
The settings above apply to the whole gallery. You can also change a single image. Click an image in the preview, then click Edit image on it. You will find these settings in the panel that opens:
- On click: Gallery setting follows the gallery. Custom link sends this image to the address you type.
- Hide in lightbox: Leaves this image out of the lightbox.
- Hide title: Hides this image’s title in the lightbox. Use it for images whose title you don’t want to show.
You may want one image that opens the lightbox, instead of the whole gallery. For that, use the Modula Link block or shortcode. A shortcode is a short tag in square brackets that WordPress swaps for content.
To decide when an image should open in the lightbox and when it should go to a page, see our guide to gallery custom links.