Modula and WooCommerce
Whether you want to sell products or images you can achieve this using Modula and WooCommerce together.
WooCommerce is a free eCommerce WordPress plugin that you can download from here. Use WooCommerce to create products and Modula to showcase them and link to their product pages.
Setup
-
Set up your shop
Before you start creating galleries, you will need to set up your shop and add your products.
WooCommerce is a very well-documented plugin and you can check out their documentation on adding and managing products. -
Create your galleries
Once you have your products set up you can start creating your galleries with Modula. Please see our instructions on how to add a new Modula gallery and get started.
-
Assign each image to their product page
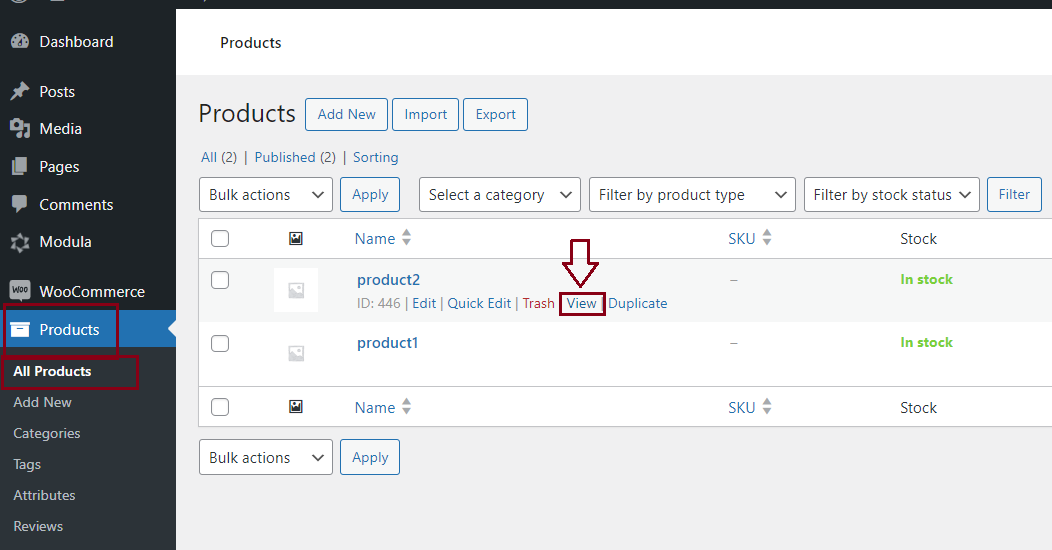
Go to your WordPress dashboard > Products > and here you will see a list of your products > hover your cursor over the one you want > and click View.
-
Copy the URL
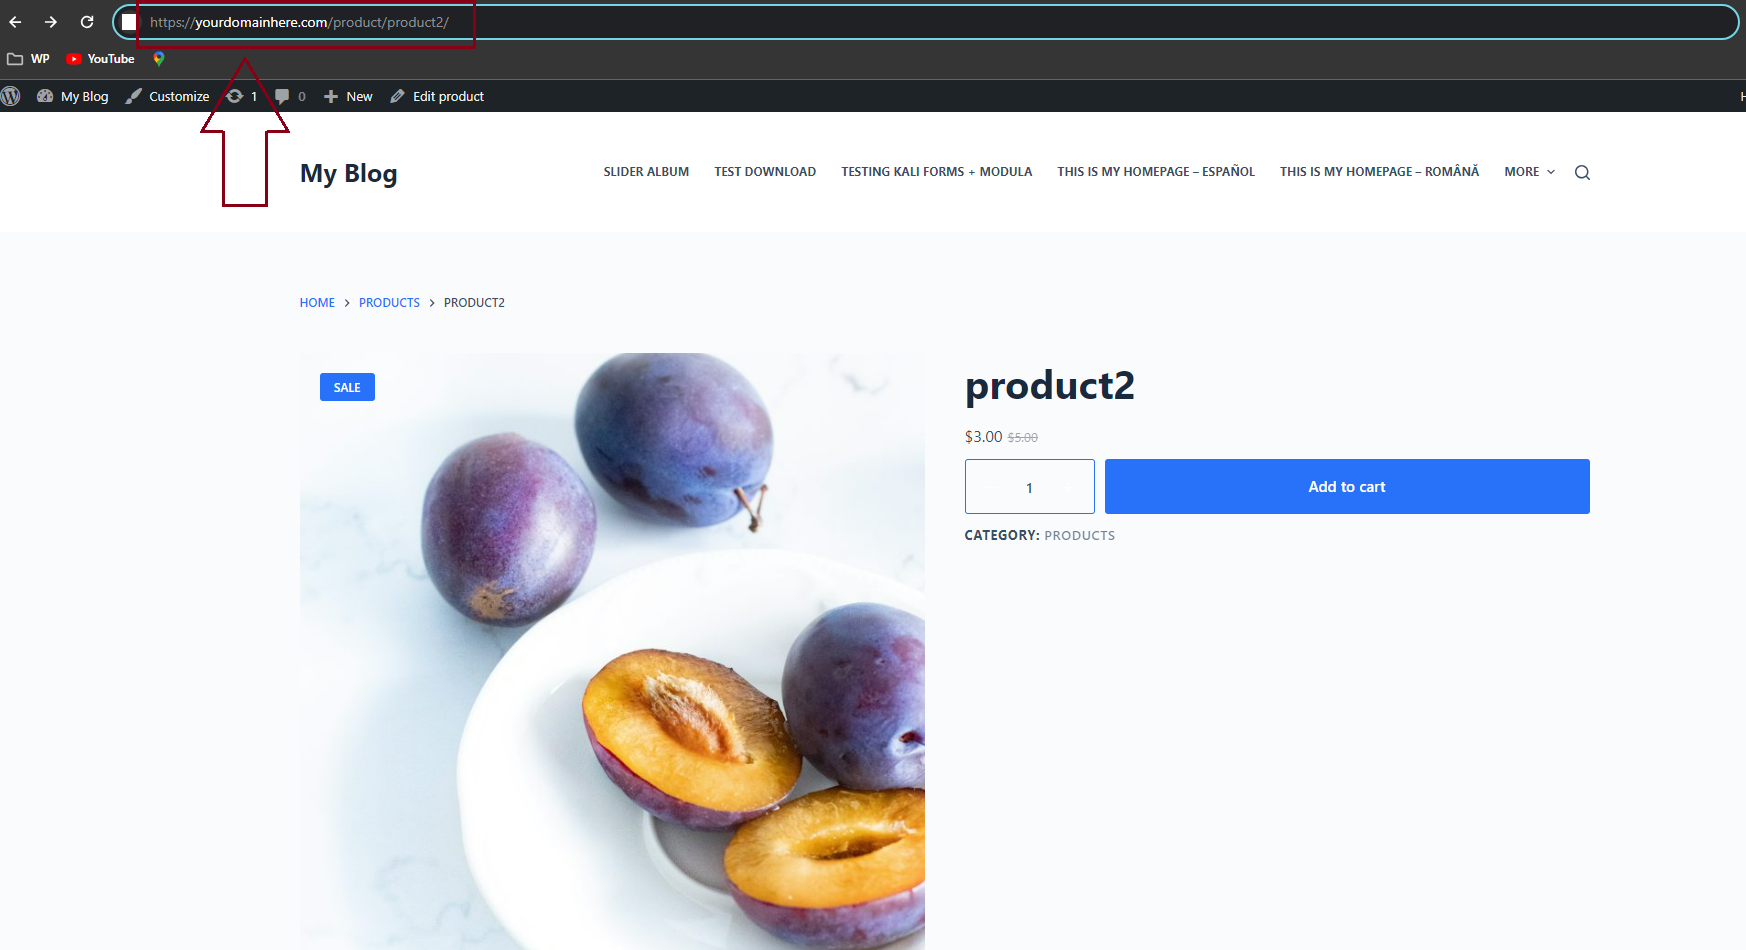
Clicking ‘View’ will take you to that product’s page where you will see all its information including the add to cart button. You will need to copy the URL from the browser’s address bar.
-
Edit the images in your Modula gallery
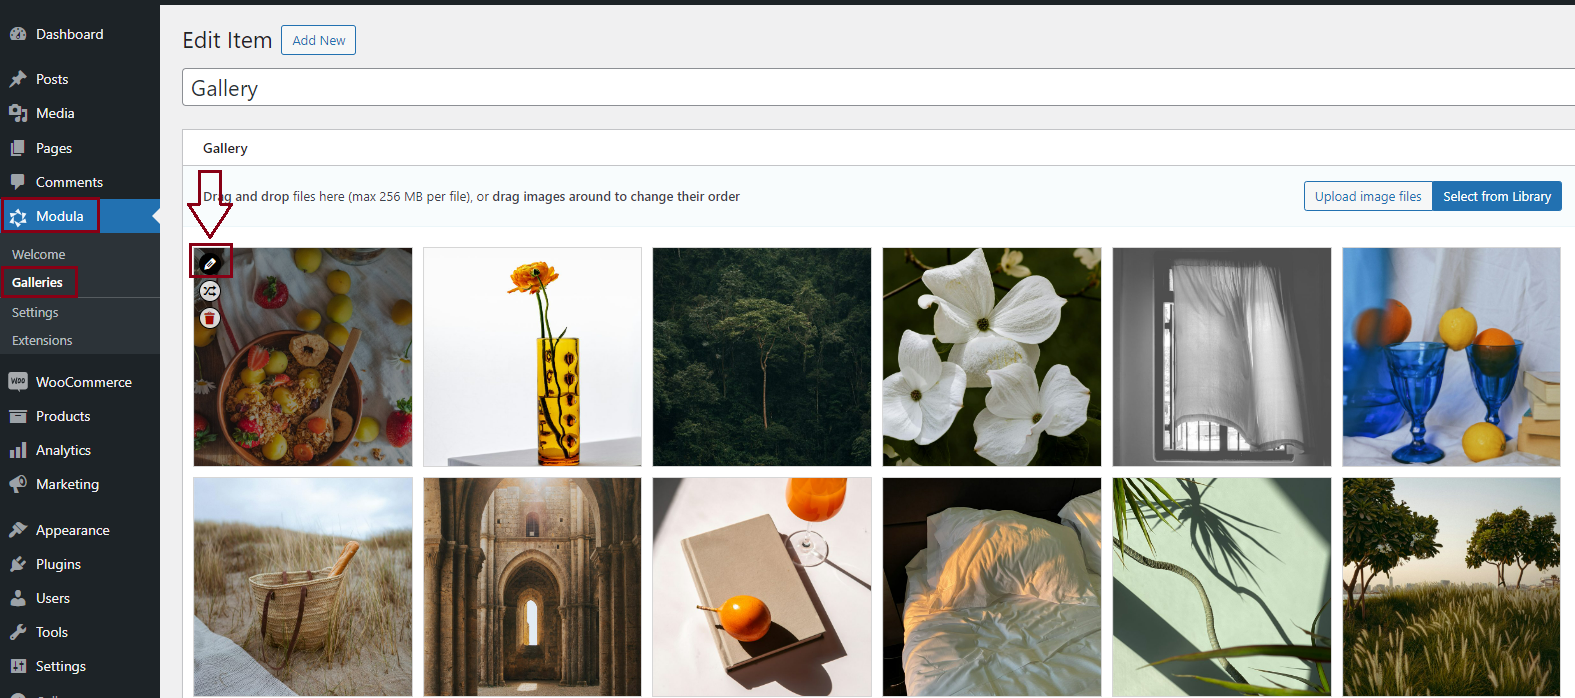
Once you copied the product’s URL, go back to your WordPress dashboard > Modula > edit your gallery of product images > hover over the image you want to assign the product’s URL to > and you will see a small pencil icon > Click it to edit that image.
-
Add your product’s URL to your image
After you click to edit the image > you will see the Metadata screen where you can add the product’s URL to that image > add it in the URL field.
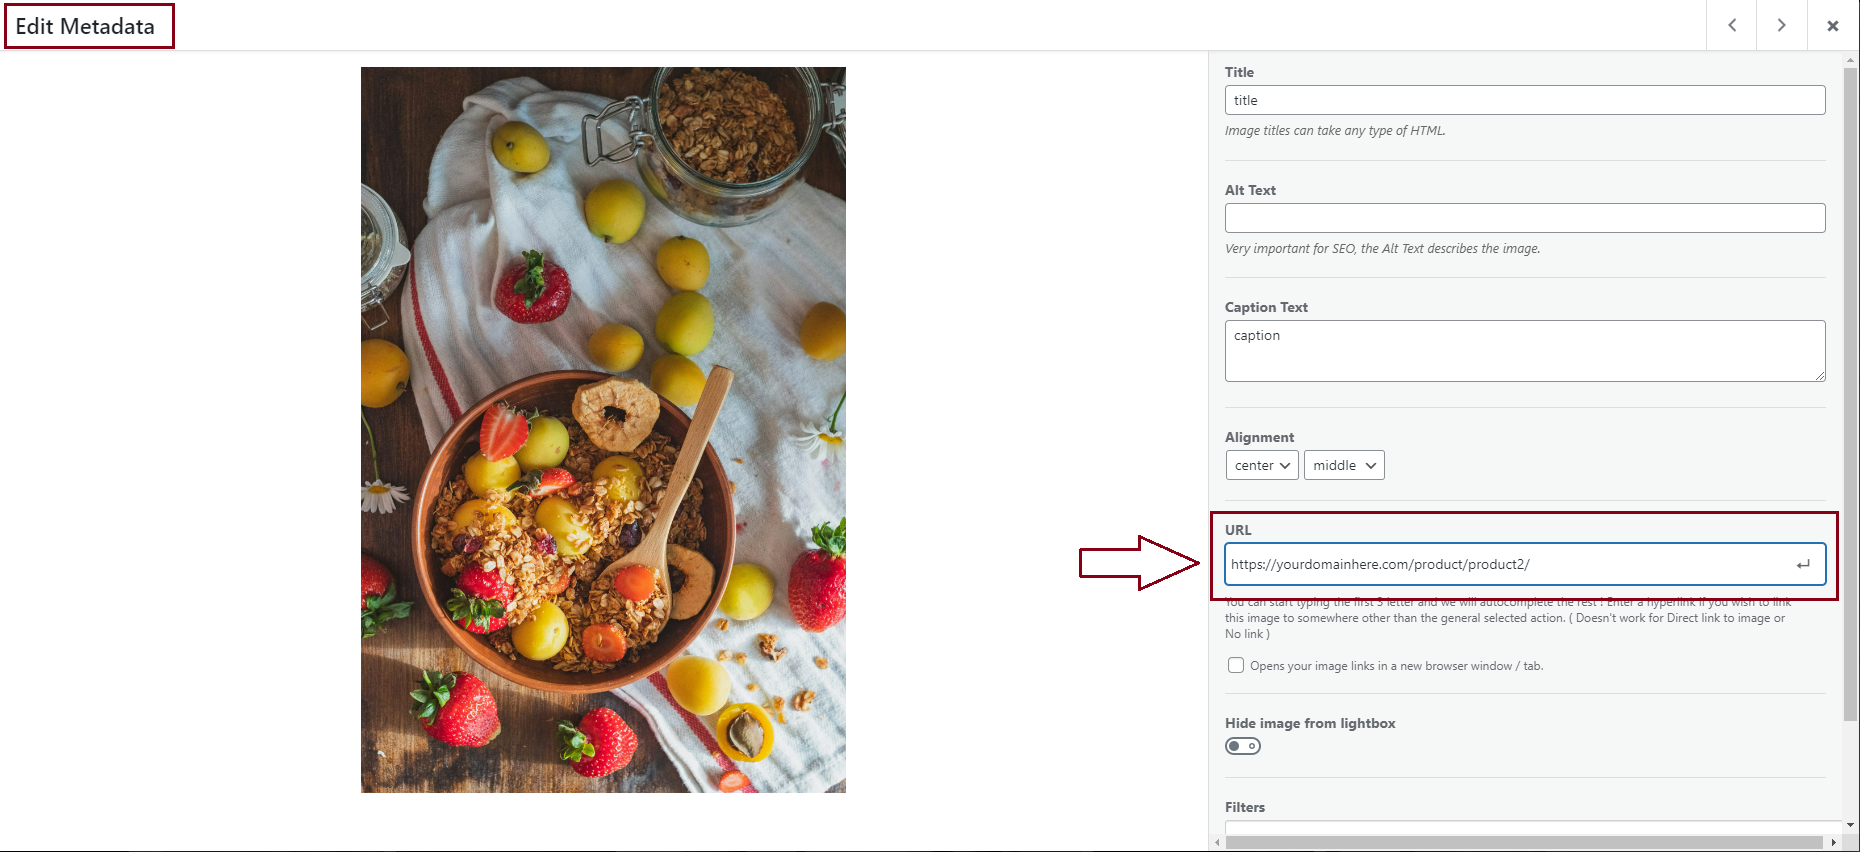
You can also follow these instructions on how to add links to images in your galleries.