Are you ready to create the most visually appealing gallery that will impress your website visitors? We’ll walk you through all the steps you need to follow to build an impressive gallery in minutes.
Create a new gallery
-
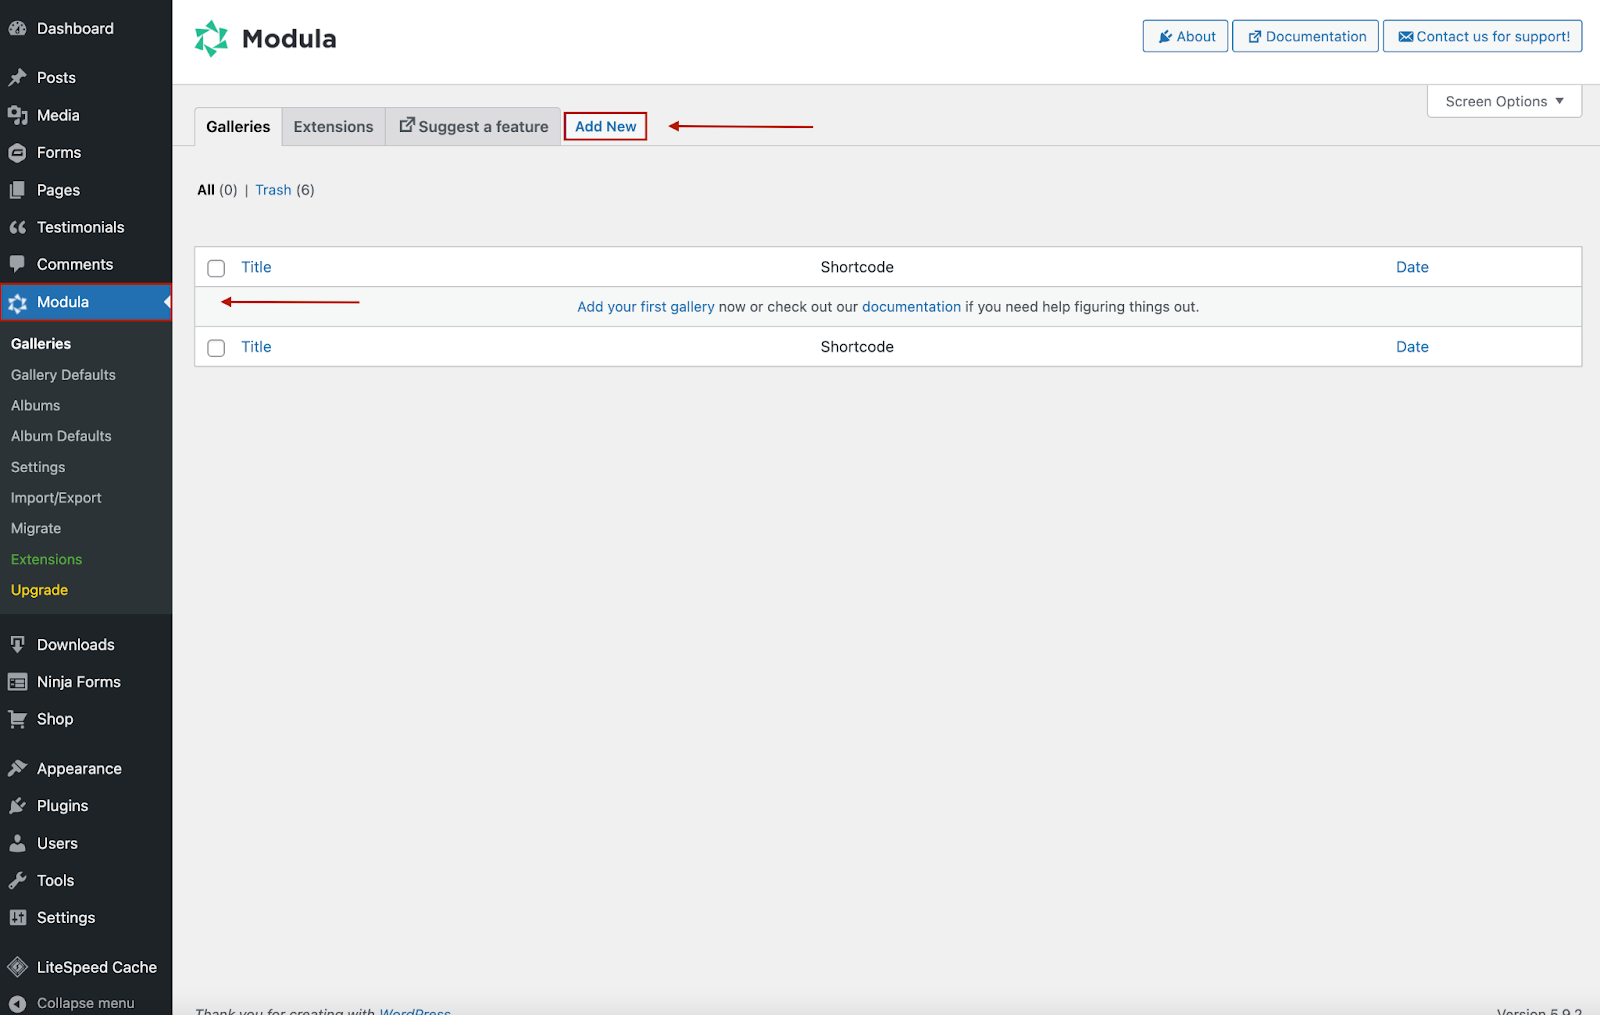
Head to your WordPress Dashboard > Modula > Add New.
-
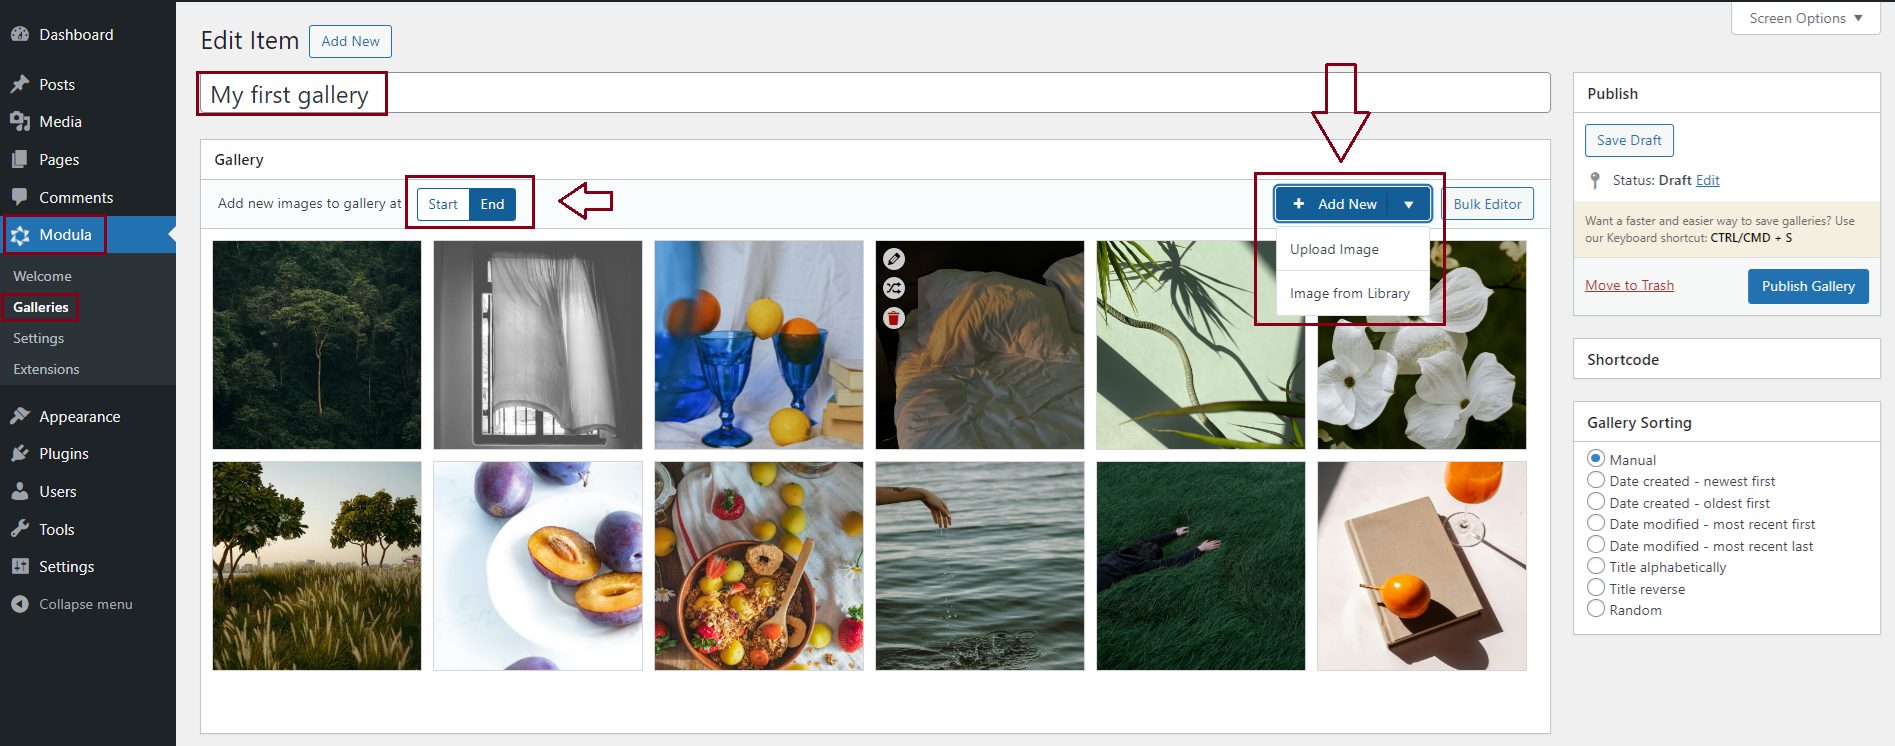
You will be redirected to a page where all the magic happens. You can start by giving your gallery a name to differentiate it from the others.
Then, upload your images, or select them from your WordPress Library. You can drag and drop images to arrange them as you wish.
You can easily choose whether you’d like to add your images at the beginning or the end of your gallery by simply clicking the ‘Start‘ or ‘End‘ button.
-
Save your gallery
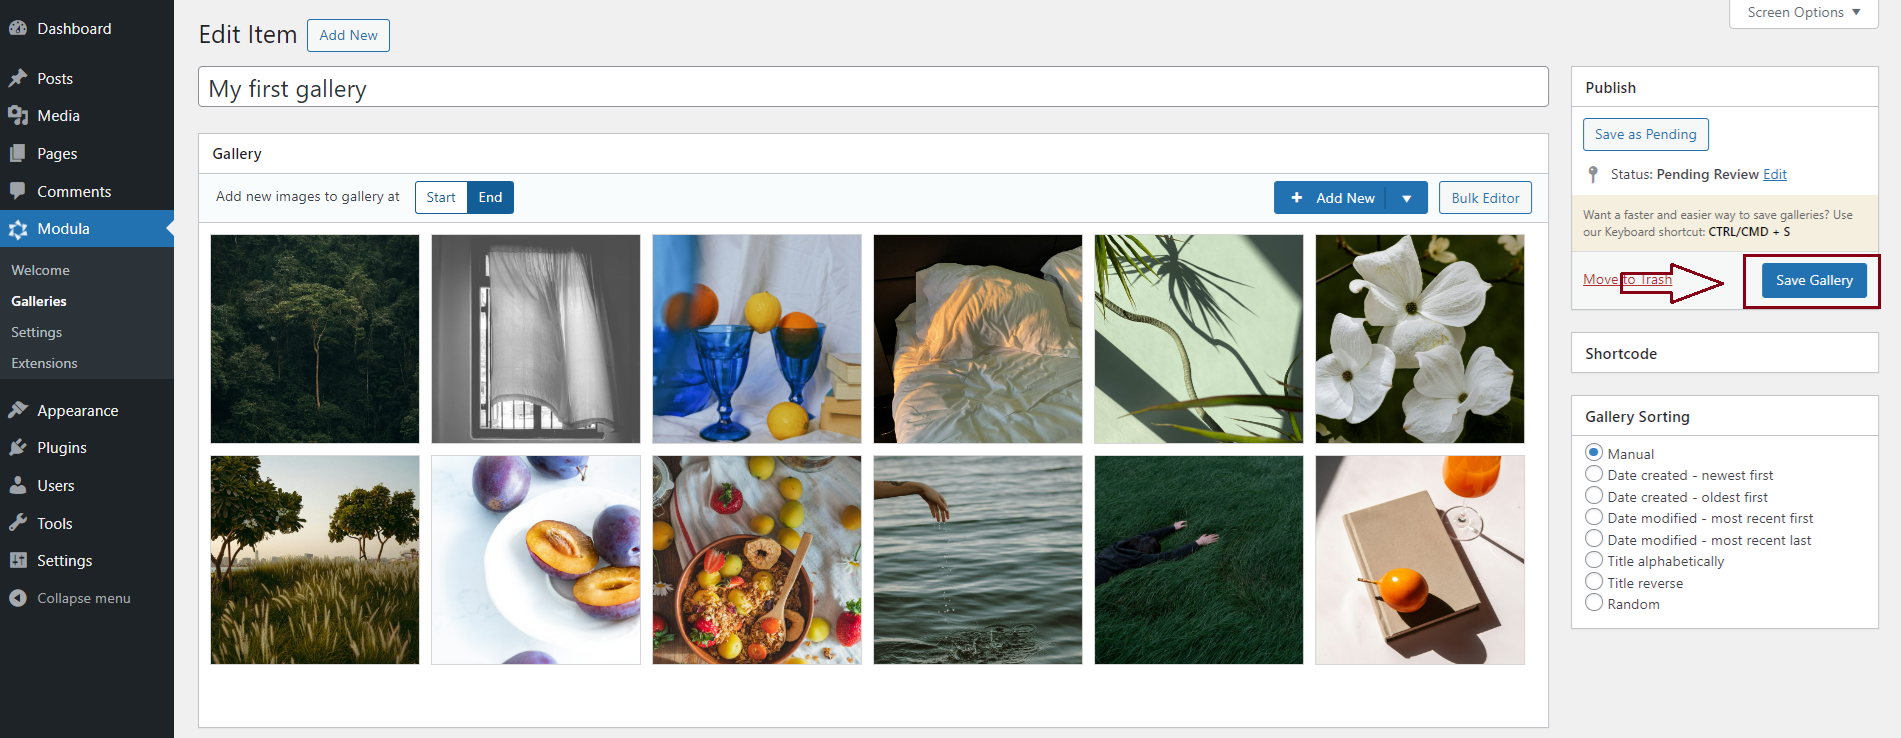
Once you’re done designing and customizing your gallery, don’t forget to click Save Gallery.
-
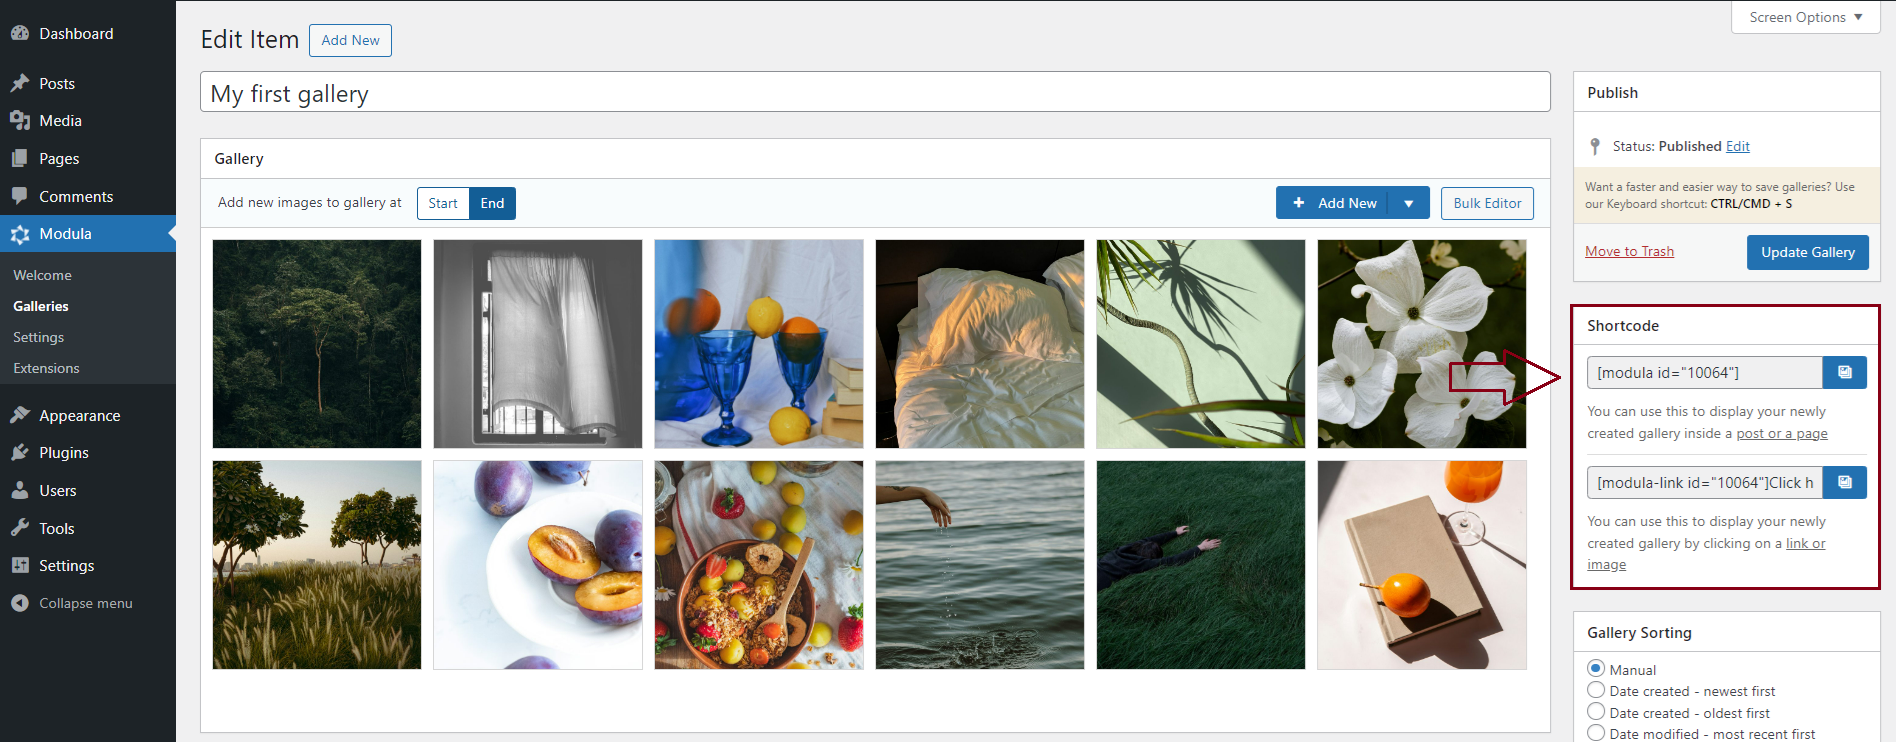
Modula will generate a shortcode for your gallery. Copy it as you will need it for later to publish your gallery.
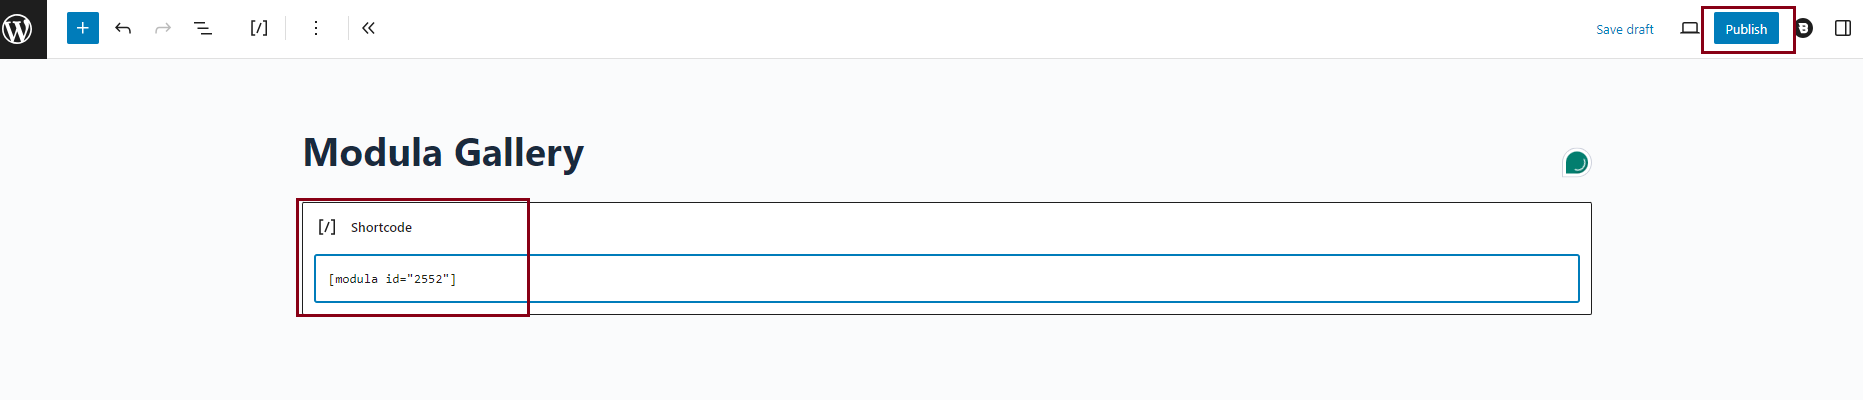
Showcase gallery on your website
All you have to do is copy the shortcode and paste it into a page or post – you can create a new one or post to an existing one.
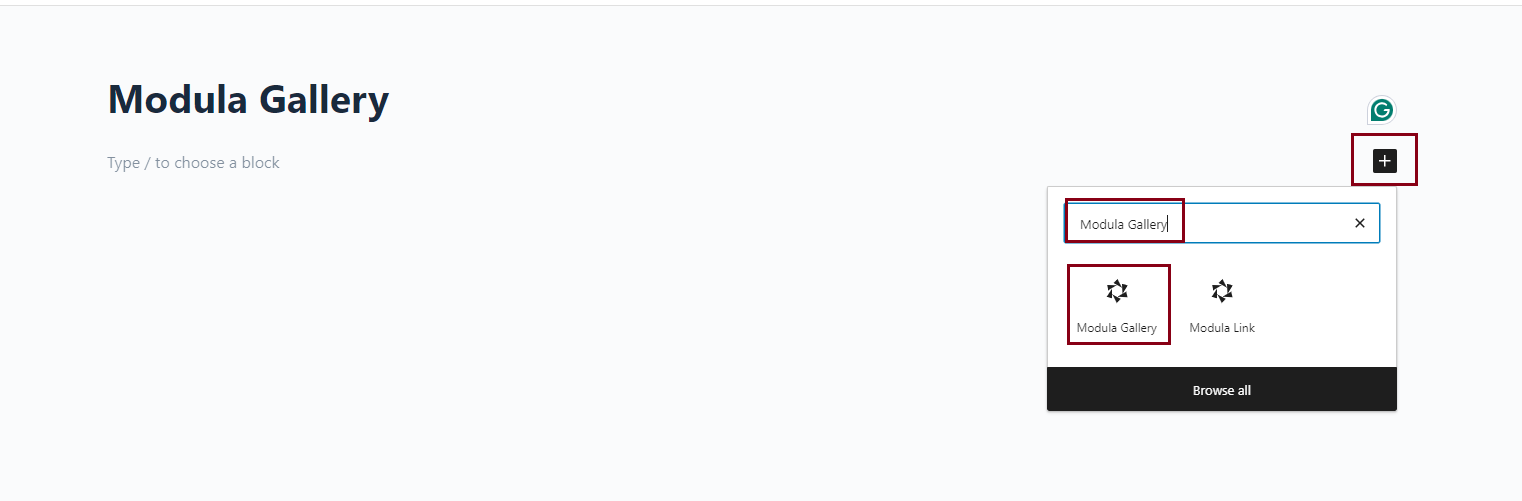
If you own the Gutenberg Block Editor, you can simply click on the “+” icon, look for Modula Gallery, and add the gallery created.
Et voila! This is how you can create the most stunning image and video galleries on your WordPress website without the hassle and coding skills.