Welcome to the world of Modula and Kali Forms, two powerful plugins that will make your WordPress website better than ever. With this magical combo, you can easily create beautiful Modula galleries right from your Kali Forms submissions. It’s a smart and simple way to show off your pictures and more.
Prerequisites
Before we dive in, make sure you have these plugins ready on your WordPress site:
- Modula
- Modula Pro
- Modula Defaults
- Kali Forms Lite
- Kali Forms Pro
Getting Started
We’ve got you covered with detailed instructions to set up this cool integration. From installing to customizing, we’ll hold your hand every step of the way, so you can make the most of these fantastic plugins.
-
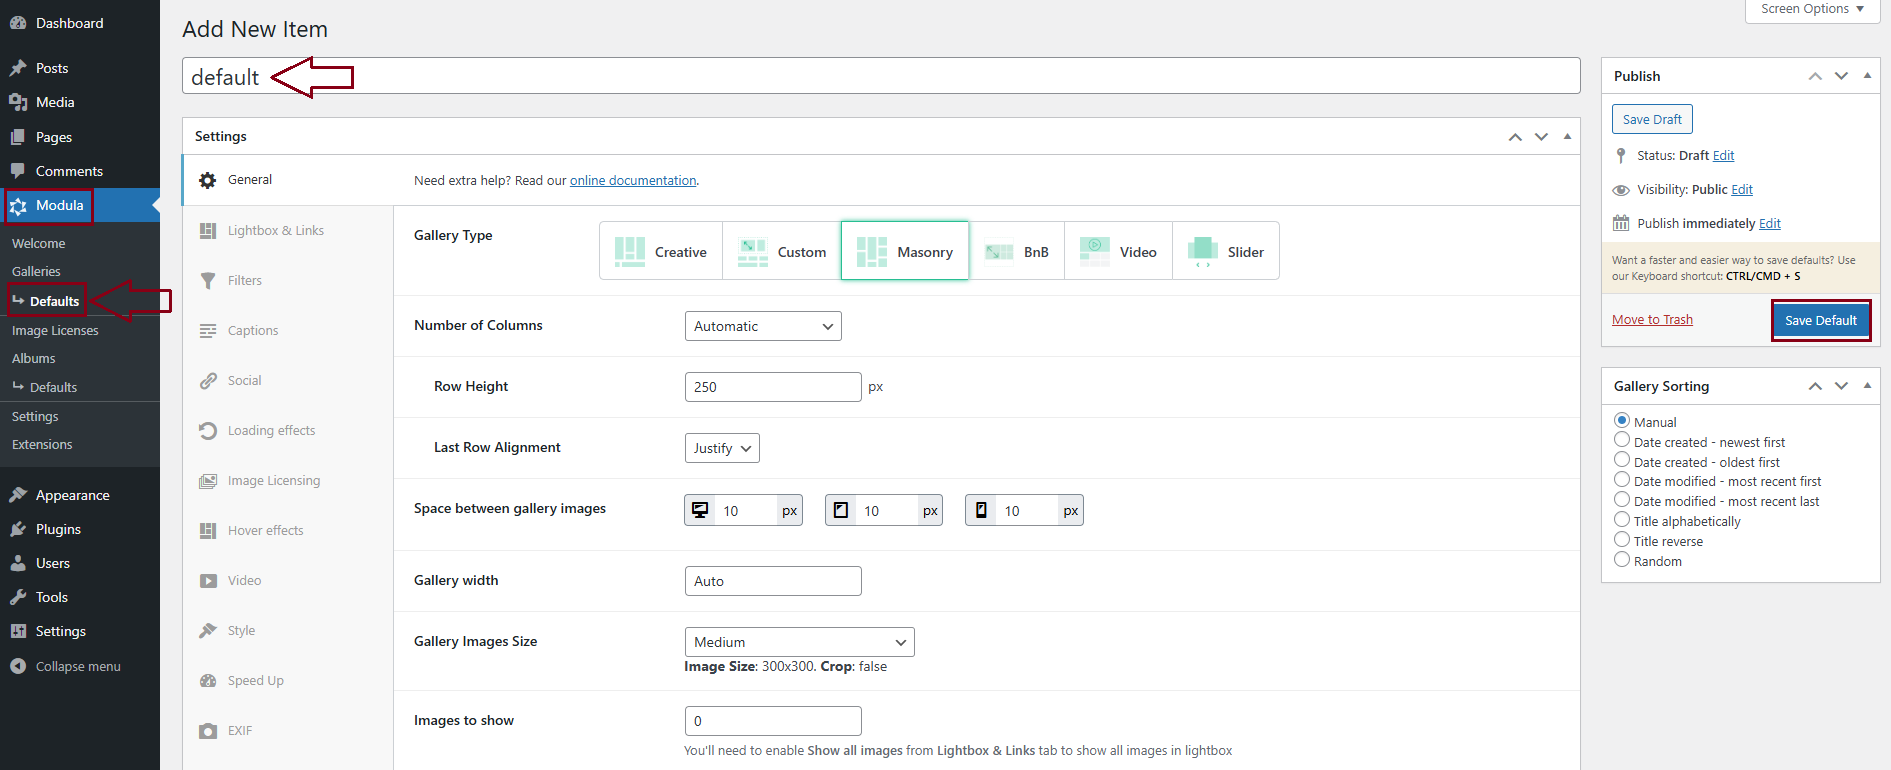
Create Modula Defaults
Go to your WordPress dashboard > Modula > Defaults > Add new > Add a title > Set the settings you need > Save Default.
-
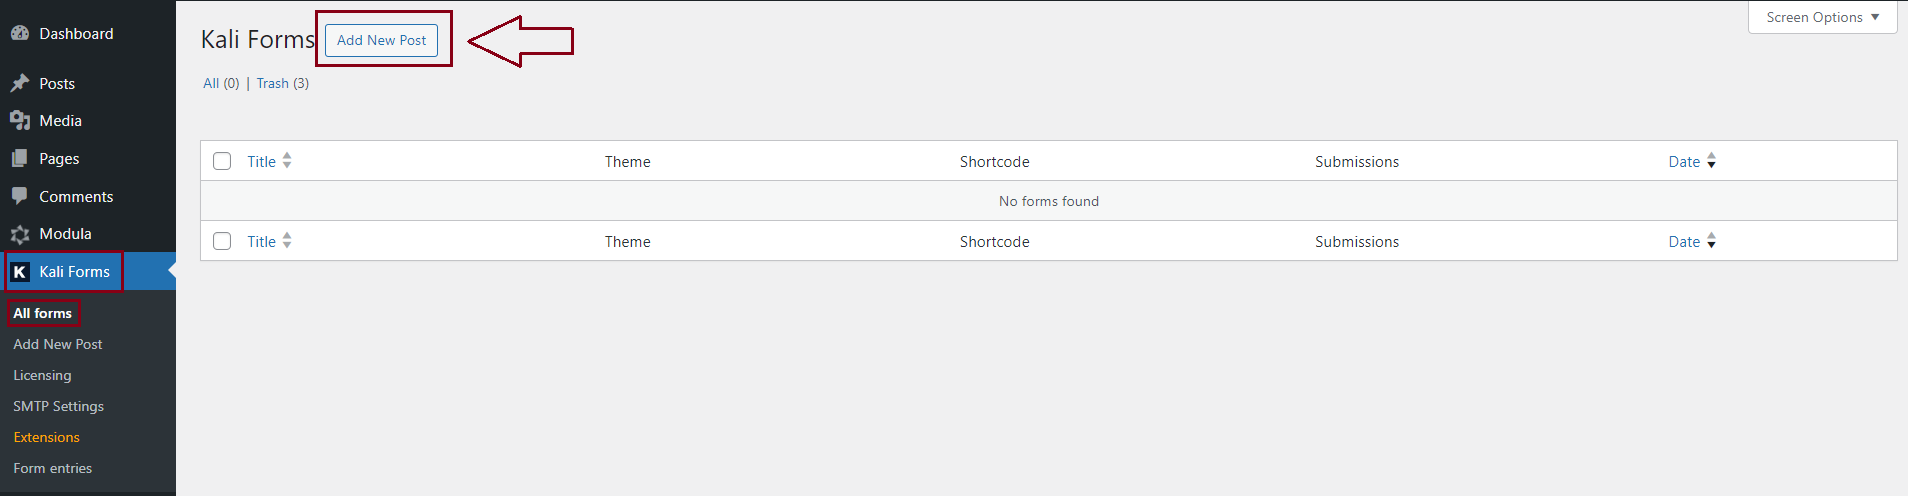
Create a Kali Form
Go to your dashboard > Kali Forms > All Forms > Add New post
Select from the list of forms presented there the form you want by clicking on Get started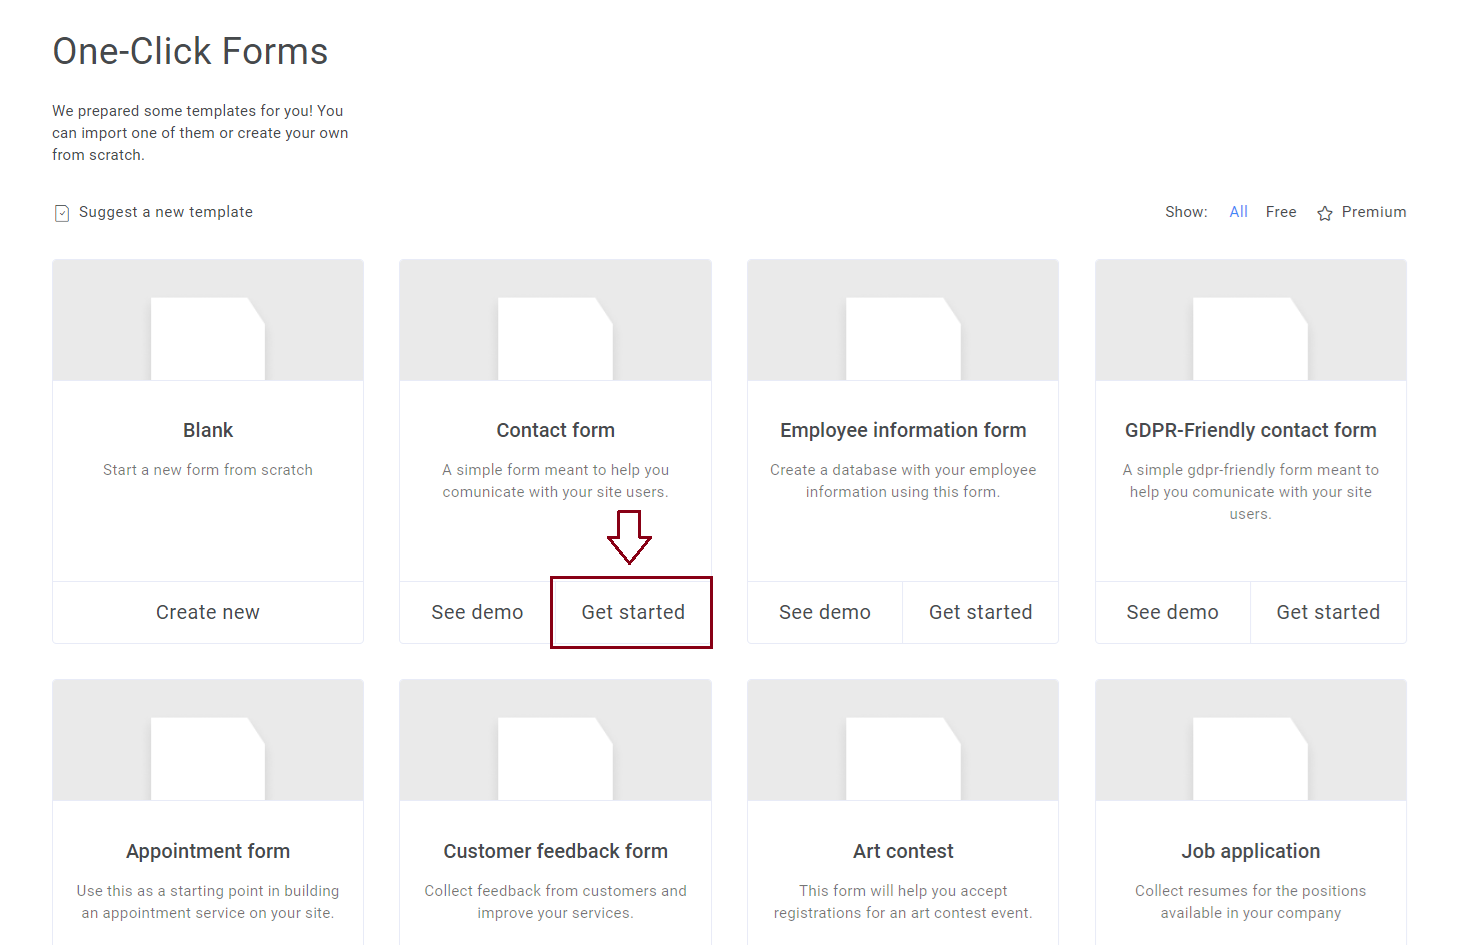
Select the visual style you like > Import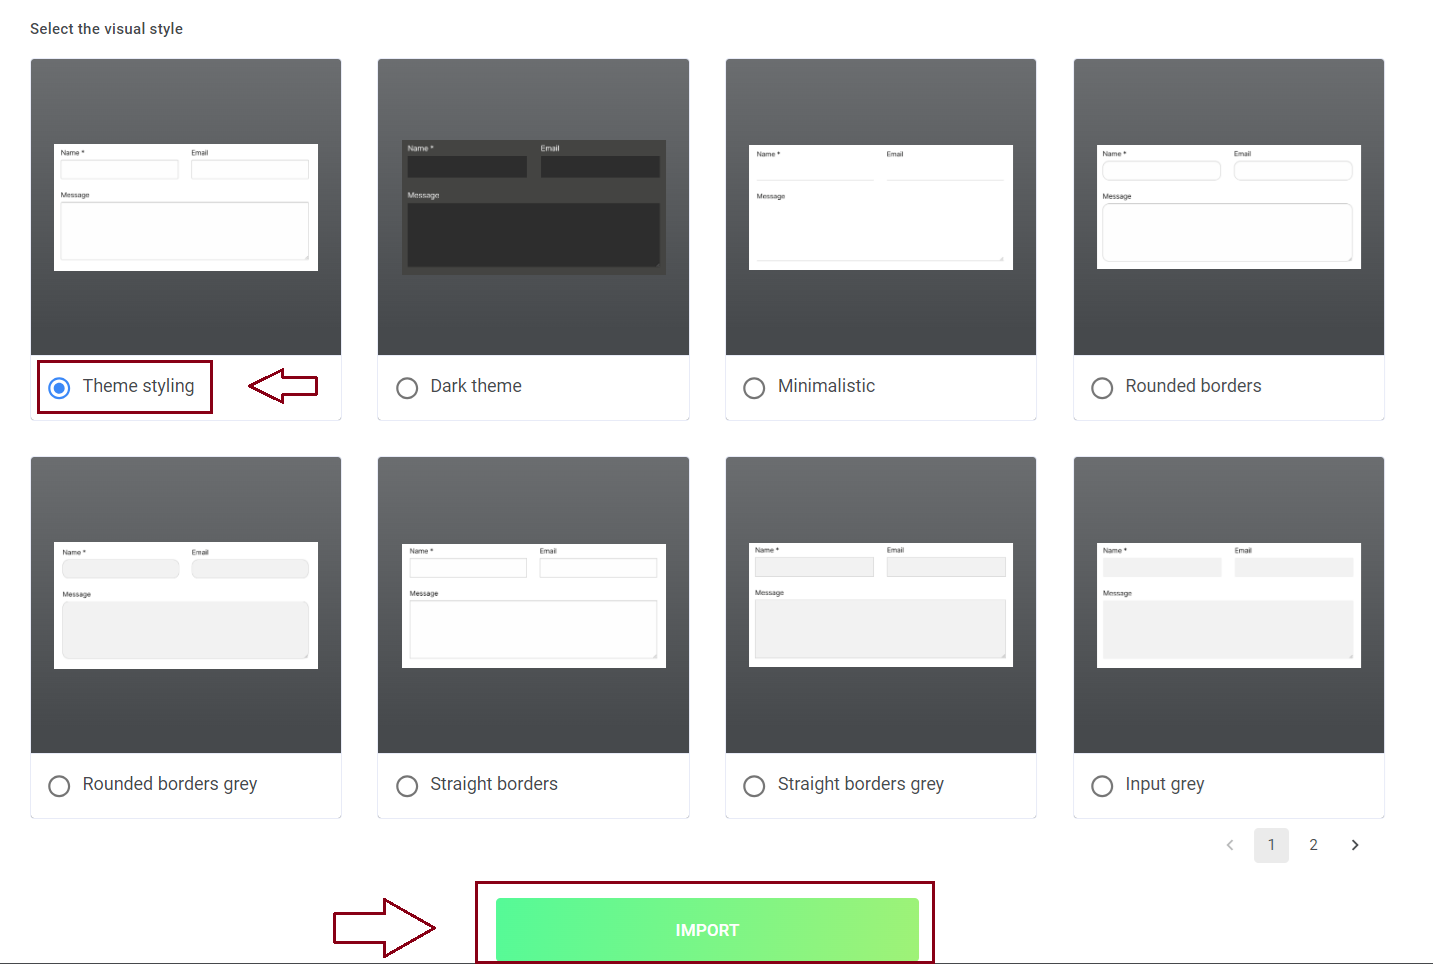
-
Add a Text Box field
Edit your form > Builder > go to Form Fields > Standard Fields > drag and drop in your form the Text box field.
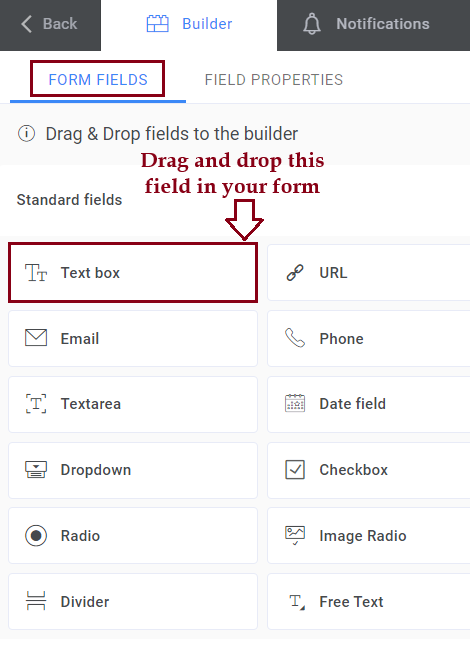
Go to Field Properties > enter there the values you need > Save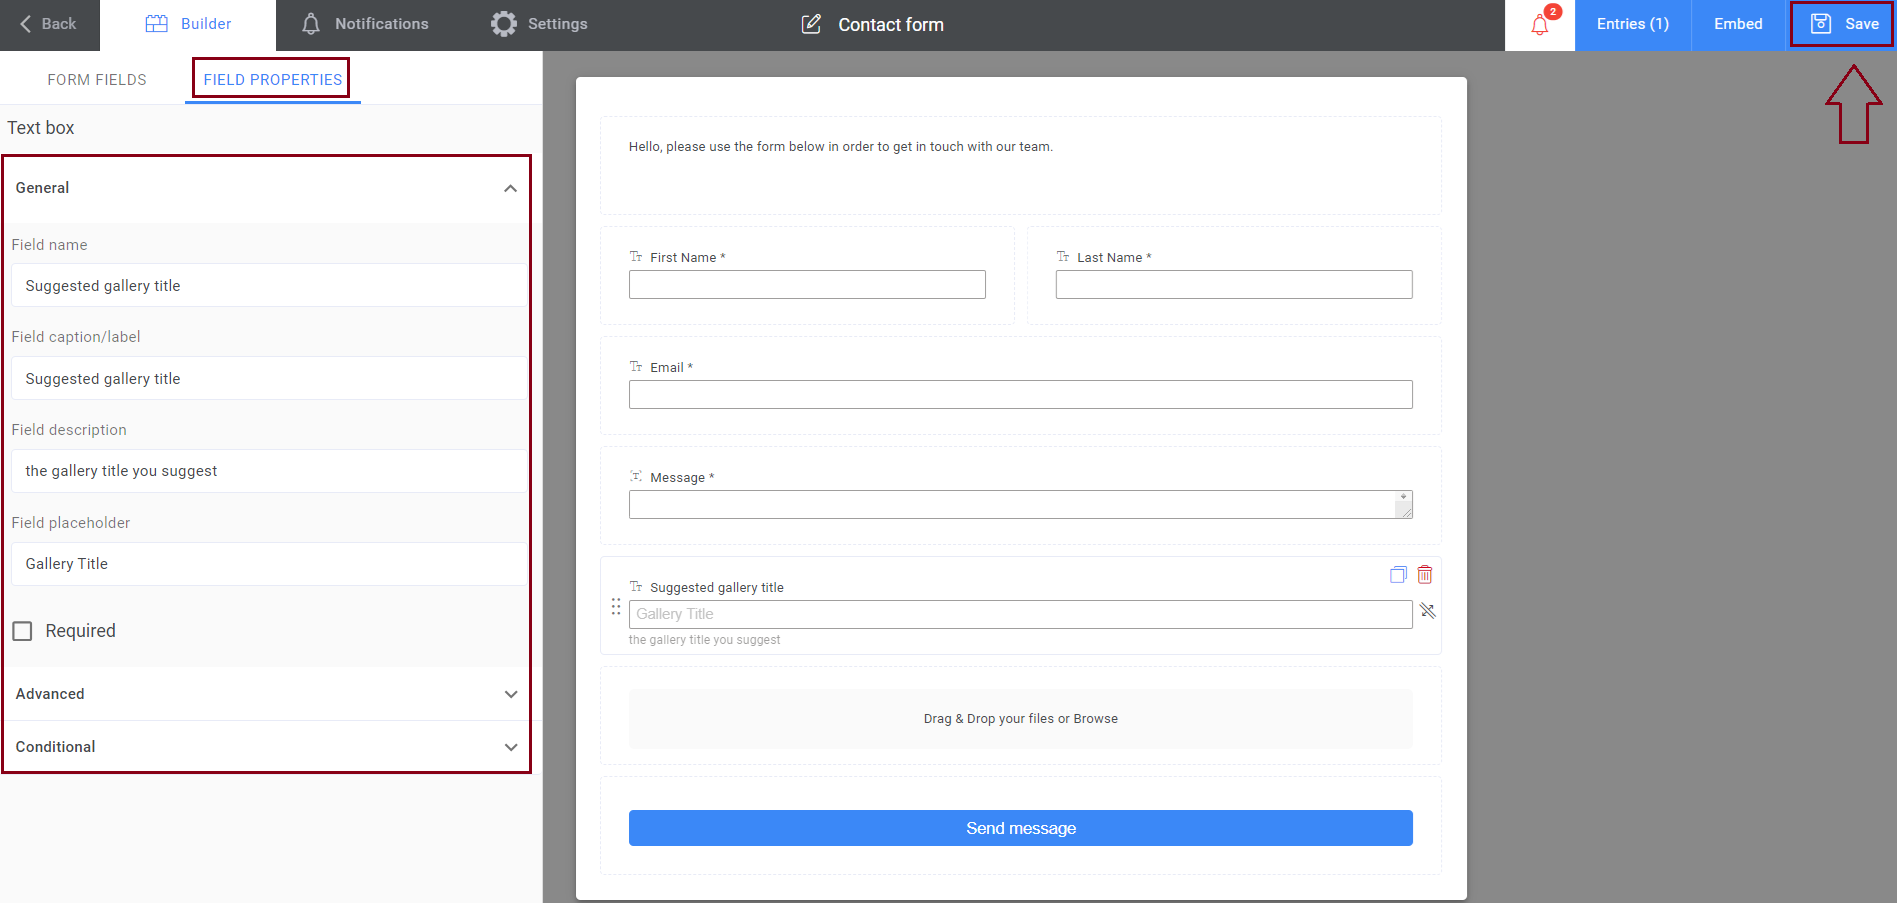
-
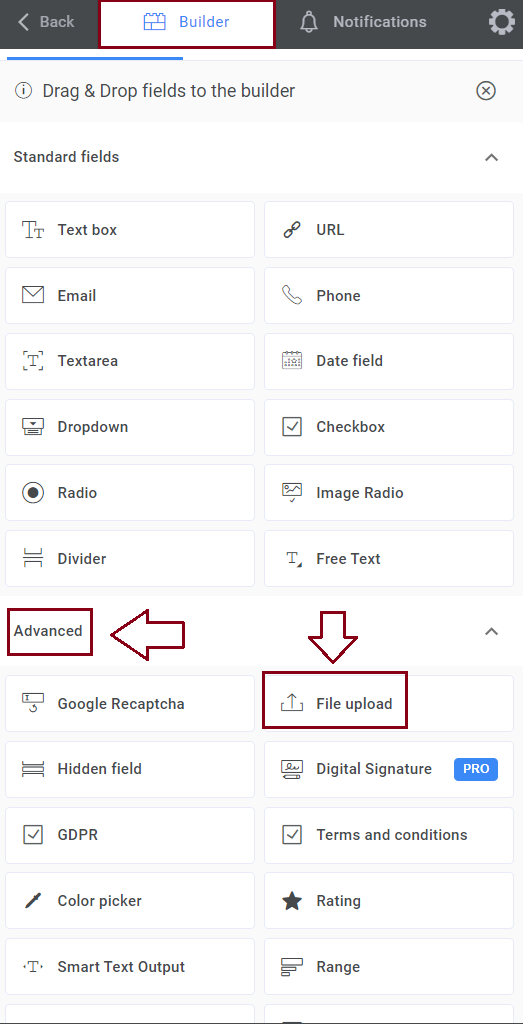
Add File Upload option (don’t forget to allow multiple uploads and set a maximum limit)
Go to Builder > Form Fields > Advanced > Drag and drop in your form the File upload field
Go to Field Properties > check the Enable multiple file uploads option and set the maximum number of files to be uploaded > Save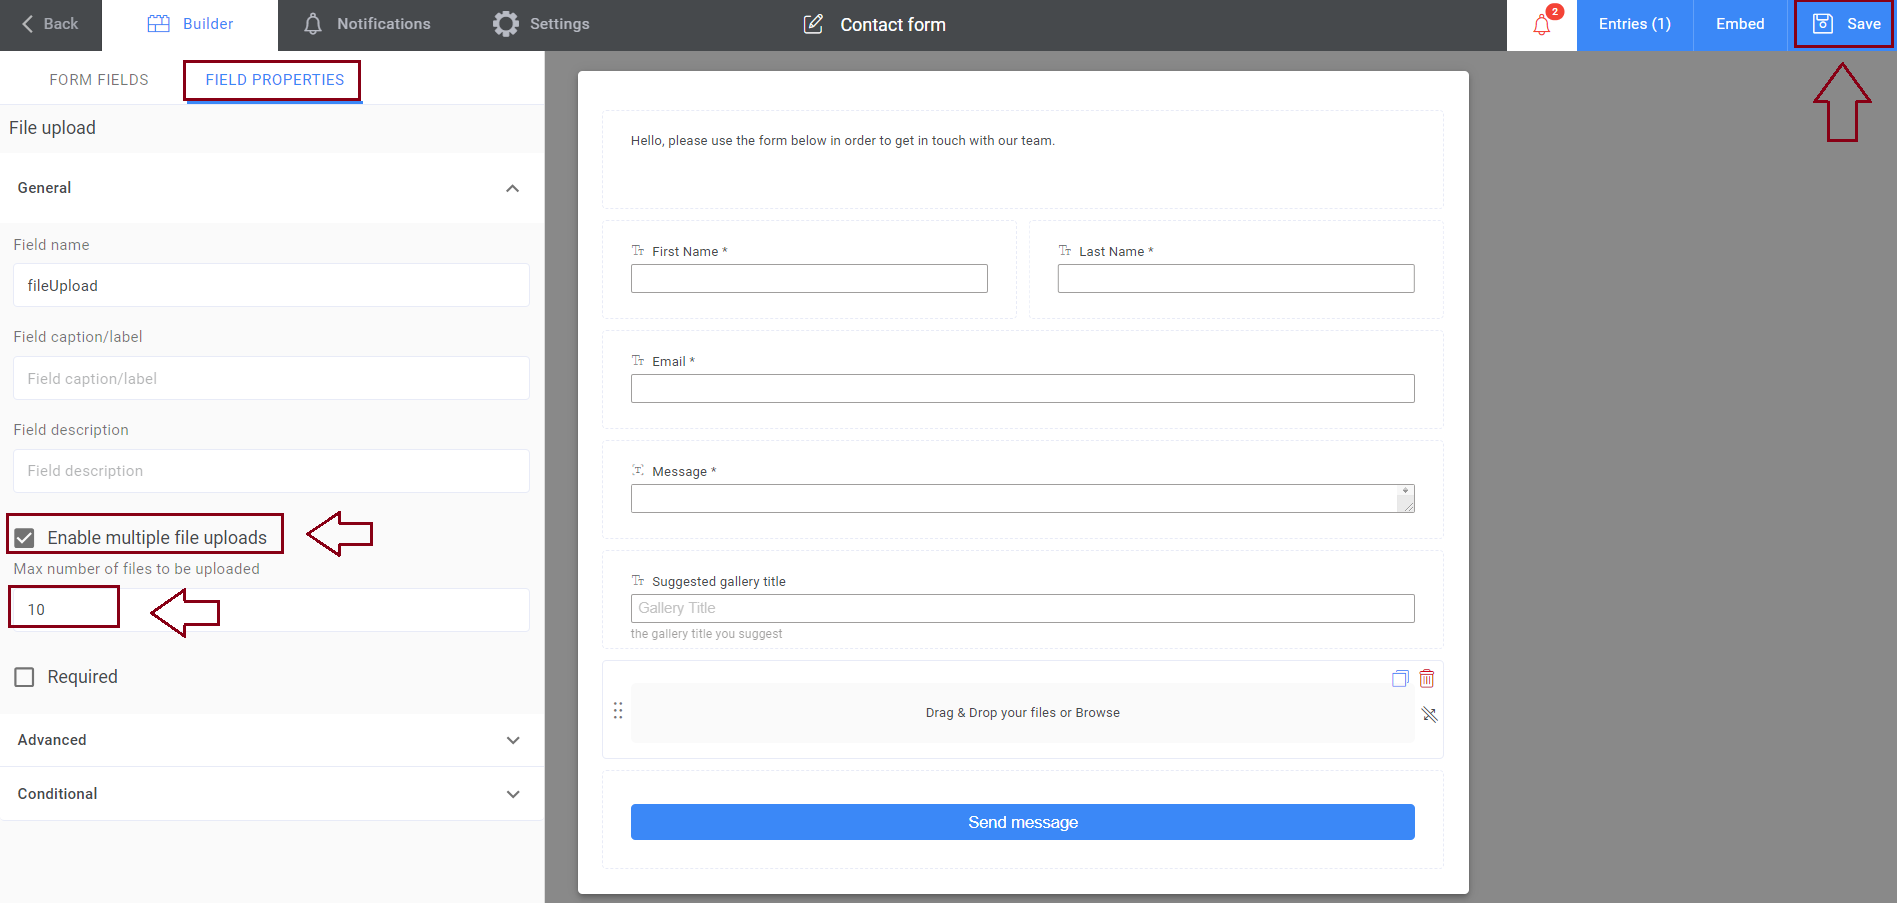
-
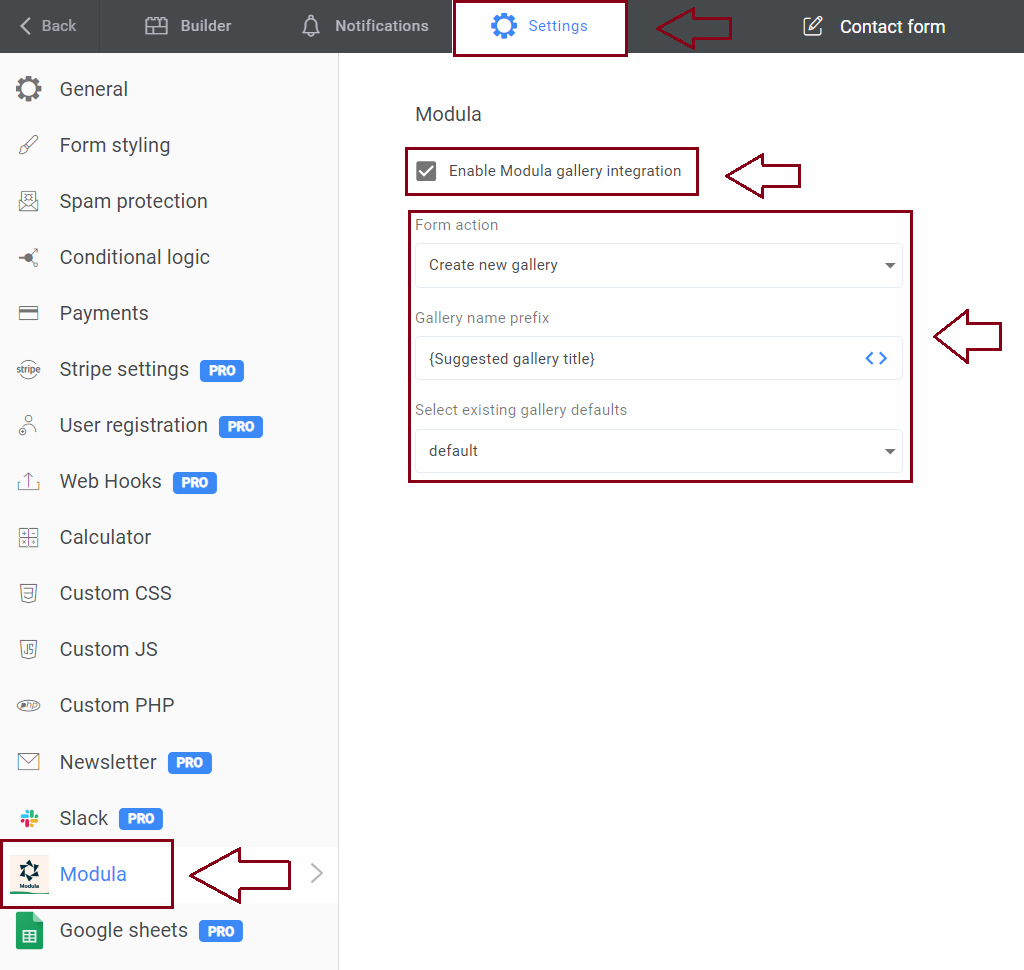
Head to Settings > Modula > Enable Modula gallery integration. Select your form action, gallery prefix, and your default settings.
-
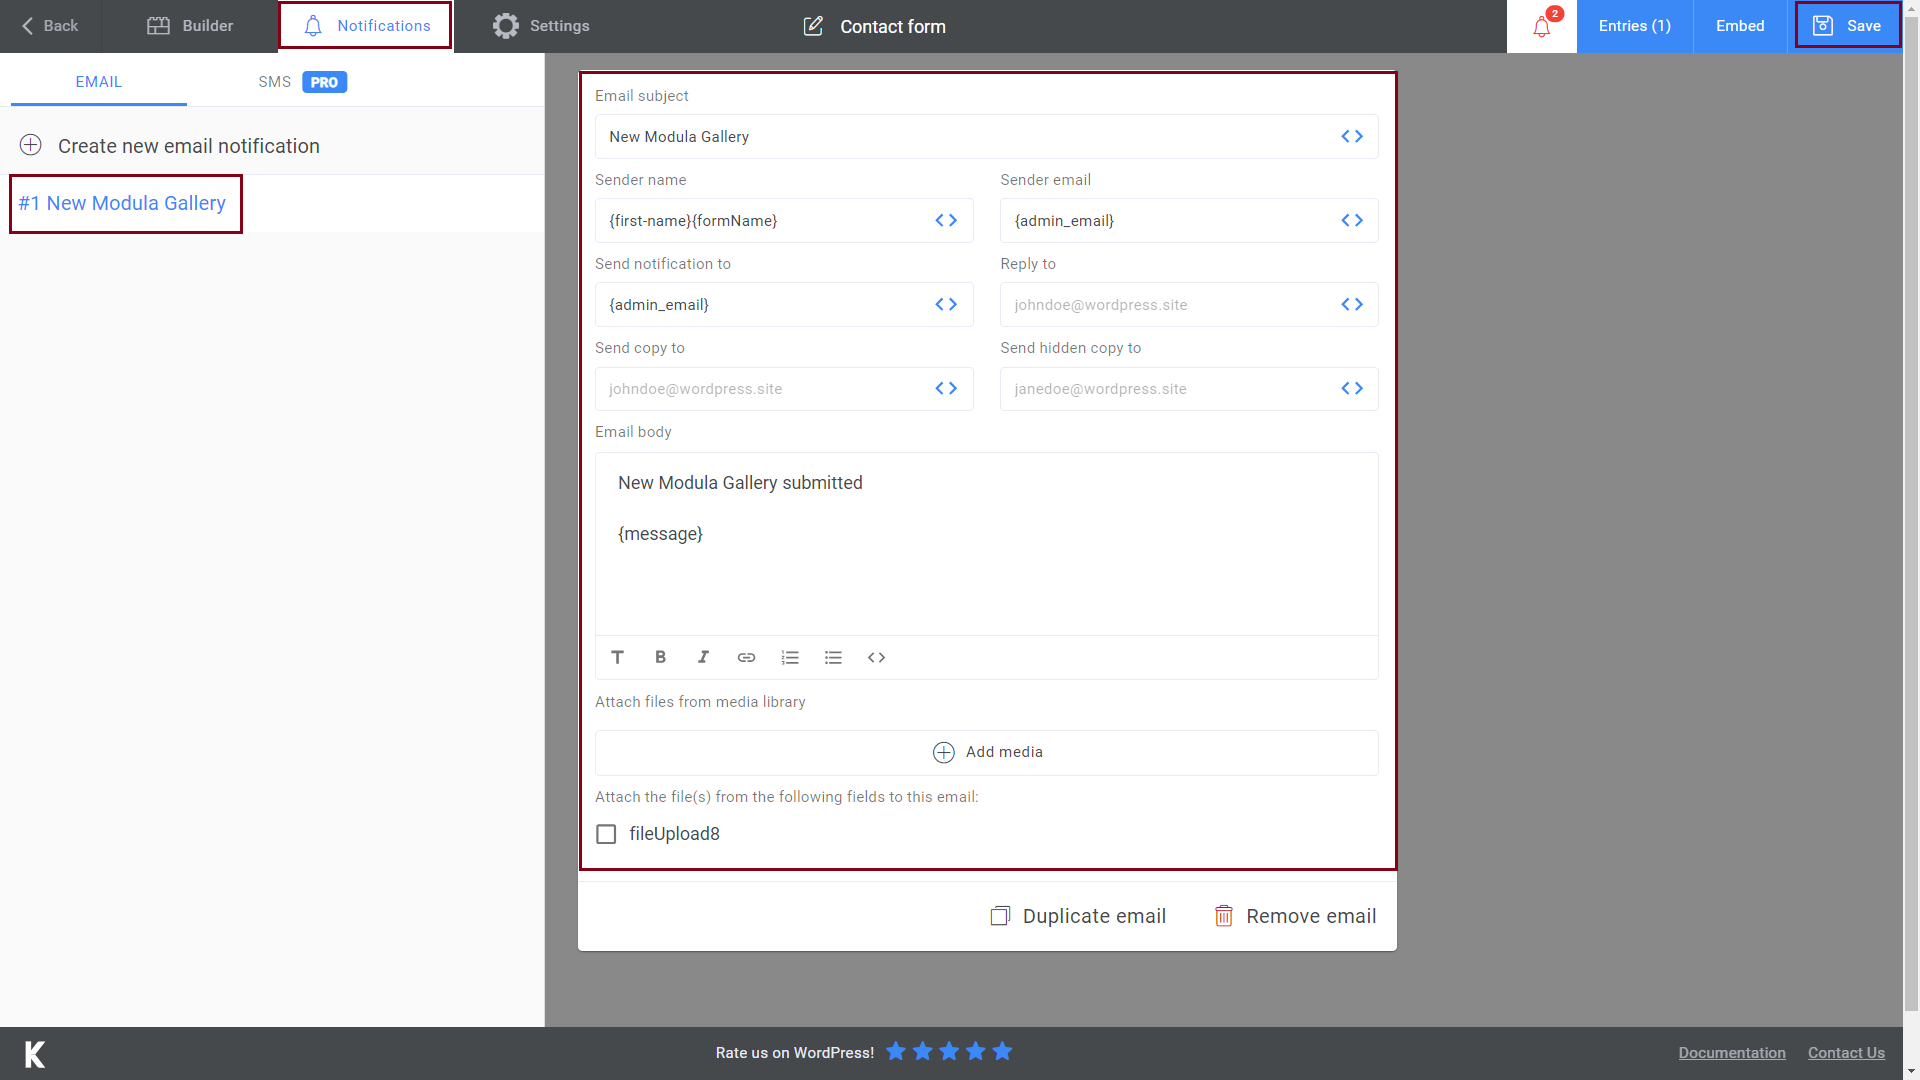
Go to Notifications > Create a new email notification with your preferred settings. Save it, and you’ll receive notifications when galleries are created.
-
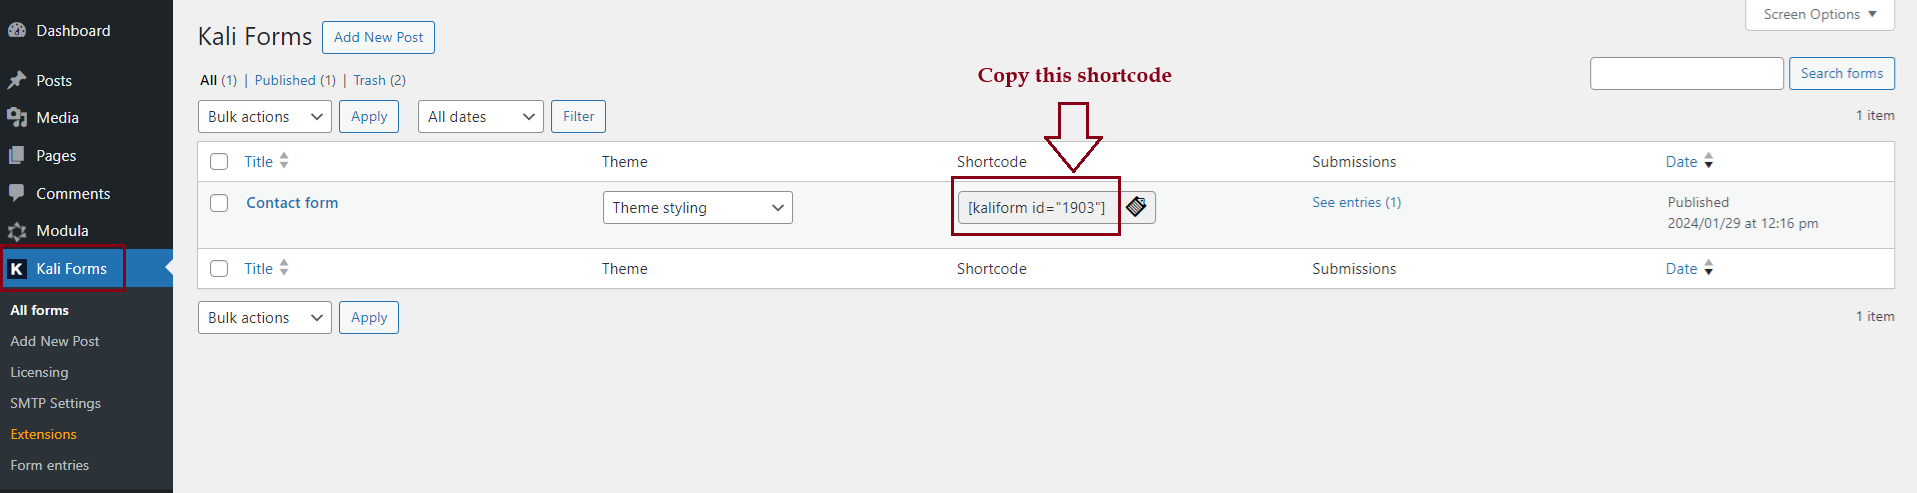
Display your form
Copy the shortcode of your form
Go to your dashboard > Pages > Add new/Edit a page you created.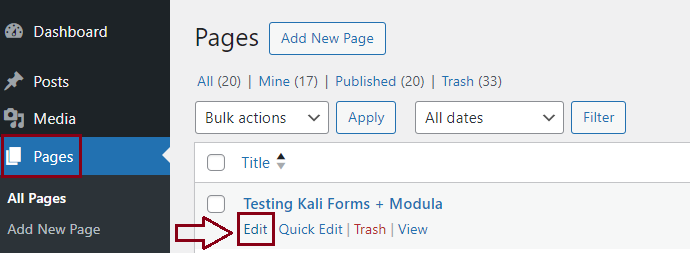
Paste there the shortcode of your form. After this simply click on Publish/Update.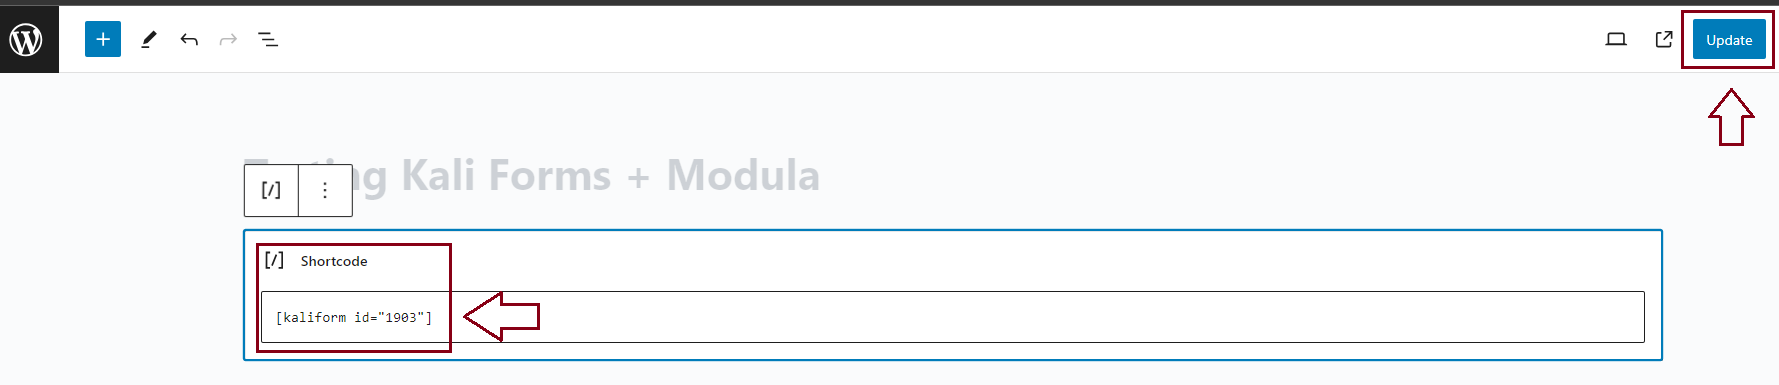
Once you’ve completed these steps, users can easily fill out the form, add a gallery title, upload images, and create a stunning gallery. All you need to do is go to your WP dashboard > Modula > Galleries > check the gallery > Publish.
In a nutshell, Modula and Kali Forms make your website a creative hub where every form submission can become a beautiful gallery. Elevate your user experience and simplify your workflow with this exciting partnership.
Do you want to see it live? Peep this video: YouTube Video Link CLICK ME.
Let’s make your WordPress journey extraordinary, one form submission at a time!