The Modula Grid Gallery plugin is a powerful tool for creating beautiful and customizable galleries on your WordPress website. In this documentation article, we’ll walk you through the process of creating a gallery using the Modula plugin and adding image captions and titles beneath each image.
Prerequisites
Before you get started, you’ll need the following:
- WordPress Website: Ensure you have a WordPress website up and running.
- Modula Grid Gallery Plugin: Install and activate the Modula Grid Gallery plugin. You can find it in the WordPress plugin repository and install it from the WordPress dashboard.
- Modula Pro: the ‘Under Image’ hover effect is available only in Modula Pro. It can be found in all premium plans: Starter, Trio, or Business.
- Images: Prepare the images you want to include in your gallery. Make sure they are appropriately sized and optimized for the web.
Step-by-Step Guide
-
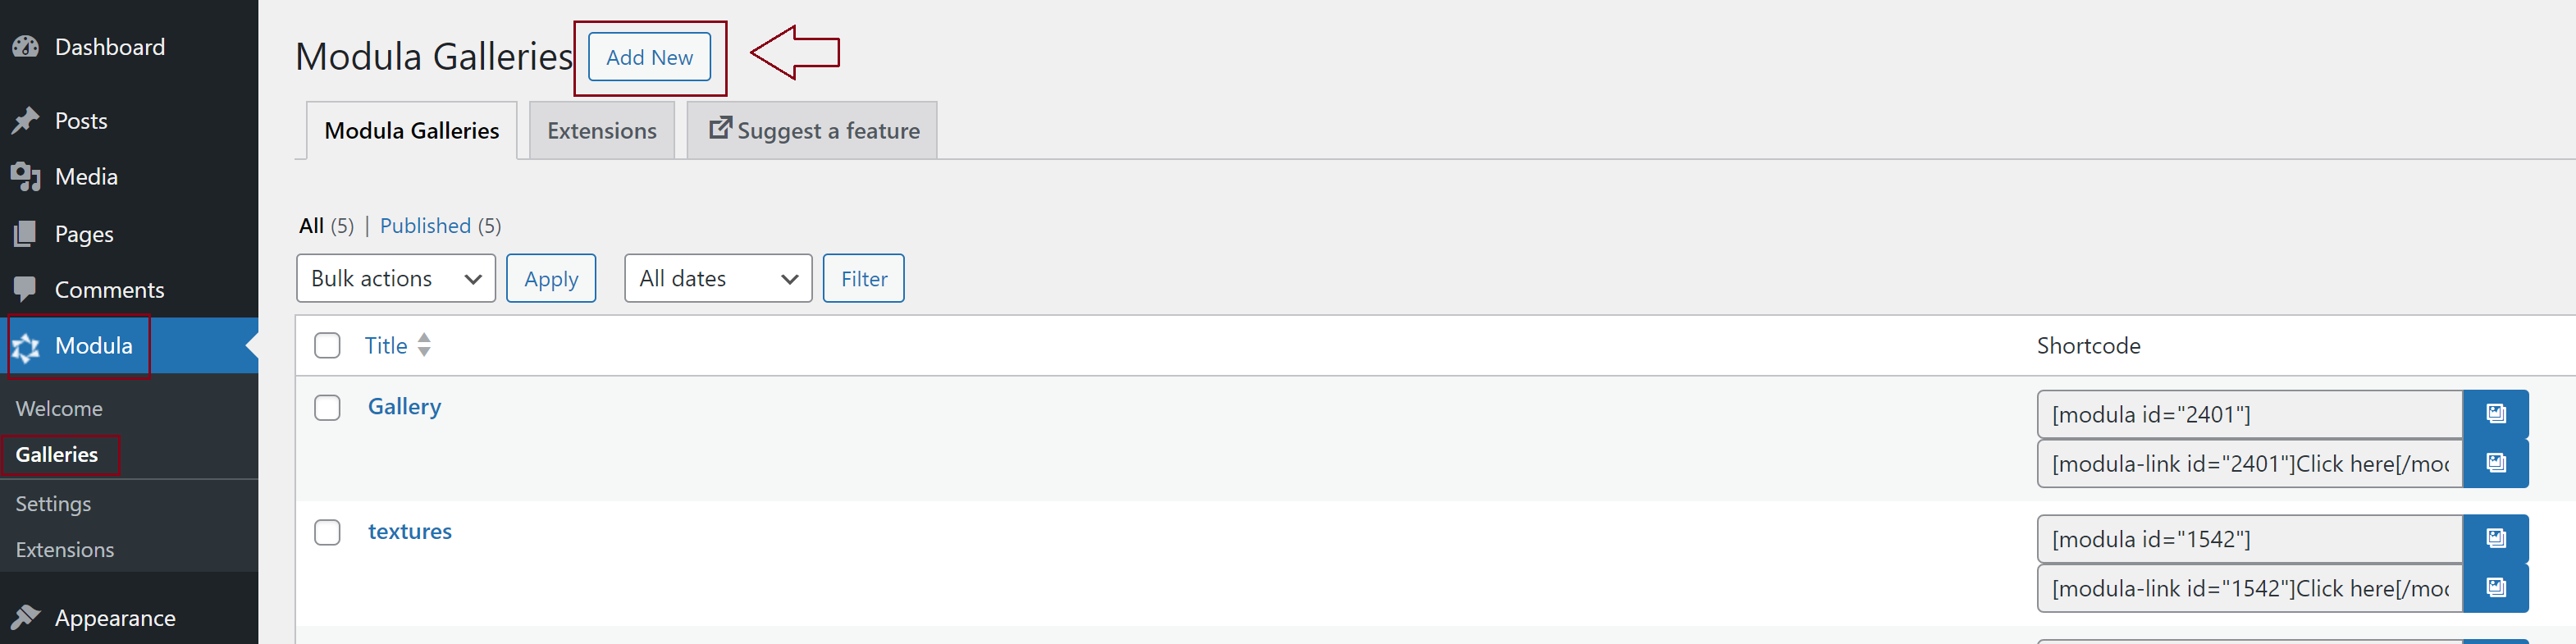
Create a New Gallery
Log in to your WordPress admin dashboard > Modula > Click the “Add New” button to create a new gallery > Give your gallery a name to help you identify it later.
-
Upload and Organize Images
After creating your gallery, you’ll be redirected to the gallery’s edit page.
Click the “Upload Image Files” or “Select from the Library” buttons > Upload the images you want to include in your gallery or select them from your WordPress Media Library.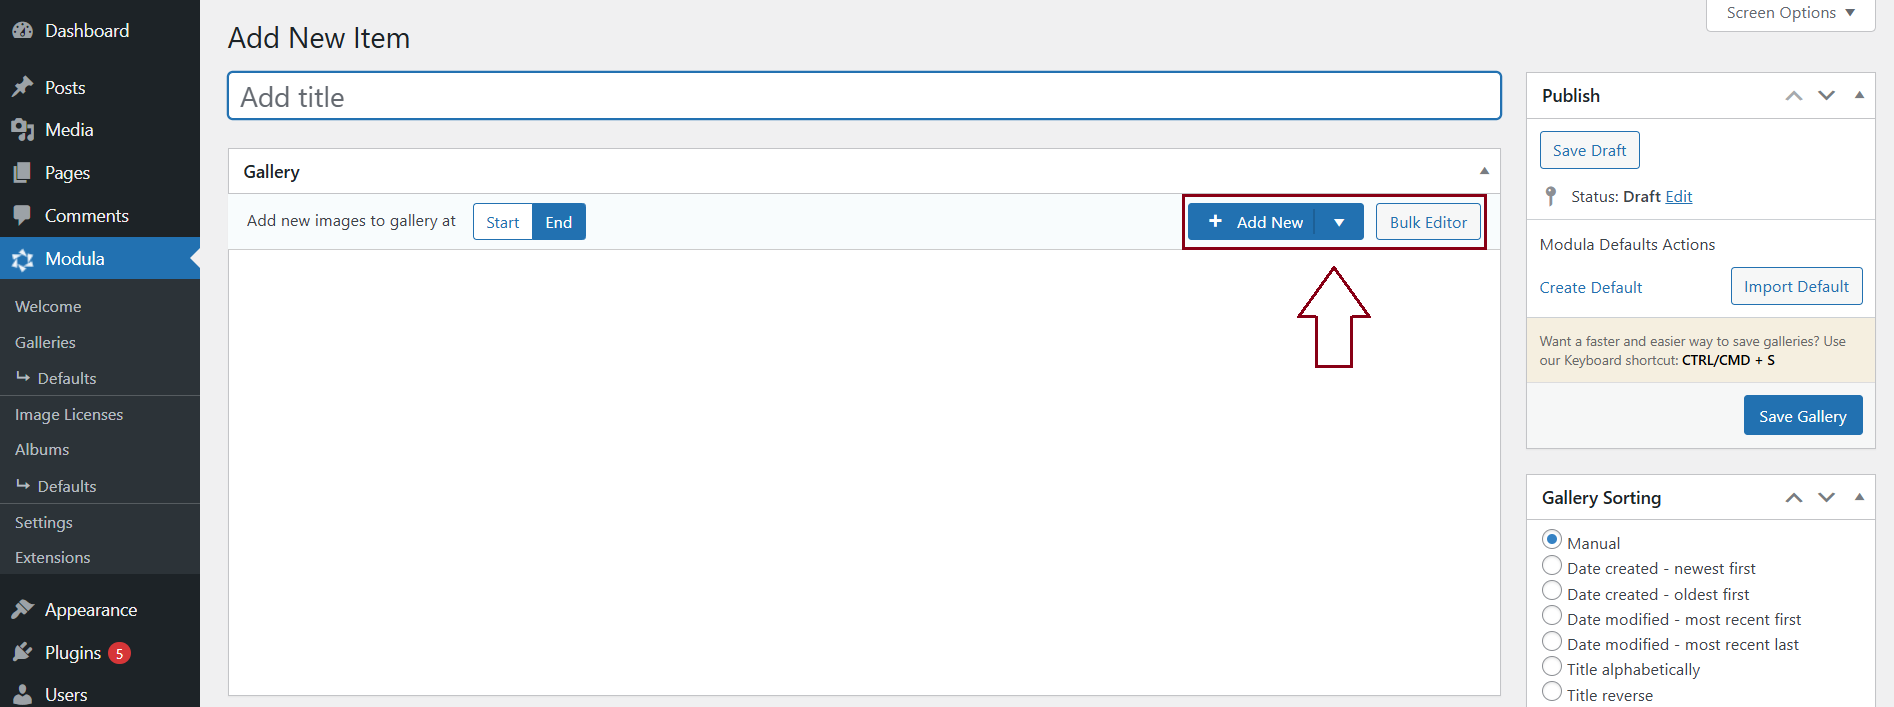
For more in-depth steps on creating a gallery, you can follow the instructions in our documentation article: How to Create Your First Gallery.
-
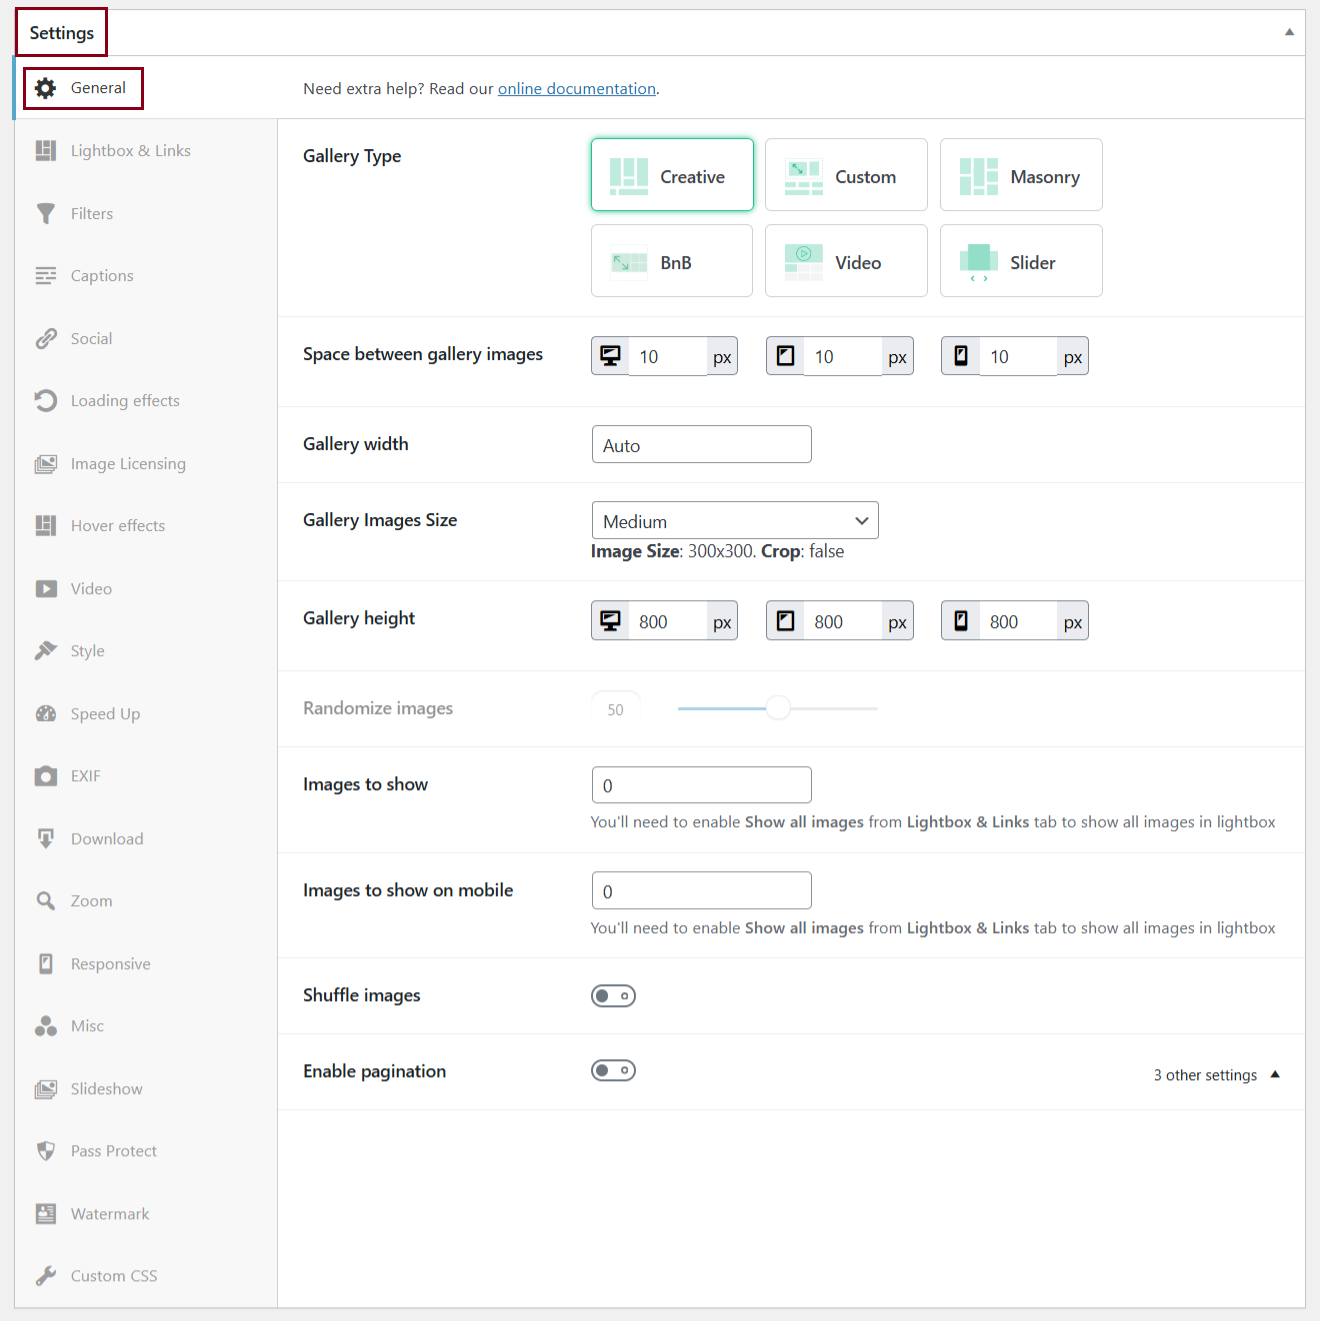
Configure Gallery Settings
Scroll down to the “Settings” > “General” section to configure your gallery’s appearance and behavior.
-
Add Captions and Titles
Scroll back up to the “Gallery” section. You will see the list of images you uploaded.
To add captions and titles, hover over an image and click the pencil icon on that image >Add there the title and captions you need > Click on the ‘ Save’ button to save the caption and title.
Repeat for the rest of the images.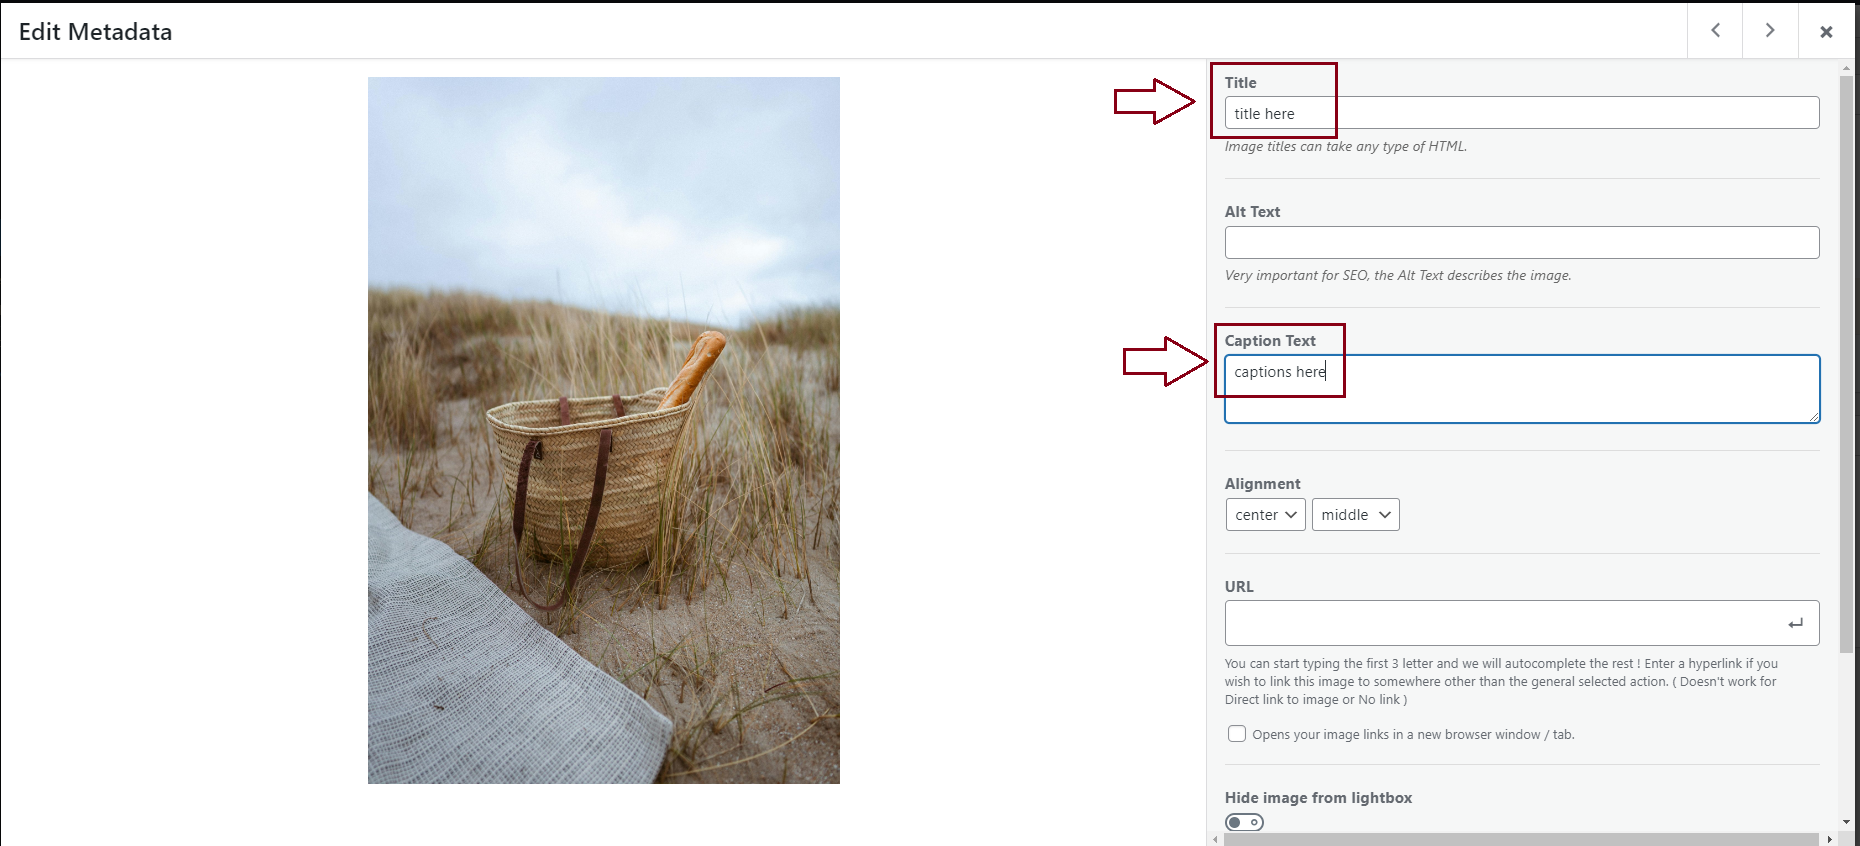
For more information on title and caption settings, you can read our documentation article: Modula Caption and Title Configuration. -
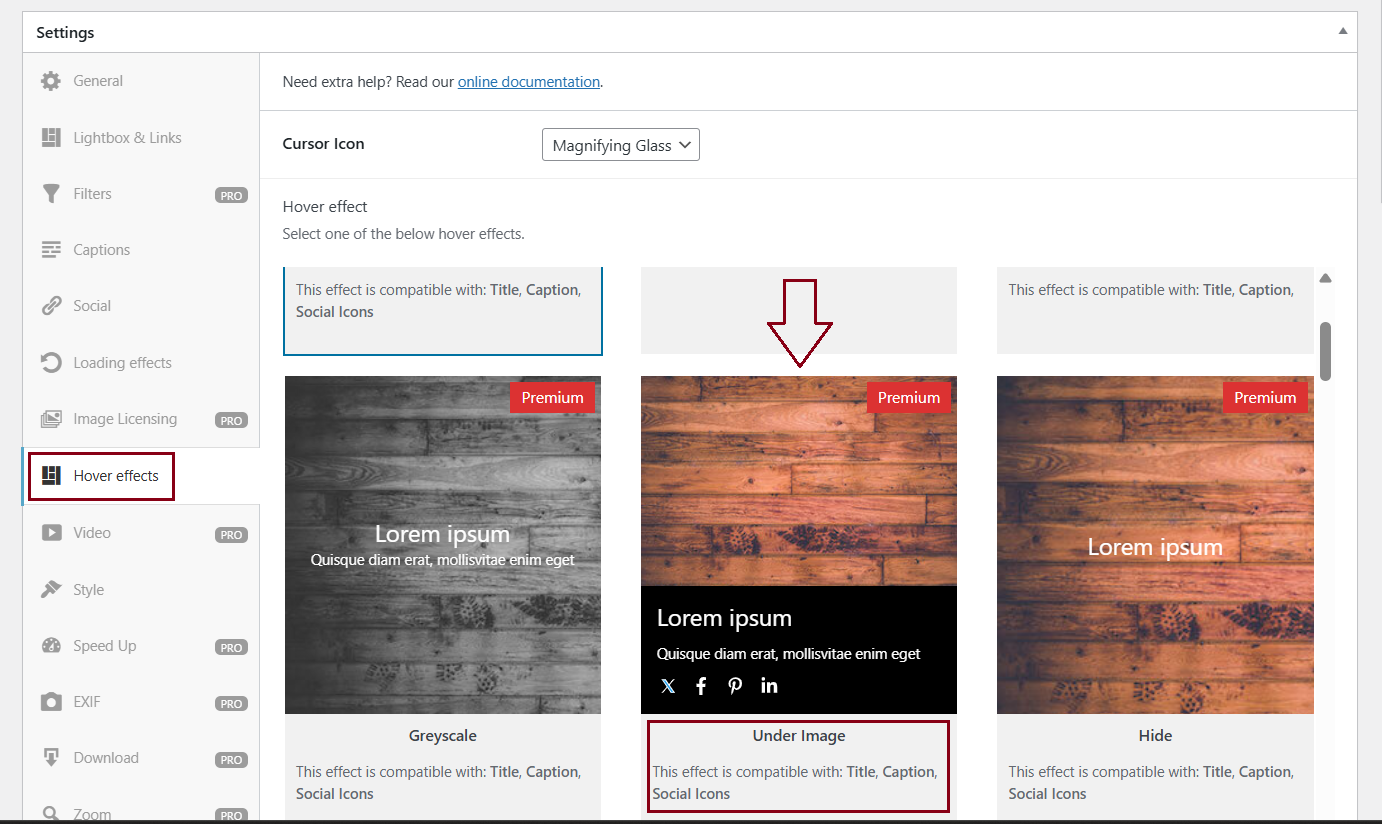
Select the Hover Effect “Under Image”
Once you have configured your gallery and added captions and titles, it’s time to select the hover effect that will display them under your images.
Go to the “Hover Effects” section in your gallery > From the list of effects select “Under Image” > Save the gallery.
-
Display the Gallery
Once you finished configuring your gallery click the “Save Gallery” button > Copy the shortcode provided for your gallery, which looks like Gallery not found.
Create a new post or page where you want to display the gallery > Paste the shortcode into the content area of your post or page > Publish.
You can also read in our documentation how to insert Modula galleries into posts and pages.
For a live demo of a gallery with captions and titles under the images, please visit our Under Image Demo Gallery page.