In managing WordPress websites, effective support and debugging are crucial. Sometimes, you may need to give temporary admin access to Modula’s support team or a developer without risking security. We’ll show you two ways to do this: manually in WordPress or using a plugin.
Whether you like the old-fashioned way or want something easier, we’ve got you covered. Keep reading to learn how to create a temporary admin, test their access, and remove their privileges when done.
-
Log in to Your WordPress Dashboard
Begin by logging in to your WordPress admin dashboard using your existing administrator credentials.
-
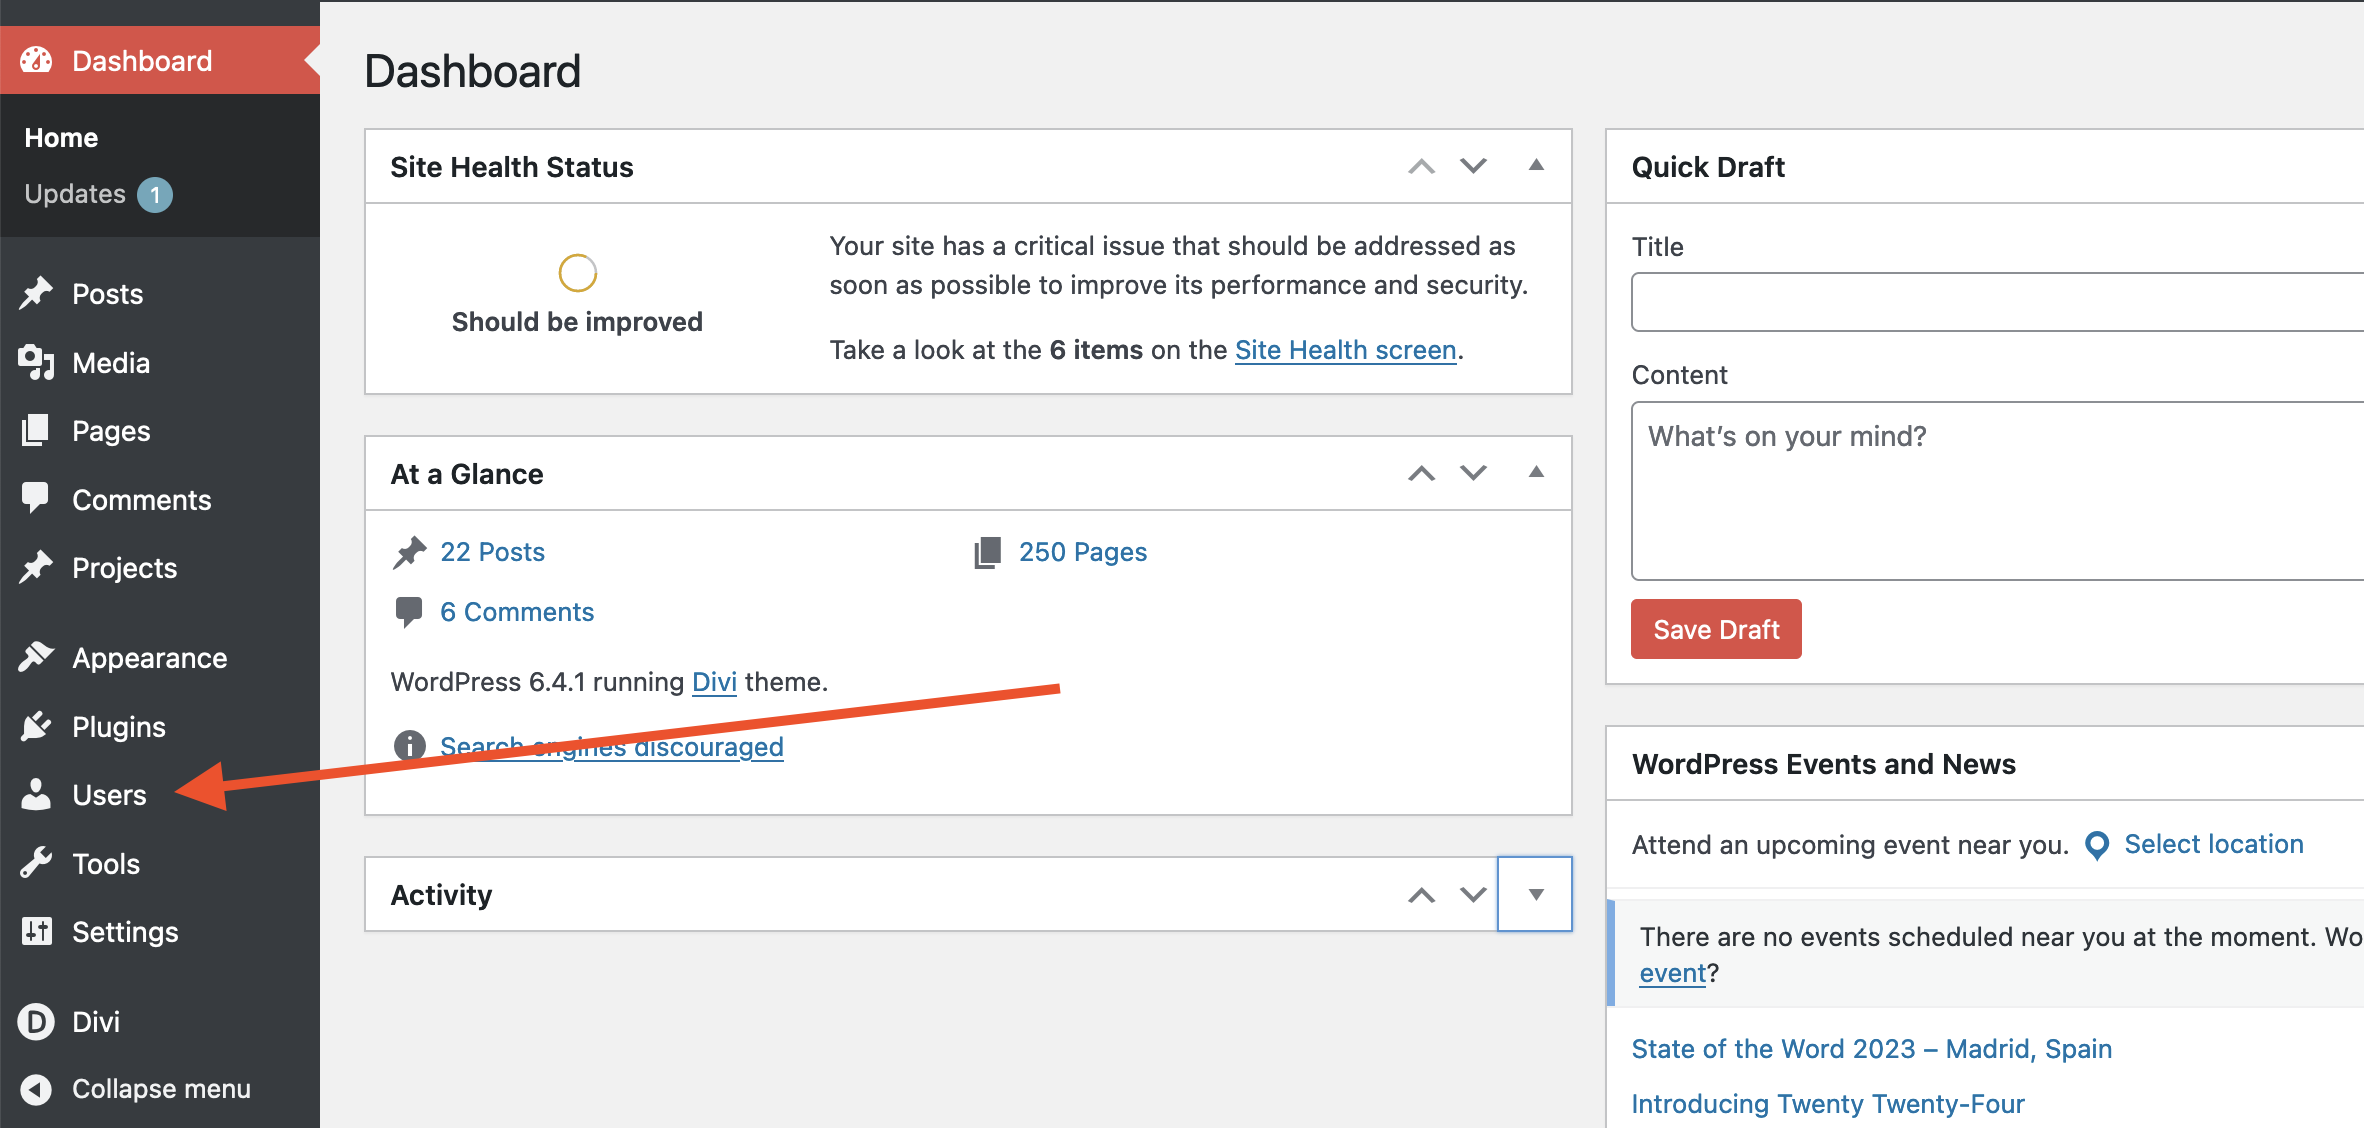
Navigate to Users
Once logged in, look for the “Users” option on the left-hand side menu. Click on it to open the Users page.
-
Add New User Manually (Option 1)
Option 1: Manually Creating a Temporary Admin User
-> Click “Add New” on the Users page to create a new user.
-> Complete the required user details, such as username and email.
-> Assign the user role as “Administrator.”
-> Generate a strong password or set one manually.
-> Optionally, send the new user a notification.
-> Click “Add New User.”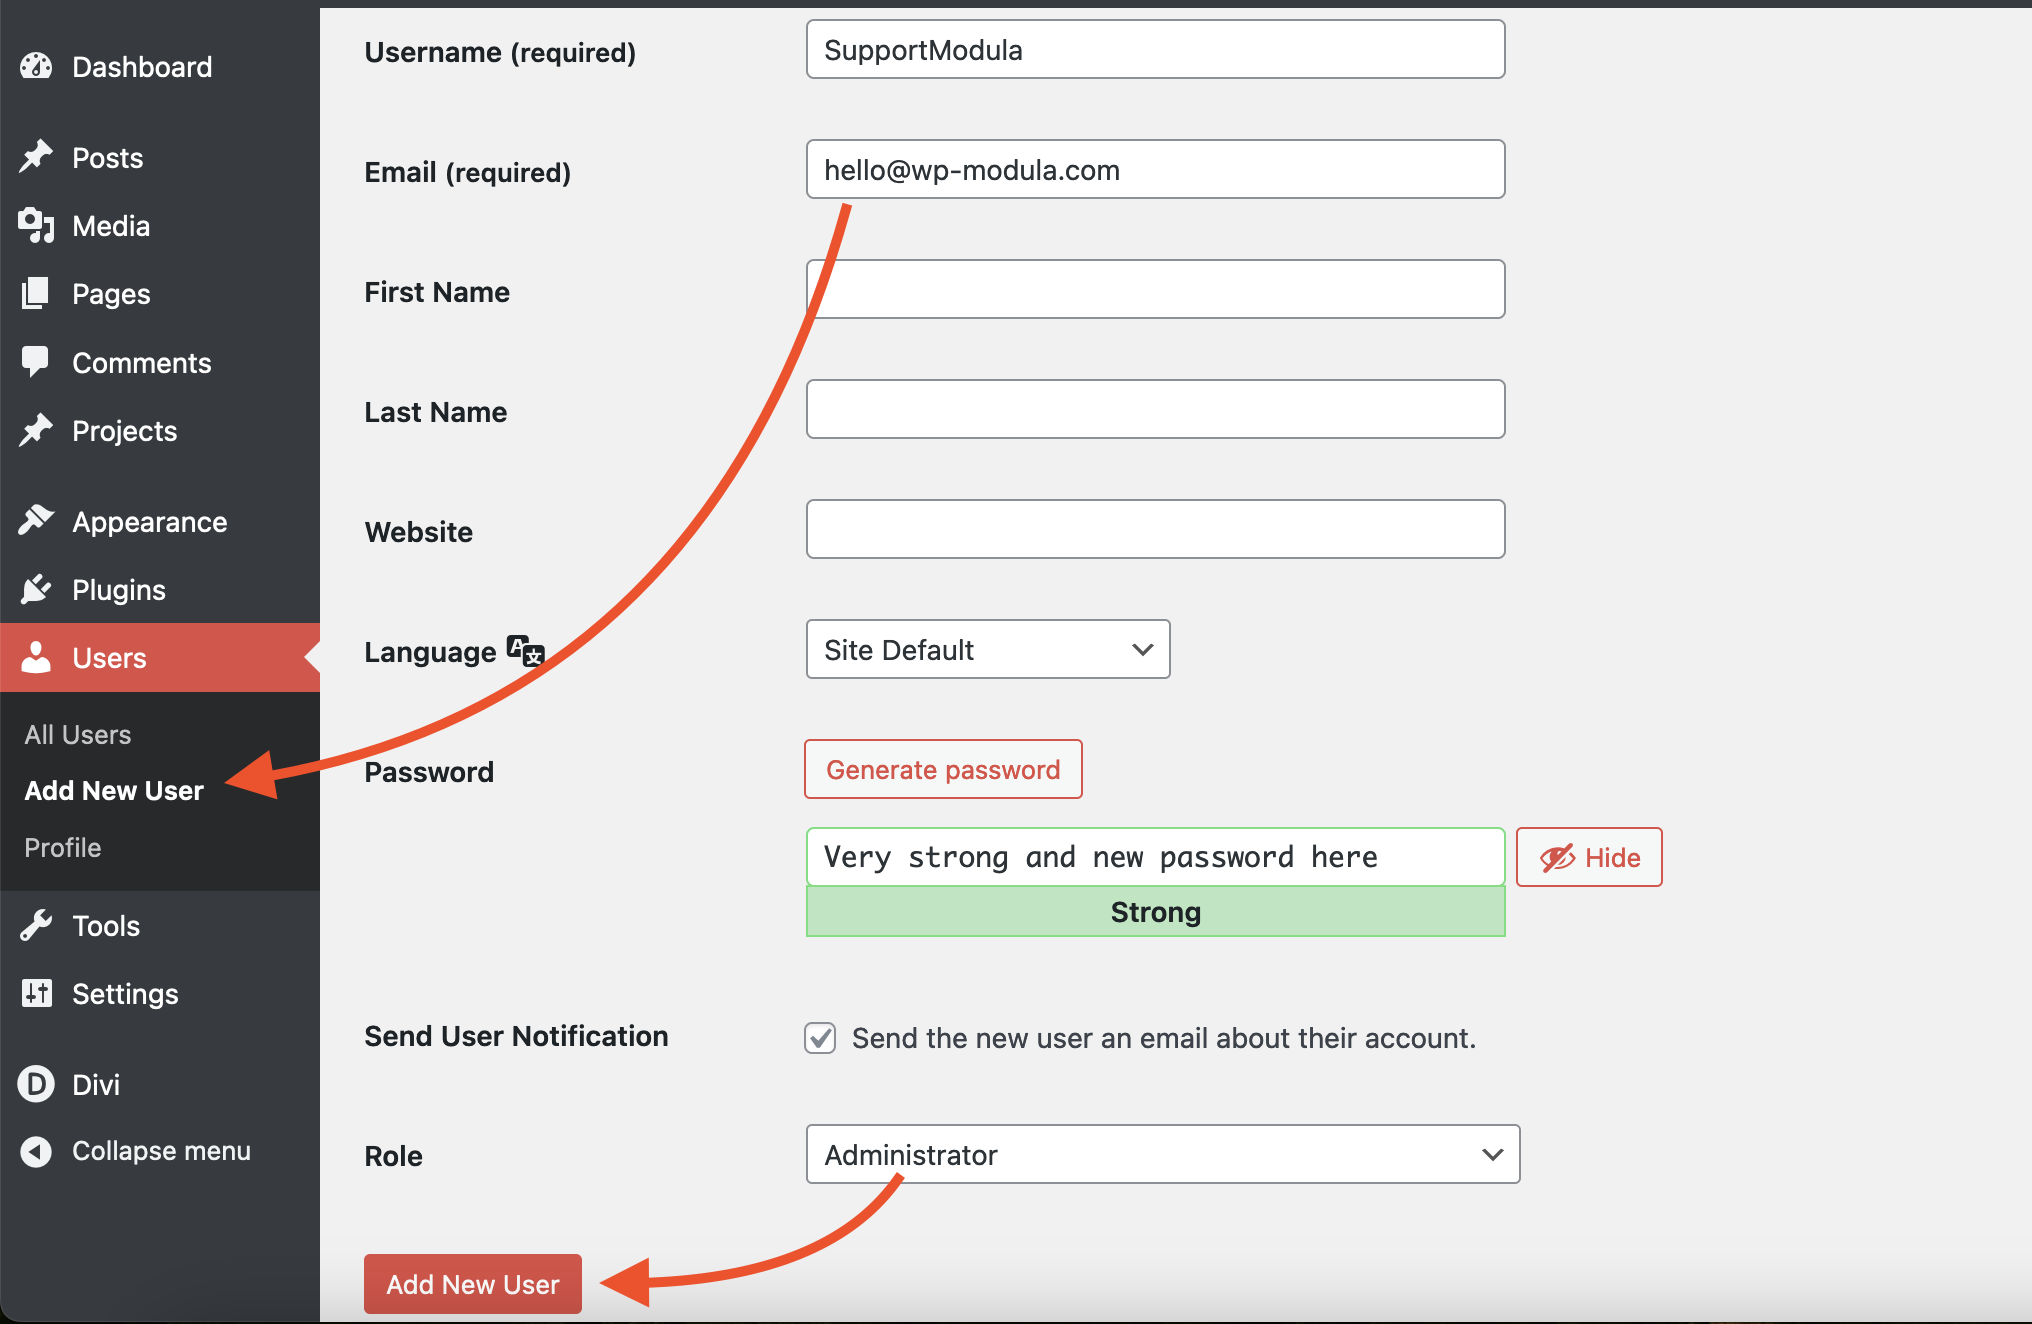
Test the New User: Log out of your current admin account and log in with the credentials of the newly created temporary admin user to ensure that it works as expected.
Remove the Temporary Admin User (After Use)
After Modula’s support team finishes debugging or providing support, you can go ahead and remove the temporary admin user. To do this:
-> Go back to the Users page in the WordPress dashboard.
-> Locate the temporary admin user in the list.
-> Click on the user to edit their details or hover over it to see the option to “Delete”.
-> Scroll down to the bottom and click the “Delete” button.Option 2: Using the “Temporary Login Without Password” Plugin
Install and Activate the Plugin:
-> Navigate to the “Plugins” section in your WordPress dashboard > Click on “Add New.”
-> Search for “Temporary Login Without Password.“ > Install and activate the plugin.Generate a Temporary Login Link:
->After activation, navigate to the “Users” page > Click on “Temporary Logins” and then click on the “Create new” button.Configure Temporary Login Settings:
-> Enter the email address and name of the new user.
-> Set the expiration date for the temporary login link.
-> Choose the user role for the temporary login (Administrator).
-> Click “Submit.”Share the Temporary Login Link:
-> Once configured, a temporary login link will be generated.
->Share the link with the person who needs access.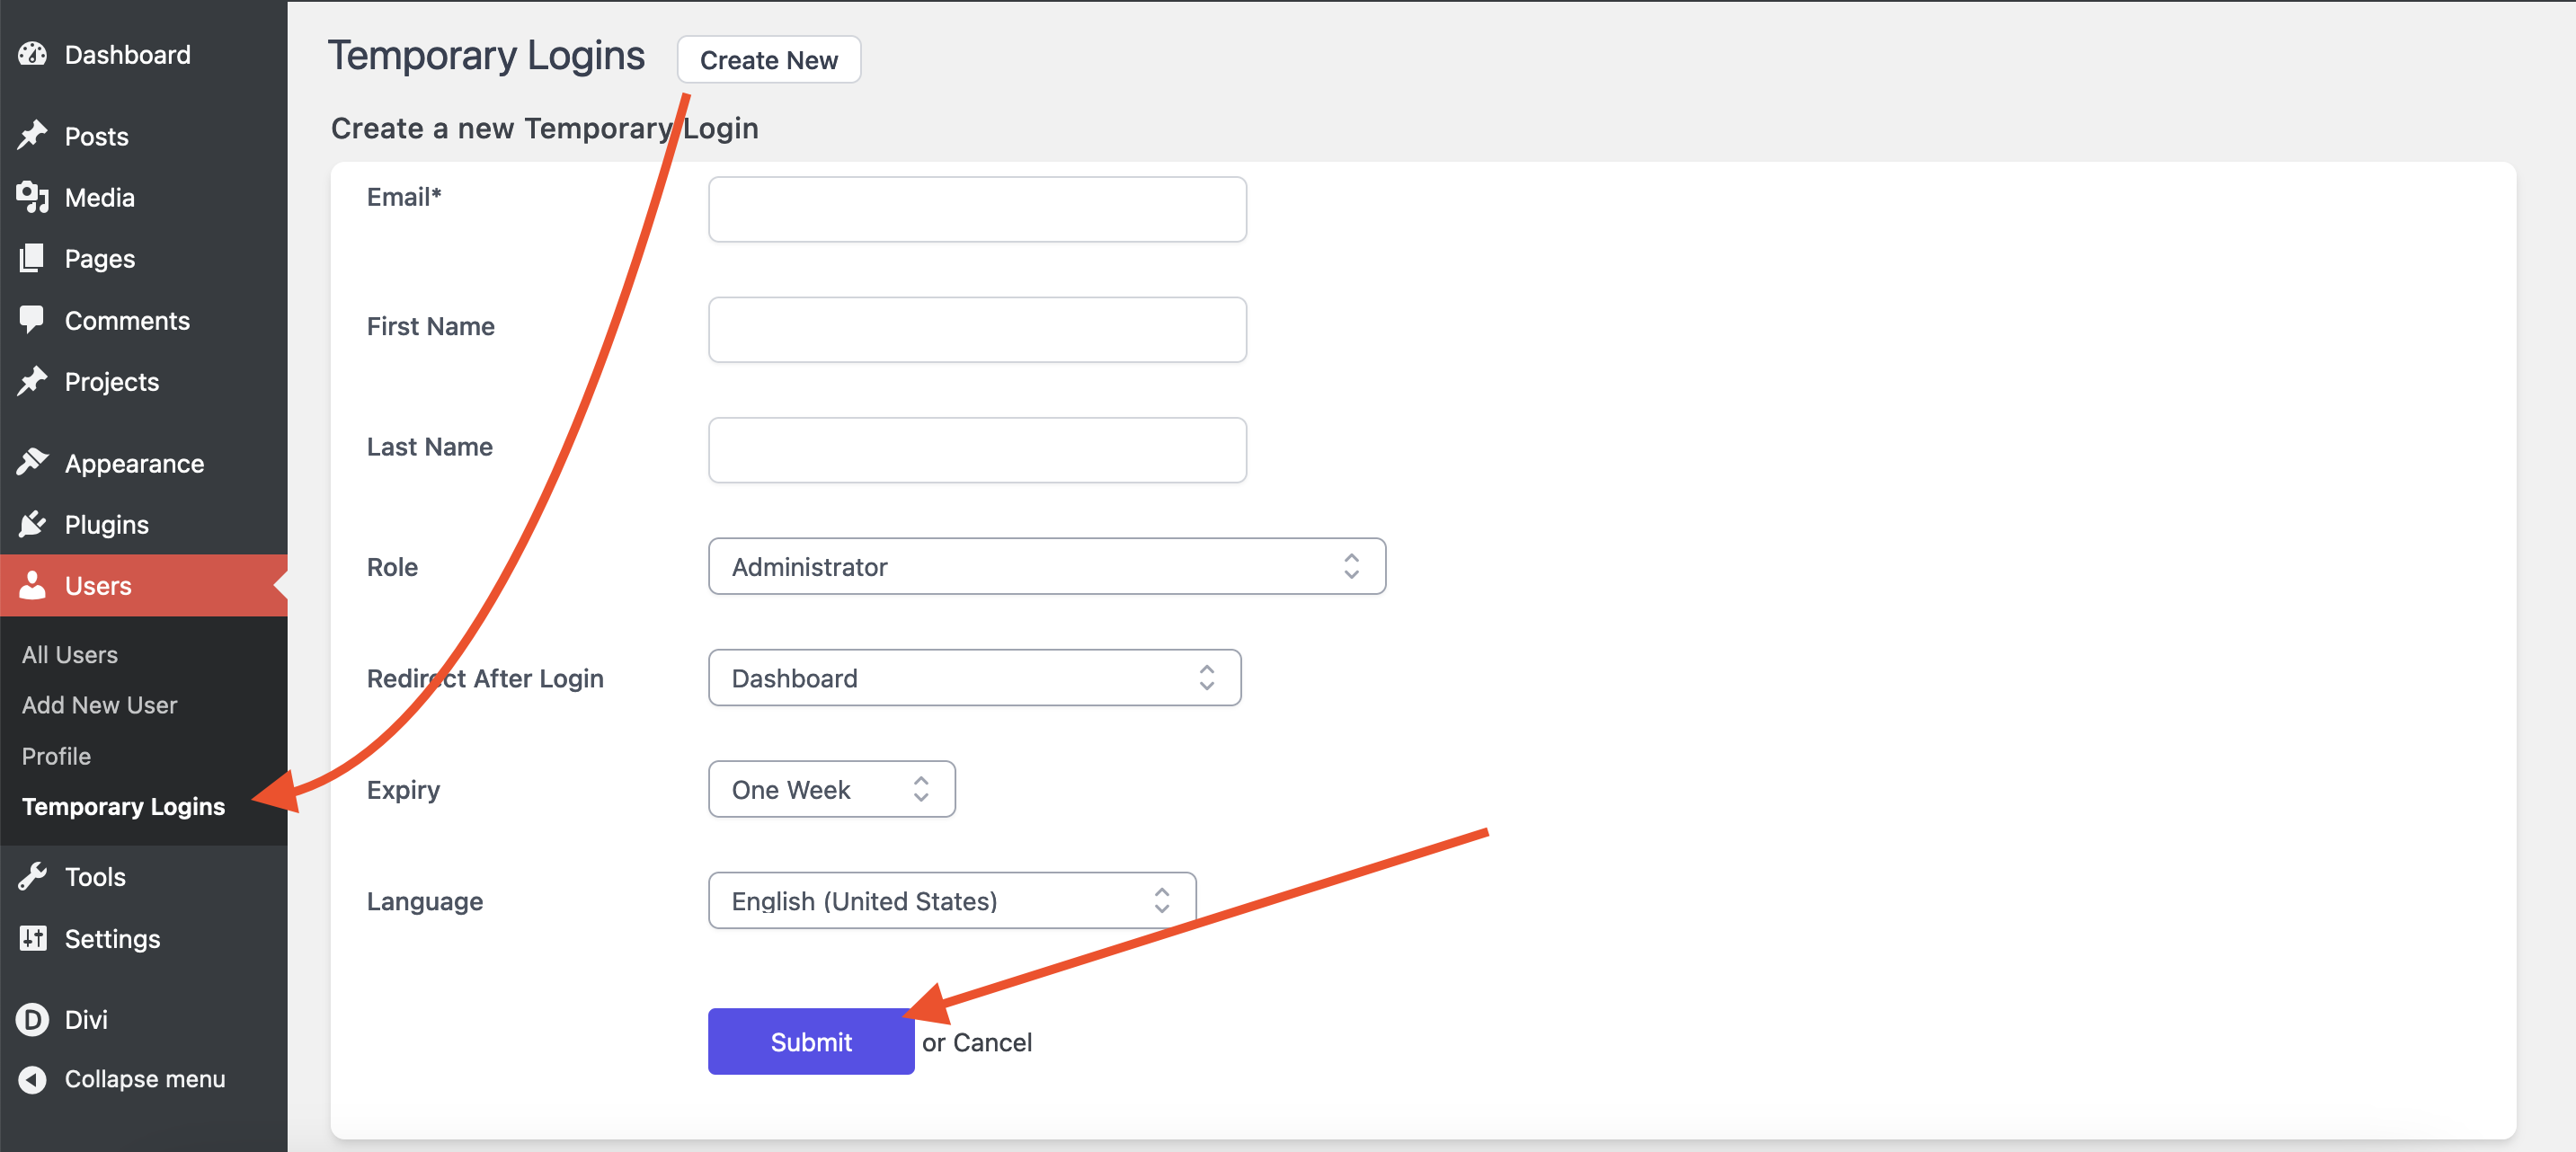
Creating a temporary admin user in WordPress can be done manually or using a plugin like “Temporary Login Without Password” for added convenience. Choose the method that best fits your needs, and remember to remove the temporary user once the task is complete.