This step-by-step guide will walk you through the process of seamlessly embedding your Modula galleries into pages constructed with the SiteOrigin Page Builder.
Utilizing Modula’s widget, you can effortlessly integrate your galleries into your SiteOrigin-powered pages, enhancing your website’s visual appeal.
-
Create Your Modula Gallery
Start by creating a Modula gallery. Ensure that you save the gallery after customization. If it’s your first time creating a Modula Gallery please follow this tutorial: How to Create Your First Gallery.
-
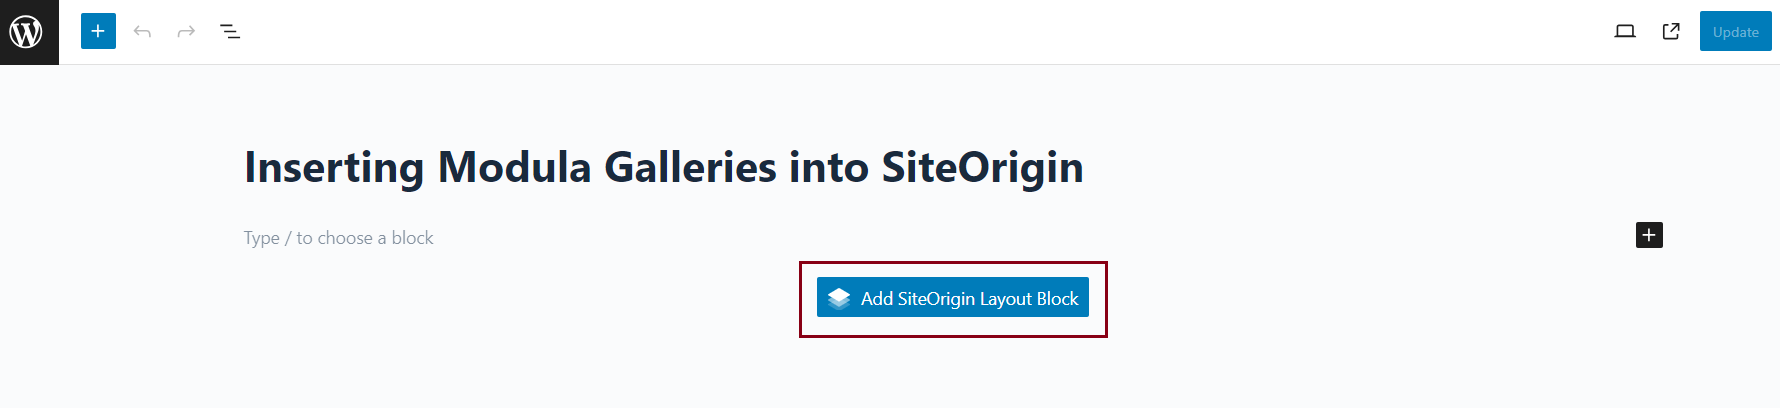
Edit or Create a Page with SiteOrigin
Navigate to the page you wish to edit or create a new one using SiteOrigin Page Builder.
-
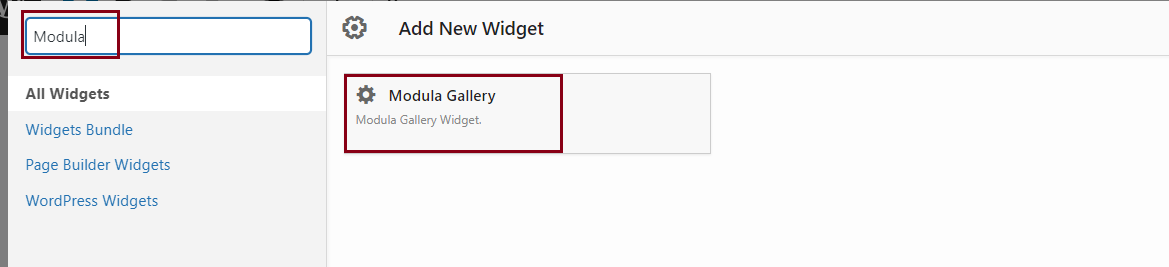
Add the Modula Gallery Widget
In the SiteOrigin Page Builder interface, search for Modula Gallery’s widget.
-
Drag and Drop Modula Widget
Once you find the Modula Gallery widget, drag and drop it onto your page in the desired section.
-
Select Your Gallery
Within the Modula widget settings, you will find a drop-down menu. Select the Modula gallery you want to display from this menu.

-
Save Your Changes
After selecting your gallery, save your changes within SiteOrigin Page Builder.
By following these simple steps, you can easily add any Modula galleries into pages created with the SiteOrigin Page Builder. This integration allows you to showcase your Modula galleries within the SiteOrigin environment, providing a visually appealing and cohesive design for your website.