If you want to design an impressive full-width gallery using Modula and Elementor, this step-by-step guide will show you how to seamlessly integrate both plugins to achieve your desired layout. By combining Modula’s gallery creation capabilities with Elementor’s page-building prowess, you’ll be able to create stunning, full-width galleries that captivate your audience.
Steps to Create a Full-Width Gallery
-
Create Your Modula Gallery
-> Go to your WordPress dashboard > Modula > Add New > Upload the images you want to include in your gallery.

-
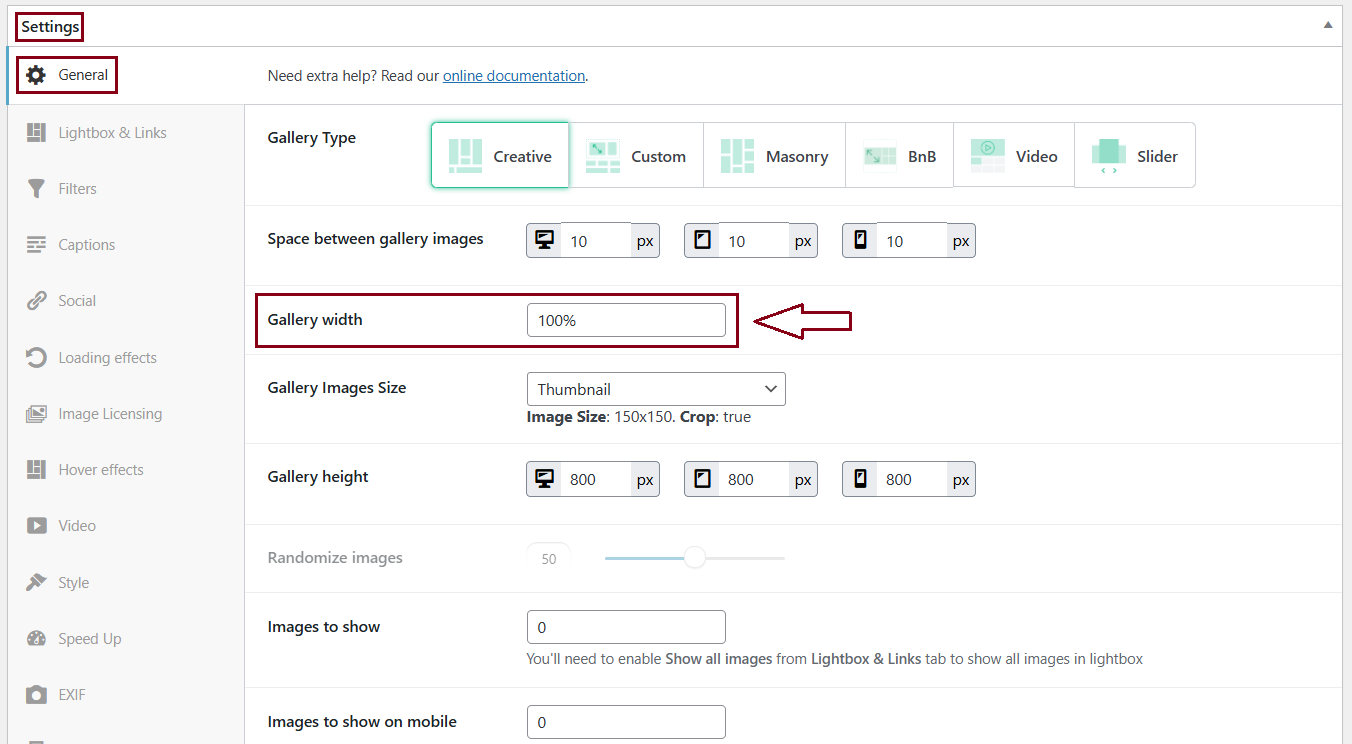
Configure Gallery Width
-> In your gallery settings, navigate to “General Settings.” > Look for the “Gallery width” option and select “100%” to make your gallery full-width > Save the gallery settings.
Steps to Create a Full-Width Page with Elementor
-
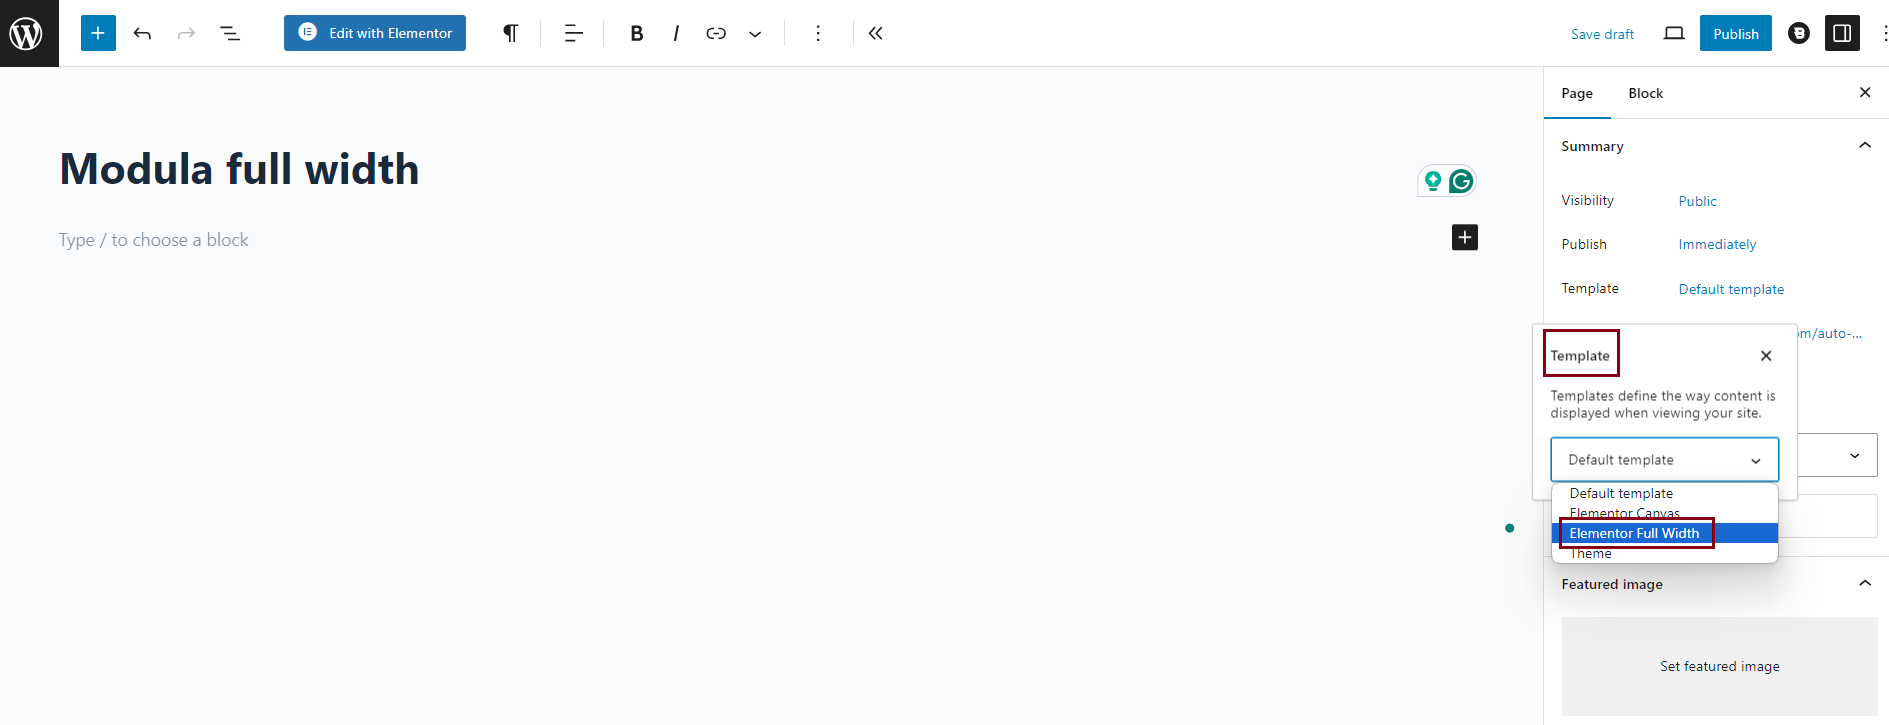
Edit a Page with Elementor
-> Navigate to “Pages” and select “Add New” to create a new page > Choose the “Elementor Full Width” template to ensure your gallery spans the entire width of the page > Save your page.
-
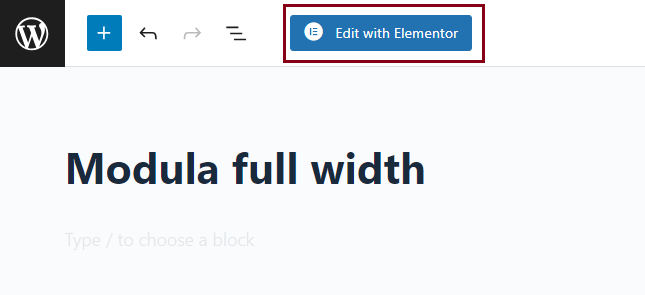
Edit with Elementor
-> Click on “Edit with Elementor” to launch the Elementor editor for the page you’ve created.
-
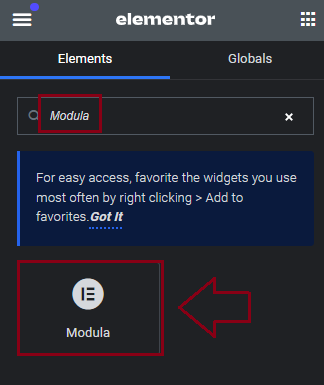
Add Modula Gallery Widget
-> In Elementor’s editor, locate the widget search bar > Type “Modula” to find the Modula widget > Click on the widget to select it.
-
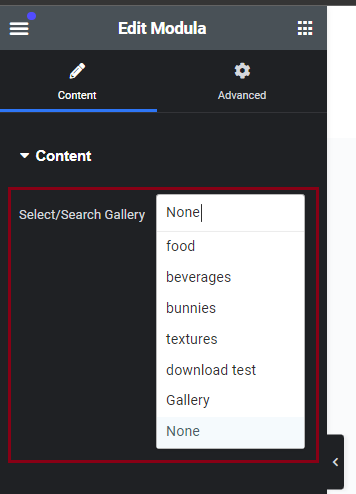
Insert Your Modula Gallery
-> Within the Modula widget settings, choose the Modula gallery you’ve created from the drop-down list > Add the selected gallery to your page.
-
Save Your Page
-> Ensure that your changes are saved by clicking the “Save” button within the Elementor editor.
By following these straightforward steps, you can effortlessly create full-width galleries that beautifully integrate Modula and Elementor. This seamless blend of gallery creation and page-building tools allows you to showcase your images in a captivating and engaging manner, impressing your website visitors.